In my post for
January's 127 Day, I described cutting 120 medium format film to the width of
127 format and respooling it with 127 backing paper. I used a
Kodak No.2 Brownie, but I didn't want to permanently convert the box camera, and used this camera to shoot with instead. As I wrote then, the film slitter was made from a craft knife blade
embedded in a block of foamboard, inserted in the box camera. After loading, this cut the film as it was
advanced through the camera.
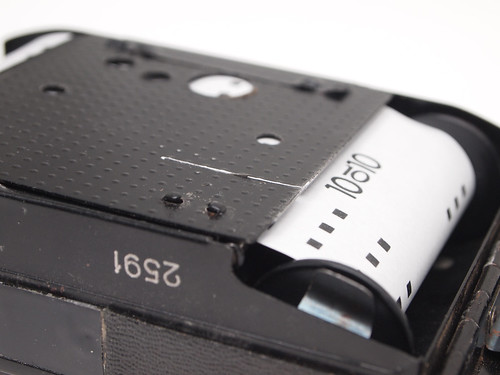
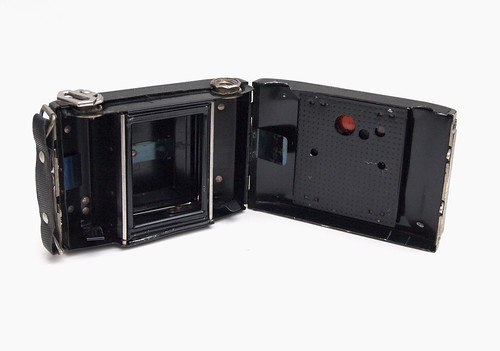 |
| Dehel medium format camera body |
To make a dedicated film slitter along the same principles, I used a body from a
Dehel medium format camera. I had bought this in a job lot, and as a cheaply constructed camera with rotten bellows, it didn't seem worth considering repairing it for use. The first stage in the process of turning this into a film slitter was to remove the mechanism for erecting the lens, simple enough given how soft and thin the metal was: although riveted together, all the parts could be prised off with a small amount of force and a pair of pliers. To hold the blade to cut the film, I made an insert the size of the 6x4.5cm frame from a piece of hardboard, with a cut in it where the blade would sit. This method of cutting the film down could be used for a number of formats, such as 8mm or unperforated 35mm; my intention was to cut medium format film to the 46mm width of 127 format, which would also provide an offcut of 16mm for subminiature cameras.
 |
| Knife blade in insert block |
I glued a short batten to one side of the blade to keep it perpendicular. I had intended to fix the blade to this with a small screw, but the fit around the blade was tight enough that this was unnecessary. This was then glued inside the camera body, with two short thin strips either side to level the blade at the right depth.
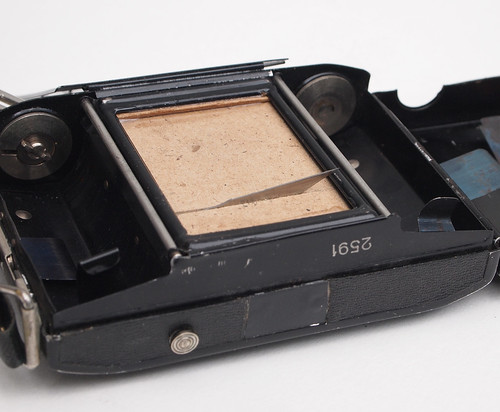 |
| Block with blade glued into the camera body |
I realised that the blade tip would be held more securely if it could be located into a corresponding slot cut into the pressure plate after passing through the film and backing paper. As a typical folding camera, the sprung pressure plate is fixed to the camera back; in order to make a cut in the plate with a hacksaw, I removed this entirely. Once cut, I fixed the pressure plate to the body with black tape where it could be folded over the film once loaded (a design that a few cameras do in fact use for their pressure plates) and the springs still attached inside the camera back would continue to provide the pressure to the plate.
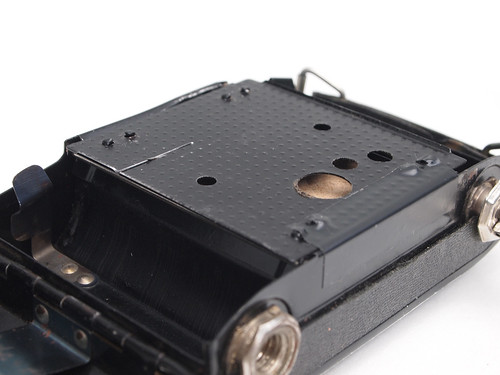 |
| Pressure plate replaced with cut to locate blade tip |
I tested the film slitter by advancing medium format backing paper through the camera; I found it best to affix the end of the backing paper to the take up spool first and make sure it's securely loaded, and then pierce the paper with the blade.
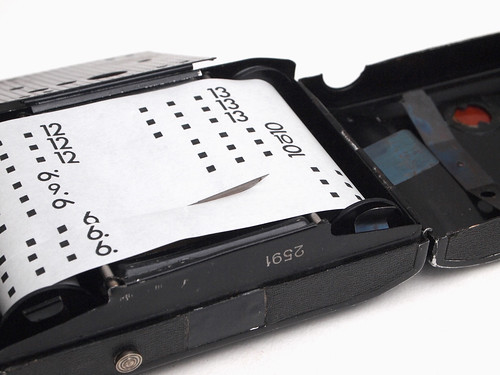 |
| Test with backing paper in place of film |
 |
| Detail with blade tip just visible through the cut in the pressure plate |
With the lens and bellows removed, although the hardboard insert fits over the frame inside the camera, as a precaution against light leaks, I used black insulating tape around all edges of the door on the front, and kept the cover over the red window on the back. Once wound all the way through the camera, it may be best to unload the film in a black bag, to ensure no light gets in the slit through the backing paper; the cut film can then be rewound with 127 backing paper onto the appropriate spool and the 16mm offcut similarly loaded into a subminiature cassette.
Good, creative !
ReplyDeleteThanks--elegance of simplicity.
ReplyDeleteReally a great addition. I have read this marvelous post. Thanks for sharing information about it. I really like that. Thanks so lot for your convene. buy dvd longmire season 6
ReplyDelete