 |
| The "Midg." Falling Plate Camera |
"It may be worth recalling that in those days hand cameras were called detective cameras, due to a popular belief that they were used by the police in the detection of crime. They used 1/4-plates (then thought small) held in sheathes and changed by a bag, or by a mechanism that could be relied on to jamb [sic] at critical moments. Serious workers and really nice people would have scorned to be seen with a hand camera."
Letter to Miniature Camera Magazine, September 1937
The introduction of the dry gelatin photographic plate was one of the most important factors in the mass popularisation of photography, soon to be followed by the innovation of film itself. The technology immediately preceding, the wet plate, had the distinct disadvantage of sheets of glass needing to be coated, shot and developed all within a very short time. The new dry plate could be coated with photographic emulsion and then stored until use - and stored again until development. Additionally, with time no longer a critical factor, both coating and development of the glass plates became two operations that a photographer could delegate to specialists. The convenience of the dry plate resulted in new forms of cameras being introduced to take advantage of this technology. In the quote above from Miniature Camera Magazine, the writer is recalling his experiences of photography in the 1890s, in contrast to the cameras of the 1930s: the magazine was dedicated the 'miniature' formats of 127 and 120 rollfilm, and 35mm. The 'detective cameras' referred to are a form of box camera: the nomenclature appears to have been used to contrast these against the typical whole- or half-plate 'stand' cameras of the time, wood and brass bellows cameras normally used on a tripod. Although by no means small, the detective camera, usually a leather covered box camera, would have appeared a
relatively unobtrusive piece of equipment. As the letter describes, these were cameras which carried a magazine of plates, sometimes changed by a bag attached to the camera, or by a mechanism allowing a series of plates to be exposed and then stored inside the camera. A common version of this was the
falling plate type: glass plates (or, in a few cameras, sheet film) either fell into place to be exposed, or, as was more common, fell out of place once exposed. Unlike stand cameras with separate single or double plate holders, the magazine camera had the convenience of holding (usually) a dozen plates at a time and could be used hand-held.
The
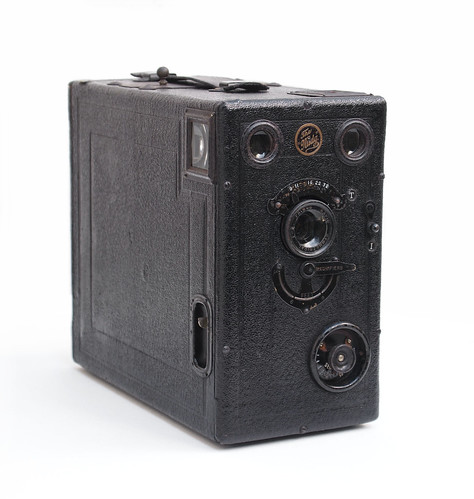
Midg (sic) was one such camera, popular in Britain at the start of the 20th century. The small round badge between the viewfinder lenses has its name written as
The "Midg." - complete with double inverted commas and full stop. It was sold by Butcher and Sons, which would later join with Hougtons and eventually become Ensign. The name suggests a small camera; its dimensions are 18.5 x 21 x 10.5cm, making it very large when compared to rollfilm box cameras of the same period or slightly later. There were a number of models of the Midg, some with focussing lenses, some with front movements. My camera has neither, so would appear to be a
No. 0, likely a back-formed model number after new, more advanced, Midg cameras appeared; the f8 lens would place its date from 1905 onwards; earlier cameras had slower lenses.
Although badged by Butcher and Sons, the camera itself would have been made by another company, not an uncommon practice. The
Living Camera Museum entry for the Midg states that it was "probably made in Germany";
Grace's Guide gives the following useful entry:
1915. Houghtons Ltd and W. Butcher and Sons Ltd formed a joint venture Houghton-Butcher Manufacturing Co Ltd to share manufacturing facilities. This agreement was essential for Butcher, which had no manufacturing plant and was mainly trading imported German cameras before the outbreak of World War 1. The two companies continued to trade separately, and the camera designs remained distinct. [my emphasis]
As many of these falling plate cameras were designed along very similar lines, it is by no means easy to discover the original manufacturer of the Midg purely by comparing images of cameras online (it is possible that the Midg was made exclusively for Butcher, but far more likely it would also have been sold under another name in Germany). However, according to Camera-Wiki, Butcher did sell cameras by
Huttig, notably the Gnom and the Aviso as the
Little Nipper, so it may just be possible that the Midg was another Huttig camera (it also mentions Ica, but not any specific models). The Midg first appeared in 1904 (
Early Photography gives c.1903 as the date), and was still being
advertised in the early 1920s. Generally, the magazine camera as a type was popular from the 1890s to around the time of the first world war; the Midg itself has a small role in popular culture thanks to the
Cottingley Fairies hoax. For the first photographs in 1917, Elsie Wright and Frances Griffiths used
Elsie's father's Midg; once these images had become famous, the girls were given Cameo cameras in 1920 to take more photographs, moving from falling plate to folding cameras, and in doing so perhaps demonstrating the decline in use of the falling plate camera.
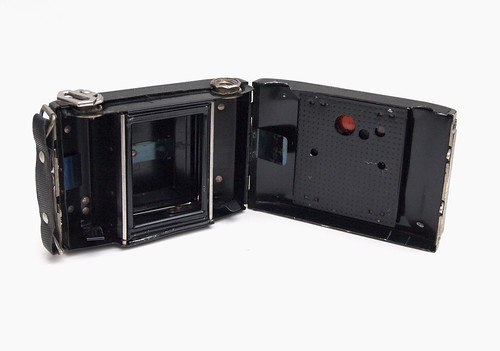
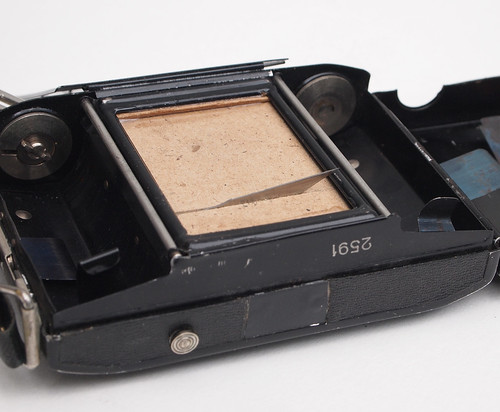
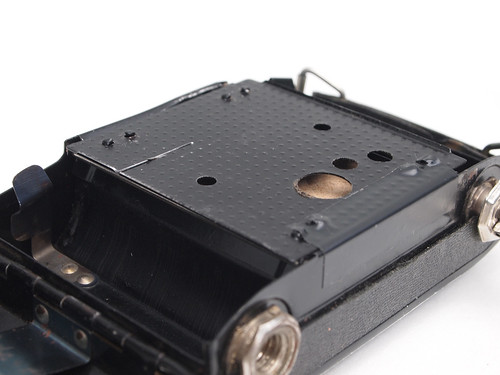
The Midg is a quarterplate magazine camera and takes twelve glass plates in metal holders. As photographic plates were usually sold in one-dozen packs, it would be possible to load a whole pack of plates at a time. The image below shows the back of the camera opened: the bolt mechanism on top of the camera releases each exposed plate to fall into the bottom of the camera. This also has a small round window which shows numbers 1 to 12 as the plates are advanced; this has to be manually set. Plates from the bottom of the camera can be removed (in the darkroom) while unexposed plates are still in position. Some falling plate cameras had split backs for this purpose, but as the Midg has a separate pressure plate this is not necessary (in some cameras, the spring was fixed directly to the inside of the camera back).
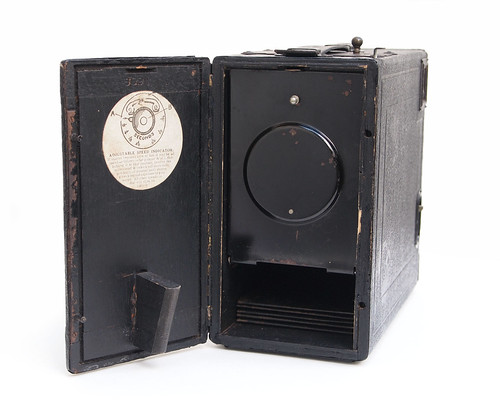 |
| Back opening showing pressure plate and plateholders |
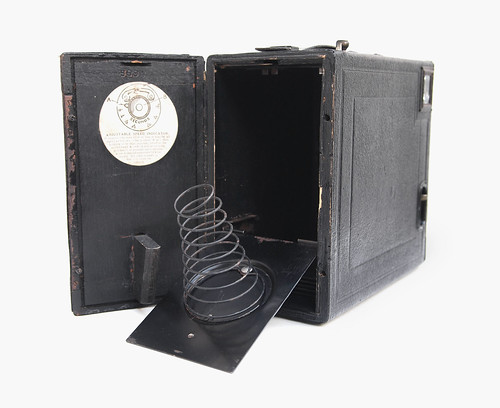 |
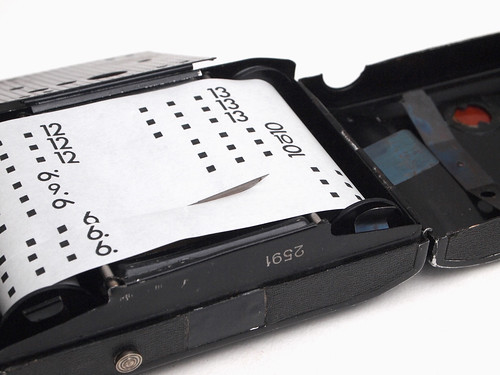
| Back opened to show spring mechanism |
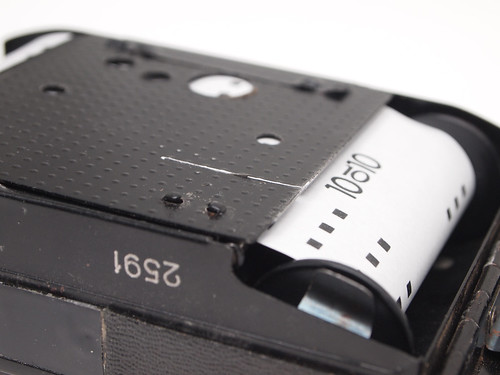
The metal holders are removed from the camera for loading and unloading. To load the camera, these are placed on two rails, just visible in the image above. The holders, below, have two pins at the bottom, which are positioned under the rails when loading, before the pressure plate and spring are then closed, along with the camera back. Along one side of the holders are holes, in groups of three, a marking which numbers the plates on exposure from one to twelve. My camera was missing two holders (numbers 3 and 11).
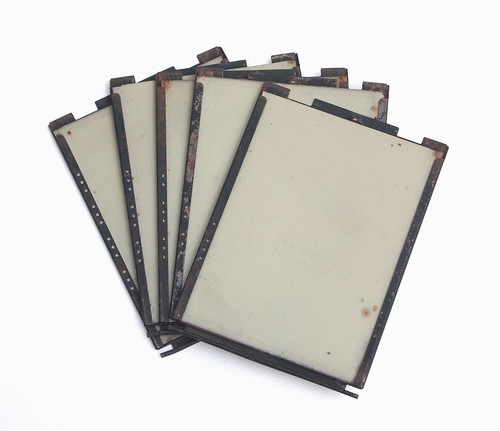 |
| Midg plateholders showing edge markings |
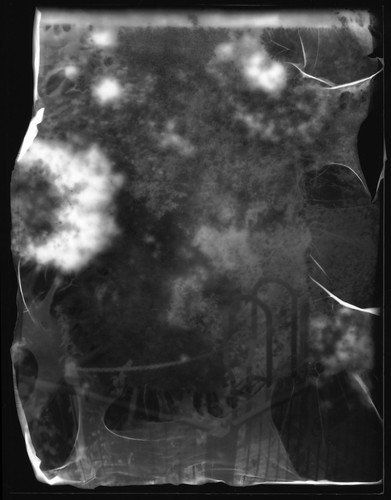
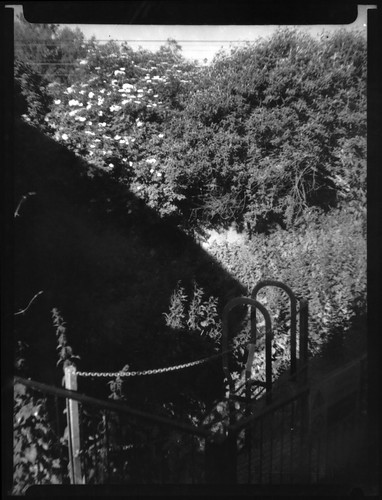
Inside the camera when I received it, the plateholders were loaded with glass plates: six of these were blank, unexposed, but four of these had negatives inside. Leaving aside the question as to why the negatives had been reloaded into the camera, it was clear - due to the markings on their edges - that these pictures had been shot with this same camera. The negatives all looked overexposed with uneven patches of fogging, probably from light leaks. I made contact prints from the negatives, three of which showed the same woman, one joined by a man, below, and the fourth with the some flowers - perhaps the same flowers seen in the photograph below.
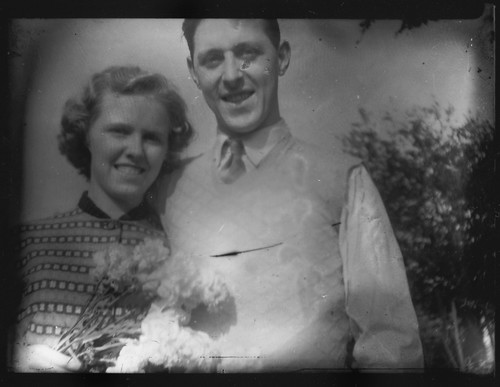 |
| Negative found inside the camera |
The lens is an f8 Primus Rapid Symmetrical lens, essentially a Rapid Rectilinear design, stopping down to f32 (when cleaning the camera, I removed the plate around the lens and found
the back of it with aperture markings engraved down to f44). The lens is fixed, but is provided with three supplementary close-up lenses. The pointer underneath the lens rotates these into place behind the front lens element for pictures at distances of 9, 6, and 3 feet (the position without these supplementary lenses is marked 'open' rather than infinity). This does mean that there is no intermediate focussing, and in use, I found these distances were not very accurate; other versions of the Midg have distances of 4, 8, 12, feet, which from my results when using the 6 and 3 feet settings, felt as though these distances might be more realistic.
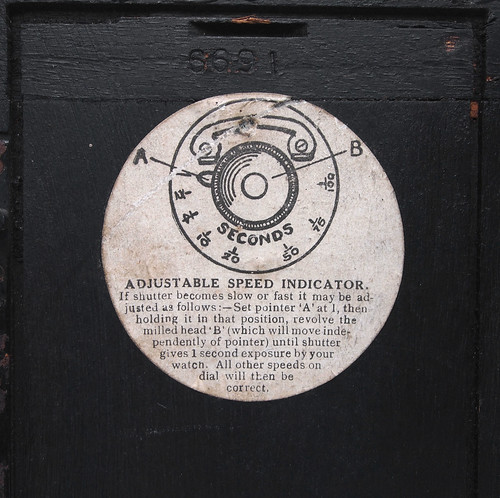 |
| Shutter adjustment instructions |
The shutter appears to be an everset self-capping, sector type. An arrow beside the lens is switched to either
T for 'Time' or
I for 'Instant' settings. On I, shutter speeds are set on a dial, from 1 second, through 1/2, 1/4 1/10, 1/20, 1/50, 1/75, to 1/100. Inside the camera back is a pasted notice about adjusting the shutter tension, from which I inferred that possibly the shutter works with intermediate timings when set between speeds. The shutter release is a lever on the side of the body which has a simple lock position.
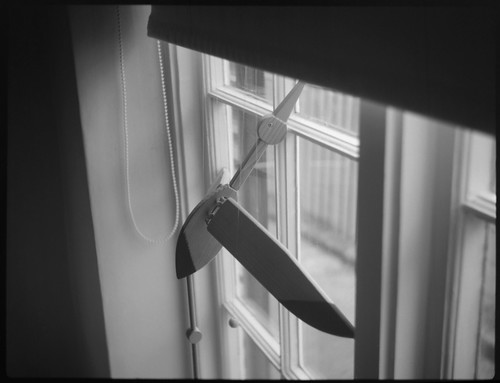
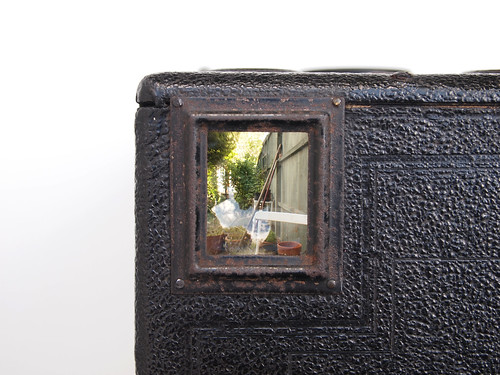 |
| Midg finder showing laterally reversed image |
Framing is achieved by two large (and surprisingly clear) viewfinders with laterally reversed images. Before using the camera, it needed a good deal of cleaning, having a smell about it of many decades in an attic. In cleaning, I removed most of the metalwork from the body, including the
plate changing mechanism itself. This fits into a rather roughly cut section of the wooden top to the camera. The metal frames of the viewfinders were simply fixed by panel pins into the wood. Although there was a small amount of corrosion on the mirrors, once cleaned these provide the best images I've seen on viewfinders of this type. The hand strap had been replaced by a home made version at some point - the underside has an embossed line bearing no relation to its shape, obviously cut from a larger piece of leather. In renovating the camera, I didn't attempt to take apart the shutter. This fired, but stuck at slower speeds. I attempted to adjust it as described by the notice inside, but this made no difference; possibly at 1/100th it is accurate. I did shoot a couple of images at 1/100th 'wide' open at f8, but these were quite underexposed.
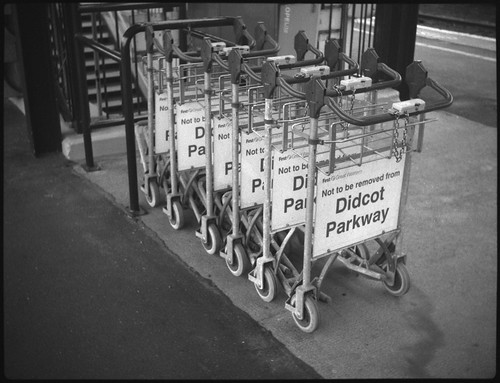
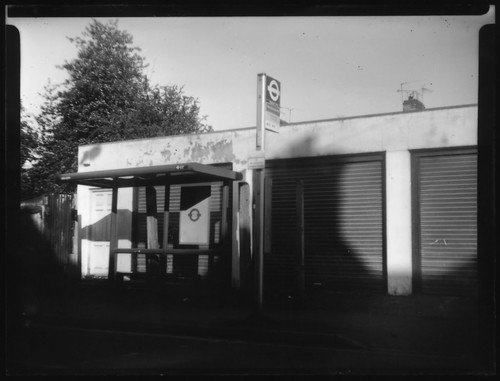
Having used old, previously unexposed photographic plates successfully in the past, obviously I wanted to use the Midg to shoot glass plates; I had seen a few examples online of these cameras being used contemporaneously with film or paper, but none shot with actual glass plates. For the first photographs with the Midg, I chose a box of
Ilford Soft Gradation Panchromatic plates. I've shot a number of these plates in different sizes from the 1940s through to the 1960s with almost universally good results. This particular box had a 1930s-1940s style label but unlike many other boxes of Ilford glass plates, although it was sealed, there was neither a label under the wrapping with developer formula and a date code, nor a separate leaflet inside to date it more securely. I rated the plates at 25, and, except for one underexposed image, I used a tripod and the T setting for all the shots. As a result, I mostly used apertures of f16-f32 to provide exposures of 2-10 seconds, easier to achieve manually, than trying to get a 1/2 or 1/4 second. I also used a yellow filter for many of the shots: as well as providing definition to the skies, this also functioned as a neutral density filter, giving longer exposures, again, making it easier use the shutter on its T setting.
 |
| Ilford Soft Gradation Panchromatic plate |
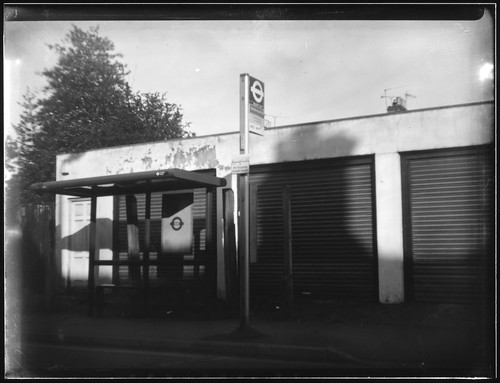
 |
| Ilford Soft Gradation Panchromatic plate |
I shot some plates with the camera in a vertical position; using the camera horizontally, after exposing the plate above, I tried the plate advance mechanism, only to find that, although the spring pushed the plate forward and released it, while horizontal, the plate didn't drop in to base of the camera cleanly, and, even with some shaking about, it got stuck at an angle. This showed up in as a shadow across the corner of the next plate exposed (below), and I was not able to advance this plate to take any more photographs. This was very much what I expected might happen - and I could have confirmed this without potentially wasting a glass plate - however, given the dark area at the top of the affected plate below, the top left corner being occluded in this way is not especially distracting. After this, when shooting horizontal images, I turned the camera back to its vertical orientation before advancing to the next plate.
 |
| Ilford Soft Gradation Panchromatic plate |
The camera is designed to hold the plates in place once these have dropped into its base by two sprung metal runners in the front, which have six pairs of protruding notches, made to secure two exposed plates at a time, as in the image below; the door of the camera has an angled profile that fits underneath the pressure plate, as can be seen in the photographs further up in this post, to ensure, once exposed, the plates are do not move around inside the body of the camera, even if the camera is turned upside down.
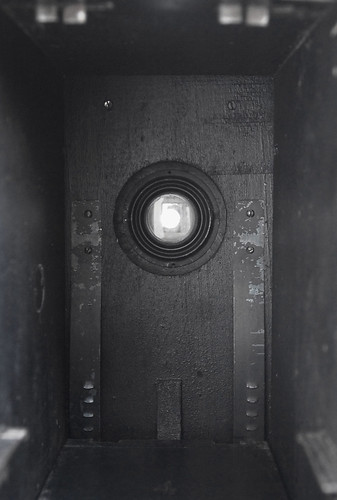 |
| Camera interior showing notched metal springs |
Having shot a whole box's worth of Ilford Soft Gradation Panchromatic plates, I wanted to try some different glass plates. Having three as-yet unopened boxes of
Kodak P1200 Super Panchro-Press plates from the 1950s, I loaded a few holders with these, and shot them at the same time as some Ilford F.P.3 sheet film. However, when it came to developing the Kodak plates, opening the tank once these were in the fixer I could see the emulsion lifting off the glass. None of the plates had the emulsion detach completely, so this was an extreme example of what is known as 'frilling'; the plates also had patches which look like mould obscuring the images on the negatives, which are just discernible, but the difference from the Ilford plates is very marked.
 |
| Kodak P1200 Super Pancro-Press |
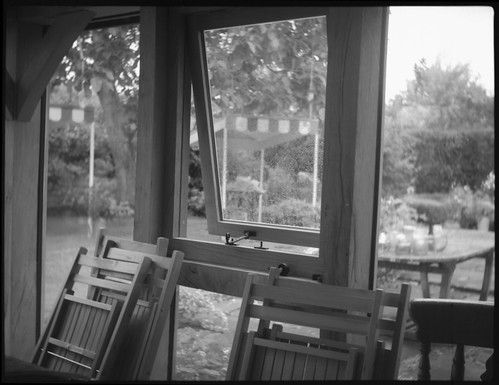
As well as glass plates, I also wanted to shoot some film with the Midg. I already possessed a number of film sheaths in the quarterplate size, and some, but no means all, of these fitted into the Midg's plateholders. I have read about falling plate cameras needing the weight of glass to provide the impetus for the plate to fall once released, but in the Midg, the plateholders happily fall into the bottom of the camera while empty, so using film instead of glass plates did not cause any difficulties. I first shot some
Ilford F.P.3 film from late 1940s. Ilford introduced F.P.3 in 1946; my box had a leaflet inside the box dated to May 1949. I had previously tested this box of film by
shooting a sheet with my Ensign Klito camera; the FP3 film has some degradation due to its age, but by increasing the exposure and achieving a denser negative means this became less obvious - it shows more clearly in areas of flat tone. Despite being nearly 70 years old, the film was still quite responsive: I shot a first few exposures rated at 25; however, with some uneven marks that I suspected might be due to the interleaving black paper (possibly not acid free), I subsequently rated the films at 12 to reduce the appearance of these marks.
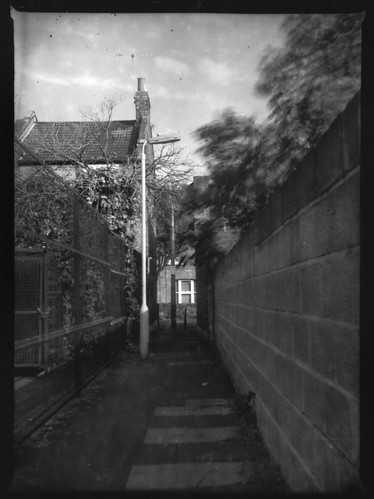 |
| Ilford F.P.3 film, rated 25 |
 |
| Ilford F.P.3 film, rated 12 |
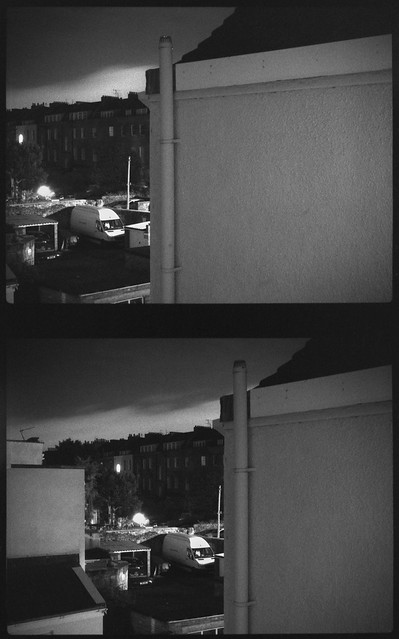
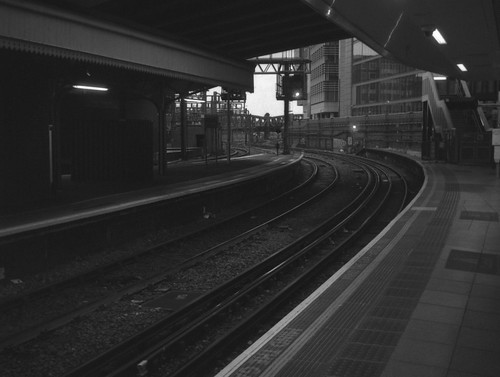
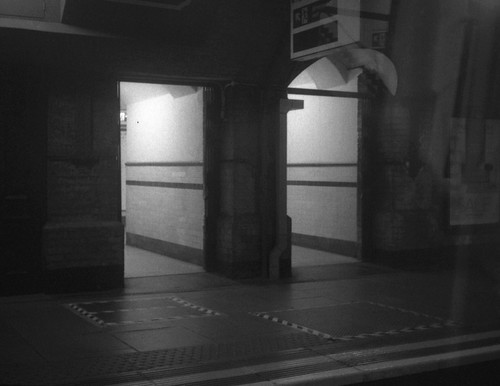
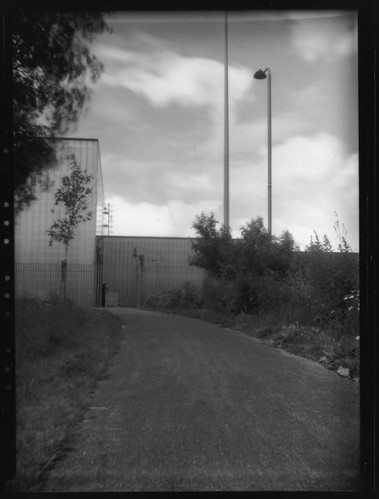
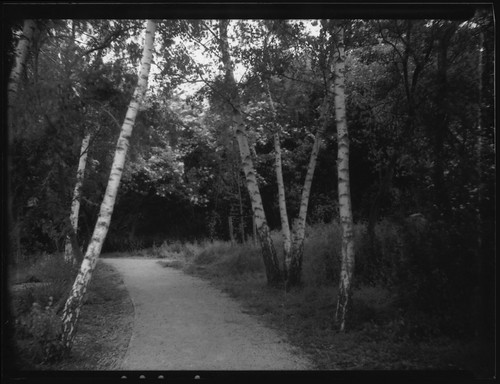
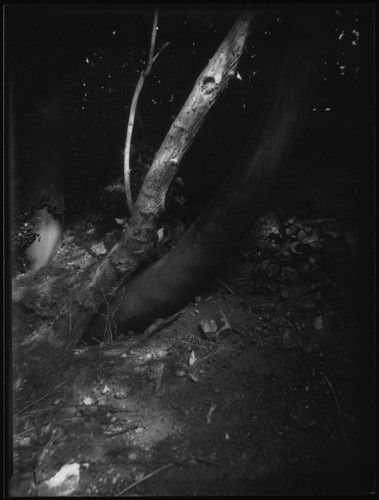
Finally, I also shot some process-type emulsions in both film and plates. I used some
Kodak Ortho Type 3 film with a 'develop before' date of April 1970 and
Ilford N.50 Thin Film Half Tone plates, dating to April 1957. As expected, both these emulsions were high in contrast, which was a little problematic with subjects containing bright sun and deep shadows, shot on sunny evenings. The Kodak film was stand developed in Ilfotec LC29 with a high dilution of 1+150, while the N.50 plates were tray developed in R09 One Shot, also at 1+150, by inspection under a red safelight.
 |
| Kodak Kodalith Ortho Type 3 film |
 |
| Ilford N.50 Thin Film Half Tone plate |
Sources/further reading:
The Midg on Camera Wiki
The Midg on Living Image
The Cottingley Fairies photographs
Detective Cameras on Early Photography, including the Midg