 |
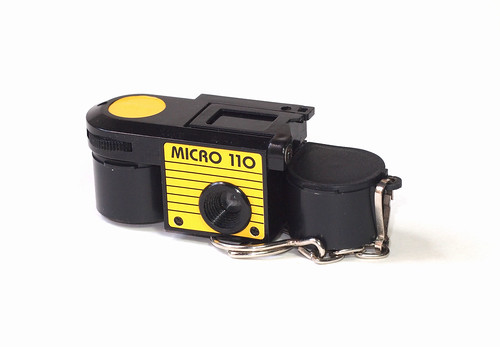
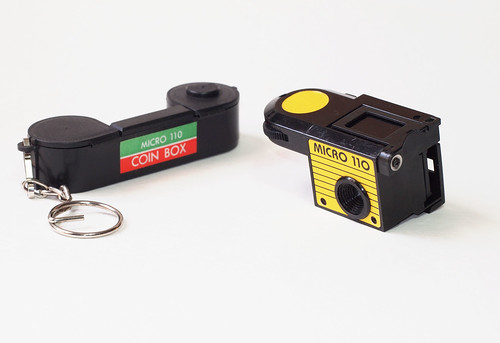
| Micro 110 with coin box and key chain |
The
Micro 110, like many a plastic toy or novelty camera, has little evidence pointing to its origin. There's no markings on the camera itself other than the name. There are a number of small, plastic 110 cameras with very similar designs under a number of different names; the model here as the Micro 110 was also sold with a 'Gemstar' nameplate, and, inevitably, there are promotional variants - Kellogs and Kitkat versions both appear online. There are versions of the Micro 110 with a number of small differences, from the name/faceplate, to cameras with a small central point in the viewfinder frame, cameras where the top plate covers both sides of the 110 cartridge, and one-sided variants which fold down to be even more compact. Contemporary versions of this camera appear under Powershovel Ltd's Superheadz brand, no doubt trading on the resurgence of the 110 film format after it was resurrected by Lomography. Haking made a
Halina Micro 110 camera, larger than this Micro 110 camera, enclosing more of the 110 cartridge, but perhaps the progenitor of the general design. Its ancestor is undoubtedly the
Hit camera of the late 1940s-1950s, thousands of which would have been given as novelty gifts, and many of which were never used to take photographs.
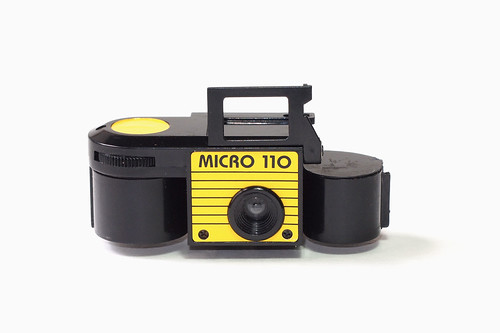 |
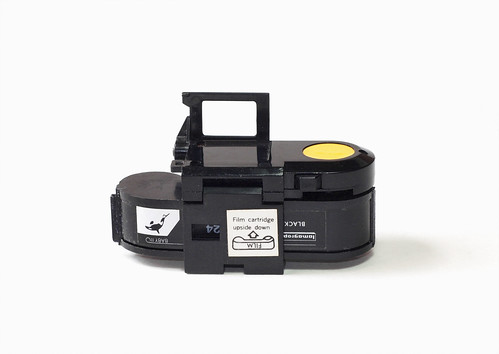
| Micro 110 |
There's very little to say about the Micro 110's specifications: as the name indicates, it takes 110 cartridge film and the camera's body encloses only the central section of the 110 cartridge while its top section extends to one side to connect to the cartridge's film advance gearwheel. This means that the cartridge is loaded upside down relative to its normal orientation - the film advance wheel is on the front of the camera to the user's right hand side, with its gearwheel directly underneath this. There is a
sticker on the back of the camera to this effect. The back of the camera is hinged for loading, and is held in place once closed by a small tab on the camera's underside. The camera has a fixed-focus, fixed-aperture meniscus lens, reportedly f8, possibly smaller (there is an internal stop for the aperture); and a single shutter speed, possibly around 1/125th, perhaps slower. The viewfinder is a simple flip-up plastic frame. This has a small tab to make erecting it easier, and when folded down, sits flush into a recess on the top of the camera.
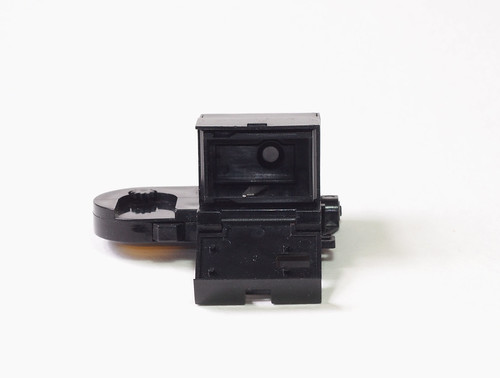 |
| Micro 110 opened for loading (upside down) showing the pin which tensions the shutter |
As with most 110 format cameras, the Micro 110's film advance requires the internal pin to locate the single perforation for each frame. Without this, the frame advance wheel will keep turning. This internal pin also tensions the shutter: with the pin located in a perforation, advancing the film pulls the pin to one edge of the inside of the camera. When the shutter button is pressed, the pin moves inwards the same amount, slips out of the perforation, springs back into its original position and trips the shutter. Without a cartridge loaded in the camera, depressing the small square shutter button feels quite unsatisfactory - there's a small amount of give, and no feeling that the button is actually
doing anything; however, once loaded and with the film advanced to tension the internal pin, the shutter button has quite a bit of snap to it.
 |
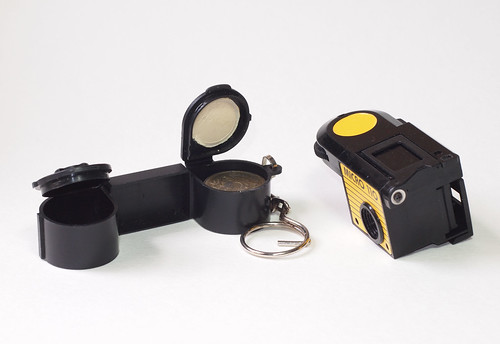
| Micro 110 with original coin box |
The camera came with a 'coin box', shaped like a 110 cartridge, with each chamber opening from the top (the green and red colours of the sticker on the coin box appear to be deliberately reminiscent of Fuji's film packaging). The coin box itself has a loop to attach the key chain; there is also a loop on the camera itself. The presence of the coin box suggests an earliest date for the camera's first appearance - 1983, with the introduction of the one pound coin in the UK, replacing the pound note. One pound coins fit perfectly into the coin box; if originally made by Haking, based in Hong Kong (or indeed any other Hong Kong manufacturers) while still under UK rule in the 1980s, there would be a certain appropriate design synergy to this aspect of the Micro 110 - although of course there may be many other territories where coins of significant denomination would fit. When the one pound coin entered circulation, cheap, novelty key ring coin keepers were very popular - the kind of gift that might appear in a Christmas cracker.
 |
| Micro 110 with coin box opened |
The camera is 62mm wide without a cartridge - or the coin box. When loaded, it's as wide as a 110 cartridge, 80mm, and 33mm high (with the viewfinder folded down), 31mm deep. With the coin box, the camera is slightly wider, as the 'supply side' of the coin box is bigger than that of a 110 cartridge; it's symmetrical in size in order to fit coins of the same size in each chamber. The camera is very pocketable as a result. There are places where it is described as "the world's smallest camera", which, although a great claim, was certainly never true. It is not, for example,
as small as its near namesake, the Mycro IIIA, but, as a cheap, novelty camera, it may have been the smallest camera commonly available at the time it was first made.
 |
| Micro 110 with Lomography Orca cartridge |
The Micro 110 was my choice for this month's '
#Shitty Camera Challenge' - I bought the camera specifically to take part. The definition given for a 'shitty camera' is one that's worth less than the roll of film inside it. I paid a whole £6.50 for my Micro 110 camera (which included postage); had this been a 35mm camera, I could well have bought a roll of film for less than that, but the prices of 110 film being what they are, means that the definition stands. The Micro 110 certainly fits the
spirit of the '#Shitty Camera Challenge' as much as the given definition, but I shot reloaded 110 cartridges rather than new film. I wrote about reloading 110 cartridges in my post on the
Pentax Auto 110; there are a number of resources online illustrating how to reload the cartridges.
 |
| Micro 110 with Eastman Double-X film |
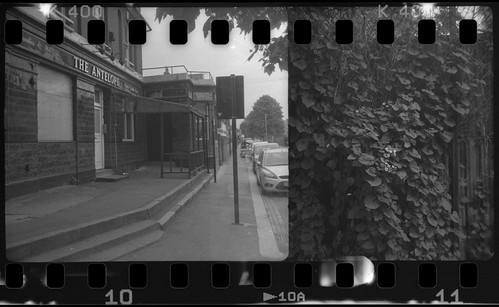
For the first cartridge, I loaded a length of 16mm
Eastman Double-X film. As the 110 cartridge is loaded upside down, the single perforated Double-X film has the perforations along the bottom of the image; with most 110 cameras, these would run across the top. On development, a number of issues were evident. There were overlapping frames, which I had thought likely: I had advanced the film twice per frame by taking a 'blank' shot after each frame and winding on again, but this was not enough. There were also lots of light leaks. As the Micro 110 does not cover the whole cartridge, light leaks are almost inevitable, especially with reloaded cartridges, split along the seams of the two main parts of the plastic cartridge. As the week progressed, and I developed the films throughout, I attempted to prevent the light leaks as best I could, beginning by fully taping up all the seams of the cartridges, but there were still vertical bands present.
 |
| Micro 110 with Kodak Photo Instrumentation film |
It soon became evident that this particular light leak was due to the camera design itself: I began shielding the camera when I advanced the blank frames, and the vertical line appeared on the right hand edge of every frame. This was aligned to the perforations, and I initially thought that it might be caused by them, but this didn't seem right. That this appeared once per frame where it did was due to a very slight gap between the camera body and film cartridge on the user's left, the side where the top of the cartridge isn't covered. This gap is very small; putting a fold of tape into the gap on loading made this better, but this tape was generally in the way of loading and unloading the cartridges, and the gap itself is so narrow that's it is actually difficult to fill.
Another light leak that was easy to solve was caused by the pinholes from the Lomography Orca backing paper, as were very clear in the films shot with the
Minolta Weathermatic A. I took two approaches to this. For one cartridge, I created a new length of backing paper by cutting a strip of appropriate width from some Ilford medium format backing paper, which seemed to work. The simpler approach was to tape over the window that shows the backing paper; both procedures forfeited the frame numbers, of course. Having developed the first film, it was clear that the negative area was large enough to cover the distance between four perforations, and, as the pin does appear to locate each perforation (and in some instances had scratches to show this), after every shot I took
three blank shots. This also meant that the frame numbers were no longer important for spacing. One other artefact that I noticed appearing in all my images was the shadow of the shutter pin itself: the small wedge-shaped mark at the bottom of the frame. In some images this is sharper, while in others there's is little motion blur, which suggests that the shutter speed is not consistent, hardly surprising..
 |
| Micro 110 with Double-X, showing shutter pin |
As I've written previously in conjunction with other 110 cameras, 110 film has pre-printed frames; the cameras themselves project a larger image than the 110 frame. When using reloaded cartridges, it's possible to make use of the whole image area, albeit with the presence of whichever perforations in the film used. The Micro 110 has the largest frame size of any 110 camera I've used: 14.3mm high by 25mm wide. The 110 pre-printed frame is roughly 12.7x17mm, making the Micro 110 considerably wider. The vertical light leak written about above would also have been within the pre-printed frame, and, only stopping on each 110 perforation, it may not have been necessary to shield the camera when advancing, provided this was done relatively quickly.
 |
| Pre-printed 110 frame size superimposed on the Micro 110 frame |
However, using the entire frame of the Micro 110 shows up the lens' limitations very clearly. The lens is not centred to the frame itself (which it would be with the pre-printed frame), and, as the image circle of the lens falls off in terms of illumination and definition quite sharply, the left hand side of the image suffers greatly from this. Pincushion distortion is also evident. The image above shows an approximation of the size and positioning of the 110 frame to the whole Micro 110 negative. It also means that framing using the viewfinder is even less accurate than it might have been. Despite the perhaps undesirable characteristics revealed, for this post I have not cropped the images; for some images I have attempted to balance the uneven illumination with dodging on the left of the image, and occasionally burning in on the right; in others it felt appropriate to leave the falling-off intact. All the photographs on this post were scanned rather than printed in the darkroom, but the emulated dodging and burning no doubt could be replicated.
 |
| Micro 110 camera with Orwo UP21 |
As well as using both single- and double-perforated 16mm film stock, I also tried a double Super 8 stock. Double Super 8 film is 16mm wide, with Super 8 perforations along each edge; the format was designed for cameras in which a spool of film is used in the same manner as 'standard' or 2x8mm film, rather than actually using a Super 8 cartridge: half the width of the roll was exposed in the camera, then removed, turned over, and the other half exposed. After development, the film was then split down the centre to provide two lengths of Super 8 for projection. The Super 8 perforations are smaller than 16mm perforations, but, as I found with testing a reloaded cartridge, the camera's pin was positioned such that
most of the time, it connected with the perforations, and so could be used (occasionally, the film needed a fair bit of winding before the pin would catch a perforation, but once located subsequent exposures were generally fine).
 |
| Micro 110 with Orwo UP21 Double Super 8 film |
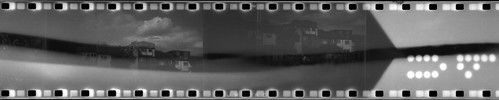
The DS8 stock I used was Orwo UP21; as I had discovered with Orwo UP15 (as shot on
Expired Film Day this year), another Orwo black and white reversal stock, the absence of a colloidal silver anti-halation layer, meant that the film could be developed to the negative stage and fixed, rather than bleaching and subsequent second development to provide a positive transparency for projection. For the first reloaded cartridge, I used an untested roll of UP21 in error - the start of this roll showed that it had been opened to the light at some point. Double Super 8, like standard 8, does not have a separate leader: the end of the film is simply exposed on loading and reloading. In the image from the start of the film, one can see where the film has been wrapped around itself on the spool, the chevron-shaped mark indicating the very end of the film, with the punched lettering 'UP' exposing the film underneath, as with the perforations; the wavy line across the film is from a rubber band around the reel.
 |
| Micro 110 with Orwo UP21 |
Although the Super 8 perforations have a different pitch or distance between them from those with 16mm film, making for 6, nearer to 7, per frame, I found that if I kept to shooting three blank frames for every photograph meant that the negatives did not overlap. For subsequent reloaded cartridges after the first test cartridge, I used a different reel of Orwo UP21 which I had already tested. This still had its original box, with a develop 'before date' of April 1991 (suggesting that it was manufactured before the reunification of Germany). The UP21 film was originally 100 ISO; a
previous test with the film suggested that a two-stop increase in exposure (i.e., rating the film at 25 rather than 100 ISO) was needed to compensate for the loss of sensitivity with age. Despite the age of the film and its loss of sensitivity, the UP21 was still very fine-grained in comparison to the other stocks used.
 |
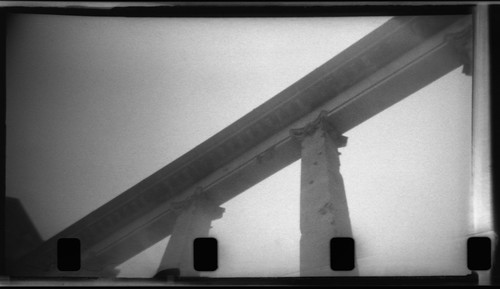
| Micro 110 camera with Orwo UP21 |
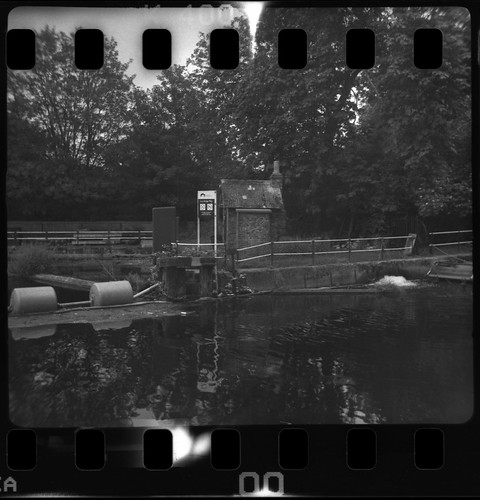
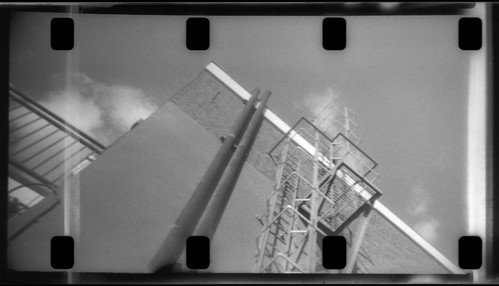
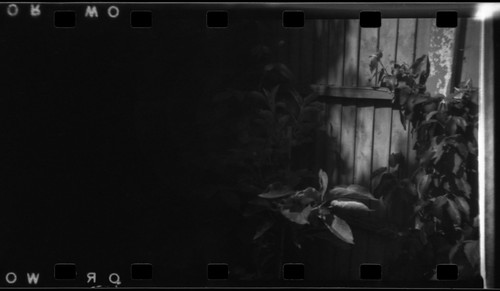
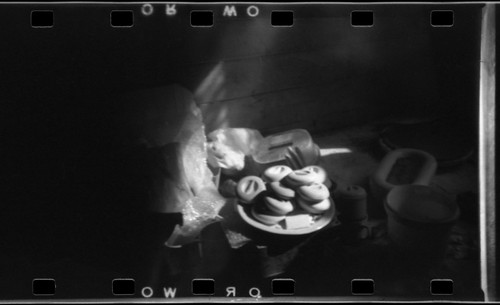
The Micro 110 camera is designed to by used with a medium speed film in good daylight. With a single shutter speed and aperture, the film's latitude is necessary to cover any variation in exposure. This meant that the Double-X film was often over-exposed - for much of the week of shooting with the Micro 110, the weather was bright and sunny - to gain more control over the results, I could have pull processed the film one stop, and could have used filters, with a deep yellow or neutral density filter to reduce exposure. However, the Micro 110 does not lend itself to the use of filters (these could have been taped on), and I wanted to use the camera in a number of different lighting situations, so did not pull the film - and so it was possible to achieve images such as the one immediately below (unsurprisingly, this images also shows up some lens flare). Although an interior, obviously the subject of the photograph is the windows, but these are bright enough to illuminate some of the architectural features inside. The second image below was an interior shot, with some natural light from above, but on an overcast evening. There was just enough information on the negative to pull out from the darkness around the subject.
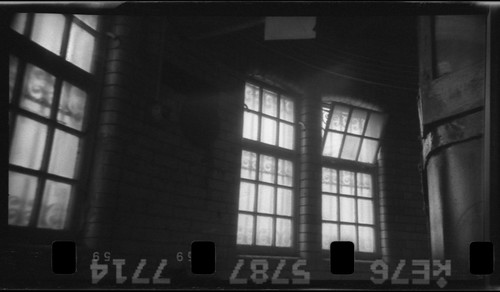 |
| Micro 110 with Eastman Double-X |
 |
| Micro 110 with Eastman Double-X |
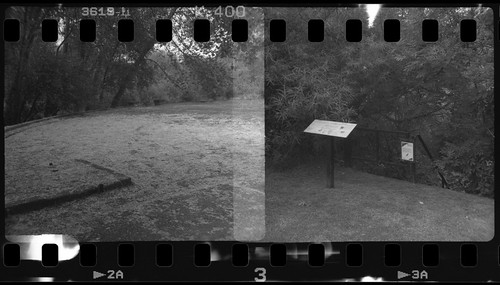
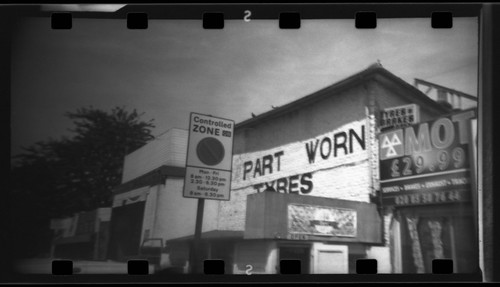
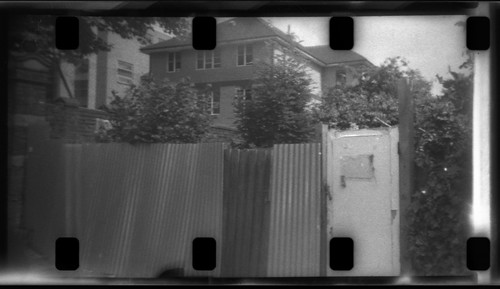
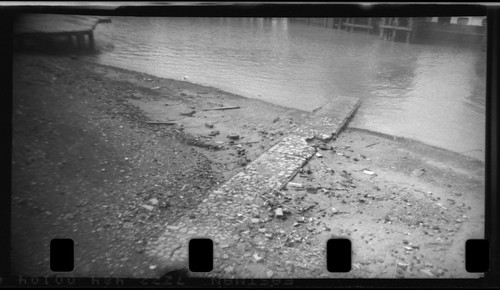
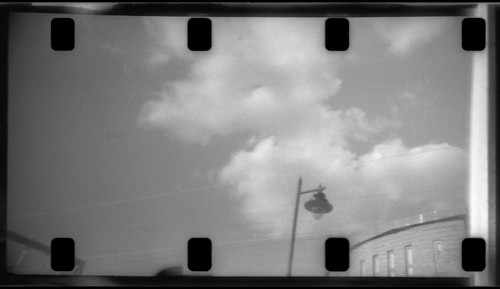
The Photo Instrumentation film was originally rated 500 ISO, twice the speed of Double-X, but more than a decade and a half after the date on its box (it's not written as a 'process before' date, so it may be a date of manufacture, though this is not specified), I've found that it's best used at an exposure index of 100. The Photo Instrumentation also has a relatively low contrast and good latitude, and so gave relatively good illumination across the frame, reducing the effect of the lens' vignetting as seen in the images below.
 |
| Micro 110 with Photo Instrumentation film |
 |
| Micro 110 with Photo Instrumentation film |
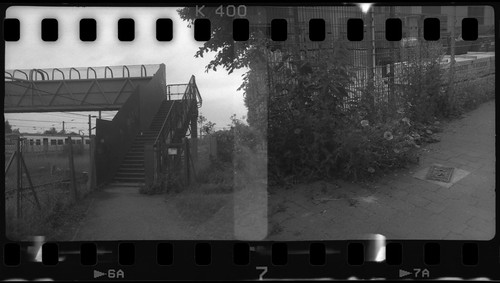
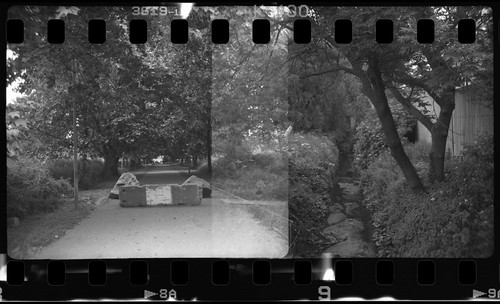
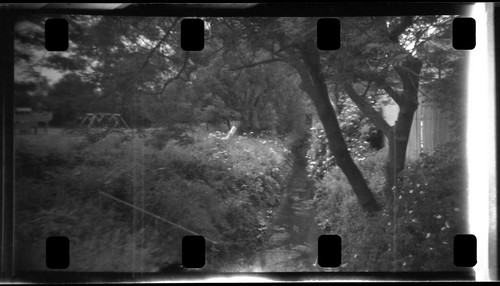
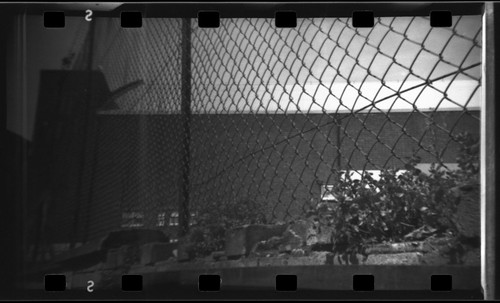
By contrast, the Orwo UP21 film was sufficiently less sensitive than the other two film stocks used to mean that I tried to use cartridges reloaded with this only on the brightest days. When testing the film previously, I had chosen an arbitrary developing time which appeared to work well enough, but when using the Micro 110 and being unable to change the exposure, I increased the developing time, essentially push-processing the film. One effect of this was to increase the effect of the lens' vignetting through the inevitable increase of contrast, and the possibility of highlights blocking out. The image below is a good example of these effects. These factors - the high contrast, vignetting - could be used intentionally, such as with the second image below, where these effectively isolate the lit subject. On problem that I did have with the Orwo UP21 film was when scanning the film, it had a pronounced curl on development, not in the direction of the reel's winding, but
across the width of the film. This may have negatively affected the focus of the scans.
 |
| Micro 110 with Orwo UP21 |
 |
| Micro 110 with Orwo UP21 |
The entry for the Micro 110 on
Ollinger's Camera Collection ends with the remarks: "I've got a couple of these, but never used them so I can't attest to the quality. Considering that it uses 110 film, the bar is set so low to begin with that it probably doesn't matter." Having spent nine days inclusive using the Micro 110 for the #shittycamerachallenge, these remarks are not unfounded. In terms of image quality, it's the worst 110 format camera of the small sample that I've used in the last few years, thanks to the meniscus lens and the absence of aperture or shutter speed controls, combined with the format's small negative size. The inherent light leaks which affected most of my images appear unlikely to show with 110 film rather than reloaded cartridges. Of course, a of these drawbacks must be set against the small size of the camera itself, the one feature that must be its sole recommendation (other than its cheapness) - but there are other small 110 cameras which are not much larger than would be far better than the Micro 110.
 |
| Micro 110 with Eastman Double-X |
 |
| Micro 110 with Photo Instrumentation film |
 |
| Micro 110 with Orwo UP21 |
Sources/further reading:
Micro 110 on Ollinger's Camera Collection
Micro 110 - My First Camera
The Haking Micro 110 on Camera-Wiki
Halina Micro 110 on Austerity Photo