 |
| Vest Pocket Autographic Kodak |
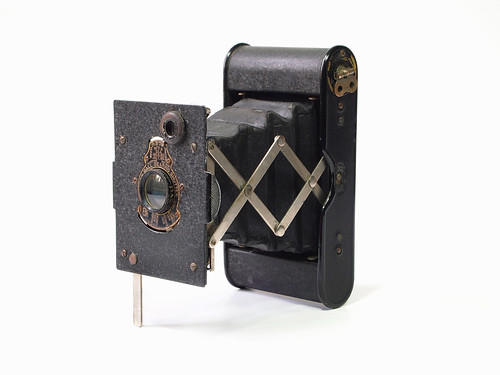
No matter how many cameras you may have, there are times when a vest pocket edition of your larger instrument will be appreciated. That's just what the Vest Pocket Kodak is- a miniature Kodak- so flat and smooth and small as to go readily into a vest pocket, so carefully made as to be capable of the highest grade of work.
Kodaks and Kodaks Supplies, 1912
Introduced in 1912, the
Vest Pocket Kodak was the first camera to use a new paper-backed roll film format commonly known as
Vest Pocket film - with 'vest' as in the American term for waistcoat - with this film later being denominated by Kodak as
127. The camera takes images nominally 4x6cm in size (the negatives from my camera measure 44x66mm), with eight exposures on a roll of film, and the catalogue quoted above emphasises the ability of achieving postcard-sized enlargements from the negatives at a time most photographs would have been contact printed. The camera itself is very compact (120mm high, 64mm wide and 24mm depth when closed), and Kodak's catalogues illustrate this by showing the camera side-on captioned
actual size on the page.
 |
| Vest Pocket Autographic Kodak |
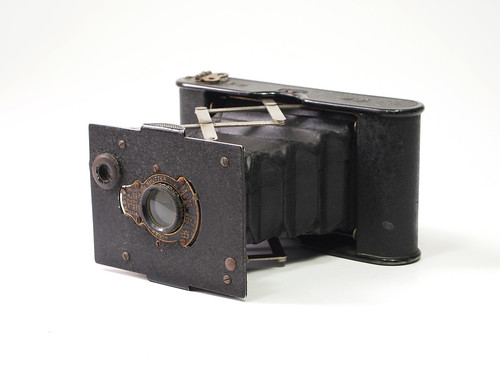
It opens like a flash, to a fixed focus, and instantly is ready for service. And then, just a slight pressure of the shutter release, at the upper right hand of the front standard, and your exposure is made.
Kodaks and Kodak Supplies, 1918
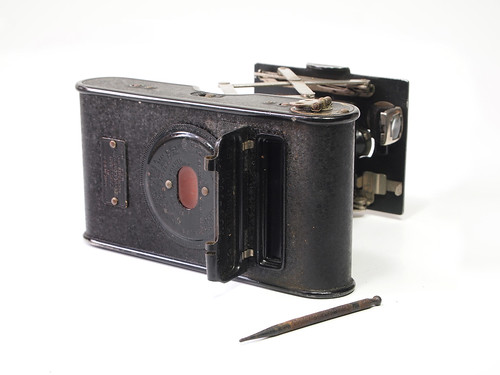
To operate the camera, the front standard is pulled out until the struts lock. With the shutter release located behind this standard, the shutter is prevented from being tripped while the camera is folded. Framing is by brilliant finder, also behind the front standard, which rotates through 90º for portrait or landscape shots. As with most cameras of this date, frame advance is manual, with an orange window in the centre of the back for frame numbers. The side (or top, depending on how the camera is held) of the camera removes for loading, and the film has to be firmly attached to the take up spool, and both spools slide into their respective slots with the paper backing stretched between them, not the easiest of operations compared to loading a camera where the back opens.
During its fourteen-year production run a number of changes were made to the Vest Pocket Kodak and different models improving on its original, limited specifications were made alongside the basic version. These changes help to date the cameras. Like many an early Kodak camera, the Vest Pocket Kodak has numerous patent dates: on my model there are three on the shutter, and several around the red window for patents in the USA, Britain, Canada and Australia. The last patent date is 1917; often Kodak patent dates refer to patents taken out some time before the cameras these appear on were made, and are not in themselves useful except in establishing a prior, earliest possible date. Other features are more secure in dating the Vest Pocket Kodak. In 1914, Kodak brought in
Autographic film, a special feature in which a narrow window could be opened to inscribe with a stylus directly onto the backing paper: a thin tissue of cabon paper between film and the backing paper would transfer this writing to the negative rebate with development. Most Kodaks other than the cheap box cameras were provided with this feature, with the Vest Pocket Kodaks gaining the Autographic window in 1915, a year after its introduction. Kodak persisted with Autographic film until the 1930s; Mischa Konig's
Kodak Classics site suggests that the feature was dropped due to the increased sensitivity of film emulsions.
 |
| Vest Pocket Kodak with Autographic door open and stylus removed from holder |
My example still has the Autographic stylus, often separated and lost, which is kept slotted into the edge of the opening door. The clearest identifying feature of my camera is the finish. Initially, the Vest Pocket Kodak was simply painted black enamel on all surfaces, but the
Special version with better quality lenses was finished in leather. My camera has neither: it is finished with a craquelure effect which,
according to Early Photography, was introduced in 1920. More secure dating may be due to the serial number - engraved on the fold out stand for portrait orientation - but I have yet to find an online resource for VPK serial numbers.
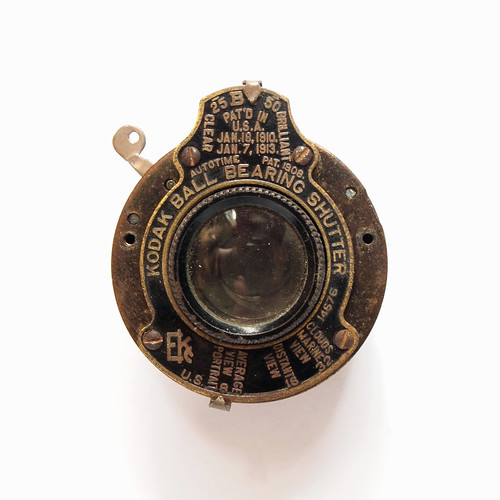
The first Vest Pocket Kodak came with a meniscus achromat lens in Kodak's ball bearing shutter; my version has the second cheapest lens option, a Rapid Rectilinear (this lens first appears in the 1918 catalogue; in 1920 a VPK with the lens was $10.58, as against the meniscus at $9.49, reduced to $9.50 and $8.00 respectively, in 1921 when the focusing
Special was introduced). The apertures are marked in U.S. stops 8, 16 and 32, equivalent to f11, f16 and f22, although the lens' maximum aperture is clearly wider than the widest stop: as with the meniscus lens, the aperture was restricted to improve definition. The stops are also marked with
Portrait/Average View, Distant View and
Clouds/Marine View, as a guide for the user. The fixed focus lens appears to be set at a distance appropriate to group shots: the settings around the lens imply that infinity focus is
not achievable by using the largest aperture, which I did find to be the case.
 |
| Rapid Rectilinear lens in Ball Bearing shutter |
The Kodak Autotime Scale greatly reduces the liability of error in exposure, as it automatically indicates the proper time and stop opening for subjects under any condition of outdoor photography. It is exceedingly simple to use. The speed indicator is merely set at the point on the scale indicating the kind of light prevailing and the diaphragm indicator at the point indicating the character of the subject.
Kodaks and Kodak Supplies, 1912
The Ball Bearing shutter has just two speeds, 1/25th and 1/50th, marked
Clear and
Brilliant respectively, with both B and T settings. According to the manual, if "the subject is in the shadow, or during cloudy weather it will be necessary to make a timed exposure", which shows how limited the conditions wherw it was possible to use the camera handheld with the films of the time, especially bearing in mind the caveat that "The markings are for Summer at mid-day. During Winter or for morning or afternoon use next larger aperture than indicated". The advice for using the T or B settings are to use a 'stable support'. The Vest Pocket Kodak features neither cable release socket nor tripod mount, but adaptors for these were available as accessories; there is a detailed section in the manual for timed exposures, firstly in interiors, giving guide exposures based on the number of windows, colour of the walls, and the light outside, and then a shorter section for conditions for timed exposure outside.
The first films I tested in the Vest Pocket Kodak showed some light leaks, but as these were largely from the edges of the negatives, this was possibly a result of cutting and re-rolling 120 film to 127 backing paper and spools, and perhaps not rolling these tightly enough, rather than problems with the camera itself. In the second image below, I used
Ilford Delta 3200 to shoot handheld indoors, albeit close to a window, at the widest aperture, a relatively slow f11, which does seem to demonstrate how close the fixed focus is. It also shows that with modern, faster emulsions, an old camera with a slow lens becomes more flexible: when made, although equipped with a T setting for long exposures, it would have been primarily intended for taking photographs outside in sunny conditions. Faster films increase the situations that these cameras can be used in and at the same time I find that most films' latitude mitigates the effects of overexposure due to the limited shutter speeds.
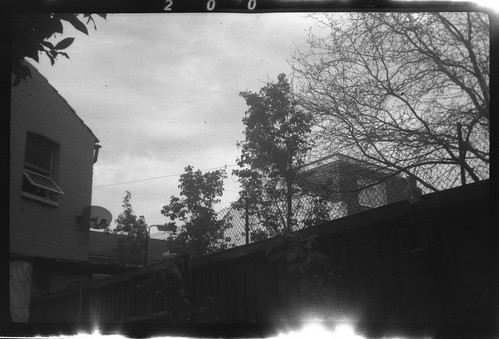 |
| Vest Pocket Kodak with Fomapan 200 |
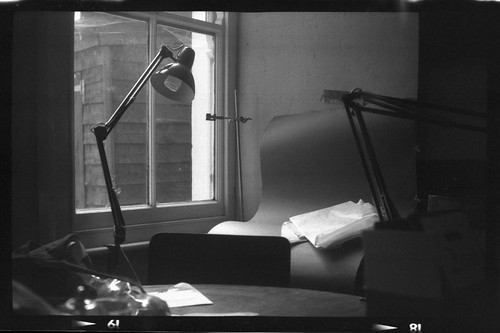 |
| Vest Pocket Kodak with Ilford Delta 3200 |
However, trying out some other films showed that there were more light leaks, which seemed to be getting worse, possibly due to the corners of the bellows being quite brittle and, with unfolding and folding the camera numerous times, these pinholes became more prominent, as in the image below. The leather at the corner folds of the bellows had mostly worn away to the fabric beneath. As the Vest Pocket Kodak does not open in the same way a more conventional folding camera does, it's provided with a circular door on the back which the red window sits in: this can be removed by rotating it and it provides access to the lens from the inside, probably for cleaning, but just conceivably to remove and replace it - although nothing I've read would suggest this was commonplace. However, this doesn't expose very much of the bellows from the inside, and so, to tackle the light leaks, I took the camera apart to better identify and attempt to fix them.
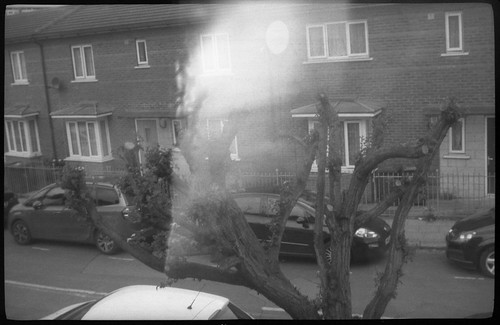 |
| Vest Pocket Kodak with Ilford Delta 3200 |
To disassemble the camera, there are two screws on the bottom of the body that secures the section with the struts and bellows. Taking these screws out, once the top plate on the other side has been removed, as if for loading film, the whole bellows section slides out.
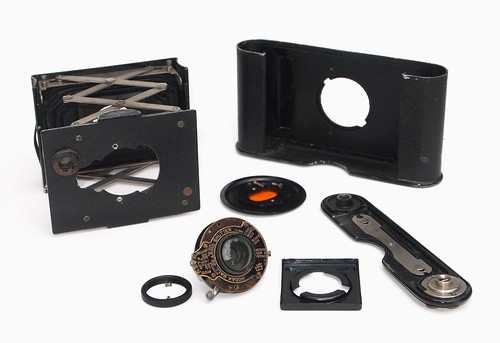 |
| Vest Pocket Kodak - disassembled |
I also used this opportunity to clean the lens. Two screws fix the shutter unit to the front standard of the camera, with the retaining ring on the rear of the lens securing it to the bellows with a square plate behind. The plate around the lens on the shutter is fixed with four screws - the two lower ones have sleeves - and once removed, I saw how easy it was to make the minor alteration needed to use the lens to its full aperture. The aperture lever ring (bottom left in the image below) has a small projecting stop to the left of the pointer; I simply flattened this stop so it would rotate fully (given that there is a gap to do so on the front standard) and open up the lens to f8 (or possibly f7.7, as with the Kodak Anastigmat lens that a more expensive version of the camera featured). I could see that there was a previous repair to the bellows on the inside to one corner. For my repair, as the bellows were still sound in themselves, I used acrylic ink to paint over the holes that I could see and fill the weave of the cloth.
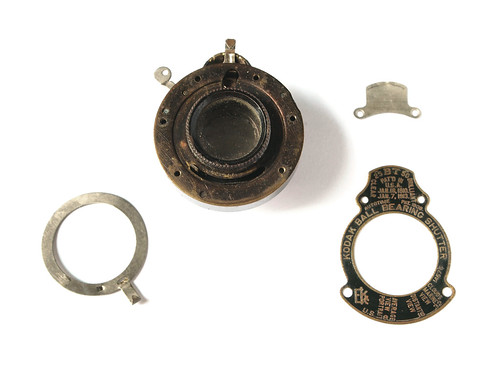 |
| Rapid Rectilinear lens in Ball Bearing Shutter partially disassembled |
After reassembling the camera, I shot some 35mm
Ilford Mark V film rolled with 127 backing paper as a test, which showed that the pinholes had been mitigated, but using the camera in bright sunlight still gave me some light leaks. As these seem to emanate from the corners of the bellows, taking the camera apart again, I ensured that I coated both the inside and outside of the corners with the acrylic ink once again, using a small torch to help to work out exactly where the light was getting in.
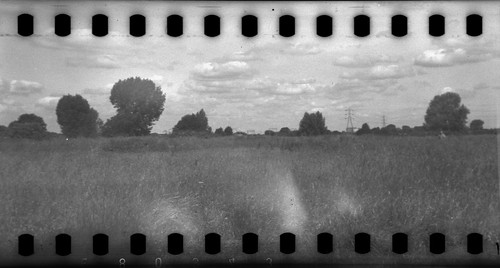 |
| Vest Pocket Kodak with Ilford Mark V film |
After making these repairs, I also taped over the inside of the Autographic window, and used the Vest Pocket Kodak on last week's
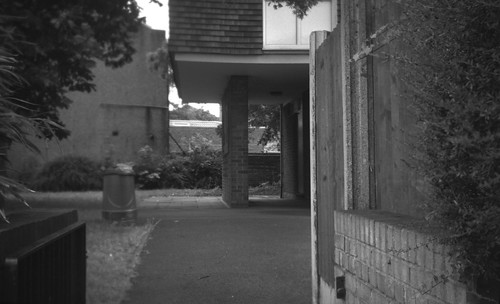
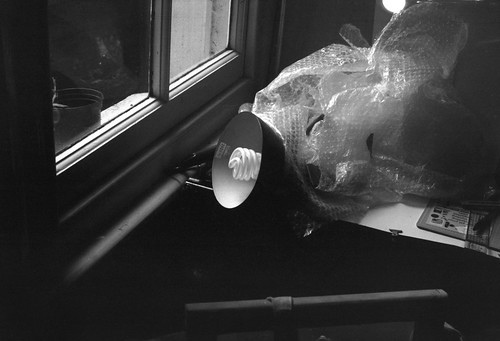
127 Day. There wasn't any evidence of light leaks, although I did take the precaution of keeping the camera folded between exposures. Shooting three full-length films (rather than short test lengths) in the camera demonstrated two other issues: problems with focus and film flatness. With the standard fully extended, the lens is not set to infinity: it appears to be focussed at around two metres. At the smallest aperture of f22, far distances are
nearly in focus, no doubt to an acceptable amount for contact prints or small enlargements. One solution to using this fixed focus lens at wider apertures and to still be able to focus at distances would be
not to extend the struts fully, difficult to achieve evenly on both sides of the camera, and pull the lens standard back by just 3-4mm by my calculations. The problems with film flatness show up in some of the
straight lines being curved and distorted; there are linear pressure springs in both spool ends of the camera which could be tightened to help keep the tension on the film.
The Vest Pocket Autographic Kodak proved to be extremely popular: Camera-Wiki states that 1,750,000 were sold, making it relatively easy to find today, a century on. It also became known as the 'soldier's camera', its ubiquity in the First World War due to being compact and inconspicuous, even with the strictures placed on photography by the British Army (the German Army took a different attitude, with photography by private soldiers being encouraged to combat boredom and engender camaraderie), although most Vest Pocket Kodaks would have probably been carried by US soldiers after entering the war in 1917. The format and strut-folding design of the Vest Pocket Kodak inspired many other cameras - often better equipped - such as the
Piccolette - and, in part, must have paved the way for smaller cameras and smaller film sizes, encouraging photographs to be enlarged, not contact printed. The Vest Pocket Kodak's legacy still lives on, if only just, after 104 years, in the admittedly very limited but continued production of 127 format film.
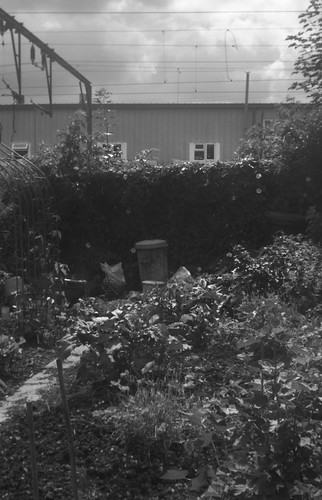 |
| Vest Pocket Autographic Kodak with Ilford FP4 Plus |
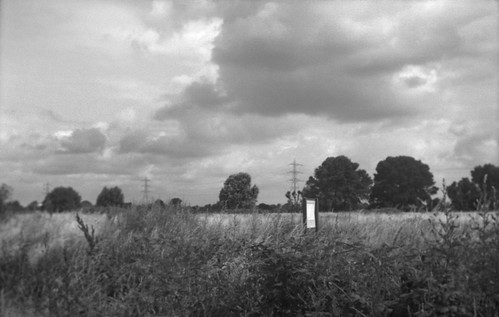 |
| Vest Pocket Autographic Kodak with Ilford FP4 Plus |
 |
| Vest Pocket Autographic Kodak with Ilford HP5 Plus |
 |
| Vest Pocket Autographic Kodak with Ilford HP5 Plus |
Sources/further reading:
The Vest Pocket Kodak website
Vest Pocket Kodak page on Early Photography
Vest Pocket Kodak on Camera-Wiki
Kodak Collector's Kodak Catalogues
Mischa Konig's Kodak Classics site


