 |
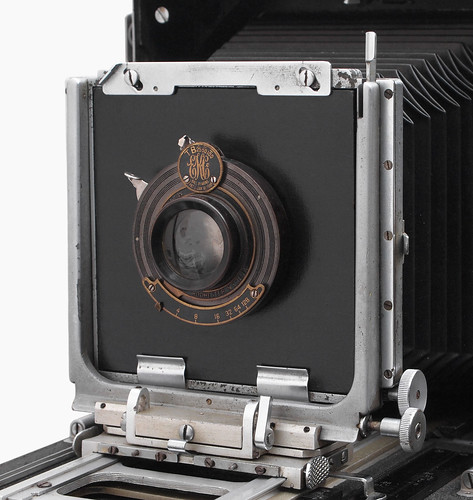
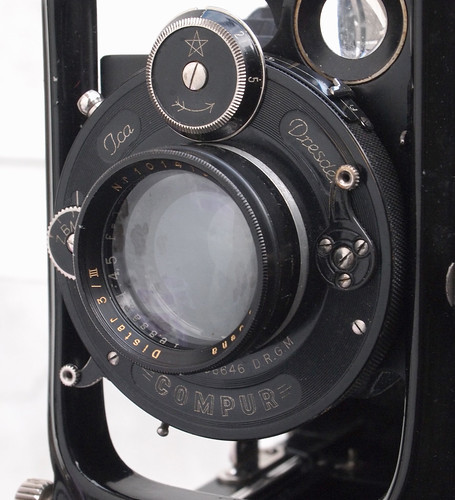
| Ica Trona with Distar supplementary lens |
Having achieved some good results recently with the
Ica Trona, use of the camera's full 9x12cm frame size is limited by the number of plateholders with films sheathes I possess, and also limited to the few films manufactured in the 9x12cm size. Using a rollfilm back with the camera is convenient and means being able to shoot with any medium format film available. However, this leads to cropping the image, or,
to put it another way, using the rollfilm back provides an image with a narrower angle of view. For most of the cameras I habitually use, I'm almost always happy shooting everything with the 'normal' focal length lens for the format
and most of my cameras have fixed, non-interchangeable lenses. For cameras of a similar age or design to the Ica Trona, if the photographer wanted to use different focal length lenses, there were three approaches to achieve this: more expensive cameras did have interchangeable lenses, often with a bayonet mount, like the
Voigtländer Bergheil (although this did require each lens to also have its own shutter); certain lenses were designed to be
convertible or combinable, where front and rear lens elements were each sufficiently well corrected to be used individually either behind or in front of the shutter; and there were also supplementary lenses, to be used like filters, which change the focal length of the lens they are attached to. The Ica Trona has a
Tessar lens, the design of which does not lend itself to being used as a convertible lens. When writing the blog post for the Trona, the Zeiss catalogues on
Camera Eccentric were an invaluable resource; the 1933 catalogue includes a detailed section on Zeiss's supplementary lenses. Zeiss introduced the
Distar first (seen in the
1927 catalogue, page 18), which increases the focal length of a lens; this was then added to by the
Proxar, decreasing the focal length. The Proxar proved to be the more useful of the two, and was produced to fit many cameras for a number of decades. Other manufacturers also produced supplementary lenses.
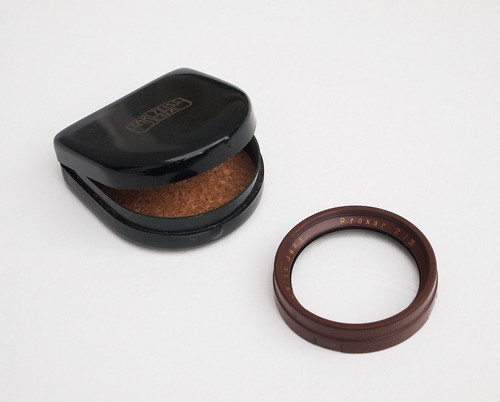 |
| Zeiss Proxar supplementary lens with case |
The Distars and Proxars were initially made as push-fit accessories to fit onto a camera lens in the same manner as a filter, in a variety of sizes and different powers of magnification. Both have gold lettering inscribed around the mounts and the pre-war Proxars are brown, perhaps to be easily identifiable at a glance. On the Camera Eccentric website, the reproduced
Zeiss lens catalogue from 1933 has both Distars and Proxars listed with a full description and tables for use (the 1929 catalogue also lists both, but the 1933 one has better illustrated examples). To quote from the catalogue:
The Distars are single lens components of small diverging power [...]. When placed in front of the camera lens they increase its focal length with corresponding increase of the camera extension. They thus add to the scope of camera lenses, especially those of an unsymmetrical type, since these, from their very nature, are only adapted for use on cameras with single extension in that their components are not corrected independently for use as long-focus lenses. In conjunction with the Tessars the Distars form wide-range sets of convertible lenses.
[...]
PROXARS are lenses of small converging power [...]. When attached in front of the camera lens, they produce an effect opposite to that of the Distars in that they shorten the focal length. Thus, Tessar F/4.5, f=13.5cm has its focal length reduced to about 13cm, 12.5cm, 12cm, or 11.5cm according to the converging effect of the Proxar selected. The range of uses of the Tessar is thereby widely extended in a twofold direction, viz:
For obtaining large figures of near objects [i.e. close focus images]
[...]
For taking wide-angle photographs at greater distances
Use of the Distar depends on the camera having sufficient bellows extension to achieve infinity focus, the greater the power of the Distar, the longer this distance needs to be, while the Proxars, to focus on infinity, need
less bellows extension than the lens would normally require. This last fact is the reason for the Proxar's greater usefulness: on rigid-body cameras, it is usually impossible to reduce the lens-to-film plane distance, meaning that a Proxar could not be used for wide angle photographs ("at greater distances") as the lens would not focus on infinity,
but it would still work as a close-up accessory, which Proxars were sold as, post war, no longer brown, as either push-fit accessories or with screw threads for mounting.
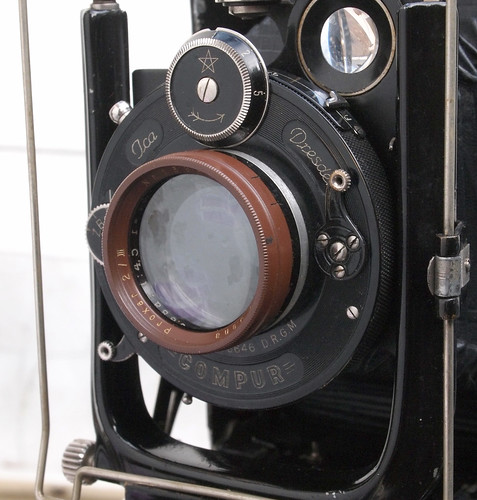 |
| Ica Trona 210 with Proxar supplementary lens |
I recently bought one of each: a Distar 3/III and a Proxar 2/III. According to the table in the Zeiss 1933 catalogue, the Distar 3 increases the equivalent focal length of the 13.5cm Tessar lens to 22.5cm, needing a bellows extension of 23cm to focus on infinity; the Proxar 2 reduces the equivalent focal length of the lens to 11cm, with infinity focus at 10.5cm. Reiterating what I've written earlier in this post, one reason I wanted the Proxar was to be able to use the rollfilm back with a 'normal' angle of view: a standard lens for the 6x9cm frame size is 105mm, so 11cm is very close.
The first set of test photographs I made with the Proxar were all out of focus, initially confusing as I'd used the ground glass screen to focus the images. When I shot a second set of test images, I realised where the problem arose: once the image was focussed, I discovered the tendency of the lens to slide forward on its runners when removing the back and replacing it with a plateholder, especially when pointing the camera downwards. On the Trona, the lens is designed to be pulled forwards to the infinity stop at 13.5cm, the focus knob is then used for closer focus and partly as a result of use, the lens moves with relative ease to the infinity stop itself (there is some friction, but perhaps the additional weight of the Proxar helps overcome the inertia). The Distar attachment provided different concerns: what's known as
bellows effect, not mentioned in the Zeiss catalogue, which, for purposes of exposure and using the ground glass screen, results in a dimmer image. As the bellows are extended, moving the lens further away from the film plane, the relationship between aperture size and lens to film plane distance are changed significantly. To simplify the numbers for the purposes of giving an example, an aperture of f4 on a lens of 100mm focal length has a diameter of 25mm. If that lens is extended to a distance of 200mm from the film plane, that 25mm diameter of the f4 aperture is now one-eighth rather than one quarter, giving an
effective aperture of f8, two stops difference in terms of exposure. Returning to the Distar 3 on my Tessar lens, as the focal length wasn't doubled, being nearer to an increase of half the focal length, for ease of calculation, I increased exposure by one stop (the same effect in reverse would be the case with the Proxar at infinity focus, but a
decrease in focal length from 13.5cm to 11cm is not as dramatic, and although logically the image should be brighter, it is not different enough to compensate for in exposure).
The images below were all shot hand held: although for testing the qualities of the Distar and Proxar themselves it would have been better to use a tripod, I wanted to use the supplementary lenses in conditions that I have been using the Ica Trona camera. I push processed the 9x12cm Fomapan 100 to 200 in order to provide an extra stop in exposure, to use a smaller aperture at a faster shutter speed. The images are arranged from shortest focal length to longest.
 |
| Ica Trona 210 with Proxar supplementary lens, Fomapan 100 rated 200 EI |
 |
| Ica Trona 210, Fomapan 100 rated 200 EI |
 |
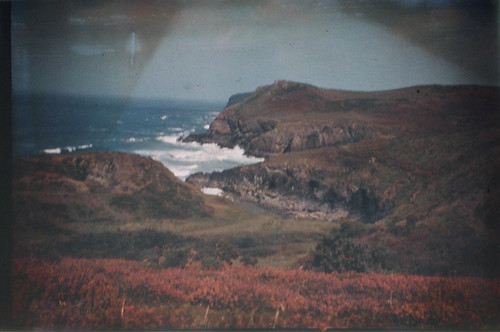
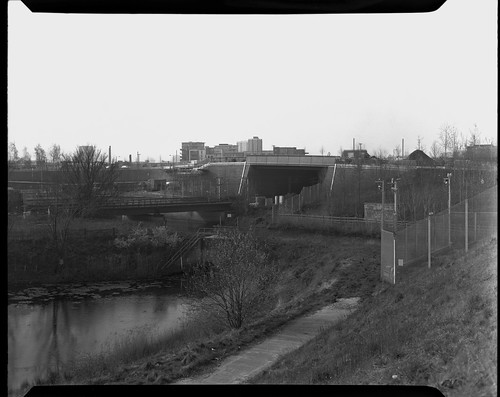
| Ica Trona 210 with Distar supplementary lens, Fomapan 100 rated 200 EI |
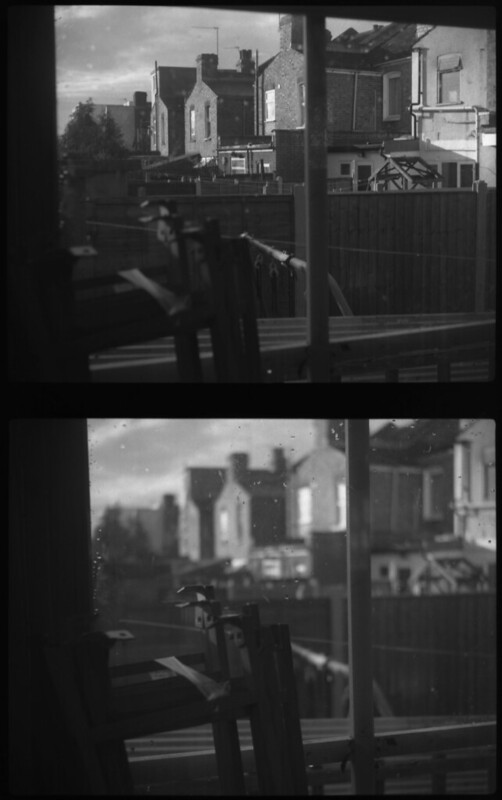
When shooting the tests, I focused with the ground glass screen, then used the wire frame finder (the 'Iconometer') for framing once the screen had been replaced with a plateholder. The wire frame finder continues to give a fairly accurate framing as the angle of view changes relative to how near or far the finder is to the eye piece (this is also true with the front rise and cross movements). The top image of the three, taken with the Proxar shows some vignetting and also has a shadow at the left had edge due to the bellows on my camera being slightly deformed. In addition, the bellows on my Trona do not have the clips that many double extension folding plate cameras often possess to gather the bellows when the lens is closer to the film plane, i.e. at or near to infinity focus.
I also shot a sequence of images with the rollfilm back. Using
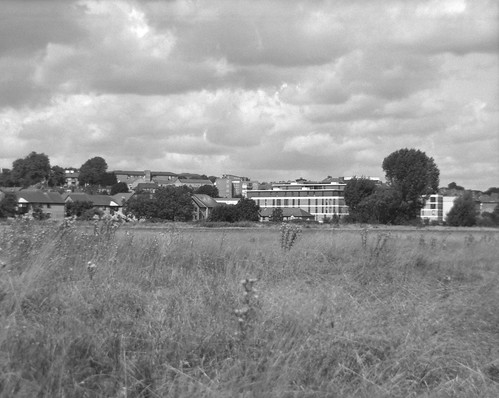
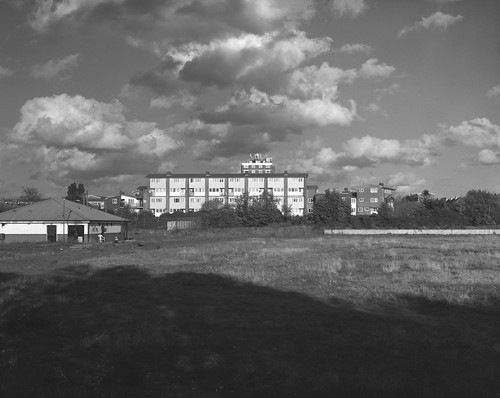
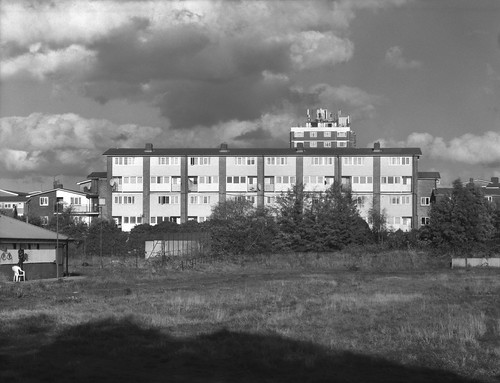
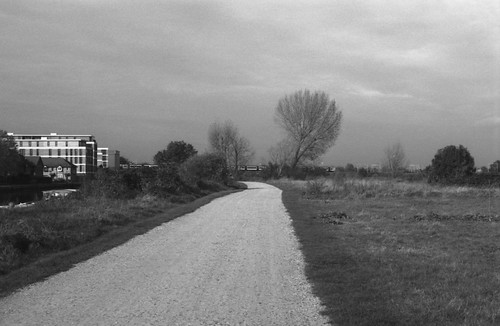
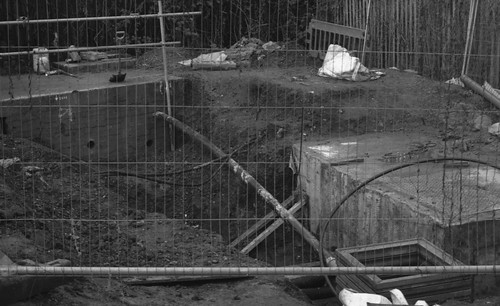
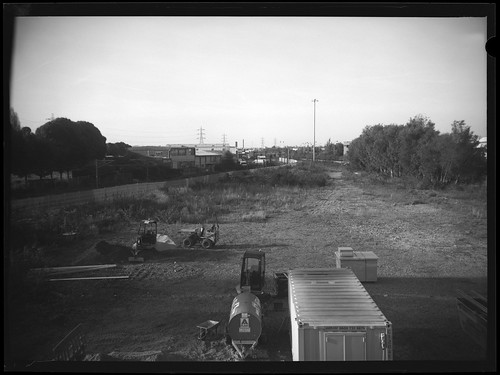
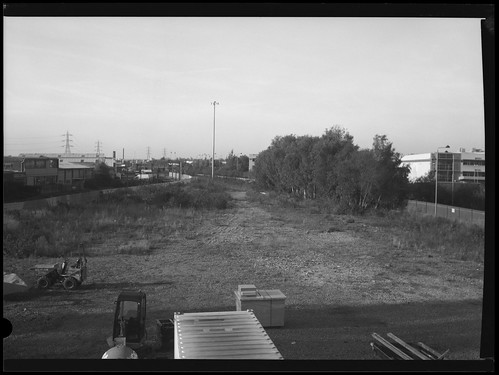
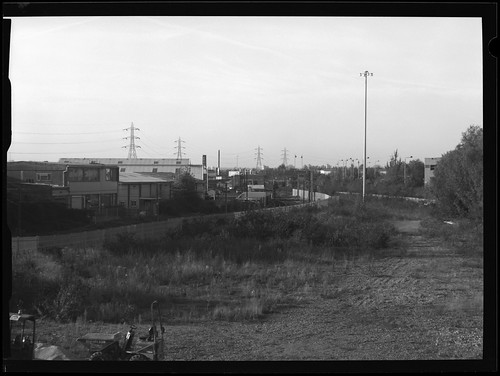
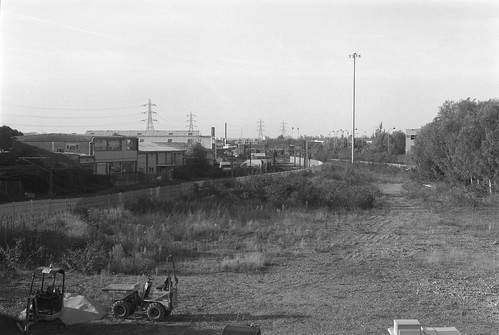
Rollei RPX 400, I gained an extra stop in exposure from the push-processed Fomapan 100 sheet film. On the frames with and without the Proxar, I stopped the lens down further; with the increased focal length using the Distar, I chose a faster shutter speed to guard against camera shake. These provide a better example of the change in angle of view than the sheet film shots above as the framing is more consistent across all three photographs.
 |
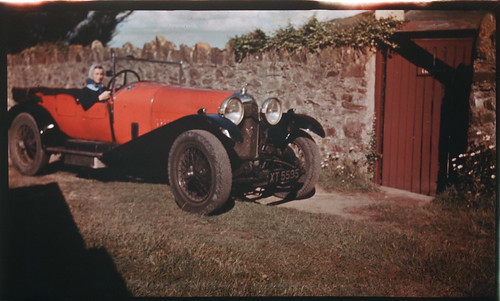
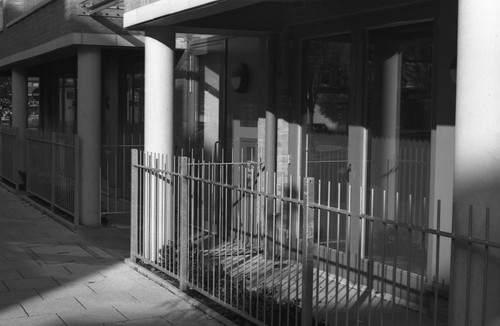
| Ica Trona 210 with Proxar supplementary lens, Rollei RPX 400 in rollfilm back |
 |
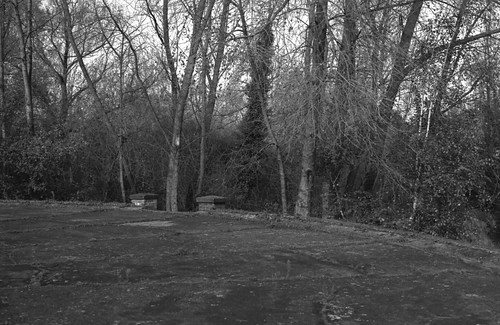
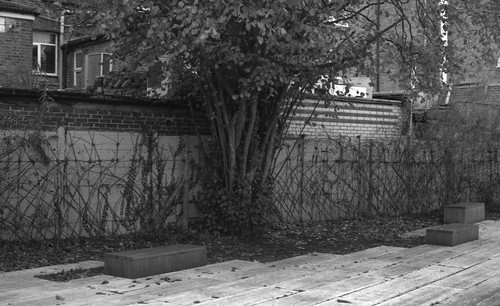
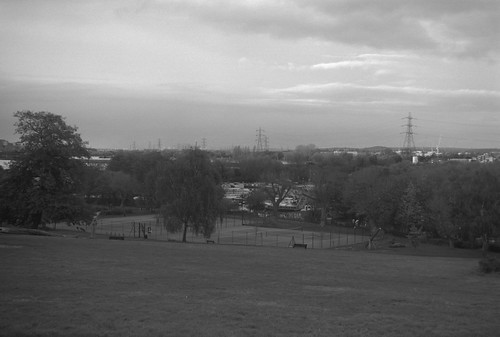
| Ica Trona 210, Rollei RPX 400 in rollfilm back |
 |
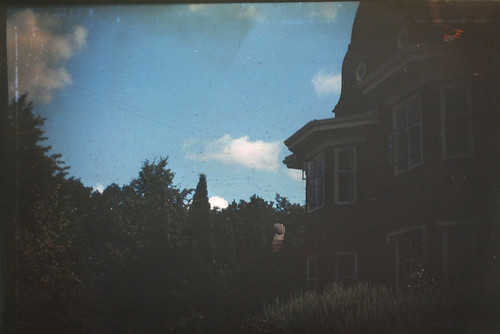
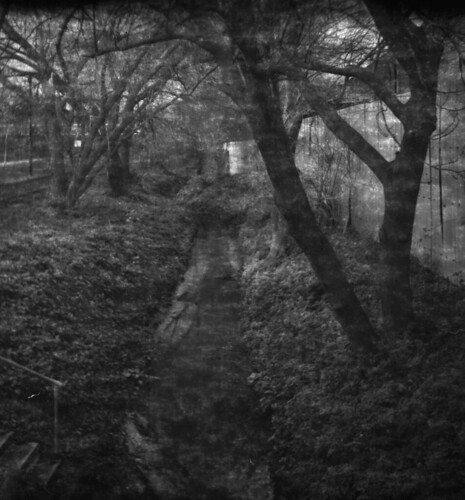
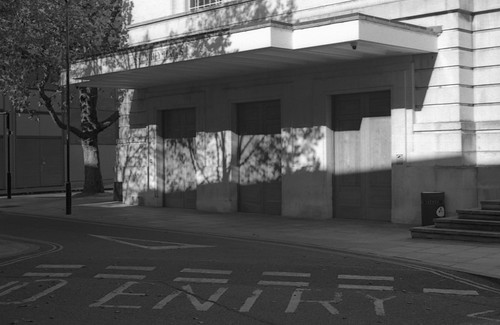
| Ica Trona 210 with Distar supplementary lens, Rollei RPX 400 in rollfilm back |
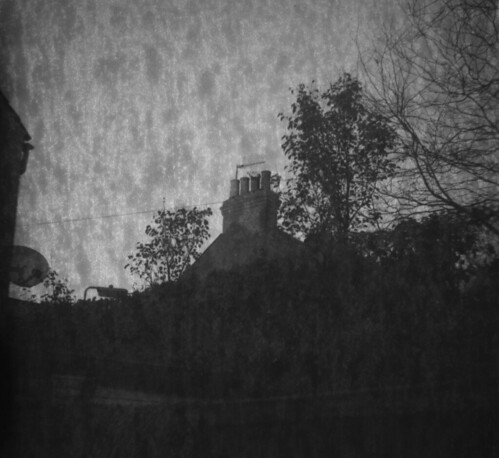
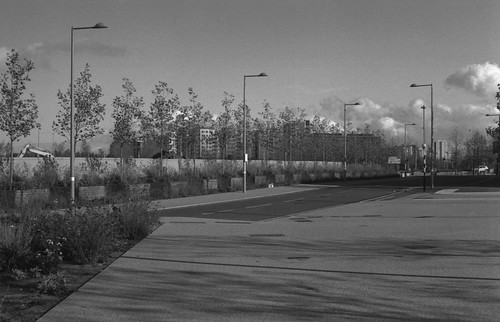
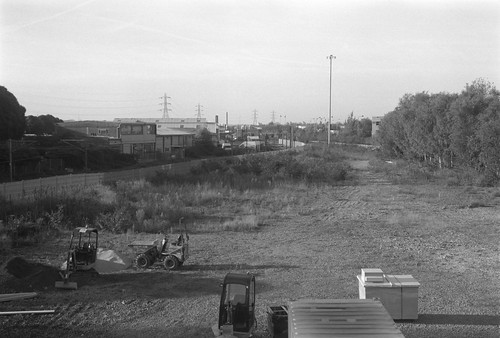
For comparison with the images from the rollfilm back, I also
shot the same scene with the
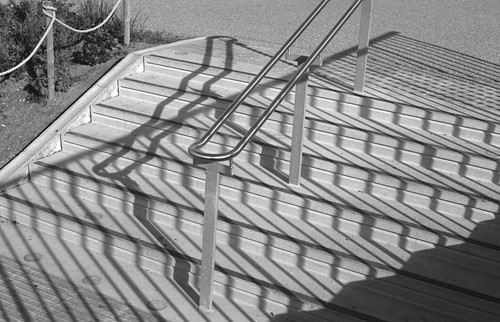
Zodel Baldalux: the 6x9cm frame size is the same and the focal length with the Proxar and the rollfilm back is close to the 105mm lens on the Baldalux - the reason for my interest in the supplementary lenses. Using the Proxar as a close up attachment rather than for wide angle, with the double extension bellows on the Trona, it is possible to focus very close to a subject. Bellows effect also applies, as with the Distar, and I also found focus difficult: even with the lens fully opened the image on the ground glass was still dim, and depth of field was extremely shallow. The photograph below was stopped down to f25 and by necessity, this was shot with a tripod (exposure was around 30 seconds). Although the shallow depth of field limits the use of such extreme close up photography, the scale of the mouse on the negative is actually larger than life size.
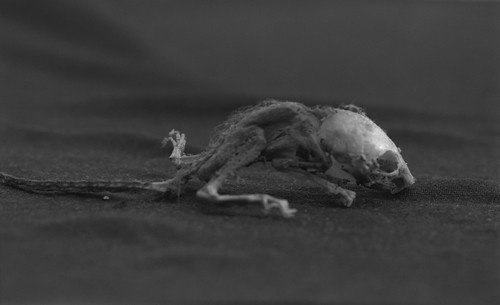 |
| Ica Trona 210 with Proxar supplementary lens, Rollei RPX 400 in rollfilm back |
The 1933 Zeiss catalogue contains an illustration (p30) showing six different views achievable from the same standpoint with a 15cm Tessar and Distars and Proxars of different powers with the caption, "Convert your
ZEISS TESSAR at small cost into an objective of wide utility." Most of the remarks about the use of Distars and Proxars in the Zeiss catalogues relate directly to their use with the Tessar lens. The other designs listed under 'Universal Lenses' are
Dagors and Protars, the first being symmetrical and the second composed of components of different focal lengths, but both can be used as convertible lenses. The introduction of the Distars and Proxars was intended to add this flexibility to the Tessar;
The Tessar is [...] pre-eminently the lens for hand cameras with single extension. In the course of recent years it has more and more taken the place of symmetrical and semi-symmetrical lenses in cameras with double extension, thanks to the introduction of our Distars and Proxars. These are single attachable front lenses whose curvatures are so computed as to increase or decrease the focal length of the objective within certain limits. They form, therefore, with the Tessar a very comprehensive convertible set, so that it can be used on hand cameras with single extension, and to a still greater extent on cameras with double extension, with a new range of applications.
Zeiss lens catalogue, 1933
 |
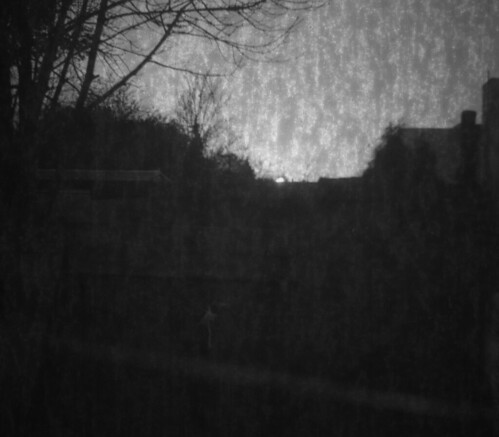
| Ica Trona 210 with Proxar supplementary lens, Rollei RPX 400 in rollfilm back |
Sources/further reading:
Zeiss Lenses Catalogue 1933
Supplementary lenses on Early Photography