Friday 24 March 2017

Take Your Box Camera To Play Day 2017

Midg Falling Plate Camera with Ilford Selochrome glass plate
To mark one hundred years since the first photographs that became known as the Cottingley Fairies were taken, I decided to use last weekend's 'Take Your Box Camera To Play Day' to make a homage to the young photographers of this hoax. A counterpart to 'Take Your Box Camera To Work Day', I had been thinking of using the Midg falling plate camera for this event; as Elsie Wright and Frances Griffiths used a Midg camera for their first set of photographs, this appeared to be a fitting subject to shoot on the day. For the fairies, I went back to the source material that the girls had used for their first published photograph, known as 'Frances and the Fairies', figures taken from an illustration in Princess Mary's Gift Book, as pointed out by the debunker James Randi. I shot the scene at the bottom of the garden on glass plates, as would have originally been used in the Midg. I didn't have any glass plates from 1917; I used some Ilford Selochrome plates from a box which had a label inside dated to February 1945 (as a footnote to this date, the paper that the box was wrapped in had a cheaper, coarser feel than the more usual brown paper that Ilford used for wrapping plate boxes until the end of the 1950s, which might reflect on wartime paper shortages).

Ilford Selochrome plates
I had problems with the first set of glass plates that I shot not falling down cleanly inside the camera when released; some of these, such as the image below, fell flat against the inside of the front of the camera, and the large white circle on the right hand side is from the plate being exposed directly behind the lens. Other plates then had the shadow of the plates stuck at the front of the camera partially obscuring the projected image during exposure. It was also clear that the focus distance wasn't very accurate; when I had used the camera before I had discovered that the 3 feet setting was actually more like 4 feet: the image at the top of the post was much closer to this distance (as was the last shot on FP4 film at the bottom of this post). After developing the first set of glass plates, I then shot another set, with more success, but I did still have problems with the plates not falling down inside the camera as they should, anticipating that, I was able to open the camera in a black bag and manually place the exposed plates flat at the bottom of the camera. When writing about the Midg, I had used a quote describing how the mechanism would jam at critical moments; this seemed to be one such moment.

Midg Falling Plate Camera with Ilford Selochrome glass plate
As well as the Selochrome plates, I also shot some Ilford G.30 Chromatic plates from the mid-1960s. I'd used a number of these plates over the past few years, mostly with a fair amount of success. The plates from this current box suffer from a large amount of fogging around the edges, something I've experienced with some glass plates. I rated these at 10 as well, but with the light fading in the late afternoon to early evening when I took a second set of photographs, the photographs probably needed more exposure then I gave them to mitigate the fogging; the lighting had been better earlier in the day: in the image above, softer light integrates the cut out into its surroundings better. Had I taken more time over the photographs, I would have also painted in the cut out figures to provide a better tonal range.

Midg Falling Plate Camera with Ilford G.30 Chromatic glass plate
I also shot a magazine's worth of Ilford FP4 film, from a box with a handwritten date of 16/11/78 (a leaflet inside the box dates to December 1977). None of these photographs suffered from the mechanism failing, which might reflect using the camera in the hand, rather than the fairy photographs, for which I used a tripod, and had to tip up the camera while still on the tripod to tilt it forward to get the plates to fall. When I'd used the Midg previously, I had shot some FP3 film, dating back to around 1950, and rated it with an exposure index of around 12; with the more recent FP4, I wanted to use the Midg hand-held. One of the problems with the Midg is that its shutter only fires at one speed, as the adjustment mechanism does not appear to change the 'instant' setting at all. The shutter fires around 1/50th, so I shot all the film with the lens wide open at f8; lighting conditions were fairly overcast, so I gave the film a one-and-a-half stop push in development (although a couple of sheets were stand developed with the plates). Some of the negatives were very thin, but the results from most of the shots were surprisingly good, and an instructive comparison to many of the photographs taken two years ago when I first wrote about the Midg.

Midg Falling Plate Camera with Ilford FP4 film

Thursday 16 March 2017

Canon Cine Zoom 512

Canon Cine Zoom 512
"[The Canon Cine Zoom 512]...was intended as Canon’s symbol of movie camera technology. The goal was to apply 16mm-movie-camera technology in an 8mm movie camera. The fast f/1.2 lens was the first to apply Gauss for the relay lens based on the high-magnification and high-resolution lens of the Reflex Zoom 8-3 (marketed in 1962). This camera, with a variable shutter opening and spring mechanism enabling long time shooting, was called a “masterpiece” of movie cameras and was used for a long time by movie lovers, who wanted to produce high-quality movies."
Canon Camera Museum
Beginning this blog six years ago, I did have an idea that it could also include posts concerned with the moving image on film. Growing up in the 1980s, I was aware of Super 8, but this was something that other families had; at the same time, cine film was being supplanted by home video. It wasn't until the 1990s when I was given an Elmo Super 8 camera as a student that I shot a couple of rolls, but the expense of doing so no doubt prevented me from shooting more.

Super 8 succeeded the 'standard', 'regular' or 'double' 8mm format. Kodak had originally introduced the 8mm format in 1932 by taking double-perforated 16mm film, doubling the perforations, and designing a camera which would expose a series of frames (one per perforation) on one side of the film; at the end of the roll, the film was flipped over, exposed in the camera again on the other side of the film, and then split into two 8mm wide lengths, now perforated on one side only, and then the two ends would be spliced together to make a continuous 8mm roll. The Super 8 format appears to have been inspired by Kodak's success with the Instamatic film cartridge: a fool-proof, easy to load (and unload) system. Kodak took 8mm film, reduced the size of the perforations to be able to increase the image area (which is where the 'super' prefix comes from) and encapsulated the film in a plastic cartridge. At the same time, Fuji applied similar principles to come up with the Single 8 cassette. Both formats, but especially Super 8 with Kodak's market dominance, made regular or double 8mm obsolete. Although some earlier cartridge systems had been tried, double 8 film cameras generally used a small roll (7.5m) of film on a metal or plastic spool; when loading the camera, as with many still cameras, the ends of the roll are exposed and are sacrificed as leaders, whereas in the Super 8/Single 8 cartridges only a very few frames are so exposed.

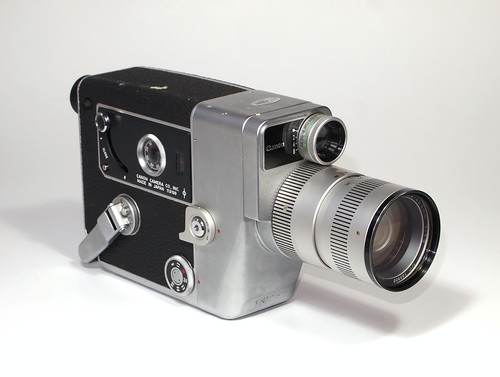
The Cine Zoom 512 was the last regular 8mm cine camera that Canon produced before Super 8 was introduced. Considering that Canon first entered the cine camera market just eight years earlier with the Cine-8T (and, according the the Canon Camera Museum, only the third cine camera made in Japan), it's remarkable how advanced the Cine Zoom 512 is. The model number '512' is derived from its zoom factor - x5 and its widest aperture - f1.2 - a construction Canon kept to name its future cine cameras.

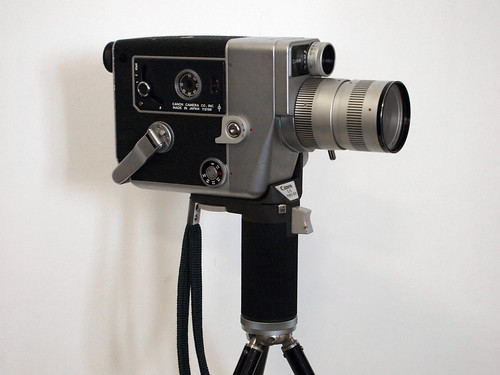
Canon Cine Zoom 512 with power grip
The Cine Zoom 512's specifications demonstrate the professional aspirations that the camera was aimed at:
  • Fast f1.2 (stopping down to f22) 8.5-42.5mm zoom lens
  • Built in CDS meter with 10 to 320 ASA range and exposure adjustment settings
  • Single lens reflex viewfinder
  • Wide range of shooting speeds - 8, 16, 24, 32, 48, 64 fps and single frame
  • Continuously variable shutter control with stops at 'open', 1/2, 1/4 and 'close'
  • Spring motor capable of shooting 4m/13ft on a single wind
  • Reverse mode to rewind film for filming cross-fades
  • Frame counter with single frame marks, one complete revolution for 80 frames/1 ft 
The camera was also provided with a number of accessories as standard, notably the teleconverter lens attachment, increasing the zoom to 14mm-70mm; there was also the power grip, which powered the zoom action of the lens as well as having a shutter trigger. The original case that the Cine Zoom 512 came in had these accessories and more: evidently well kept, all the documentation was still there, including the warranty card which shows that the camera was purchased from one Jardine & Matheson in Hong Kong on the 6th January 1965. There was also an address label, with the first owner's addresses at an RAF base in Kent, crossed out, with a new address, and a telephone number at a Maidstone police station. There's also a price label: £22 (although no indication of when this was sold for this price). Further, the owner had included a review of the camera copied from Amateur Cine World, dated December 3, 1964, a month before the camera was bought, and a couple of pages from Amateur Photographer 10 June 1964: the two articles that seem to be the reason for keeping these pages are 'The Right Way to Zoom' by George Zygmund and 'Any Time is Show Time' by Anthony Wigens.

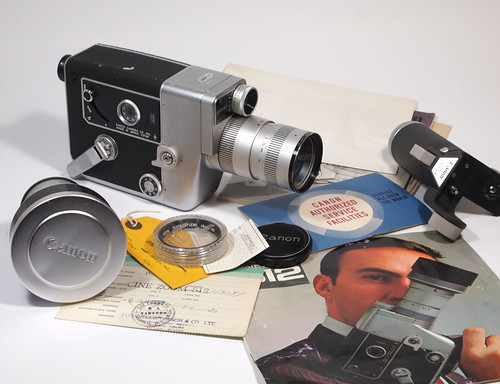
Canon Cine Zoom 512 with accessories and ephemera
Also in the case is the instruction manual and promotional leaflet, a list of authorised service facilities around the world, a close up filter, cable release and viewfinder cap to prevent light entering when used away from the eye.

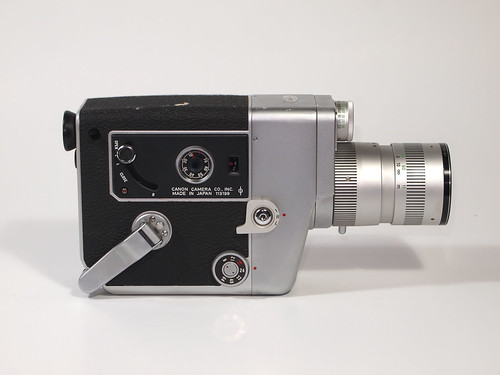
Canon Cine Zoom 512 controls
Almost all the controls are on the user's right hand side of the camera, with the exception of the aperture dial and the lens' zoom handle. This suggests that, with the power grip attached, the camera is held in the right hand, which can operate the shutter trigger, while the left hand focuses, zooms and sets the aperture - although, reversing hands, the aperture dial can be fairly comfortably used by resting the right hand on top of the camera from where the middle finger can easily find the dial. The ergonomics of the camera are important given how heavy it is - 1.7kg (perhaps being able to easily change hands, whether right- or left-handed, is a tacit acknowledgment of this). This factor is mentioned in the Amateur Cine World 'User Report': "First, the weight. A curse after you've carried it around for eight hours, but a blessing in use because of the rock steady pictures. With the heel of the pistol grip on a firm surface it is even possible to get satisfactory hand held shots on the 42.5 end of the zoom range".

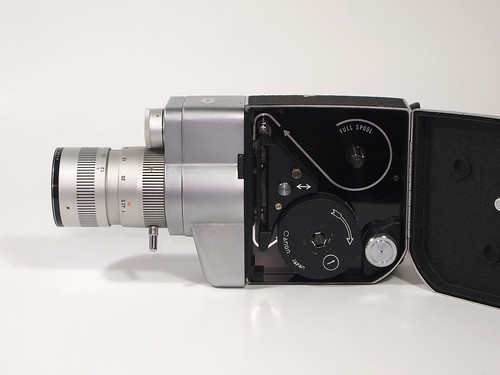
Canon Cine Zoom opened for loading, showing film path
The weight itself does give a sense of solidity to the camera's construction: almost all components are cast or machined metal, with very little plastic used at all. There were a couple of minor issues relating to the age of the camera: I did find that the motor will drive 8-10 feet on a single wind now, meaning that it takes three full winds to expose one side of a roll of film, not two, as described in the manual; and there was a rubber roller on the film path which stubbornly refused to turn, which I simply removed and this seemed to cause no problems in shooting.

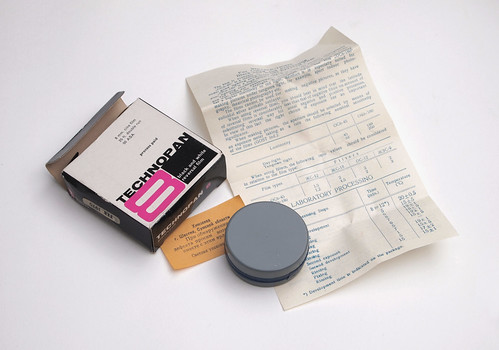
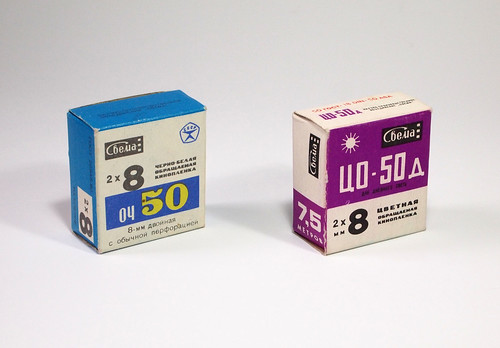
Technopan 8 8mm film dated Feb 1970
For a first test with this camera, I bought (very cheaply) a roll of very old 8mm cine film. This was black and white reversal film manufactured by Shostka Chemical Plant USSR for Technical & Optical Equipment Ltd. The film was a standard 25ft length, 50 ASA, with a date on the box of 'Feb 1970'. I initially assumed that I could develop the Technopan film as a negative, thus cutting out the extra steps involved in reversal processing. I tested the film by loading a small length in the Minolta-16 QT; the first test roll came out almost completely black and featureless. I discovered that the problem was fixing rather than developing the film: designed for reversal processing, the film has a colloidal silver anti-halation layer. This layer would be bleached out with the negative image in reversal processing, the remaining unexposed emulsion being subsequently exposed and developed to form the positive image.  However, I could develop as a negative without fixing: for a second test, I didn't fix after development, and I was able to scan the unfixed film. This had a compressed range of tones; had I processed the film as reversal, I would probably had better results, however, this would have meant buying extra chemistry, and going through additional steps in the processing, which did not feel worthwhile with expired film, just to test an old cine camera.

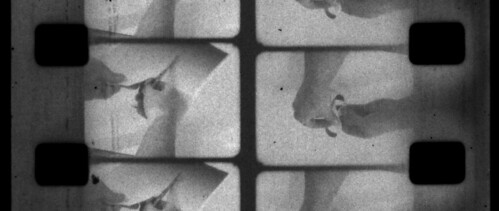
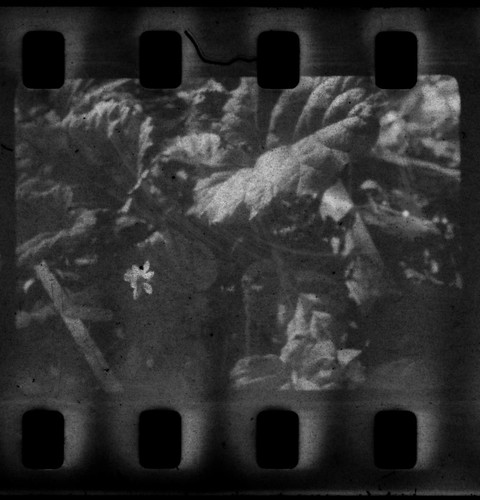
Technopan 8 test shot
Once I had tested the Technopan film, and was happy enough with the results, I shot the rest of the roll with the Cine Zoom 512, intending to make a short film with the results.  As the camera's motor is clockwork, no battery power is needed to shoot film; the battery required for the camera's light meter is of the obsolete mercury variety, but as the battery merely activates the meter itself, the camera can be used without it (the power zoom grip takes two rather more common AA batteries, which I didn't use: I set the zoom between shots generally, rather than shooting while zooming in or out, apart from one section at the end). For exposure, I used the 'Sunny 16' rule when shooting: the manual has a table which describes the relationship of shutter speed to frame rate, while the variable shutter's positions at 2 and 4, give the equivalent of half or quarter exposure, which, when coupled with the aperture settings, provides a wide range of possible exposures.

After shooting the film, I developed it in lengths of around 1.5m using stand development (some of this was done with Ilfotec LC29 at 1+100, for one hour, and some in RO9 One Shot at the same dilution; the Ilfotec LC29 appeared to give slightly higher contrast, although it was not easy to judge from the negatives themselves). With the unfixed negatives, I scanned these by taping several lengths to an A4 sheet of paper and used a flatbed scanner.

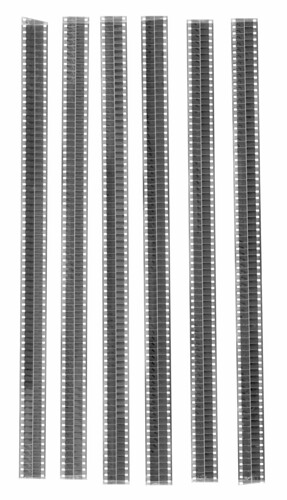
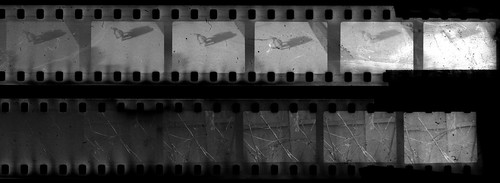
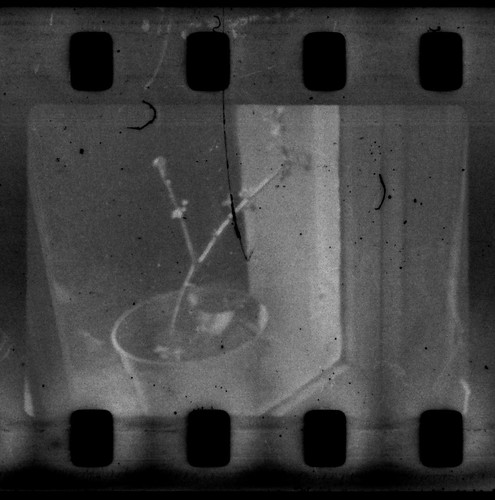
Technopan 8 unfixed negative scan
From the raw scan, I first flipped the image - as this was the emulsion side, the scan was a mirror image; the next operation was to invert the image to a positive and use levels to attempt to restore a good tonal range to the images. To compile the scans into a moving image file, I copied and pasted a selection across all of the rows in the scan into a new document and converted the layers into frames; setting up an action to do this in a single step in Photoshop, took much of the work out of what would otherwise have been an onerous task. I then made separate images for each of the strips, then a new document cropped from the left-hand image; the right hand image had to be rotated through 180ยบ and the frame order reversed (otherwise this would be playing backwards). All the subsequent files created in this way were then exported from Photoshop as Quicktime movies and edited together, back into a single film using Premiere.

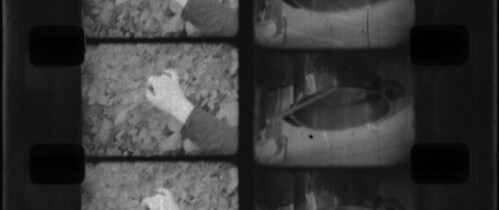
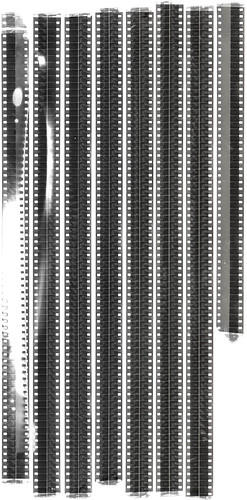
Technopan 8 scan, inverted from negative
Most of the footage was shot at 8 fps, some at 12, partly because I originally thought that I might only scan some short sections to animate, and doing this at as low a frame rate as possible would mean less work (additionally, the low frame rate provided the possibility to compensate for the film's loss of sensitivity in exposure); as a result, the film, mostly edited in camera, in its entirety, as has become five minutes long, rather than the more usual three minutes (some film was sacrificed for the exposure tests of course). In Premiere, I attempted to restore the frame rate to as close as how most of the film was shot, but I hadn't actually made notes when filming of what frame rates were used, so I did this by visual 'feel'.

A better test of the Cine Zoom 512 would be to shoot a roll of new 8mm film: although Super 8 killed off double or regular 8mm as a format (in much the same way that Kodak's110 cassette made other 16mm still camera formats obsolete, despite not necessarily being a better design), the film, although very rare, is still available (at the time of writing) from Foma in R100 and Orwo UN54. When I was a student, more than twenty years ago, I came across a clockwork-driven 8mm camera in a charity shop, but the shopkeeper warned me that they didn't make film for it any more. Perhaps the main reason that the double 8 format is still available is that it uses 16mm film, albeit with an extra set perforations, meaning that continuing to manufacture the film is not as difficult as even more obscure formats, like centre-perforated 9.5mm. After Canon introduced the Cine Zoom 512, the appearance of Kodak's Super 8 format, with its bigger frame size and ease of loading, changed the home cinema market; in response, Canon took the lens that they had developed for the 512 and modified it to the Zoom 518 Super 8 camera. The Cine Zoom 512 was the technological pinnacle of Canon's 8mm camera range, and then quickly became its swansong, the last regular 8mm camera that Canon made.


Sources/further reading
Cine Zoom 512 on the Canon Camera Museum
Historical evolution of film formats on sparetimelabs.com

Wednesday 15 March 2017

Expired Film Day 2017


For last year's Expired Film Day, I shot some large format photographs that I used for a piece that I made featuring a long roll of contact prints on transparency film for an exhibition. This year I wanted to do something different for the day: shoot a short film on expired film. I've recently been using a fifty-year old 8mm camera, the Canon Cine Zoom 512, and so it seemed fitting to attempt to shoot something with it today.

Svema Och 50 black & white and CO-50D colour reversal films
I'd previously bought a couple of rolls of Svema 8mm film from a well-known auction site, OCh-50 black and white reversal film and CO-50D daylight colour reversal film, with develop before dates of 04/91 and 05/91 respectively. I tested these films with the Mamiya-16 Automatic: as 'regular' or 'double' 8mm film is 16mm and only split to 8mm after processing, this would fit in the subminiature camera like any other 16mm film. I shot both films at a range of exposure indices to see how much compensation I might need to make for the film's loss of sensitivity with age. Both black and white and colour films were stand developed in RO9 One Shot for one hour.

Svema CO-50D (top) and Och 50 (bottom) exposure tests
As both films are designed for reversal processing, they both feature a colloidal silver anti-halation layer. This means that they cannot be fixed as negatives: the anti-halation layer would normally be removed in the bleaching stage. After developing to the negative stage, attempts to fix the film result in it darkening a great deal without the base becoming clear. Without the necessary chemicals for reversal processing, instead I developed to the negative stage, and then scanned the unfixed negatives.

Svema Och 50 shot with Mamiya-16 Automatic at 3EI
The black and white film, Och 50 did not produce as good results as the colour film as it had seemingly lost more sensitivity with the passing of time; in addition, the CO-50D as a negative had a fairly uniform yellow cast, which, when removed in Photoshop, gave a better tonal range. Regardless, both films were fogged and showed typical degradation, and the small size of the negatives enhanced these qualities far more than a large format would.

Svema CO-50D shot with Mamiya-16 Automatic at 12EI
Having tested both films, I cut two five-foot lengths from each, for the practical reason that this is as much film as I can develop in my universal tank at a time. To get as long a film as possible from a five foot length of film, I shot at a low rate of 8 frames a second, meaning that, at 80 frames a foot, I'd have about fifty seconds for each side of each length of film. As well as providing a longer running time, the lower frame rate also has a slower shutter speed, critical for ensuring the film had sufficient exposure. Normally double 8mm film would be daylight loaded, and the start and end of the reel would be exposed in loading, and this would be taken into account when shooting. I denied myself the luxury of doing this, so had to thread the film through the camera's film gate in the dark, and, given the way the film has to pass through the camera twice, reload the film in the dark too.

For the content of the film, I wanted something which would reflect the nature of the double-8 format in a structural manner. From using the film previously, I was struck by the rotational symmetry of the unsplit, full width of the 16mm film, with two sets of frames running in different directions, but didn't feel it was appropriate to show the full width of the film in its final presentation. In addition, the end of one set of frames on one side of the film becomes the beginning of the second set of frames on the other side; I imagined that it might theoretically be possible to loop unsplit double 8 film in such a way that it might run through a 16mm projector, showing both sets of frames, one upside down and running in reverse, but at the join of the film into a loop, this would flip over and run the right way around and continuously do so. This notional film loop that could flip from backwards to forwards might take the form of a Mรถbius strip.

Moving from imaginary, theoretical loops to the film I made, I chose to shoot myself making a Mรถbius strip from a sheet of paper printed with a gradient from black to white, printed in different directions on each side, as a way of conveying the idea of one continuous surface: connected in a straight loop, the paper would have an abrupt transition from dark to light at the join, but twisted around, this join would be at the end of a gradient, dark on one side of the paper, light on the other, but continually shading from one to the other.

Double 8 unfixed negative scan
I filmed myself cutting and joining the printed paper twice, once on the Och 50 film, the second time using the CO-50D; for both, on the first run of the film through the camera, I cut the strip out, then flipping the film over in the camera in a dark bag, I shot the second side and joined the cut strip into the Mรถbius band. I stand-developed both films in RO9 One Shot for one hour at a dilution of 1+100; the second take I knew to be the better one, and exposing at an exposure index of 12 rather than 3 meant I was able to stop down the Canon Cine Zoom lens a small amount. However, I'd given myself nearer to 6 feet rather than 5 with the CO-50D, and it would not all fit on the developing reel: the white patches on the scan above are where the loose end of the film wrapped around itself on the outside of the reel. Once washed and dried, I scanned the unfixed negative by cutting it into strips and taping it to a sheet of paper. Inverted to a positive, the film was animated in Photoshop in individual sections, with each section also rotated through 180ยบ and the frames reversed so that the upside down and backwards running right hand frames would then be on the left and running in the right direction; each section was then edited together so that when animated, the whole width of the film would fill the frame and it would flip over in the middle, and, in theory, loop and play all over again.

Wednesday 1 March 2017

Take Your Box Camera To Work Day 2017

Kodak No.2A Brownie with Ilford HP5 Plus
For yesterday's 'Take Your Box Camera To Work Day', I used my Kodak No.2 Brownie; having shot with it for last June's 116 Day, I was keen to use it again, but hadn't had the excuse. Keeping the 116 backing paper from the two Kodacolor 116 films that I had used last year, it was a simple matter to transfer 120 film to the slightly larger paper. The original 116 film is longer than 120, with the result of getting just six whole images from a roll, but I had no problems with frame spacing, as I did have when using 120 film with adaptors, as the numbers and markings do not quite evenly match up; although I did get six whole images, most of a seventh image was possible, but with the odd effect of the very end of the film curling up inside the camera and creating an odd oblique shadow on itself with distortion in one corner, as the narrow width of 120 film meant that it wasn't securely held each side of the frame (this did also show up as a slight curl at the top or bottom - or both - of most images).

Kodak No.2A Brownie with HP5 Plus - seventh frame
I shot two rolls of Ilford HP5 Plus with the 116 backing paper; most were long exposures with the 'time' setting, and at the camera's smallest aperture, finding level surfaces to place the camera for a few seconds, although I did attempt a few shots on the 'instant' setting, such as the one below, but with the Brownie's widest aperture being around f11, interior shots with a fixed shutter speed of around 1/40th would generally be underexposed; in addition, the weather for most of the day was overcast, providing less daylight to help illuminate rooms with windows.

Kodak No.2 A Brownie with Ilford HP5 Plus
Despite having attempted to clean the rollers on the camera, the photographs shot with the Brownie did have scratches through the emulsion, although not generally as bad as the film I'd used last year. These scratches tended to show more on the instantaneous shots, as the negatives were thinner; the patterns of the scratches also suggested that, by virtue of how the Brownie's film advance works, each turn of the wind on key has points where the tension is greatest, and the scratches were more prominent, as seen in the image below.

Kodak No.2A Brownie with Ilford FP4 Plus
As well as HP5 Plus, I also shot a roll of Ilford FP4, using the spool adaptors I'd previously made, which worked well enough, as did the spacing generally, using the 6x4.5 frame markings on the back of 120 paper (which I have written about more fully in my post about the Zeiss Ikon Cocarette). Probably the best shots from the day were two on FP4 Plus from my journey home, with the light failing, using relatively long exposures at f22, at the bottom of this post, which demonstrate how good the Brownie's lens can perform stopped down (the subjects of most of the other photographs are a little close for the fixed-focus lens). An additional synchronicity for using the No.2A Brownie on this year's 'Take Your Box Camera To Work Day' is that my particular model B version is one hundred years old this year: a couple of small details (specifically, the spool-end tension springs and the unmilled latches) are evidence that the camera was produced at some point between June and October 1917.

Kodak No.2A Brownie with Ilford HP5 Plus
Kodak No.2A Brownie with Ilford FP4 Plus