Thursday 28 March 2013

The MPP Micro-Technical Camera

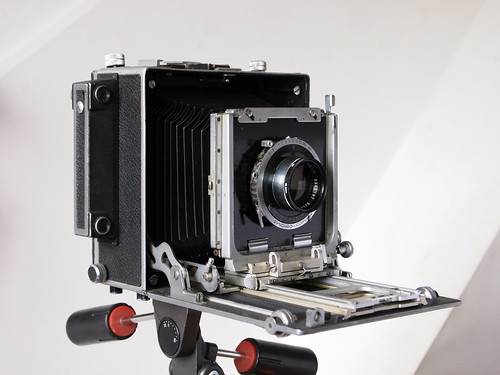
MPP Micro-Technical Mark VIII with Schneider Kreuznach 150mm f4.5 lens
In the latter half of the 20th century there weren't many UK-based camera makers of note: companies like Ensign Ross and AGI failed to capitalise on their expertise with medium format cameras and follow consumers into the 35mm market, and as a result disappeared by the start of the 1960s. One exception was Micro Precision Products, which became MPP Photographic Products Ltd, which, as the name suggests, produced high-quality cameras aimed at the professional market. MPP were notable for the Microcord and Microflex TLR cameras based on the Rolleicord and Rolleiflex, and its large format cameras, the Micro-Press, and the Micro-Technical camera. The Micro-Technical became the mainstay of many professional photographers in the UK, as well as institutions such as the police and the armed forces in particular: the UK government ordered one S92 camera (a Micro-Technical variant) for every RAF base.

As a result of MPP's homegrown market dominance, for many students of photography in the UK, the Micro-Technical camera was the large format field camera: it seems every university photography department had one in the 1990s and 2000s. My first experience with large format was in asssisting a friend studying in the early 2000s and using the college MPP Micro-Technical camera.

MPP Micro-Technical Mark VI with Schneider Kreuznach 150mm f4.5 lens
I first bought a MPP Micro-Technical Mark VI as an affordable introduction to large format photography after winning a prize for painting. Common to all the Micro-Technical cameras, it's a 4x5 triple extension folding bed camera. The design is essentially that of a field camera, but its designation as a 'technical camera' indicates the nearly full list, albeit limited, of view camera movements ("15 degrees of everything" as I once read on a large format forum). It has a rotating spring back, rise, cross and tilt front movements, a swing front and swing back, and a 15 degree drop front. As a view camera, the ground glass screen is typically used for focusing, but the camera also has a rangefinder with an interchangeable cam assembly for lenses of different focal lengths: my camera came with a Schneider Kreuznach 150mm f4.5 Xenar lens, which must be original, as the lens' serial number matches that etched on the rangefinder cam. The serial number dates the lens to 1952-54, which fits neatly within the production dates of the Mark VI body, 1951-1956. There are also interchangeable focus scales on the drop bed: my camera has scales for 150mm, 135mm, and 89mm lenses. Both the rangefinder and focus scales can only be used when the camera back is flush to the body of course: with any back movements (and, ideally, any movements), the ground glass screen must be used to focus the camera.

MPP promotional leaflet showing Micro Technical Mark VIII camera movements
Shortly after buying the Micro-Technical Mark VI, I came across an auction listing for a Micro Technical Mark VIII body, which had a couple of fittings broken or missing, and a missing hood for the ground glass, but at just over £100, this seemed rather good value. The Mark VIII was the last of the series of Micro Technical cameras, produced from 1963 until the company wound up in the 1980s. The camera body and lensboard were redesigned from the Mark VII, which had retained much of the Mark VI design (the rounded corners to the body with more exposed metal make the Mark VIII design a little reminiscent of the Kern Bijou). As well as the body, the lensboard was also redesigned: the Mark VIII board is smaller with rounded corners, meaning earlier Micro Technical lensboards are not compatible with the Mark VIII body. Improvements from the earlier body styles are that the drop bed now has two positions, at 15 and 30 degrees and it also has an additional tripod bush on the side of the body. Both Mark VII and Mark VIII had an international standard back (some Mark VI bodies were retrofitted with an international standard back, although mine has the spring back).

Laser cut 3mm MDF for Mk VII lensboard and replacement front tilt knob
The missing fittings were two knobs that control the front tilt, one releases the lensboard from its perpendicular position, the other secures the angle of the tilt. I replaced the missing knob that secures the tilt, but not the other (it's more complicated to fix), however rising the front sufficiently frees it for tilt movements anyway and it can be lowered it again in a tilted position. To make the replacement knob, I could simply have found a wingnut that would fit the screw thread, but for a more elegant solution, I made the replacement with two pieces of laser cut 3mm MDF, glued to a nut with epoxy resin. I also made new lensboards for my existing lenses to use these with the Mark VIII body: the 150mm Xenar which came with the Mark VI body had a lensboard to match, and I'd subsequently bought a 90mm Angulon lens which also had a Mark VI-style board. The new lensboards were made from the same laser cut MDF, two sheets glued together with wood glue, painted with matt black acrylic, and varnished on the front only, the inside face left matt of course.

MPP Micro-Technical Mark VIII with 'homemade' lensboard
Other than the international standard back, the additional drop bed position and tripod bush already mentioned, the main advantages of the Mark VIII body over the Mark VI are that its construction appears more solid and sturdy, exuding confidence when using the camera movements: parts seem to lock into place more securely, and the vibrations caused by actions such as inserting and changing film holders feel less likely to upset carefully positioned tilts and shifts. However, my Mark VIII body is currently awaiting further repair as the locking bolts for the drop bed are both jammed, and I have been using the Mark VI again, and it's the camera I've been using for my recent large format posts on this blog.

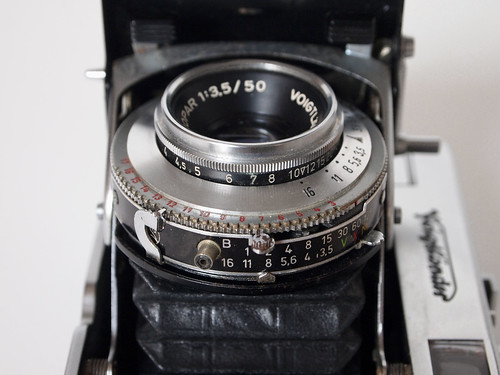
Harman Direct Positive Paper, Schneider Kreuznach 150mm Xenar lens
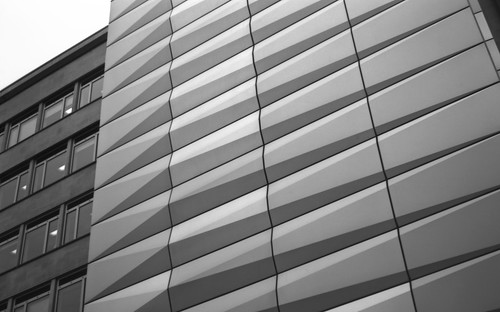
Adox Ortho, Schneider Kreuznach 150mm Xenar lens
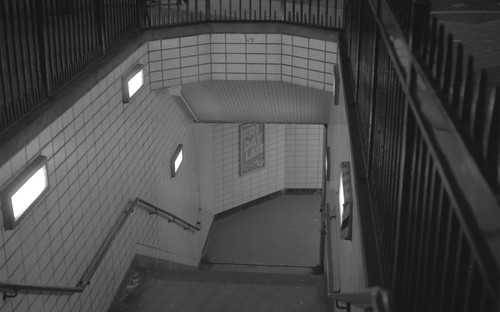
Adox Ortho, Schneider Kreuznach 90mm Angulon lens
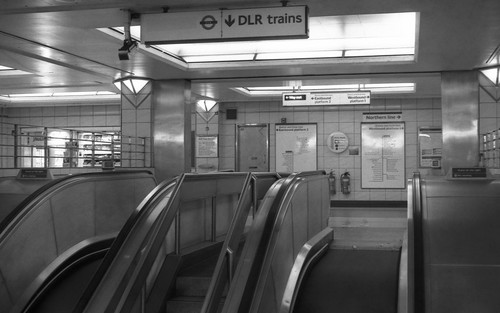
Kodak Ektar 100, 150mm Xenar lens. Image courtesy Sarah Wishart:
taken with my Mk VIII camera, shown here to demonstrate 'tilt-shift' effects
(specifically, diverging front and rear tilts)
Sources/further reading
The MPP Users' Club
MPP on Camera-Wiki
The MPP Micro Technical group on Flickr

Friday 15 March 2013

An Experiment with Three Colour Photography

The principles of colour photography are almost as old as photography itself, a three colour process being described by James Clerk Maxwell in 1855, and first demonstrated by Thomas Sutton under Maxwell's direction in 1861. James Clerk Maxwell's method was simple: using black and white emulsion, make three separate exposures with red, green and blue filters. The three photographs were then combined through an additive colour process, by projecting lantern slides of each photograph through the same red, green and blue filters, aligning the projections to create a colour image. This process became more successful when panchromatic emulsions, able to represent the whole spectrum of visible light, emerged around 1900. The most celebrated proponent of this technique was Sergey Prokudin-Gorsky, who documented the Russian Empire before the First World War. The three colour technique was superseded when a convenient, consumer-level colour photography was developed by a number of manufacturers, notably Kodak, during the 1930s with integral tripack colour films.

However, there has been renewed interest in the three-colour process in recent years, in part due to digitisation which makes for easy display of the images so produced. There's a large group on Flickr using the technique, commonly dubbed 'trichromy'. For my first attempt at this technique, I decided to take the approach of making it more difficult than it needed to be by using large format. With taking three separate exposures, I was aware that movement between the images would create ghosting: it would have been quicker to shoot three images in succession on rollfilm, and to shoot more of them, but the challenge of working with large format appealed to me.

Kodak Tri-Colour Filters
To take the photographs, I used my MPP Micro Technical Mk VI camera with Fomapan 400; I had a number of filters which came with a large format lens I'd bought, including a tri-colour set. I took three shots with the RGB filters, using the unsophisticated method of simply holding these over the lens (I took the blue image twice, as I was concerned that the first shot wasn't sufficiently shaded from the oblique sunlight; I also shot it on a glass plate for good measure). The negatives were developed in Rodinal diluted 1:50, for 11mins at 20ºC.

Red, green and blue exposures
Scanning the large format negatives was complicated by not having a scanner capable of taking 4x5 sheet film: I had to scan each negative in two halves. To begin with, I attempted to stitch the two halves of each negative together, and then combine them, but this led to problems with registration across the image, so instead I composited the top and bottom halves of the image separately, then stitched these together. To make the colour image, I used Photoshop to combine the three separate grayscale images by pasting each into a separate channel of a new file in multichannel mode, stacking the channels in the order of red-green-blue, then changing this image mode to RGB.

Uncropped RGB Composite
Despite taking all four exposures as rapidly as possible, I did realise that the movement of clouds in the sky would cause ghosting in the image; what I hadn't expected was how apparent the movement of the shadows is. With the three colour process,  movement between each exposure causes these ghosting effects, making it more appropriate for using with still subjects. Cameras were designed around this problem, initially with backs that could expose three plates in quick succession, followed by dedicated colour separation cameras, which used beam splitters to expose all three plates at same time, such as the Bermpohl Naturfarben Kamera.

RGB Composite
Rather than adjusting the colours in RGB, I made adjustments in each channel separately, feeling that this was more appropriate to the enterprise. The image as a whole suffers from being scanned in sections, leading to the colour being patchy and uneven, yet it works. As I've shot the image in large format, it's possible to look at some details at 100% of the 1200 dpi scan. In the detail of the houses which have reproduced well, the shadows of the trees show colour fringing, which could be due to the movement of the sun, but on reflection it's more likely to be wind in the trees. In the second detail below, looking across allotments to the recycling centre, the arm of a JCB is visible in three different positions, in three different colours.

Detail of houses in the upper left

Detail of JCB movement


Sources/further reading
Wikipedia entry on Colour Photography
James Clerk Maxwell and colour analysis on Wikipedia
Sergey Prokudin-Gorsky in the Library of Congress
Three-Color Camera on Camera-Wiki

Thursday 7 March 2013

Voigtländer Vito IIa

Voigtländer Vito IIa
Reputedly the last folding 35mm camera in production, Voigtländer's Vito IIa was just one of many cameras the company produced bearing the Vito name. Introduced in 1955, the Vito IIa was a refinement of the Vito II, which itself improved on the original pre-war Vito (the Vito III was an altogether different rangefinder model). The Vito cameras also have specific model numbers to identify changes made to the cameras during production: my example is a Type 135/99. The Vito IIa's production run overlapped with the rigid bodied Vito models which superseded the folding models: concurrent to the Vito IIa was the Vito B, essentially a non-folding version of the camera, based on a very similar body, lens and shutter. (Although one suspects that folding cameras were more complex and therefore more expensive to make, which led to their disappearance in the market of 35mm cameras, interestingly, both folding and rigid bodied Vito cameras appear to have cost the same however, and the Vito B also offered the option of a faster lens). Common to the family of Vito cameras was the Color-Skopar lens. The original Skopar was Voigtländer's version of the Tessar; the Color-Skopar, as its name suggests, was the post-war coated version. The folding Vito cameras all have a f3.5 Skopar or Color-Skopar 50mm lens.

Top view
The improvements from the Vito II were not sufficiently groundbreaking to warrant an entirely new name for the camera: the significant changes are across the top plate of the camera, the Vito IIa gained a rapid advance lever, a rewind knob that's recessed into the top plate and an accessory shoe. The rewind knob pops up when it's released by a lever below to rewind the film. Releasing this when loading the camera also allows the button next to the viewfinder window to advance the film counter, which doesn't reset automatically.

Rewind crank, released by the lever below;
film counter reset button on right hand side of viewfinder
The camera opens by depressing a recessed button on the bottom plate. There's a small metal prop on the bottom of the door which functions as a stand when the camera is on a flat surface. Unusually, the shutter release and cable release socket are located on the top edge of the door, not on the top plate itself, an evolution from the original Vito's unusual bar release. In my experience, this provides a more comfortable position holding the camera, with the forefinger forward on the shutter release. To close the camera, there are two tabs inside the door which need to be pushed down at the same time. Loading the camera, the back opens with a sprung latch that runs the height of the camera back on the left hand side. There's a double-exposure prevention which releases when the film is advanced; this also prevents the shutter firing if there's no film inside, although in the shutter can still be cocked. The interlock depends on the roller with sprocket teeth being turned, which can be done manually without a film of course, to fire the shutter when the camera isn't loaded, to check the shutter, exercise it and so on.

Camera opened for loading
The serial number on my camera dates the lens to 1958, which appears to be the last year of the Vito IIa's production. The other features that date it to the end of the Vito IIa's production run are the Prontor SVS shutter (it was also offered with the cheaper 4 speed Pronto shutter) with a new style run of shutter speeds - 1, 2, 4, 8, 15, 30, 60, 125, 300 (rather than 25, 50, 100 for example) and it also has a light-value (LV) system built into the shutter. This is a mechanism which links the shutter speed and aperture together by an arm which extends from the aperture ring to connect with teeth along the edge of the shutter speed ring. These settings are numbered (the red numbers in the picture below), and these would have related to numbers on exposure meters, meaning that the aperture and shutter speeds can be changed in sync to give the same exposure. In practice the LV mechanism is fairly easy to ignore when setting the aperture: simply by pulling the arm outwards when selecting an aperture disengages the connection, however to do this when setting shutter speed does need two hands. This doesn't seem to be an especially useful function now, but it was clearly an innovation at the time. The shutter also has PC flash sync and a V/X/M switch: the X and M settings are for flash, X for electronic flash, M for bulbs. The V setting is for a self-timer, missing on my camera.

LV mechanism around lens
Focus is by estimation: there are markings on the distance scale around the lens between 10 and 12 feet (a triangle, presumably for group shots) and between 20 feet and 60 feet (a circle for distance shots). When folded, the Vito IIa has a streamlined profile, if somewhat compromised by the accessory shoe, and, although it's not much smaller than the Kodak Retina for example (obviously it has no rangefinder), its rounded edges make for a more pocketable camera, or at least make it easier to get in and out of a pocket. In the examples below, the first shot on Ilfodata document film is a good demonstration of the sharpness of the Color-Skopar lens; the third shot below was a long exposure taken without a tripod by standing the camera flat on a low wall.

Sample image on Ilfodata HS23
Sample image on HP5 Plus rated 1600 EI
Sample image on FP4 rated 64 EI
Edit 19/2/20: Further examples

Voigtländer Vito IIa with Ilford Mark V Motion Picture Negative Film
Voigtländer Vito IIa with Ferrania P30 Alpha
Voigtländer Vito IIa with Ilford Pan 100
Voigtländer Vito IIa with Foma Retropan Soft rated 650

Sources/further reading:
Vito IIa on Mike Elek's Classic Cameras
Vito IIa in Hans Lißberger's Voigtländer Collection (in German)

Friday 1 March 2013

A few words about the Lumière Scout Box

Lumière Scout Box
Simple in construction and use, there isn't much to be written about the Lumière Scout Box, but having used it for the 'Take Your Box Camera To Work Day' yesterday, I felt it deserved a post of its own. There were a number of box camera models that Lumière produced under the Scout Box (sometimes written 'Scoutbox') name. Sylvain Halgand's collection has a comprehensive range of Lumière box camera models (shown under the 'Même Marque' tab), none of which my camera exactly resembles, although it is very close to the inventory number 489, my example lacking flash sync and has a fabric handle rather than plastic.

The camera is a sturdy all metal construction, covered with a coarse-grain leather finish. The metal trim has a black craquelure or craze paint effect, which is also used inside the camera, presumably to reduce internal reflections. It's relatively compact for a medium format box camera taking 6x9 images (the Scout Box's negatives are actually nearer to 6x8): the box itself measures roughly 9x9.5x7cm; a camera such as the Kodak Hawkeye using the same negative format is 11x14.5x7.5cm. The controls are very simple: the shutter lever is on the right hand side of the lens. Above the lens is a pointer that can be switched from 'I' for Instant to 'P' for 'Pneumatique' (bulb - 'B' setting), 'I' or 'P' showing in a small round window. The camera has a single brilliant viewfinder set directly above the lens for portrait orientation; for landscape shots, this rotates on a pivot through 90º. The camera also has tripod mounts for both portrait and landscape.

Viewfinder in landscape mode
To open the camera, there's a catch on the left side, which releases the right side of the camera, which slides out and has the film transport mechanism attached. My camera had a 620-sized spool inside, and is described on some websites as taking 620 film, but 120 spools do fit, if a little tightly; inside the camera it has a label stating the camera uses Lumière 49 film.

Camera opened for loading
The lens has 'Lumière Objectif Rapid' inscribed around it and this appears to be a meniscus lens. As it's a fixed focus lens with a single aperture, there's no need to provide the user with information on its focal length or aperture. I've measured the focal length to be c.95mm. The aperture is a circular hole in a metal plate behind the lens and shutter, which, although hard to measure without dismantling it, I estimate to be around 4.5mm across (looking through the lens with the shutter open and a ruler behind it): this gives an f number of just under f22 (G. Even's site lists the aperture as f16 and the focal length as 85mm). Even given the need for depth of field to compensate for the fixed focus of the lens, this does seem like a small aperture (when this camera was made 100 ISO was a fast film). I decided to check the shutter speed in Instant mode by recording it with Audacity. Measuring the waveform from peak to peak is 0.019 seconds; which translates as very close to 1/50th (I think the third peak in the waveform is the sound of the shutter swinging back to its original position). An exposure of 1/50th at f22 should give a correct exposure on 100 ISO film in bright sunlight, going by the 'Sunny 16' rule; if the aperture is f16, this would allow for a little less than optimal conditions. None of my measurements are rigorously precise of course, so there could easily be a margin of error of a stop or so.

Lumière Scout Box shutter recorded with Audacity
The first film I ran through the camera was HP5 Plus which I pulled to 200 EI, reasoning that the camera was designed for use with slower film. This test film did lack shadow detail, and all the films I have used in the camera since have been 400 ISO, which have given good results on relatively overcast days.

Test roll, HP5 pulled to 200 EI
Rollei RPX 400
Fomapan 400

Sources/further reading:
Scout Box on Collection Sylvain Halgand (in French, with some English translation)
Lumière Scoutbox on Camera-Wiki
G. Even's Lumière Collection (in French)