Showing posts with label folding camera. Show all posts

Sunday, 29 January 2023

127 Day January 2023

Baby Ikonta with Kentmere Pan 400
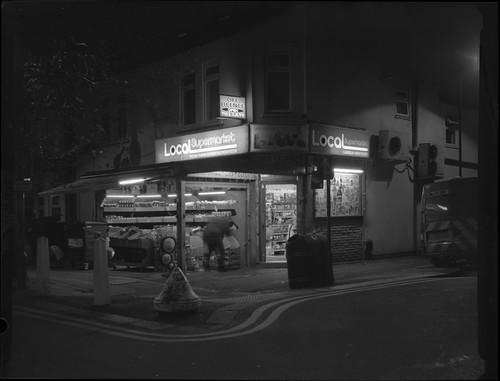
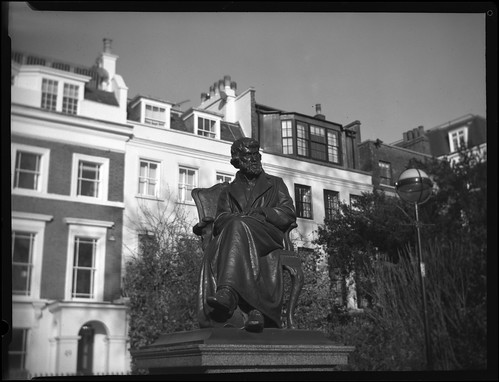
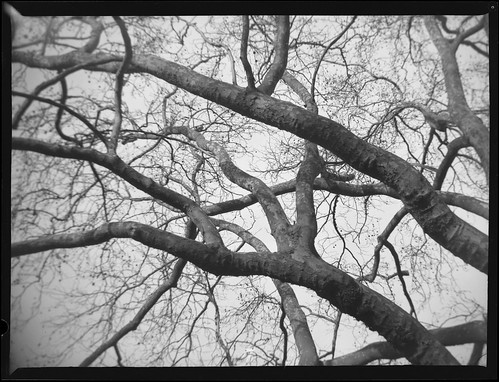
Last Friday was the first of the year's calendrical 127 Days, and I had time during the early afternoon to expose a roll of cut-down Kentmere Pan 400 in the Zeiss Ikon Ikonta 520/18–the 'Baby Ikonta'–a favourite for its small size, relatively good Novar lens and Compur shutter. I used cut-down medium format Kentmere Pan 400. The weather was mostly overcast, and having a 400 ISO film certainly fitted the lighting conditions typical this time of year in the Northern hemisphere. Even then, in a few situations, such as under the dense branches of bare trees, the light levels were pretty low, and I didn't accurately guess-focus as accurately as I might in a few frames, with the aperture wider than I might have liked to provide little assistance in careless focussing. Developing the film in Kodak HC-110 (at dilution E, 1+47 from concentrate) provided low contrast negatives, no doubt compounded by the uncoated Novar lens of the Baby Ikonta, some flare in a few frames (such as in the second image below), on top of the lighting conditions. In retrospect, a one-stop push might have benefitted both the contrast, as well as being able to use a smaller aperture in some situations. However, regardless of the results of this one roll, having an inexpensive 400-speed film newly available in medium format is ideal for the purposes of being cut down to 127 size–a rather cheaper alternative to the few films currently available in the niche 127 rollfilm format, which, somehow, still survives in 2023.


Tuesday, 29 March 2022

A small adjustment to the Baldalux's double-exposure prevention mechanism

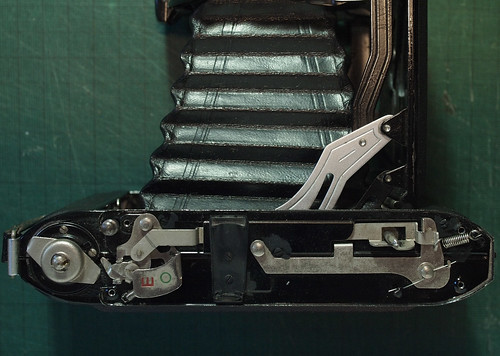
Zodel Baldalux–view of top plate
Anticipating a trip abroad in the near future, the first since the global pandemic, I was considering which medium format camera to take with me, and naturally thought of the 6x9 folding Zodel Baldalux camera. Over the past decade this has accompanied me on many trips, and usually provides fairly good results for its modest specifications. However, since I'd first acquired the camera, I'd always been using it with the double-exposure prevention disabled. I'd done this as it had begun to continually trip to the 'exposed' position, denoted by a red 'E' in the small square window on the camera's top plate. In this position, the shutter release on the body is prevented from being depressed and the only way to release the shutter is either with a cable release attached to the lens or, rather more clumsily, by pulling down the lever on the shutter which connects to the body shutter release linkage, and this is a good way to get one's fingers in front of the lens. I taped a small L-shaped piece of card in place to stop the mechanism from shifting to the 'E' position, which, at the time, seemed like a good–and reversible–intervention. At the time I wrote "I've yet to accidentally double-expose a frame, but I'm sure that this will happen." This did happen subsequently, not too often, but picking up the Baldalux once more, I decided to look at this again.

Double-exposure prevention mechanism disabled with card and tape
To remove the top plate of the camera, there are four screws, two at each end, which are fairly easily loosed. I found that it was simple enough to keep the top plate level, and not actually take them out from their respective holes. I could lift and pivot the plate on the shutter release (which pops up when the camera is unfolded) and remove the piece of card, which looked a little frayed at the edges after ten years. Before taking the plate off completely, the shutter release button needs to be removed. Opening the camera makes the shutter release stand proud of the top plate, which may make it easier to undo. In the centre of the release is a separate slotted screw cap which once undone, lifts off with the shutter button, itself sitting on the release pin that has a threaded top that the screw cap connects to.


Shutter release with slotted centre cap.
With the shutter release removed, the camera's top plate can be taken off, and, as mentioned, kept upright with the screws in their holes at either end. Underneath the top plate, loose, but on the shutter release pin, is a short arm that has the screw fitting for the cable release slot on the top plate. This can be simply lifted off.

Shutter release pin with cable release arm
At this point, although separate from the top plate, I removed the film advance knob. This is best seen in the image above showing how I originally disabled the mechanism: slightly off centre in the middle of the knob is a tiny screw–very easy to loose!–which needs to be unscrewed before the advance knob itself can be unscrew: the two images below show it positioned for unexposed ('O') and exposed ('E').

Double-exposure prevention mechanism in 'unexposed' position 'O'.

Double-exposure prevention mechanism in 'exposed' position 'E'.
The sequence of how the mechanism should work from the unexposed position, through exposed to unexposed again is as follows:
  1. Having first cocked the shutter, as the shutter release is depressed, the shaft under the button pushes against a detent in a vertical section of the forward arm (seen below the rectangular hole around the shutter release pin in the pictures above). For this to work once the top plate is removed, I placed the shutter release button onto the shutter release pin (this did not need to be fixed with the central screw plate to activate the mechanism).
  2. This pushes the forward arm down and away from the front of the camera: the right hand end of the arm is held in tension by a spring. This downward movement releases a small angled catch at the end of the arm which can then slip past a vertical section of the lower or rear arm, and is pulled taut past this vertical piece by the spring. A section of the detent on the forward arm is now underneath the shutter release button shaft, preventing its depression, and thus preventing double exposure.
  3. Simultaneously, the other end of the forward arm travels under the viewfinder to the left side of the mechanism where it pulls on a linkage to move the double-exposure indicator from 'O' to 'E'. This also causes a flat pin to protrude towards the film advance knob.
  4. To reset the mechanism, the film advance knob needs to be rotated. Under the advance knob (now removed), there is a kind of cap which sits over the shaft of the film advance column (which travels through the top of the camera body to the take-up spool inside). This has two arms either side with downward pointing ends.
  5. As the advance knob rotates, one of these arms pushes the flat pin of the indicator linkage towards the back of the camera body and in doing so this pulls the forward arm to slip its small catch over the vertical section of the rear arm. This pulls the detent away from the shutter release button shaft. The shutter can now be tripped again.
  6. Meanwhile the indicator linkage shifts from 'E' back to 'O' and the flat pin of the linkage slips out from the arm of the film advance cap and springs back to a position where the advance can now rotate freely without connecting with the pin.
With the camera top plate removed, turning the cap that would normally be hidden by the advance knob was pushing the flat pin in the indicator linkage, shifting the position from 'E' to 'O', but once released from the pressure of the arm, the mechanism sprang back to 'E', My initial thought was that the spring on the other end of the forward arm no longer held this in sufficient tension–hardly surprising after sixty-odd years–to pull it firmly back into the 'O' position, and the small catch at that end was loose enough to slip back past the upright which should stop it.

Detail of spring, catch and hook
I stretched a couple of loops of the spring over the hook to which it is attached to increase the tension, then reduced it to one loop as this felt too much. This did not solve the issue; I wondered whether it was the spring at the other end under the indicator linkage, but this is slightly more difficult to access. Manipulating the whole linkage here by hand, it looked as though the flat pin on the linkage did not travel far enough to lock this into the 'O' position. Removing the cap on the film advance column, I tried to bend the ends of the two arms so that these would flare slightly outwards, as in the picture below (I didn't take a 'before' photo). This seemed to have solved the problem: in this position, they push the flat pin of the indicator linkage further towards the back of the camera as they rotate, and the linkage now locks into the 'O' position until the shutter is released.

Cap with arms showing adjusted angle
Reassembly is a case of following the disassembly steps backwards: the cap should sit firmly over the advance column–the hole on top has squared-off ends in order to turn the advance, which correspond with the top of the film advance. Replacing the film advance knob, I found I needed to firmly hold the key inside the camera which sits in the end of the 120 film spool with pliers to screw the knob on tightly enough to get the two halves of the tiny screw hole to match so that the screw can be reinserted. Replacing the top plate merely needs the tiny arm for the cable release positioning correctly before reinserting the screws at both ends, then finally replacing the shutter button on its pin and screwing down the small plate at its centre to secure this. Before reassembly, I also polished the indicator plate, somewhat tarnished, particularly over the letter 'O'.


Sunday, 25 April 2021

#FP4Party April 2021

Two years ago, less a couple of months, for the #FP4Party in February 2019, I used my Ensign Folding Klito de Luxe No.9 with some old Ilford FP4 sheet film in quarterplate size; two boxes of this had come as part of a larger job lo: both were unopened boxes of 50 sheets each, both with the handwritten date of 16/11/78. I'd used film from this stock for the January and March #FP4Parties in 2019 too, in different cameras; for April 2021's #FP4Party, when considering what format to use, I saw that I had seven sheets of the last box of this film left, assuming I'd tallied my usage correctly. Thus, I decided to simply shoot one sheet a day for each day of shoot week, and the choice of camera had to be the Ensign Folding Klito de Luxe No.9 as it's the best of the three quarterplate-sized cameras I have. In 2019, in the three successive months, I'd shot two sheets a day, hopefully providing a 'good' and a 'spare'; with only seven sheets left this was not a luxury I could allow myself. In the event, I did accidentally use two sheets on one day, a result of unclear labelling of my plateholders. 

Although I was exposing just one sheet of FP4 each day, I also photographed each subject on other film stocks, some Ilford F.P.3 from the 1940s, and Ilford Fine Grain Ordinary N5.31 film (this box has a handwritten date of 11/3/70): without thinking, I picked up a second plateholder when photographing on the Friday, thinking it was the latter film when instead it was a second sheet of the FP4. In order to shoot FP4 film each day of the shoot week with two days to go and only one sheet of quarterplate-size FP4, I then cut down some larger FP4 Plus film to fit the format. Having made a jig that I taped to a cutting mat to cut the film to size inside a changing bag, I found this more difficult than expected. I tried to cut some 9x12cm film to quarterplate size–8.2x10.8cm–but found it was far too easy for the film to move around while changing from a cut in one orientation to the second cut in the other. After spoiling one sheet of 9x12cm FP4 Plus, and badly cutting another, I then cut down a sheet of 5x4-inch FP4 Plus. For this I only made one cut, going from 5 inches to 3¼ inches; quarterplate film measures 4¼ by 3¼ inches, but for ease of cutting down film to use in the Klito, 4 inches by 3¼ would have to do.

Part way through shoot week, I developed the first four sheets, partly as I didn't have enough spare film sheathes to load seven plateholders at the start of the week. This was also instructive: I had overestimated the bellows factor on the sheets already exposed, resulting in dense negatives, especially Thursday's; as a result, on Friday and Saturday I didn't compensate in exposure for bellows factor, and the negatives developed fine (Saturday's shot was taken on the cut-down 5x4, rated the same as the FP4 from the 1970s, although its process before date was only April 2010). As a consequence of simply being at home throughout the week, almost all the photographs were of close-focus subjects around the house and garden (such subjects needing to compensate for bellows factor–or not as the case seemed to be). The weather was almost uniformly sunny, with the brief exception of showers on the Saturday afternoon, which I tried to record somewhat obliquely.

The first shot of the week I'd hoped to have been better, but there was too much of a breeze to use an exposure time of 1/5th and expect the subject to be sharp; Sunday's subject, the last sheet of the 100, I chose the tree outside my window which I had been photographing for an entire year, and had indeed only recently finished that project, but wanted to record its new growth after being heavily pruned in the autumn. This shot suffered from a light leak which I think may have been due to mixing up darkslides and plateholders: some of the plateholders which fit the Klito camera are branded Klito; some are AP Paris; and others are unbranded, and, although very close in all respects, it's easy to mix up the darkslides and then find some are a better fit than others. 
 
Monday
Tuesday
Wednesday
Thursday
Friday
Saturday
Sunday

Wednesday, 27 November 2019

Voigtländer Avus

Voigtländer Avus
The Voigtländer Avus was my first 9x12cm format folding camera. I initially bought it as a relatively inexpensive and compact large format camera; I did subsequently buy a 4x5 camera not long afterwards, but also found other 9x12cm cameras after the Avus: the Kodak Recomar 33 (which was extremely cheap); the Ica Trona; and the Photo Plait camera (as a format, 9x12cm sheet film is still made: it's essentially the continental European metric equivalent of 4x5 inch film, although not as common). The Avus was the mid-range option of Voigtländer's stable of plate cameras, between the lower-priced Vag cameras and the top-of-the-range Bergheil: the Bergheil cameras seem to have been entirely contemporary with the Avus, while the Vag was introduced later, as a more economical option. The Avus appears to be a relatively common camera, and presumably made in fairly large numbers; it was produced from 1913 to 1934 (some sources give 1914-1935, or -1936), with some minor changes throughout the two decades of that run. My camera is the 9x12cm version that appeared in 1927, clearly identified by the centrally-positioned brilliant finder directly above the lens, rather than offset to one side, as with most plate cameras of this date. Two different origins of the camera's name are given in different sources: one suggestion is that the name is formed from the initials A.V.U.S., as seen on the ground glass back on early versions, derived from "Aktiengesellschaft Voigtländer Und Sohn"; Camera-Wiki states that it was named after an early motor racing circuit in Berlin, the AVUS, also an acronym. This AVUS was under construction when the camera appeared, but not opened until 1921, so it seems highly unlikely that Voigtländer would have been deriving some name recognition from the racetrack's popularity.

Voigtländer Avus - side view
The Avus was made in a number of different formats: there is a horizontal 9x12cm plate version, a 10x15cm, one dual-format version for 9x12cm plates and 122 rollfilm, but the most common sizes are the vertically-oriented folding cameras for 6.5x9cm and 9x12cm plates. Like many folding plate cameras of its time, the Avus was provided with different lens and shutter combinations. My version of the Avus has a 13.5cm f4.5 Skopar lens, Voigtländer's own version of the Tessar, in a Compur dial-set shutter, which together would have been the most expensive options at the time.
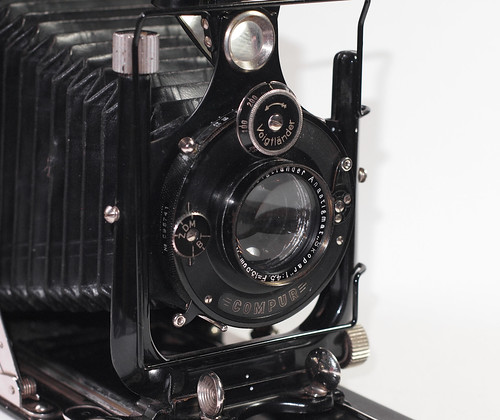
Detail with Voigtländer Skopar lens in Compur dial-set shutter
The other features of the Avus are double extension bellows; limited movements in the form of front rise and cross; a rotating brilliant finder with spirit level, and a wire frame viewfinder. Focus is with a ground glass screen; the front standard is focussed with a rack and pinion knob, which pulls out to turn, pushing in to lock the focus. There is also a focus scale on the bed - which needed adjusting, as this was initially out of true: when first using the Avus, I relied on the infinity stop of the focus scale, and found most of the images out of focus as a result (the focus scale can be adjusted with a couple of small screws that, once loosened, can be moved backwards or forwards a small amount). The removable ground glass screen was missing from my camera; ground glass screens, unlike spring backs, have a tendency to get separated from their cameras. I made a ground glass screen from a 9x12cm film pack adaptor which came with the camera, and lacking a focus shade it does have the benefit of opening completely out, without a viewing hood, which I found useful when using the camera for night photography, but, for general use, I have tended to use the ground glass screen from the Recomar.

Avus with bellows extended
Over the years, I've picked up various 9x12cm plate holders, some Voigtländer-branded ones, a number of which came with film sheathes, essential for shooting sheet film with the camera. The Avus is compatible with all the plate holders I have, which is not the case with the Recomar. As the Avus was my introduction to large format, I experimented with paper negatives and Harman Direct Positive paper for ease of loading and development under darkroom safelights. I used a sheet of stiff card behind the photographic paper in the plateholders before I had acquired the necessary film sheathes. When I first started to shoot sheet film with the camera, I attempted tray processing, but found it too difficult to get even development with the negatives and also found it too easy to scratch the film: I had been using Foma film, which in my experience has a soft emulsion compared to others, very easy to damage while wet. I subsequently got a Combi-Plan tank to develop large format film and plates, which I have found much easier to develop sheet film with.

Voigtländer Avus - paper negative, digitally inverted
What drew me to the Voigtländer Avus was its compactness in relation to its negative size: the camera is the size of a fat paperback book. Using it handheld, my general procedure was to focus on the ground glass screen, then replace this with a plateholder or rollfilm back, and use the wireframe finder to compose the shot. I've remarked before on my preference for the dial-set Compur shutter over the later rim-set version for ease of use: when focussing with the ground glass screen, with the shutter speed set, the selector for the I/B/T setting can be quickly turned between 'T' to open the shutter and 'I' for taking the shot.
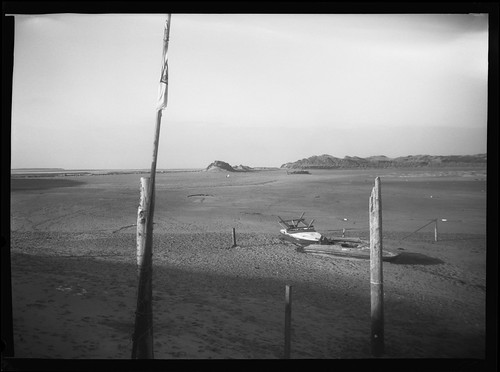
Voigtländer Avus with Agfapan APX100
I also invested in a Rada Plaubel rollfilm back for the 9x12cm format for the ease of using medium format film with the camera, with a much wider selection of films available, as well as being easier to develop.

Voigtländer Avus with Adox CHS 100 in rollfilm back
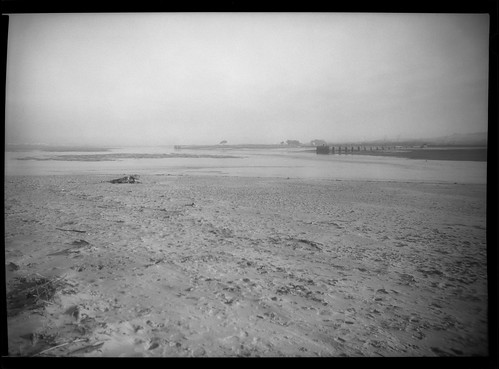
The Proxar and Distar supplementary lenses that I used with the Ica Trona - which I found at the time I bought the Trona - also fit the 37mm lens mount on the Voigtländer Avus; the Proxar lens can be used as both a close up filter and a wide angle one due to fact that it's possible to reduce the distance between the camera's lens and film plane in order to achieve infinity focus. With a full 9x12 frame, there is some vignetting and distortion towards the edges of the frame, as can be seen in the image below; a narrower aperture might reduce this somewhat.
Voigtländer Avus and Proxar with Fomapan 100
With the roll film back, the 6x9cm medium format frame, normally cropped of course, approaches an equivalent angle of view as the full 9x12cm frame without the Proxar: the two images below give a good comparison in terms of the difference the Proxar makes. On the 6x9cm frame, the vignetting and distortion lies outside the image area; it does appear to make the image softer however.

Voigtländer Avus with Ilford XP2 Super in rollfilm back
Voigtländer Avus with Ilford XP2 Super in rollfilm back and Proxar lens
In use, although the Avus is well-made, I found that the front standard on my camera had a tendency to hold the lens a little out of parallel to the focal plane, possibly due to tension or simply the weight of the bellows on the unsupported top of the front standard, with the result that the plane of focus in photographs taken with the Avus would often shift across the scene in front of the camera, less noticeable with smaller apertures of course. As well as this issue, the Skopar lens on the camera, uncoated of course, was very soft, prone to halation: this is clear in the image below with the sky backlighting the subject, creating a haze around the ruin.

Voigtländer Avus with Rollei Superpan 200 in rollfilm back
Although the Kodak Recomar 33 has a slower lens, and a simpler shutter, I have found this easier to use than the Avus. The Recomar has a triplet lens, the Radionar, which is around the same age as the Avus' Skopar, but on my cameras, it gives a better result, and so I've used the Recomar in recent years in preference: although it was my introduction to large format I found the Voigtländer Avus frustrating to use, and I never felt like I quite got the quality of the images from the camera that I felt it promised.

Voigtländer Avus with Adox CHS 100 in rollfilm back
Voigtländer Avus with Ilford HP5 Plus in rollfilm back
Voigtländer Avus with XP2 Super in rollfilm back and Proxar lens
Voigtländer Avus with Ilford Soft Gradation Panchromatic glass plate (label dated to 1947)
Voigtländer Avus with Ilford HP3 glass plate (1950s)
Voigtländer Avus with Ilford HP3 glass plate (1970s)
Voigtländer Avus with Fomapan 400
Voigtländer Avus with HP5 Plus
Sources/further reading:
Full range of Voigtländer Avus Models

Voigtländer Avus on Camera-Wiki 
Early Photography on the Avus
Voigtländer Avus on J. Noir Cameras
Voigtländer Avus on Collection-Appareils
Camaras sin Fronteras - Avus (with manuals and original adverts) (in Spanish)
Voigtländer Avus manual

Sunday, 27 January 2019

#FP4Party January 2019/Revisiting the Butcher's "Cameo"

Ilford FP4 shot on Ilford FP4 with Butcher's Cameo and close up lens attachment
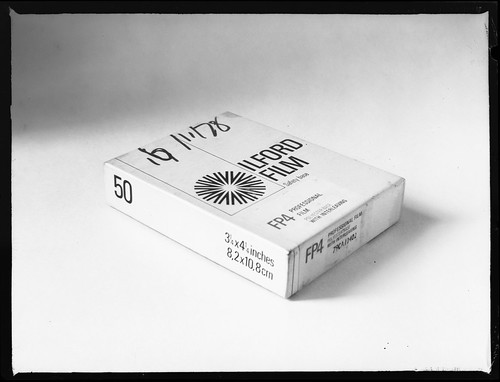
When choosing a camera for January's #FP4Party, a clear deciding factor for me was already having a fair stock of quarter-plate (8.2x10.8cm) FP4 sheet film. With one part or mostly used box of 50 and one unopened box, I decided not to buy any new rolls of FP4 and use this instead. Both boxes have a handwritten date of 16/11/78 (one box looks like it starts with 17/- which was then changed to 16); the film dates to well before the 'Plus' iteration was introduced in 1990 but I've previously used it with just one stop of extra exposure to compensate for age (I have also shot it at an exposure index of 100, and pushed the development by one stop instead). Possessing three cameras for the format: the Klito, Midg, and Cameo, all plate cameras, all of a similar age, over a hundred years old, I picked the Cameo, having used it for the first #FP4Party in September 2016, being the smallest and lightest of the three, and it seemed time to revisit it for this month's #FP4Party.

Butcher's and Sons "Cameo"
I restricted myself to expose just two sheets a day over the 'shoot week' (although on the first day I actually shot three sheets; I also didn't count the shot of the FP4 box in the total, but it made sense to photograph this on the film itself, using the lens attachment, during shoot week). Low light and short daylight hours in the northern hemisphere in January do not make for using a film rated at an exposure index of 50 necessarily sympathetic. In addition, using the Cameo handheld is not without a number of difficulties. Not entirely trusting the focus scale on the drop bed, to focus the camera using the ground glass screen requires one to use the spring clamps to position the front standard at the correct distance on the rails of the drop bed: it needs a certain amount of dexterity to put one's hand in such a way to move the front standard without obscuring the image on the ground glass with it: I miss rack-and-pinion focussing with the Cameo, particularly when using it hand-held.

Home-made ground glass screen; lens wide open
Even in relatively bright light, the Cameo's Beck Symmetrical lens produces a dim image: its widest aperture is nominally f8 (although it's most likely f7.7 when fully open beyond the f8 mark), slow by modern standards, and the screen is missing its hood to shade the ground glass, making this image difficult to assess. The ground glass was missing from my camera when I acquired it; I replaced this with some glass that I ground myself, but used too coarse a grade of grit, which adds to the difficulty in focussing. Once the image is in focus (as close as one can tell) on the ground glass, one then has to remove the focus screen and replace it with a plate holder, adjust both aperture and shutter speed to the desired settings, remove the darkslide from the plate holder, then frame the subject using the brilliant finder - and then gently press the shutter release lever. The Lukos II shutter has three 'instantaneous' speeds of 1/100th, 1/50th and 1/25th, and, while it would have been possible to get usable exposures at 1/25th, wide open on f8, for overcast, dull days, I only used the Cameo hand-held on a couple of days (Tuesday and Friday) when there was some winter sun, partly to use smaller apertures in the hope that a greater depth of field might compensate for any errors in focus.

Brilliant finder on the Cameo
For most of the shots during the week, I used a tripod or simply balanced the Cameo on a flat surface for long exposures, low-light shots, interiors and those at night. I also used the wide angle/close up lens attachment for some shots (Friday and Saturday) and the image of the box itself. I did my first batch of development during the shoot week rather than the 'development week' that followed. This acted as a check on my exposure and development regime: the first batch of film I developed with a one-top push - on top of the one and a third stop extra exposure - but developing the first few sheets appeared to show that extra development was unnecessary and the rest of the week's shots were developed in RO9 One Shot for the recommended time, 9 minutes, at a dilution of 1+25 at 20ºC.

Revisiting the Cameo, the quality of the results from the shoot week varied. Some of this was down to user error of course; other aspects were to do with the camera's limitations. When using the wide angle/close up lens attachment, there is clear vignetting, with a falling off of both illumination and definition towards the edges of the frame. This is less obvious when used as a close up attachment, as the lens' image circle would be wider the more the bellows are extended; when used as a wide angle attachment, the bellows are extended less than normal, making the image circle smaller. As well as the difficulties of focus set out above, there were also problems with film flatness (notably visible in the middle of the shot from Saturday); this might be due to the motley group of film sheathes I've been using, with some clearly home made, and others professional: some fit the sheet film better than others. The film itself stands up remarkably well: over four decades old, with only a little loss in sensitivity, the quarterplate-sized FP4 is still very usable.

Monday
Tuesday
Wednesday
Thursday
Friday
Saturday
Sunday