"Light radiated from the sun travels through space and impinges upon the crowded surface of our world."Although this opening line is redolent of an H.G. Wells novel, it is in fact the very first sentence from the Ilford Manual of Photography. The Manual was first published in 1890 (some sources give the date as 1891), ten years before the Britannia Works Company became Ilford, Limited. The original Manual of Photography was written by C.H. Bothamley, superseded by George E. Brown as editor in 1935. The next version of the Manual then edited by James Mitchell and published in October 1942, became the 'first' edition, despite all editions published during the previous fifty years. After four editions, Mitchell was subsequently replaced by Alan Herder as editor, who presided over the fifth edition of 1958, the last as the Ilford Manual of Photography, before Focal Press took over publishing. As the Manual of Photography, the tenth edition was published in 2011.
My copy here is the October 1946 reprint of 1944's second edition. What follows is not so much a review, but rather a series of observations from the hindsight of seventy years, as photographic practices has changed. The Manual is a comprehensive reference book, 484 pages in the 1946 printing, and goes beyond the scope of the keen amateur photographer; around the same period Ilford also produced the Selo Text Book of Amateur Photography, roughly half the size, containing many of the same illustrations. The illustrations from the Manual itself date from various previous editions, and make a stylistic hodge-podge (I've seen one of the Brown editions, which has many of the same illustrations, and some are wood engravings - notably in the 'Trimming, Mounting, and Framing' chapter - which must date as far back as the late 19th century editions). The Manual is also parochial in tone: inevitably, it is largely Ilford products that feature, apart from those aspects of photography outside of Ilford's remit as a manufacturer, most notably in the chapter on cameras. What is interesting is that this edition of the Manual was published during a long transitional phase when the technology of photography was changing, from plates to rollfilm, from the general use of larger formats to 35mm, from orthochromatic to panchromatic emulsions (including changing development from inspection to the time/temperature method) and from producing prints by contact to enlarging.
First Principles
After the poetic start, the book's first chapter, 'The Mechanism of Image Formation', describes the physics of light, which, through diffraction, leads on to explaining lenses, and provides a historical overview of camera lens development. The most up-to-date lens designs written about are Zeiss Tessars and Protars, fifty years old when the Manual was published, with a paragraph on the "long-sighted policy of the German Government of the day" in making grants to Abbe and Schott to research the properties of optical glasses.
Cameras
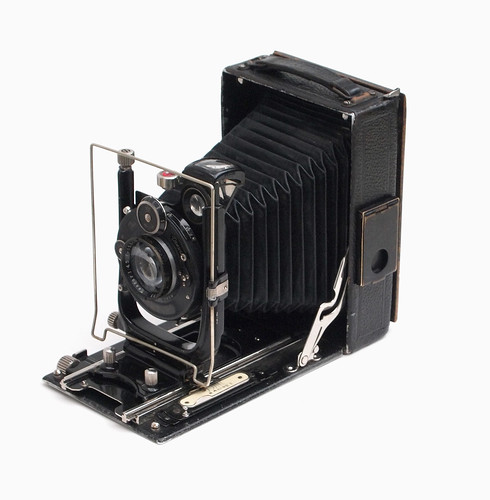
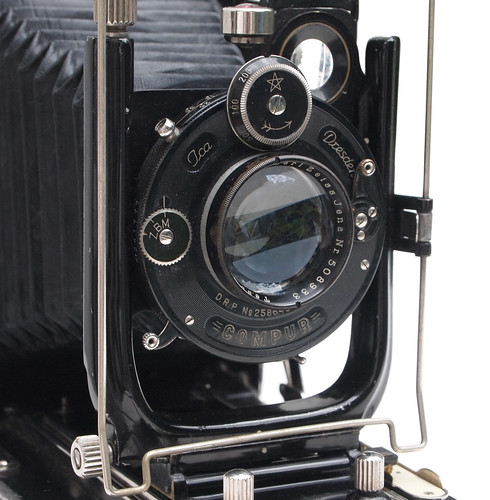
As there were no Ilford or Ilford-branded cameras at the time of publication (the troubled Witness camera was announced a year after my volume), the second chapter, 'Cameras' contains a general typology of cameras, mentioning some specific models, with illustrations, followed by a table detailing many more. The category miniature ("the graininess of the photographic emulsion is a constant enemy") encompasses 35mm but also negative sizes smaller than 6x9cm, so 6x6 on 120 film is a miniature format, the definition being about the size of the negative not the size of the film, which I presume is related to making prints by contact, rather than enlargement (this makes cameras such as the Rolleiflex and Rolleicord, and the VP Exakta with 127 film 'miniature' along with the Contax and Leica). At this period, Ilford did not use Kodak's descriptors for film formats, dropping the '1' from 120 and 127 (and other sizes), which become size '20' and '27' rollfilm, and 'Z' replaces the '6' in 620, becoming Z20 size.
The Recording Medium
The chapter on films and plates only lists Ilford materials. It is interesting to note that, in the mid-1940s, there are 19 emulsions available in glass plates, 11 as sheet film, and 4 each for 35mm and roll films (but not all four are the same). The film and plate emulsions are listed in order of contrast and a table details ideal uses for each with a small description and speeds in H&D and Scheiner numbers, and Ilford Speed Groups, with no ASA or DIN (incidentally, this has provided useful background information for some of my work with glass plates). The chapter makes special mention of HP3 and FP3, "two new plates recently introduced", HP3 being "the fastest panchromatic plate available". There are some discrepancies between this chapter's lists (p74-77) and the chapter on development which includes Empress and Press (Ortho) plates (p195). This chapter mentions in passing that Ilford supplies stock sizes up to 20x30 inches, and both films and plates are availble to order up to a huge 36x45 inches (over a metre wide), with sheet film larger still. Later on in the book, under development papers (p294), 'Negative Card' is mentioned, something I hadn't been aware of, "a low-priced substitute for plates or films for use in the camera", with two versions, Studio Negative Card and Outdoor Negative Card. Printing was by reflection, and one advantage of negative card was the ability to make prints from the negatives before these were dry.
Colour is treated in a separate chapter (pages 400-406) towards the end of the manual, after a chapter on the copying of business records, alongside sections on photomicrography and cinematography - and given very similar weight. It states "prints in colour to be viewed by reflection can even now be prepared only with some difficulty and by the exercise of considerable patience and skill". It details both Kodachrome and Agfacolor as reversal processes (mention is also given to Autochrome and Dufaycolor), but gives more space and explanation for the making of separation negatives with black and white emulsions to make colour prints, essentially similar to the three colour process.
Picture Making
"At one time cameras came in and out with seasonal regularity, and photography other than by daylight was a thing unheard of excepting by the professional photographer, who by reason of his expensive and elaborate lighting equipment was able to work by artificial light. Now, however, with fast plates and films and fast lenses, photography is an all-the-year-round activity..." (p.113)Although this statement was unquestionably true at the time, it was also the case that many cheap snapshot-type cameras were still being made for years afterwards which did require sunny weather for optimal results, like the Instamatic I recently wrote about as 'My first camera'. Ilford did promote the first version of their Hypersensitve Panchromatic film for night photography in 1935, as reproduced on Photomemorabilia's Ilford chronology. It could be seen that Ilford used the advance of film technology as an opportunity to promote film sales: the advertisement begins: "The nights are drawing in. But that's no reason for putting away your camera." There are two separate chapters that cover the taking of photographs, one on 'The Technique of Picture Making', followed by 'Exposure'.
In the first of these, there are generally sound principles on composition (a keenness for the rule of thirds is demonstrated), although occasionally too dogmatic: "Never divide the picture into two approximately equal parts by a horizontal or vertical line" (p102). There are also assumptions that dictate how men and women should be photographed;"The addition of an undiffused spotlight introduces harsh shadows, giving a somewhat dramatic effect. This arrangement is suitable for character portraits of men." - although this is illustrated by a picture of a female model (p127). Oddly, there is a whole section on table top photography, photographing model trains, planes and so on, with suggestions for replicating surfaces such as snow (salt), concrete (French distemper), and "Surf from ship's propellers" ("Soap lather applied with artist's small paint brush"). Evidently in the 1940s there were limited options for home entertainment: "In table top photography the creative impulse can have full expression" (p117).
For exposure, three type of meter are described, actinometers ("some of these meters are still in use..."), extinction meters and photo-electric meters. There is also a very comprehensive set of exposure calculation tables, far more detailed than the Sunny 16 rule. The sum of values from five tables (film or plate speed; time of day for a given latitude; weather conditions; type of subject; aperture) provides the shutter speed in Table VI. There are also tables for artificial light, copying work, interior daylight with Selochrome, night scenes with HP3 and flash bulb, powder and magnesium ribbon.
The section on 'Holding the Hand-camera' suggests larger cameras ("such as quarter-plate reflex, or press camera", p121), being heavier, are more easily hand-held with longer exposures, 1/10th or as long as 1/4th "by those of steady hand". When I began to be interested in photography, I absorbed the rule of thumb of using a shutter speed, hand-held, numerically no smaller than the focal length of the lens (i.e, using 1/60th with a 50mm lens and so forth); larger cameras tend to have longer focal length lenses, so this rule contradicts the suggestions made about what shutter speeds to hand-hold - but I can't imagine having any confidence in using my MPP Micro-Technical camera at 1/10th of a second hand-held. The Manual's advice on using miniature cameras seems unnecessarily cautious in comparison: "It is doubtful whether anything longer than one-hundredth of a second is safe for a hand-held exposure by the average photographer using a miniature camera" (p37) and "For all exposures longer than 1/25th second, or those 1/50th second in the case of miniature cameras, it is necessary to rest the camera on a rigid support" (p48).
The Darkroom

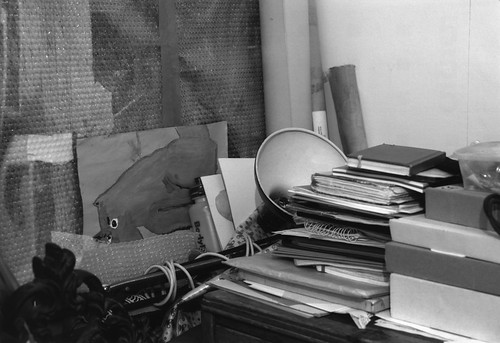
Before discussing development, there is a detailed chapter on 'The Darkroom'. One wonders how many people had darkrooms at home in the middle years of the 20th century. For purposes of review, I've reproduced some of the illustrations that are given as examples of how to organise any available space: "the amateur is, of course, often obliged to make temporary use of a room designed and normally used for other purposes, and generally chooses the bathroom..." This is one section of the Manual that is still very relevant for film photographers today as much of the requirements of a darkroom have not changed in decades.

The Manual includes information that extends to professional and commercial use, which later includes a whole chapter on 'The Developing and Printing of Amateur Films' which gives a "brief outline of an efficient system" for running a developing and printing business. The darkroom chapter includes plans for setting up a commercial darkroom.

The first method described in this chapter is development by inspection which requires the film to be orthochromatic, but also includes a brief section on desensitization, a practice I was not aware of, by which fast films and plates are treated with a solution (the Manual names Qualitol or Desensitizing Yellow) after exposure and before development which enables development to then be carried out under a green safelight. Although development by inspection is not common now that most photographic materials are panchromatic, the Manual does provide useful descriptions of the process and how to evaluate the negatives during development, worth quoting at length:
"If the highlights (e.g., sky) appear first and are followed gradually and steadily by the half-tones, and then by the darker parts of the subject, it may be taken that exposure has been reasonably correct.For tank development with the time and temperature method, times are given for temperatures of 13º, 18º, and 24º centigrade. Ilford's current recommendation of developing temperature, and one generally used for black and white processing, is 20ºC. Their time/temperature compensation table only goes down to 18ºC, and for many films, a temperature of 24ºC gives very short development times - Ilford currently do not recommended times shorter than 5 minutes as this may lead to uneven development (on the development table on p.195 in the Manual, some plates and films are given just one and a half minutes dish development at 24ºC).
When the highlights are slow in appearing, and the darker tones are also much slower in showing plainly, the film has been underexposed. If, on the other hand, highlights come up in appreciably less than half a minute, with half-tones showing almost at the same time, the film has been overexposed.
Development is continued until it is judged that the process has gone far enough. But it is not easy for the beginner to know when this point is reached. In general, the deepest shadows of the subject (the lightest parts of the negative) should show a slight greyish veil (with detail visible) when looking at the negative in the dish, and if the negative, when held up to the darkroom lamp (not too near), also appears almost opaque in the highlights, development may be considered to be sufficient. [...] At this stage, the edges of the negative, where the emulsion was protected from the action of the light by the mask of the camera, should be almost white. If they are greyish, it is a sign that the emulsion is beginning to fog, and that development should not be continued longer."(p191)
The numerous film developers listed in the chapter are all given as recipes, each with an 'ID' number (I have only ever used ID-11, essentially the same as Kodak's D76), demonstrating how common it was to make up these from their constituent ingredients, although a few are mentioned as being available in powder form. The list of formulae and their uses are very useful if one wants to make up film developers from scratch. The only developer listed as being available in solution is Certinal "a highly concentrated developer of the paramidophenol type" which was Ilford's version of Rodinal.
In many references to developing in the Manual, this is usually followed by 'rinsing' rather than the use of an acid stop bath, although it is mentioned in the 'Fixing, Washing, Drying' chapter. This is followed by a very detailed chapter on 'Faults in Negatives', with a table and illustrations to help diagnosis. The description of fault number 56 below is, unintentionally or not, wryly amusing.

There are chapters on 'After-treatment of Negatives' and 'Preparation of Negatives for Printing'; after treatment includes intensification and reduction, and there are intensifying solutions formulae listed that contain potassium cyanide, mercuric chloride/iodide, and uranium nitrate, none of which would be recommended for use today. In comparison, Silverprint currently list chromium intensifier and selenium toner as intensifiers. Later in the manual, there is a description of how to make a mercury-vapour enlarger using asbestos sheets (p297). Also alarming, but less dangerous, is the section on hand after-treatment of negatives, which includes knife work directly on the emulsion, as well as the use of mild abrasives to reduce density, pencil and stump and watercolour for retouching, and varnishing the negative prior to working on it. One sees photographs from the mid-20th century, especially portraits, which have been extensively retouched; digital retouching is often, although not always, more subtle.
At the time of publication, gaslight paper was still in use, as well as bromide and chlorobromide papers. Plastika (a paper with a "characteristic curve with a long straight line") and Ilford Multigrade paper were both recent introductions. For each, formulae are given for making up different paper developers, just as in the chapter on developing films. Although attention is paid to contact printing, the Manual states that "enlarging has become the general practice among amateur photographers. In some degree the tendency has been fostered, or even forced, by the increasing popularity of small cameras." As well as describing the printing process, alternative processes, such as gum bichromate, carbon printing, bromoil are all discussed, and a whole chapter is given over to the making of lantern slides. This chapter lists three different types of lantern plate: Gaslight Lantern plates, Warm Black Lantern plates, and Special Lantern plates, the last type I've used successfully shot in a camera to obtain a negative (for the pinhole photography day earlier this year, but also at night); the Special Lantern plates are "the most rapid, though they are very slow in comparison with plates made for negative work" (p354).
The Manual ends with 'Useful Formulae' which collates those used through the book into one chapter, and appendices on reversal processing and 'Special Photographic Effects' describing unusual phenomena such as the Sabattier effect.
Although not necessarily a book to be read from cover to cover, the Ilford Manual of Photography must have been one of the most comprehensive reference works on photography ever published, and certainly in the middle years of the 20th century it was still possible to contain almost everything a professional, commercial or serious amateur photographer would need to know in a single volume.
References
The Ilford Manual of Photography, edited by James Mitchell, M.A., B.Sc., F.R.P.S., 1946
The Manual of Photography on Photomemorabilia
Photocornucopia: The Ilford Manual of Photography