|
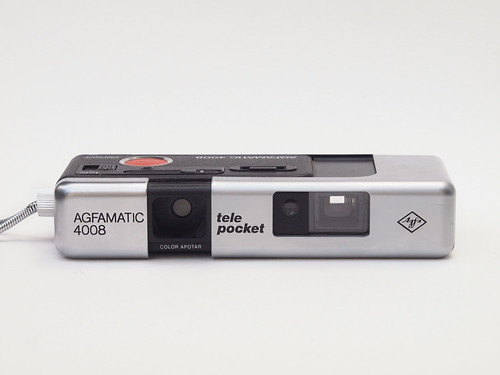
| Agfa Agfamatic 4008 tele pocket sensor |
Thanks to Lomography's reintroduction and support of 110 film, this subminiature drop-in, cartridge load format–despite all its drawbacks–is not obsolete as it once was, and looked to remain, at some point in the 2000s when Kodak and Fuji stopped making 110 film. Early last year, during a period of pandemic restrictions, I found myself looking at Agfa's range of 110 cameras from the 1970s again. I had used the
Agfa Optima 6000 Pocket Sensor camera for a while, but had ultimately sold it on; looking back to that post, I realise that I'd only used reloaded 110 cartridges with the camera, and no new 110 film. This was partly, I think, due to having never been quite satisfied with Lomography's black and white Orca film when I'd used it before–as well as not using colour film, leaving unexplored other film options with the camera.
In my post on the Optima 6000 pocket sensor I'd written a bit about Agfa's enthusiastic embrace of the 110 format, but neglected to mention Agfa's approach to design in the 1970s: this, I suspect, is part of the reason for the appeal of their cameras, and mention should be made of Agfa's employment of the Schlagheck & Schultes Design studio. Alfred Klomp, writing about the Optima Sensor cameras, sums it up thus:
"...the Agfa Optima marks the end of the engineer's era and the onset of the industrial designer's. Around the time of the Optima series, industrial design became a serious factor in consumer products. Flatly technical solutions didn't cut it anymore, because with increasing competition on price, manufacturers couldn't afford to disregard their users's experience. Had camera manufacturing always been the realm of the small mechanical industry, now the factories discovered that it was profitable to listen to consumers. Hence the industrial design approach. [...]
I think Agfa's idea was to design a line of cameras without reference to any mechanical heritage or past. They emancipated the camera as something technical/mechanical and gave it to the users as a friendly household instrument."
Regardless of precisely whatever it was that drew me back to Agfa's 110 cameras, online, I found a fairly inexpensive Agfamatic 4008 tele pocket sensor. The 4000 models are towards the upper end of Agfa's range, with features that put them fairly above the usual 110 box-camera equivalents (usually a fixed focus lens, one or two aperture settings, and/or one or two shutter speeds), but below the 5000 and 6000 cameras. This also makes the 4000 cameras shorter than the 5000 and 6000s, with the Agfamatic 4008 tele pocket sensor 12cm long when closed, compared to the 6000 at 13.2cm.
 |
| Front view, opened for use |
The first iteration, the 4000 model, takes flash cubes; this was updated to take a flip-flash, and named 4008 (presumably the eight in the name stands for the eight bulbs in the flip-flash unit). The final version of the camera from 1975 has 'tele pocket' appended to its name, and, as this suggests, it features an additional telephoto lens, and is also a little longer in the body than the other 4000 models (there was also a later 4000 flash pocket model). Having been unable to find a manual for the tele pocket version of the Agfamatic 4008, there is conflicting information online about its precise technical specifications. Many sites describe it as being 'the same' as the Agfamatic 4008 pocket sensor with the addition of the telephoto lens: the
4008 pocket version manual states a shutter speed range of 1/500th to 30 seconds; the lens is not described, but online, this is given as a 26mm f6.3 Color Apotar name. For the 4008 tele pocket model,
Camera-Wiki gives an aperture of f5.6 with a focal length of 27mm (the additional lens being 47mm and f5.6) and a shutter speed range of 1/1000th to 15 seconds - but having timed the longest exposure (with the shutter closing again–see comments about night photography below), this is 30 seconds. Apart from the telephoto lens however, it
is a different camera from the non-tele 4008: notably, the focus scale itself is different (which might suggest the possibility of a different lens) close focus being 1.2 metres; the sliding focus scale has markings at distances from 1.5, 2, 3, 5, and infinity. The non-tele model has just three settings with pictograms for 5m-infinity (a mountain), 2-5m (two people) and 1-2m (one person): on the other side of this scale, it's marked 4, 2, 1 metres for flash. Intriguingly, the
Apphotnum website describes the Agfamatic 4008 tele pocket as a
"special model based on 4008 but with some elements borrowed to 5008 and 6008"–without stating what those elements are. Given the slightly more detailed focus scale on the 4008 tele pocket model
, one might speculate that this might be helpful for more accurately focussing a slightly faster lens, especially as the aperture is fixed
(the sliding scale is also longer–allowing for more accurate intermediate positions)
; in addition, having a slightly faster lens might also call for a higher top speed of 1/1000th (as well as a shorter long exposure limit) - however, without knowing the true specifications this is just speculation.
Although neither f6.3 nor f5.6 is especially fast, either would be a large improvement on simpler 110 cameras which commonly feature f9, f11 or smaller aperture fixed focus lenses.
 |
Top view showing focus slider, cable release thread, telephoto lens selector,
flipflash socket and sensor shutter release |
As can be seen from the image above, most of the user controls are located on the top right of the camera, easily accessible by fingers on the user's right hand: the big orange sensor shutter release, the focus slider and selector for the telephoto lens. This switches between the normal lens, behind the shutter, to the telephoto lens, which swings in front of the shutter. The viewfinder also changes, with an additional hinged component for the wider-angle view that the normal lens requires. There is a cable release socket between the focus scale and shutter release, useful given the camera's impressive shutter speed range–whether this runs from 1/500th to 30 seconds, or from 1/1000th to 15 seconds. Partially depressing the shutter button, a red light inside the viewfinder shows as a long exposure warning if exposure is below 1/30th. The manual for the non-tele version of the 4008 also describes holding a finger over the small CDS meter and partially depressing the button for a battery check. The viewfinder itself has a simple frame outline with a single mark for parallax. On the bottom of the camera is a sliding catch to unlock the camera for opening; typically, frame advance is by opening and closing the camera. The catch on the bottom can be put in the 'close' position while the camera is open, which means that when the camera is pushed into the closed position, it locks closed, rather than (for example) having to hold the camera closed and then sliding the catch back to lock it. To load the camera, a small sliding catch releases the back of the camera.
 |
| Battery cover opened, showing LR44 instead of V625U batteries |
The camera takes two V625U batteries, hidden behind the name and model number panel on the front of the camera, with a subtle finger grip to slide this open. I tried two LR44 button cell batteries when I first received the camera, and these seem to work perfectly well, and, despite being a slightly different shape from the V625U, the nature of the battery compartment design with two angled, sprung contacts, secures these without any need to adapt them (such as with a washer or other spacer that would need to be conductive). Incidentally, the shutter will not open to expose film without batteries inserted, although there's clearly both a mechanical element as well as an electronic one to the shutter: pressing the shutter release without batteries inserted does trip the shutter–which appears to be a guillotine-type–and one blade can be seen replacing another, which makes a noise, deceptive perhaps, and the film can be advanced to cock the shutter again–but the lens remains covered.
 |
| Detail of accessory shoe, wrist strap and tripod socket |
One final feature on the camera is its accessory shoe, which can be used to mount the dedicated Agfalux 400T electronic flash unit, with a cable that plugs into the flipflash socket; the accessory shoe is also used to attach the wrist strap, which fixes into a plastic tab via a screw fitting inserted into the accessory shoe: this doubles as a tripod socket.
 |
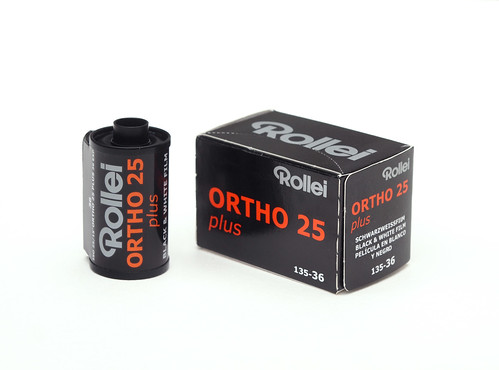
| Agfamatic 4008 with Lomography Orca film |
I first used the Agfamatic 4008 during the period of restrictions early in 2021 while still working from home, but leaving the house for exercise, walking and cycling. I tested the camera with some reloaded 16mm film to make sure everything worked, and then shot cartridges of both Lomography Orca film and expired Fukkatsu black and white film. The Fukkatsu film had a "PROCCESS [sic] BEFORE" date of 2018, and is marked 100 ISO–but is packaged in a cartridge with a high film speed tab. This isn't an important concern for many simple 110 format cameras which do not sense the film speed but, for those which do–like the Agfamatic 4008–the film would therefore be underexposed. When Kodak designed the 110 cartridge, they included the possibility of indicating film speed by the length of the tab at one end of the cartridge, without specifying what ISO these referred to, leaving it to camera manufacturers to designate: essentially there is a low ISO cartridge tab (long) and a high ISO tab (short). There's very little information online about Fukkatsu films (it's not listed on the Massive Dev Chart; the box does state "PROCCESS [sic] D-76/ID-11" but without any times), and certainly no times for a two-stop push, and, as a result, this was left on a shelf undeveloped for months.
 |
| Fukkatsu 110 Black & White Film |
In late December, looking for a camera and some film to put in a pocket for a cycle ride, I went back to the Agfamatic 4008; I had a cartridge of Lomography Orca film, but, as the light levels were low, with short days of overcast weather, I cut the film speed tab on the Orca cartridge to expose it as a high speed film. When it came to developing the Orca film, like the Fukkatsu film, the Massive Dev Chart wasn't much help in terms of times, with only entries for Orca at box speed in Rodinal, my preferred developer. I used Adox Adonal (a Rodinal clone) at a dilution of 1+25 for 14 minutes at 20ºC, an educated guess for a two-stop push. I also loaded the tank with the roll of Fukkatsu film shot earlier in the year just to see what the results were with the same development time as the Orca film. Incidentally, the Fukkatsu cartridge came apart very easily after scoring with a knife, to remove the film in the dark. I've used Lomography Orca before, but have generally been underwhelmed by the film in the past; when scanning the negatives after pushing the film, I was pleasantly surprised by the results.
 |
| Lomography Orca film, pushed two stops |
The estimated development time worked well enough, and the film scanned quite easily; any increase in contrast was not especially discernible given the low-level, low-contrast lighting conditions. Ultimately, the Lomography Orca film when pushed gave the best results with the camera, and I'd certainly expose and develop the film in this way in future. The extended development time also worked for the Fukkatsu film exposed months earlier.
 |
| Fukkatsu B&W film, pushed two stops |
For a second roll of the Fukkatsu film, I wanted to expose it at the right exposure index, so needed a way for the camera to recognise the cassette as being a low ISO film. As a simple expedient, I cut a short length from a wooden skewer and taped it at the bottom of the tab, which would connect to the button inside the camera.
 |
| Fukkatsu 110 cartridges, front cartridge (left) modified for low film speed |
When I developed this roll, I found that the focus seemed a little off on many of the frames. This could have been user error, but there were a few shots that would have been set to infinity focus (such as in the image below), and these were very soft. I suspect that the piece of wood taped to the cassette end upset the lens-to-film plane distance a small amount, being a little thicker than the cassette on its own (as a consequence of the format's design, the tolerances of using paper-backed film inside the plastic cassette is in itself not ideal in this regard). A better approach may have been to simply reload the film into a properly-tabbed 110 cartridge.
 |
| Fukkatsu B&W film at box speed |
I also used some Kodak Plus-X, reloaded into a slow-film speed tabbed cassette. Like many 110 cameras, the Agfamatic 4008 does need the format's single perforation for each frame: reloading the cassette with double perforated 16mm film means that the internal pin locates each perforation, preventing the film from advancing any further, so, to avoid overlapping exposures, a second 'blank' shot needs to be taken to advance the film sufficiently. With unperforated film, the camera's lens does not cock, and the film will wind all the way through without stopping.
 |
| Kodak Plus-X in reloaded 110 cartridge |
Using double perforated film, the perforations do show prominently at the top and bottom of the frame. I did get some overlapping exposures, and some in which I did not cover the lens enough when making the second exposure. Reloading 110 cartridges with 16mm film does make use of the whole negative area, without the pre-exposed frames of the 110 format; with single perforated film, and with cropping these out, very little of the image area would be lost in relation to a pre-exposed 110 frame.
 |
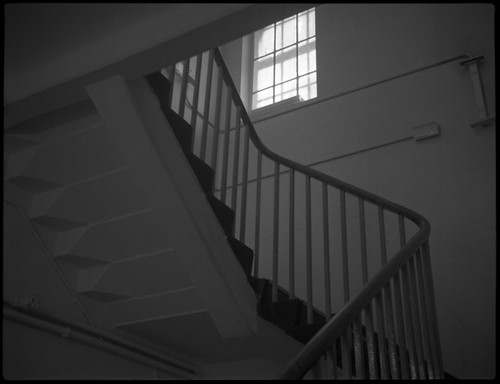
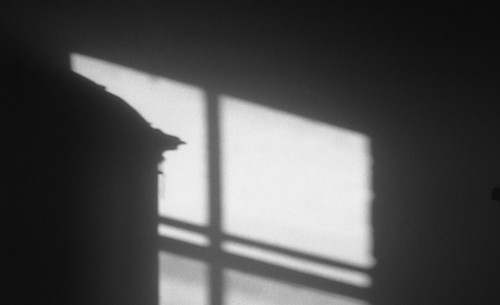
| Long exposure with Lomography Orca film (pushed two stops) |
Given the Agfamatic 4008's shutter speed range, I wanted to test long exposures with the camera. With relatively low light, this seemed to work pretty well: I made some test exposures at night, under moderately low interior lighting, placing the camera on a table for stability rather than a tripod, and could hear the lens open and close with exposures measured in seconds, as in the image above; taking photographs outside at night with the camera, I found that the shutter stayed open. This may
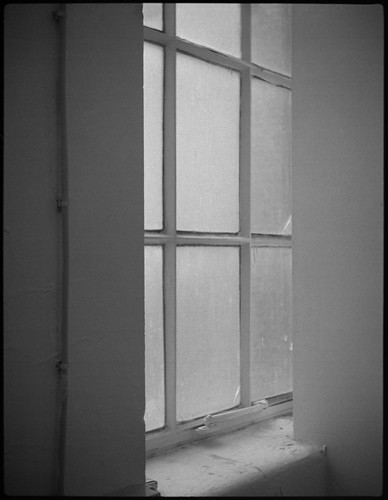
possibly be intentional, an effective 'B' setting if the exposure is longer than 30 seconds, but the shutter only closes when advancing the film–which is very hard, if not impossible to do without moving the camera and this showing up in the resulting image, as seen below with the light trails (there is also a small amount of camera shake). However, with care, it is possible to get sufficiently good night shots with the Agfamatic 4008 as seen in the second image below.
 |
| Long exposure with Lomography Orca film at box speed |
 |
| Long exposure with Fukkatsu B&W film at box speed |
The one feature of the Agfamatic 4008 tele pocket sensor I've left to last is the telephoto lens: on my camera, selecting this simply resulted in out of focus images, as in the comparison of the two frames below. Initially I did wonder whether, when engaging this lens, the camera's focus lever had to be set at
different distances from the normal lens, but there are no markings for this, which one would expect if this was intentional. Despite the possibility of an effective 'B' setting as described above, it's impossible to keep the shutter open to check how the focus works with the telephoto lens: ideally, one could use tape in the back of the open camera and a loupe, but, having tried covering the light sensor to get the shutter to stick open, it still closes again shortly afterwards if it's in an environment bright enough to be able to examine the camera.
 |
| Lomography Orca film (box speed) with normal lens |
 |
| Lomography Orca film (box speed) with telephoto lens |
The out of focus telephoto lens is a bit of a puzzle: sliding the focus scale, the telephoto lens clearly moves with the scale, but there does not appear to be any means to adjust the lens itself. It's possible that the telephoto lens in my camera may have always been out of registration, but, short of taking it apart to investigate, this is unknowable (the camera doesn't have any damage to suggest a significant knock or drop which might have caused such a problem). Putting aside the unusable telephoto lens, the camera itself is one of the better 110 cameras around (even without the telephoto lens, the more accurate focussing scale might make it preferable to the standard 4008 model), and Agfamatics of all kinds seem to be very plentiful on the secondhand market. It's clearly not in the same league as the Pentax 110 Auto, but still a good camera for a once all-but-obsolete film format which, unlikely as it seems, is still catered for in 2022.
 |
| Agfa Agfamatic 4008 tele pocket sensor with Fukkatsu B&W film at box speed |
 |
Agfa Agfamatic 4008 tele pocket sensor with Fukkatsu B&W film at box speed
|
 |
| Agfa Agfamatic 4008 tele pocket sensor with Lomography Orca at box speed |
 |
Agfa Agfamatic 4008 tele pocket sensor with Lomography Orca at box speed
|
 |
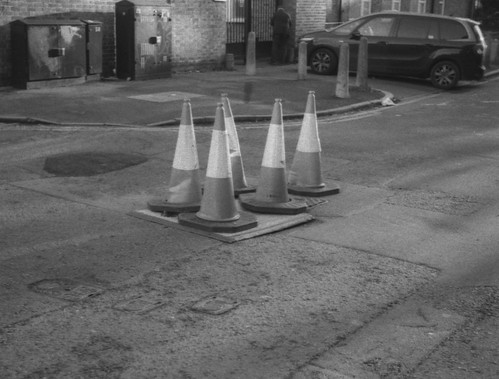
| Agfa Agfamatic 4008 tele pocket sensor with Plus-X |
 |
| Agfa Agfamatic 4008 tele pocket sensor with Plus-X |
 |
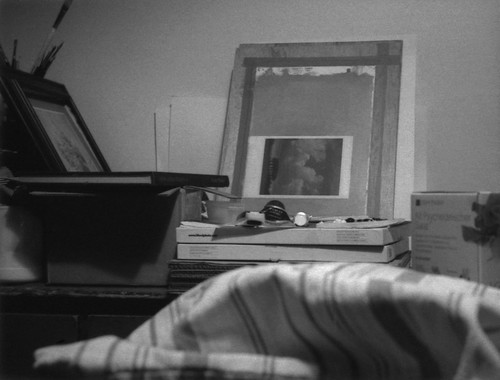
| Agfa Agfamatic 4008 tele pocket sensor with push-processed Fukkatsu B&W film |
 |
Agfa Agfamatic 4008 tele pocket sensor with push-processed Fukkatsu B&W film
|
 |
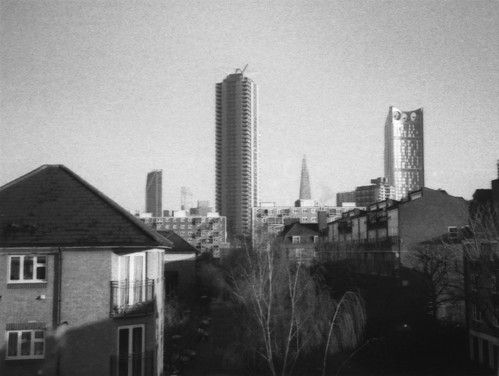
Agfa Agfamatic 4008 tele pocket sensor with push-processed Lomography Orca film
|
 |
Agfa Agfamatic 4008 tele pocket sensor with push-processed Lomography Orca film
|
 |
Agfa Agfamatic 4008 tele pocket sensor with push-processed Lomography Orca film
|
Sources/further reading: