 |
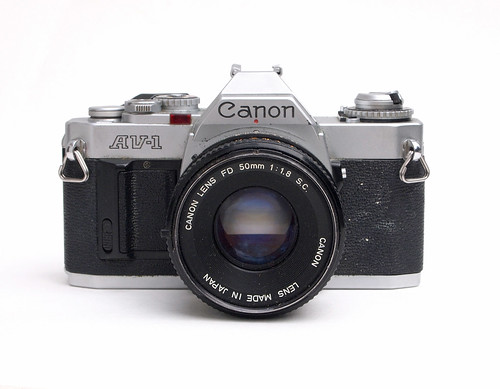
| Canon AV-1 with 50mm f1.8 lens |
Writing about the
Canon A-1 SLR camera for my last post prompted my partner to find her old AV-1. This hadn't been used for well over ten years, and I had looked at the camera some time ago to find it apparently inoperable. The battery inside the camera was dead, but fortunately not corroded. Like the A-1, the AV-1 will not work without a battery, but on inserting a new battery, although the meter needle responded to light, the shutter would not fire, nor could the film advance lever be moved. At the time, it seemed like there was little else to do but put the camera away again as a 'non-shooter'.
The
Canon AV-1 appeared in 1979, one year after the A-1, and three years after the AE-1, which it clearly draws upon, although there are a few similarities to the higher priced and fully-featured A-1. Canon's
Camera Museum website describes the rationale behind the development of the AV-1:
Even though the camera would cost more, shutter speed-priority AE cameras were important to Canon since users could comprehend shutter speeds easier than aperture settings. However, in America and other overseas markets, aperture-priority AE 35mm cameras were in the majority.
Overseas distributors also clamored for an aperture-priority AE model. Canon responded with the AV-1.
Named for
Aperture Value, the Canon AV-1 shared much of the AE-1's design and construction, including the use of metalised plastics in its build, to make it both lighter and cheaper (it's around 200g lighter than the more robustly made A-1). However, the AV-1 isn't Canon's aperture-priority version of the AE-1: the design and functions of the camera have been further simplified. Although it has the same EV range (1 to 18 EV at 100 ISO), it lacks the top film speed setting of 3200, 1600 being the maximum (this is set on a dial around the rewind crank, more like the A-1's design). The exposure preview button on the side of the lens mount is missing, although the backlight correction button remains, giving an exposure adjustment of +1.5 stop. Exposure preview is by partially depressing the shutter release, which activates the meter and gives a preview of the shutter speed in the viewfinder, with a needle indicating a range from 2 seconds to 1/1000, with under- and overexposure indicated at either end of the scale. 1/30th is marked with a black bar: with the needle at or below this speed is a warning of camera shake. The stopping down lever is also absent, as is the PC connection for flash. Flash sync is at 1/60th, a separate setting on the mode dial, which has a red-accented 'A' for automatic shutter speed, 'B' and both self-timer and self-timer-with-flash. The red LED on the AV-1's top plate is only used for the self-timer - like the A-1, but unlike the A-1 it's not used for the battery check function as well (pressing the battery check button raises the needle inside the viewfinder). According to prices given on the Canon Camera Museum, in 1979 the AV-1 cost 57,000 yen (with the 'New FD' 50mm f2 lens, designed to be a low-cost prime), as against the AE-1, which three years earlier was 81,000 yen (albeit with the more expensive 50mm f1.4 lens). As a point of comparison, the A-1 was 83,000 yen in 1978
for the body alone - and 114,000 yen with the 50mm f1.4 lens.
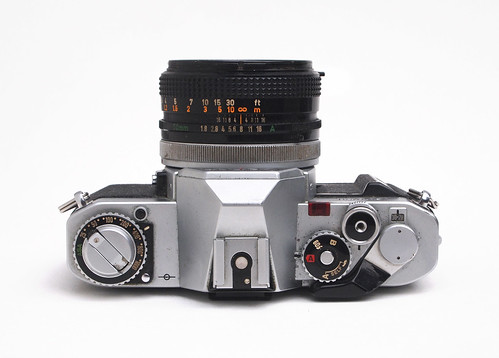 |
| Canon AV-1 with 50mm f1.8 lens |
What made me want to write this blog post, not as a full article or review on the Canon AV-1, was my experience in getting the shutter to fire again and the film advance to work. I searched online about how to free the shutter, and found much about the Canon AE-1, which came up in searches for the AV-1. From this information I had a general idea of what might be wrong, but pictures of the AE-1 with the bottom plate removed showed a slightly different layout. The following steps were what I did to release the shutter after being stuck and left for many years - this was very simple - but as I couldn't find the specific information relating to the AV-1, this may be of some use to others.
The first step is to ensure that the camera has a working battery: the shutter will not fire without one. The AV-1 requires a PX28 battery, like other A series SLRs. With the collar around the shutter release set to A, press the small black battery check button just in front of the film speed dial. If the camera's circuits respond, the needle inside the viewfinder will move, and, according to the manual, it should raise above the black bar next to the 1/30th speed (a weak current may move the needle but it may not be enough the trip the shutter). At this stage the shutter release would not trip the shutter, and neither could the film advance lever be moved. The following description of the steps I took to free the shutter mechanism are to be undertaken with caution and at one's (or one's camera's) own risk.
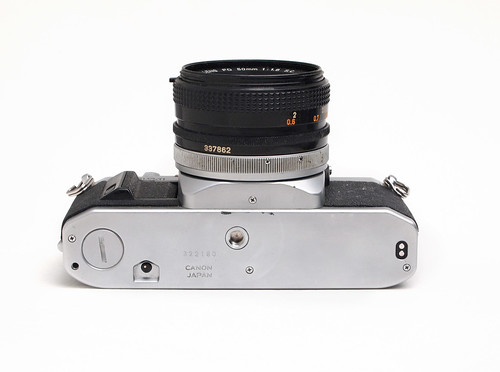 |
| Canon AV-1 bottom plate |
The bottom plate is removed by taking out the three small cross-head screws. The fourth screw below the lens mount is for a separate section of the casing and can remain in place. In reading around problems with the AE-1, it seemed the most common reason for the shutter to be jammed is the magnetic shutter release. In the AE-1, this is easier to access: on the AV-1 it is visible, but somewhat buried: in the image below it is located to the right of the tripod fitting underneath the red and black wires with a transparent plastic cover. The magnet itself has copper coiled around it. Perhaps it would have been best to give the camera a proper CLA and clean the magnet's contacts, but this requires more disassembly. I hoped that I could get the shutter to work again without going any further. At this stage it wasn't entirely clear to me whether the film advance or the shutter was stuck.
 |
| Canon AV-1 bottom plate removed |
With the bottom plate removed it is possible to see whether the stutter is cocked or not. If it is cocked, the magnet circuit is closed: there is a metal release linkage just visible in the image above closing the circuit in contact with the magnet. Using a small screwdriver, I managed to get the shutter to release by forcing the lever on the left hand side (it pivots upwards to the right) which connects the film advance (the large toothed wheel on the left) to the shutter cocking mechanism. The shutter fired once, then stuck again. However by tripping the shutter a few times by forcing the lever with it intermittently sticking, after exercising it enough it stopped getting stuck and I felt confident that the shutter and film advance now worked freely - for the time being. I can't claim this to be an in-depth explanation of how to fix any shutter problems with the AV-1, but it may well be the
first action to take to free a stuck shutter; beyond this step, the next would be to take out the tripod fitting and the black plastic next to it, and possibly the circuit board on the right hand side, in order to access the magnet and clean the surfaces that contact when this closes. The reason for the shutter being jammed may simply have been that it had been stored with the shutter cocked (i.e. wound on) for a number of years: when not in use for some time, it may be best practice to fire the shutter, then remove the battery.
Although the New FD mount lenses appeared at the same time as the Canon AV-1 (Canon Camera Museum: "When this camera appeared, a new type of FD lenses featuring instant mounting/demounting was also introduced"), this particular camera had an
old breech-lock FD lens (although technically both new and old FD lenses are breech-lock, it appears to be common to refer to the new FD lenses as 'bayonet mounting'). With the shutter firing again, I re-attached the lens to find that it jammed the shutter - or more accurately, it prevented the mirror from fully returning somehow. The mirror did return when I partially loosened the breech-ring, and the lens had the same effect when mounted on my A-1. Looking at the old lens on the all-black A-1, I wonder whether the visual design of the New FD lenses were in part inspired by the look or the general design principles of the A-1, even if these lenses were released a year later, along with the AV-1. One oddity of FD lenses with an 'A' setting when used on the AV-1 is that this simply selects the smallest aperture - and meters for it.
Researching the AV-1, I came across
Bob Atkin's website which details Canon's date codes. According to the information listed, the AV-1's body dates to 1979, while my Canon A-1 is a year more recent in manufacture, to 1980. Having got the AV-1 working again, I ran a couple of short rolls of film through the camera, one of
Retropan 320, and
Ilford Mark V just to make sure everything was working as it should. The AV-1 had a 2x macro teleconverter with it, allowing for 1:1 image reproduction, such as in one of the close up images of plants below.
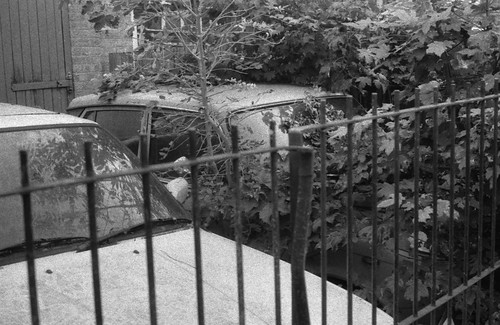 |
| Sample image with f1.8 50mm lens and Foma Retropan 320 |
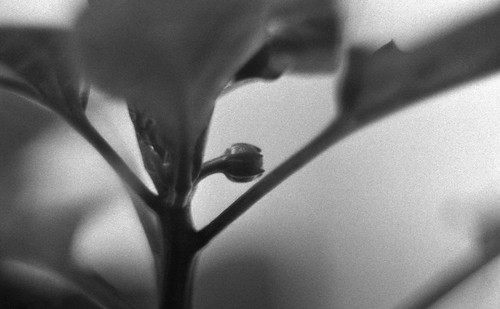 |
| Sample image with f.18 50mm lens and 2x teleconverter on Retropan 320 |
 |
| Sample image with f.18 50mm lens and 2x teleconverter on Retropan 320 |
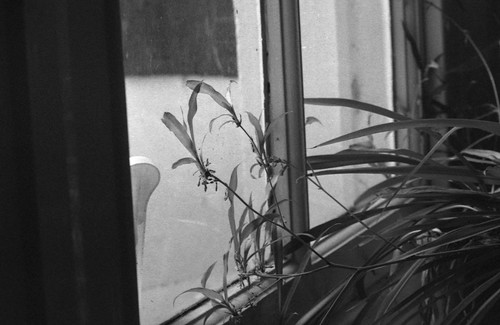 |
| Sample image with f.18 50mm lens and 2x teleconverter on Ilford Mark V |
 |
| Sample image with f.18 50mm lens and 2x teleconverter on Ilford Mark V |
Sources/further reading:
Canon AV-1 manual (PDF)
Photography in Malaysia's Canon AV-1 pages
Fix Old Cameras' AE-1 release magnet video


This was very helpful. I had the exact same issue with the exact same camera. Thanks to your detailed instructions I'm back up and running now.
ReplyDeleteGlad this helped - I think it might be a common problem with cameras of this age especially if they're not used for some time.
DeleteI have the same problem. will try your method to fix it.
ReplyDeleteIt worked. The camera is back in working order.
DeleteThanks man.......
Good to know! Thanks for your comments.
DeleteMany thanks for this! I have inherited a box of cameras which have been stored for many years. I took out the AV1 first and followed your instructions for the jammed mechanism. I had to remove the tripod mount and apply a tiny drop of switch cleaner to the actuator before it fired reliably. There is also a A1 and F1 in the box, hope they are that easy too.
ReplyDeleteThanks for this. It worked for me
ReplyDeleteThanks so much for sharing! I've just saved myself monies and a lengthy wait time to getting my AV-1 repaired. She's firing perfectly now. Although I feel like the shutter was still getting stuck until I kept tripping the circuit by weirdly touching the tiny blue electrical cylinder on the right hand side below the red and orange cables... not sure how that makes sense but either way she's working again! :)
ReplyDeleteGlad to hear that this fix is working for other people too!
DeleteThank you for the detailed explanation. My AV-1 exhibits intermittent cases where only half of a frame is exposed with the unexposed half appearing black in the developed film. Would the above fix resolve this issue? Anyone else experiencing similar issue?
ReplyDeleteHey buddy, just want to say thank you for this guide, it got my jammed AV-1 up and working in no time. All the best!
ReplyDeleteHey there. Ive just come across this and am hopeful that will solve the issue with my AV-1. The only problem being is that I don't know where exactly you are referring to when you mention the metal release linkage so am stuck at the first hurdle - are you able to describe in really basic terms (like by describing their shape or colour for example?) thanks!
ReplyDeleteHi - it's been some time since I've opened up the AV-1, but I think what I describe as the 'metal release linkage' here is what looks like a small white wedge in the image (made out of metal) which sits on top of the magnet which is the orange cylindrical shape behind the red and black wires to the left of a slot head screw between two plastic gears. This - the magnet - has a plastic cover over it which is slightly hazy. If the circuit is closed the metal wedge sits directly on top of the magnet (I presume the battery current acts on the magnet which attracts the metal wedge, which then springs open when there is no current), if the circuit is open there is a gap between the wedge and the magnet. It is not very clear in my photo as I did not want to take the camera apart any further than I needed to, and fixed this at this stage.
DeleteThanks Nicholas, very helpful. I actually go a bit lucky and sorted it before you replied. I was prodding around with a screw driver in the small hole to the bottom right side of the tripod mount (which isn't too far away from where you mentioned) and the shutter did something, seized again, tried again as you mentioned and nows its working. A big thank you to you I can now get back to taking some pictures!
DeleteGlad to hear it!
DeleteHave you tried replacing the battery first? Or try manually moving the left-hand lever at the same time as pushing the wedge?
DeleteThis comment has been removed by a blog administrator.
ReplyDeleteDear fellow AV-1 tinkerer
ReplyDeleteI recently bought a cheap AV-1 clearly advertised as broken, with the best intentions of resurrecting it in the most elegant way afforded to an enthusiastic camera-repair noob. After researching the analogous issue affecting the other A-series siblings, I was fully prepared to find my way under the electromagnet's plastic cover, clean the surfaces, and even possibly somehow oil the lever connected to the metal release linkage/wedge (which I discovered is properly called 'armature')... or so I thought.
First off, the lever is hidden out of sight under the black plastic, which seems to be part of the camera skeleton and impossible to detach without disassembling the whole camera (i.e. starting from the top - a headache even in the more easily serviceable AE-1).
Secondly, opening a flap in the plastic cover to clean the magnet was of no use. In my specimen, the metal release linkage/wedge armature did stick to the electromagnet when cocked, and did release when the shutter button was pressed, but only partially, not far enough to trigger the shutter. Moreover, the plastic cover moved slightly in both cases, as if touching the armature. This led me to conjecture that the plastic cover itself was in the armature's path.
Since the plastic cover was already cut up, I ended up brute forcing it off bit by bit (with no small amount of effort and cold sweat, since it's rather thick, wraps around the magnet, and the whole asembly sits near delicate components such as the electromagnet's thin wires). After a few stutters, the shutter is now clicking away like reborn (and no squeal to speak of).
I'm worried this might cause other issues down the line, since the plastic cover was put there for a reason. I might have to open the bottom and remove debris every now and then. But for the time being, the problem seems to be solved, thanks also to your illustrated write-up and precise descriptions.
Cheers
Hey, just letting you know that this post helped me fix my AV-1 several years ago, and its still shooting today! I'm writing an essay, mentioning the repair and once again, when searching for what I did, I saw this and was very pleased to have stumbled across your page. Thank you!
ReplyDeleteBookmarked
Great tip — simple fixes like what you shared for the Canon AV-1 really make a difference over time. It’s the little adjustments that keep vintage film bodies running smoothly.
ReplyDeleteBy the way, for anyone exploring gear repairs or upgrades (film or digital), check out the camera market lahore — they stock useful tools, accessories, and reliable equipment.