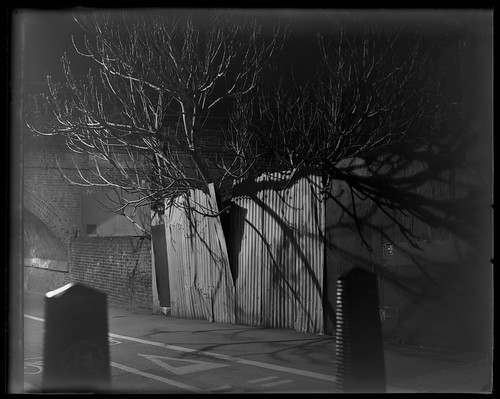
Tuesday, 25 June 2013

Rollei ATO 2.1

Rollei ATO 2.1 Supergraphic film
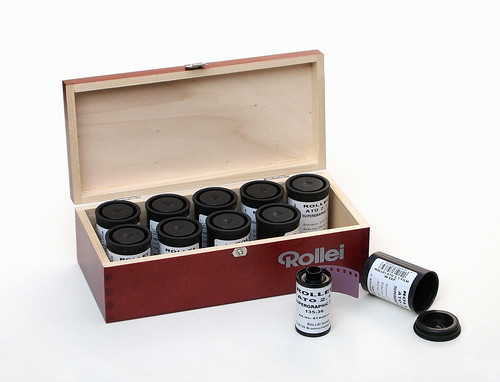
The emulsion marketed as Rollei ATO Supergraphic 2.1 used to be available as sheet film only, under the label of Maco Genius Film, but recently Maco has made it available in 35mm and 120 formats. ATO stands for Advanced Technical Orthographic, which might lead one to suppose it's an orthographic version of Rollei ATP, suggested as a replacement film for Kodak Technical Pan. However, these are both more versatile films which can be used for pictorial contrast without too much difficulty. I've had some experience with high contrast technical films, such as the Kodagraph Ortho film and Ilfodata HS23, a document film, and the general approach to using such films for continous tone or pictorial contrast is to rate the film with a low exposure index, and then either develop with a low contrast developer, or a highly dilute compensating developer such as Rodinal, which I use. I have found Rollei ATO 2.1 more difficult to control than the other films. Maco describe it as a 'true lithfilm' and to get continous tone negatives from it requires careful attention to both exposure and development. However, the film is cheap (I bought a box of ten films with an expiry date of 08/12 for €35 from macodirect.de ) and there are some advantages to being able to handle a film under a safelight.

Nominally rated 25 ISO, (although FirstCall post its speed at 32 ISO), with Rodinal, the Massive Dev Chart recommends 1 ISO and a dilution of 1:300. Maco recommend their own Rollei RLC Low Contrast film developer for pictorial contrast, or for 'normal' development (i.e. a very high contrast, lith-film look), Rollei RHC High Contrast document developer.

Rollei ATO 2.1, exposed at 25, 12, 6, 3, and 1 EI
For a first roll to test the film, I shot it with ratings down to 1 EI, and used Rodinal with a dilution of 1:200, rather than 1:300, as this would mean very low amounts of developer: with a 3-reel Paterson tank, 1:200 works out as 6ml Rodinal to 1200ml water. I kept to the Massive Dev Chart's recommended development time of 12 minutes, using 30 seconds agitation at the beginning, and a couple of inversions every minute. The results look overdeveloped, and also overexposed at 1 EI, but by 25 EI, there is no appreciable detail in the shadows (there is also, as one might expect, grain too fine to be resolved by a relatively inexpensive flatbed scanner). As the highlights still register clearly at 25 EI, it's possible to make high-contrast images with less exposure, if printed (or scanned) appropriately. However, there was a portion of this first film subject to a light leak (which may have been 'light piping' due to the particular type of extremely clear synthetic filmbase used for ATO): this suggested one way to lower the contrast of the film would be pre-exposure.

Rollei ATO 2.1 test roll, showing light leak
The principle of pre-exposure is to determine a minimum exposure where the film gains density, and use this to expose the film uniformly, then take the photograph as normal. This has the effect of raising the shadow values, while having no appreciable effect on midtones or highlights. Pre-exposure can be achieved by exposing the film in camera to a featureless, uniform surface such as a grey card which fills the entire frame before taking the shot. This is difficult to do while the film is in a 35mm camera as most do not permit double exposures, so I exposed short lengths of the film in the darkroom using an enlarger after doing a control test. This is easy to do as it's an orthochromatic film and can be handled with a red safelight. (I also spooled some lengths of the film with 127 backing paper for the upcoming 127 Day next month).

For a second test, I shot two rolls at the same time, one pre-exposed in the darkroom. Again, I used a full range of exposure indexes: 1, 2, 4, 8, 16, 32, 64 and also 25 EI. I developed these test rolls in Rodinal 1:200 again, but reduced the time to 10 minutes at 20ºC (I also used water instead of an acidic stop bath, as the emulsion on the first roll seems to have damaged easily). The results were better, and the pre-exposure did have the desired effect of raising the shadow values. In the examples below, the pre-exposed film is on the right of each pair.

Rollei ATO 2.1 exposed at 8 EI
Rollei ATO 2.1 exposed at 16 EI
Rollei ATO 2.1 exposed at 32 EI
As I did want to try the film with Rodinal diluted 1:300, I shot another roll, split in two lengths, and pre-exposed one. To develop the film I used 4ml Rodinal to 1200ml water. Compared to my previous test, the results are disappointing. I had hoped that increasing the dilution might lower ATO's innate contrast further, but instead (or perhaps as well) the negatives are extremely thin, even in the highlight areas. This may be that there was not enough Rodinal in the working solution: as mentioned in my post on stand development, Agfa recommended a minimum amount of 10ml Rodinal per film, which is conservative, as manufacturers usually are; I've found 6ml gives sufficiently consistent results. At this point I did feel frustrated at not quite getting a working combination of exposure and development.

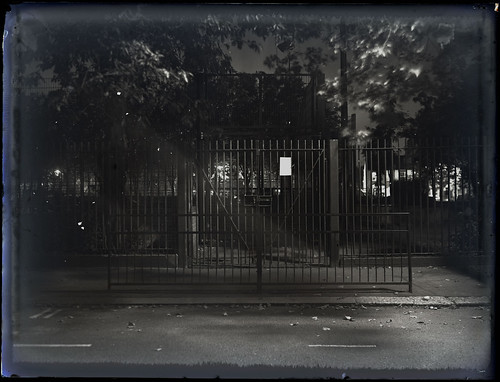
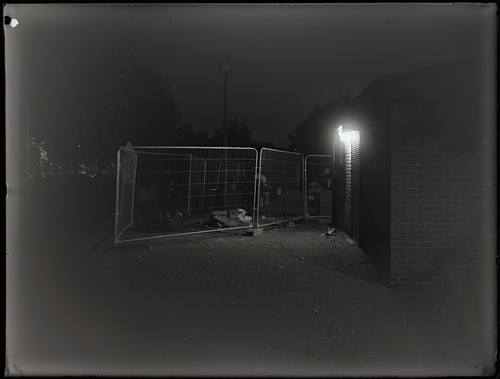
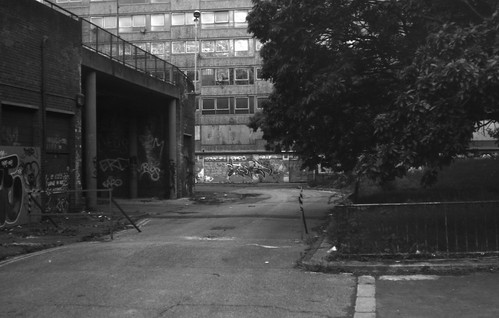
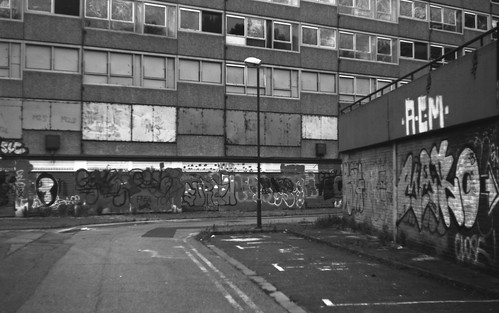
Heygate Estate, Rollei ATO 2.1 at 25 EI
Heygate Estate, Rollei ATO 2.1 at 25 EI with pre-exposure
For a fourth roll of film, pre-exposed in the darkroom and shot at 25 EI (with some bracketing), I went back to using Rodinal with a dilution of 1:200, and ideally I would have used 10 minutes at 20ºC, but as the weather was warm and humid, the water from the darkroom tap was 22ºC, even after letting it run for some time. I reduced the development to 8 minutes accordingly, and the results below compare favourably with those using a dilution of 1:300. The high contrast of the film does make shooting any scene of normal contrast problematic if one wants to achieve detail in shadow areas without losing it in the highlights. With a minimum of pre-exposure, I've found this possible at 25 EI, although using an exposure index of 16, 12, or even 10 might provide better results. For hand-held shots using the film with available light, the slow speed of Rollei ATO means shooting at a wide aperture and relatively slow speeds (I generally used 1/50th and no smaller aperture than f4). However, I should finish by stating that this whole post is based on achieving continuous tone negatives from this film, which is not what Rollei ATO 2.1 is designed for.

Heygate Estate, Rollei ATO 2.1 at 25 EI with pre-exposure

Thursday, 13 June 2013

'126 Day'

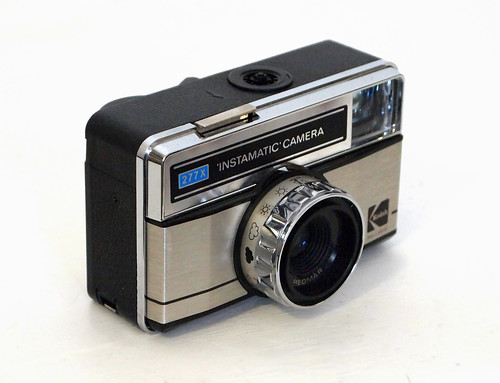
Kodak Instamatic 277X Camera
Like the '127 days' to encourage the use of the 127 format, yesterday, 12th June, for a '126 day', I shot the last 126 film left from those I had bought at a Paris flea market. I had previously used one of the films in a Kodak Instamatic 50, and found all the results underexposed. As the 126 format was designed with inexpensive snapshot cameras in mind, most have a limited capacity to adjust settings for exposure, but to get results from a colour film nearly forty years old, I wanted to increase the exposure to counter the film's inevitable loss of sensitivity.  I chose to use the Instamatic 277X above in preference to the 50 (which has just two shutter speeds), as this has an adjustable aperture. Around the lens is a band with pictograms for lighting conditions on one side (from 'beach' to 'dark cloud'), and distances for flash on the other: turning this either way has the effect of opening the aperture, which is controlled by two blades giving a square aperture when in the central position, stopped down.

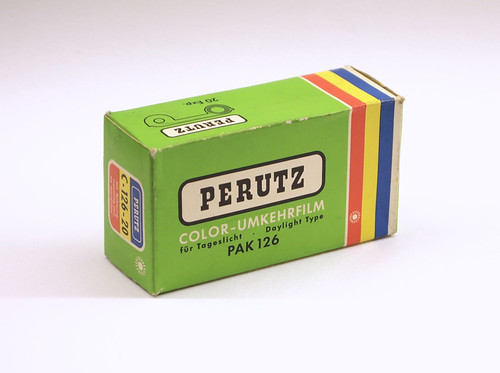
Perutz Daylight Type Colour Reversal Film
I used Perutz Daylight Type Colour Reversal Film, which has a develop before date of May 1974. Originally 64 ASA, I shot the whole film with the camera's aperture at its widest setting. I had wanted to shoot the film in full sunlight, but such was the weather yesterday that I simply went for a walk and tried to shot the frames when gaps in the clouds appeared.

As colour reversal, the Perutz film was originally for slides. The film was 'process paid' and the box contains an envelope to return the film to Perutz for processing, no longer a possibility. The film also requires different chemistry to the E6 reversal process still in use today, as the Perutz film was made for Agfa's C18 process (Perutz, a photographic company founded in the 19th century, was bought out by Agfa in 1960s). Incidentally, there's an advert for Perutz slide film on YouTube : http://www.youtube.com/watch?v=sEYv_pbmcv4

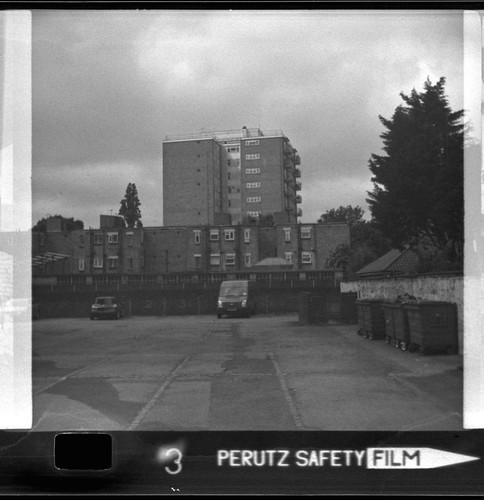
Rather than attempt to develop the film as colour reversal film, it was easier to cross-process it as a black and white negative film. Inside the 126 plastic cartridge is a roll of paper-backed film on a plastic core, rather like any older rollfilm format. The film is the same width as 35mm, which means that it can be put onto a 35mm spool for developing. I used stand development with Rodinal diluted 1:100, for 1 hour. Once developed, the film has a heavy yellow-green cast, but, by giving the film as much exposure as possible, this has resulted in usable negatives.


Recent Glass Plate Work - part two

Ensign Folding Klito de Luxe No.9
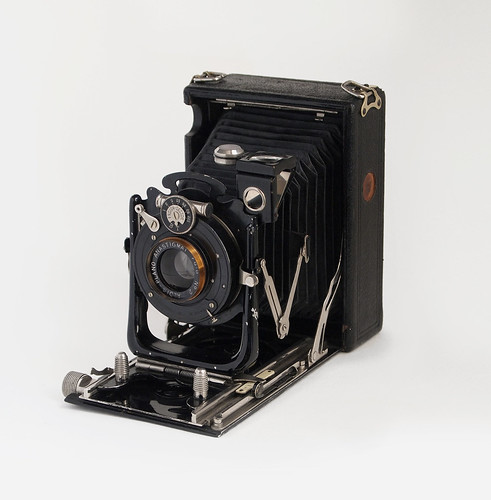
Over the past few months of looking out for unused vintage photographic plates, I have noticed that the most common size of plates to find in online auctions (in the UK at least) are in 'quarter-plate' format (3 1/4x4 1/4 inch/8.2x10.8cm). Smaller formats, like 6.5x9cm and their Imperial equivalent are also relatively common, while 4x5 inch plates are rare in comparison. I had been intending to make adaptors for my 4x5 format holders to fit the quarter-plate size, but it was as easy to buy a camera in the right format specifically to shoot the plates: the Ensign Folding Klito de Luxe No.9. This would have been a fairly well-featured hand-and-stand camera of its time. My model has an Aldis-Plano Anastigmat f6.8 lens in an Ensign-Sector everset shutter. The camera features double extension bellows, held by the distinctive hinged metal arms at each side, significant front rise and fall, and front cross movements.

Ilford G.30 Chromatic plate, Ensign Folding Klito
With the Ensign Folding Klito, I loaded a number of plate holders to test plates from some of the already open boxes in the quarter-plate size. Apart from the Ilford G.30 Chromatic plate, which I shot as a single exposure based on my previous experience of the plates (the results were more fogged than the other boxes I used), I made graduated tests with successive exposures on each plate. FP4 first appeared as a plate emulsion in 1955, and as Ilford's packaging changed around 1960, these plates could be dated to 1955-60 (Ilford didn't produce FP4 for roll film until 1968 - and according to Photomemorablia this was not the same emulsion as the plate version: the plates were rated 160 ASA post-1960, unlike the rollfilm FP4, which remains 125 ISO to this day in its 'Plus' iteration). For this test I rated the plate at 40, half its pre-1960 speed rating, and took four successive exposures.

Ilford FP4 plate, Ensign Folding Klito
I also had a box of Imperial Special Rapid plates, the test of which did not come out, and two boxes of Kodak plates, Kodak Orthochromatic plates and P.1200 Super Panchro Press. The Orthochromatic plate, below, was partially fogged from exposure to light: the dark diagonal line in the lower left of the picture is a shadow from the cardboard runner that usually holds the plates together in pairs (the rest of the box may be in better condition). The P.1200 Super Panchro Press plates have a handwritten date on the box '11/04/61'; the plate test below is fairly unpromising.

Kodak Orthochromatic plate, Ensign Klito
Kodak P.1200 Panchro-Press plate, Ensign Klito
Having shot the tests, I swapped the original Aldis-Plano Anastigmat f6.8, for a faster lens (to aid focussing in low light), an f4.5 Dominar from an Ica Ideal III, which, unusually for a 6.5x9cm camera, has a 120mm lens rather than the standard 105mm focal length for the 6x9 format.

Ensign Folding Klito de Luxe No.9 with Ica Dominar lens
Entrance to a Park, FP4 plate, Ensign Klito with Ica Dominar lens
Park at Night, Ilford G.30 Chromatic plate, Ensign Klito with Ica Dominar lens

In same lot as the quarter-plate FP4 and G.30 plates that I've tested and used with the Ensign Klito above, there were three boxes of plates, which didn't have a size on them, but were in slightly larger boxes than the others. These were 9x12cm plates, which I shot with a Voigtländer Avus with a f4.5 Skopar lens; I've also got a Kodak Recomar 33, but this has a slower lens, and less suited to night photography.

The three boxes (all previously opened) contained Barnet Line-Tone (Thin Film) plates, Ilford H.P.3 and Ilford Soft Gradation Panchromatic plates. The Barnet Line-Tone plates were too heavily fogged to scan, although an image was discernable against a bright light, from three successive exposures at 10 EI.

H.P.3 - Hypersensitve Panchromatic plates were introduced in 1943. Before the 1960 change in meter settings these were rated at 200 ASA. The box style suggests these plates are from the late 1940s to the 1950s. According to Silver By The Ton, HP4 was first produced in rollfilm as early as 1960 and sheet film in 1964: it may not have been produced as a glass plate, and it doesn't appear in the plates list in the Appendix of Silver By The Ton. The Technical Information Sheet for HP3 plates from the Ilford Technical Information Book is dated 1961, so HP3 plates were produced alongside HP4 in rollfilm for a period. For the test below, I metered for 100 EI, and took four successive exposures.

Soft Gradation Panchromatic plates were introduced by Ilford in 1928. This emulsion was later given the designation R.10, and post-1960 were rated at 100 ASA. These were the first plates I shot last year, in a smaller size, and gave good results. The box of the 9x12cm Soft Gradation Panchromatic plates has an earlier packaging style, possibly dating back to the 1940s. I metered for 50 EI, and gave the plate three successive exposures. The results were as good as the same plates from the 1960s, and suggest 25 to 12 as a usable exposure index.

H.P.3 plate test, Voigtländer Avus
Soft Gradation Panchromatic plate test, Voigtländer Avus
For the first 9x12cm glass plates I shot at night, I chose a fairly difficult subject. The lights inside the telephone exchange are very bright in comparison with the exterior of the building, which is lit from streelights partially obscured by trees. This gives the lighting of the scene a look reminiscent of being underwater. The plate might also be a little underexposed due to reciprocity law failure (for comparison I also shot the scene on Fomapan 100 film). Despite the heavily fogged Barnet Line Tone plate, I'd loaded a couple more plateholders with them, so I shot two. I scanned the best result which shows the light from the doorway just visible.
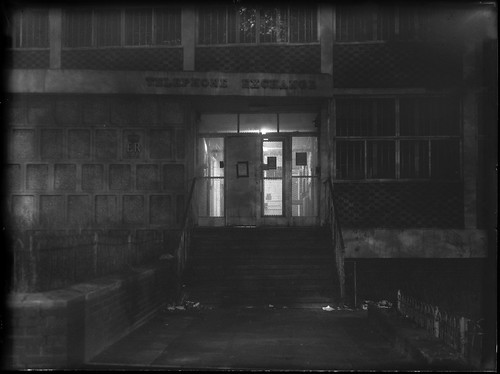
Telephone Exchange, Ilford H.P.3 plate, Voigtländer Avus
Telephone Exchange, Barnet Line-Tone plate, Voigtländer Avus


Sources/Further reading
Silver by the Ton - A History of Ilford Limited 1879-1979, RJ Hercock and GA Jones
Ilford Technical Information Book Volume 2
Wednesday, 29 May 2013

Recent Glass Plate Work - part one

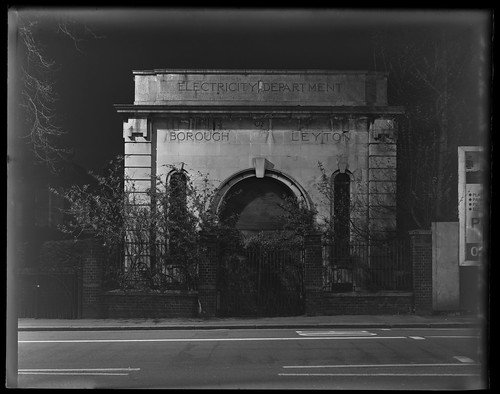
Electricity Substation, MPP Micro-Technical Mk VI, Ilford G.30 Chromatic Plate
Having had some success with using a number of different types of vintage glass plates, I wanted to design a project to use them for. These glass plates are a finite resource, although they do appear frequently in online auctions (photographic plates are still manufactured, but only for very specialist applications, and are prohibitively expensive). So, to use those plates I've already collected, I decided to undertake an ongoing project of urban night photography. There are a couple of examples in my post on Ilford G.30 plates, although it was only when photographing the disused cinema that the idea began to formulate.

Mimosa Porträtyp-Antihalo plate test
With the exception of the Ilford G.30 plates, most of the plates I've used are from previously opened boxes, which does mean that there is a chance that contents may have been exposed to light at some stage in their history. This has only been the case with the Mimosa Porträtyp-Antihalo and Kodak B 40 plates, and it hasn't been all of the plates in the box. The Mimosa plates have nothing to date them securely, but these could be as old as 1930s-40s (the box says these are "Made in Germany" and presumably date from before East and West Germany). I shot a test of these, which did come out with heavy fogging, and a number of Kodak plates. I have been systematically testing the plates in my Icarette L with successive exposures to a get a rough idea of the exposure needed.

Kodak B 40 Fine-Grain Regular plate test
Kodak B.4 Half-Tone plate test
Some of the plates were originally for specialist applications, such as the Kodak B.4 Half-Tone plates, which as the name suggests, are high-contrast; many of the plates are not panchromatic, meaning that they can be loaded under a safelight, useful when there are loose plates in a box, making it easier t to determine which is the emulsion side. The safelight for the B.4 Half-Tone plates is given as 'OB'. Although OB doesn't appear on Kodak's safelight data sheet, all the other 'O' series safelights are yellow. Considering the given safelight for these plates would be yellow, I made a guess that these are blue-sensitive only and loaded the plate under a red safelight. (Given my limited experience of different Kodak plates, panchromatic plates have a 'P' prefix, orthochromatic, 'O', so it would make sense for blue-sensitive to have 'B' - although I have found nothing to confirm this).

Kodak P 300 Special Rapid Panchromatic and P.1600 Panchro-Royal plates
Two previously unopened boxes of plates I've made tests from are Kodak P 300 Special Rapid Panchromatic and P.1600 Panchro-Royal plates. As sealed boxes, these have information sheets inside, useful for the original meter settings and developing times: I've posted the P 300 Special Rapid Panchromatic sheet and the P.1600 Panchro-Royal sheet on Flickr. I've generally been using a starting point of increasing the exposure by 1 or 2 stops for the tests to compensate for the age of the plates, then the succesive exposures provide a more accurate exposure index to shoot with. Although both boxes were sealed, the Panchro-Royal plates have not aged as well as the Special Rapid plates, which are 'tropically hardened': this may or may not have an effect on the longevity of the emulsion.

Kodak P 300 Special Rapid Panchromatic plate test
Kodak P.1600 Panchro-Royal plate test
Shooting them at night adds an extra layer of difficulty and not only in terms of getting the exposure right (I haven't touched on reciprocity law failure). The shot of the ghost train below proved hard to focus, even with the lens wide open at f4.5: the image on the ground glass screen was very dull, simply because the scene was at a considerable distance from any streetlights. Stopping down to f5.6, I calculated a ten minute exposure. Using a smaller aperture with greater depth of field would have meant that the accuracy of focus would be less critical, but this would have given much longer exposure times. The 4x5 G.30 Chromatic glass plates (shot with my MPP Micro-Technical Mk VI camera) are still the best plates I've used, and both subjects using them on this post were well-lit, in terms of night photography.

Branches and Shadows,  MPP Micro-Technical Mk VI, Ilford G.30 Chromatic plate
Concrete Stairwell, Wallace Heaton Zodel with Kodak O.250 plate
Ghost Train, Ica Icarette L with Kodak O.250 plate

Tuesday, 21 May 2013

The New Flickr

I set up this blog a couple of years ago specifically to write about film based photography, so to write about the changes to Flickr are a little outside the remit I have given myself, yet my recent engagement with photography would probably not have happened without Flickr. I started using Flickr nearly six years ago as a way to contribute to Camerapedia, and followed the disgruntled contributors of that site to Camera-wiki when Camerapedia was turned into a commercial site. Through Flickr I've learnt and shared new knowledge about methods and techniques, cameras and film, and have enjoyed being part of a community, one of the best online.

I logged into Flickr this morning to find that the user interface had changed. Although aspects of some changes had previously appeared elsewhere (such as in Group pools), the complete overhaul of Flickr was a surprise: the thrust of the redesign appears to be to make Flickr smartphone and tablet friendly, with a frictionless mosaic of images that the user can endlessly scroll through. However, as a maker of images I want mine to have friction: as someone who occasionally exhibits work, the space around the image greatly reflects on how that image is seen. The new interface delivers up something like Google images, a levelling down rather than a levelling up. These complaints about the design, in overview, might appear just a natural reaction to change, a desire to return to the familiarity of a system I've used for a number of years, if the changes worked.

I'm using a PowerBook G4: it is an old laptop, though it will load and display most web pages, but not the new Flickr. When I click on the link to my Photostream I get this:


Firefox seems to think the page has loaded, but it just hangs. The generic cover photo strikes me as a terrible assumption: why the designers did not leave this blank, or greyed out, as a default, rather than adding someone else's photograph as the users' default cover image. To get to something that appears like the old Photostream, you can click 'Edit', which brings up a page like this:


Before the changes, to 'edit' the titles of photographs in the Photostream, it was a simple matter to click on the text and edit it. This no longer works for me, making the 'Edit' button a bit of a hollow promise. Clicking on individual images brings up a screen very like the old Lightbox view:


At the top of the image is a warning message I get for using an out of date browser. Previously I was able to close this by clicking the checkbox at the top right of the image (arrowed in red): the warning message did not reappear until I logged in again. With the new interface the checkbox is underneath the grey bar and cannot be clicked on to close the message, so it now appears on every photo page. My laptop won't run a newer version of Firefox, so I'm stuck with it. The old Lightbox view was not a bad way to view single images, but it's now the only way. Scrolling down the page, the junction between the black background and the white is rather ugly to my taste:


Many of these changes are cosmetic, and using a newer computer (or smartphone, or tablet) would no doubt improve my experience of them. However, as a Pro user who has paid for this service for a number of years, my standing to this ill-thought-through redesign is rather different, for example, to when Facebook unveiled the 'new Facebook': with a free service one expects to have to accept changes in interface and functionality as a result. It appears that Flickr no longer values its Pro subscribers: Flickr now offers 1TB of space free (free users were previously limited to 200 images), and this denigrates the distinction of having paid for a service, when that service significantly changes. Today, the first day of the new interface, the feedback appears overwhelmingly negative, with perhaps over 90% against. The redesign must have been thoroughly tested I assume (although it looks like they didn't test it on older systems with slower bandwiths), but did they test it with any photographers?

A version of the cover photo appears when clicking on the profile icon:


I can't help but think that it represents flocks of long-standing users leaving to find a service that values them.

Saturday, 11 May 2013

Ilford ULF Sheet Film Order 2013

Once a year Ilford invites orders to manufacture film in a number of non-standard or obsolete sheet film sizes. It's known as the ULF film order, but it isn't restricted to ultra-large format film. Although it is possible to cut smaller sizes of sheet film from 4x5 or 10x8, it's a great advantage not to have to do this oneself for a number of reasons. I've got a box of HP5 Plus in 9x12cm format, to use with my Recomar and Avus cameras, which must have been produced from the ULF order (although I didn't specifically place the order for the film size myself).

Of the sizes Ilford are proposing to supply this year, the announcement of HP5 Plus in 50ft lengths of 46mm, the size of 127 format, has caused a little excitement: since Fotokemika stopped production last year, there has been a niche, admittedly small, to be filled in the roll film market. Obviously this does still mean rolling lengths of the film with 127 backing paper, but it removes the need to slit medium format film down to size.

The deadline for orders this year is Friday 28th June. For more information see Ilford's website: http://www.ilfordphoto.com/products/page.asp?n=137

Tuesday, 30 April 2013

Recent Updates

I'm not in the habit of going back to revise posts I've made on this blog, but my recent research into Ilford has turned up new information that I've added to my posts on Ilford's G.30 & R.10 plates, as well as finding a data sheet which provides more information on Kodak's O.250 plates.