Tuesday, 1 December 2015

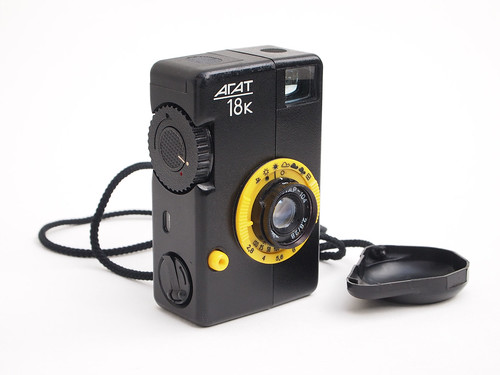
Belomo Agat 18K

Belomo Agat 18K
Most half-frame 35mm cameras were designed to shoot in portrait format, partly due no doubt as the way a roll of film logically winds through a camera from left to right horizontally, with the wind on lever or wheel operated by the thumb on the right hand. The ergonomics of this on a standard full-frame 24x36mm format camera provides a landscape, horizontally-orientated image; with the same left to right film travel, a half-frame image size of 18x24mm becomes vertical. The very earliest cameras that took 35mm film - before the Leica - often used something approximating the half-frame format, a legacy of 35mm film coming from the motion picture industry. These were often large and bulky cameras however, made to shoot much longer lengths of film; the invention of the standard 35mm cassette allowed camera designs to shrink. However, with the even smaller frame size, half-frame cameras could be scaled down to become smaller still, and compact sizes made it easier to design cameras to be held in different orientations, and a number of half-frame cameras (such as the Yashica Samurai) were made with the film travelling vertically to provide a landscape format image.

The Agat 18K is one such horizontally-orientated half frame camera. It's a very small (95x60x45mm), light-weight (130g) camera mostly constructed from ABS-type of plastic, manufactured by Belomo in the former Soviet republic of Belarus. There was an earlier Agat 18 (presumably the 18 is from the frame size); the 18K model improves on its predecessor in having a wider ISO range, an extra setting on its exposure calculator, a threaded shutter button for cable release, and a redesigned lens cap which covers both lens and shutter release. This lens cap is attached via a cord that has a screw fitting which doubles as a tripod mount. It's designed to be held for horizontal shots, with the film travelling from bottom to top rather than left to right, and held to the right eye with the shutter release operated by the right hand. The camera's ergonomics make holding it for a vertical portrait framing rather more awkward - perhaps it's best held to the left eye and operated by the left hand; using the right eye, the bulk of the camera rests against the user's forehead.

The 18K's manual only appears online in Russian, and so the camera may never have been intended for export (apart from the initials ISO, all other writing on the camera is in Cyrillic): some of the information in this post has been gleaned from other websites, but some from the manual via my own attempts to translate some of it using online tools. The Agat cameras are very easy to find online and very cheaply too: SovietCams.com suggests over half a million of the first version were produced from 1983; the 18K version came out in 1988 and would be the preferred model simply for its extra features. Both versions of the Agat camera have an Industar-104 f2.8 28mm lens (giving a slightly wide angle of view, about 40mm on a full-frame 35mm format), stopping down to f16. The lens has a filter thread and also focuses down to 0.9m, with the viewfinder giving indications of parallax correction for close focus.
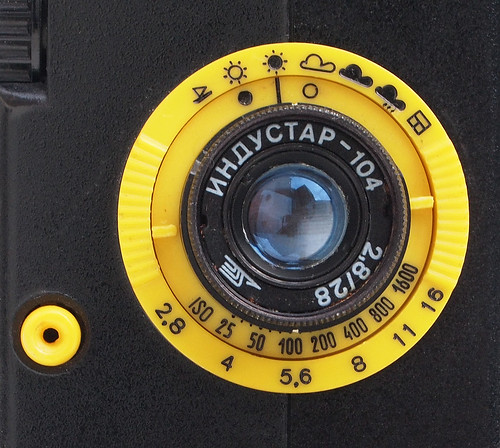
Agat 18K lens and exposure calculator
The unique feature about the Agat 18 cameras is the manual calculator which gives a form of programmed exposure. The film's ISO, from 25-1600 on the Agat 18K, is set on the inner ring around the lens, using the white mark underneath the lens first: this ring is difficult to turn using the two tabs on either side of the lens - the manual suggests using a match. The exposure is then set by lining up one of seven symbols on the outer ring with the black line on the inner ring: although largely self-explanatory, the manual provides further information on the lighting conditions they represent:
Object in snow, in the mountains, the sea under clear sun
Bright sun, harsh shadows
Hazy sun, soft shadows
Light cloudy weather, no shadows
Cloudy or shade with open, clear sky
Very cloudy, thunderclouds
Indoors 1 metre away from a window in the absence of direct sunlight
The inner ring also includes dark and light circles at either side of the line for one-stop exposure compensation. With the exposure set, the calculator indicates which aperture is in use, marked off next to the white line where the ISO is set. The shutter is coupled to the aperture setting: the manual lists the possible combinations in a table that appears to suggest that both aperture and shutter speed are continually adjustable as it shows intermediate aperture settings and odd shutter speeds. At f2.8 the shutter is either set to 1/65th or 1/130th, down to 1/540th at f16. The table of apertures and shutter speeds in the manual has asterisks against the intermediate aperture settings, 3.4, 4.8, 6.8 and so on and the asterisk appears to mean something like "The aperture value is not specified on the camera"; as there is also an asterisk against 1/65th at f2.8, this would appear to show that this aperture and shutter combination is set with the exposure ring rotated as far as possible anticlockwise (on the fastest ISO settings, the outer ring is moved some distance past the window symbol to achieve this). As well as the provision for exposure compensation, it is of course easy to override the exposure calculator by simply by either changing the ISO setting or choosing a different symbols.
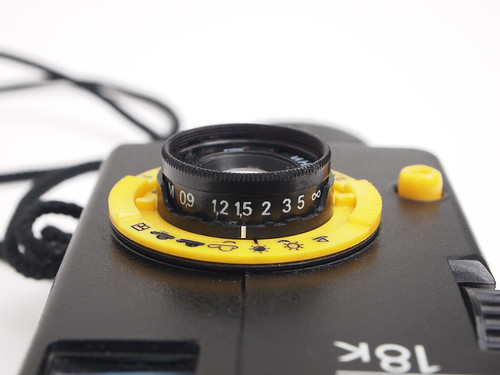
Agat 18K focus scale and depth of field indicator
There is a depth of field scale around the lens with a series of indentations to indicate different aperture settings; at f11, with the focus at 1.5m, depth of field should be from 0.9m to infinity, although this seems rather generous. The manual has a diagram as to how to interpret the indentations on the scale.

Depth of field diagram from Agat 18K manual
The film advance wheel is the same width as the camera body, which has cutaway sections to give a grip on both sides for ease of turning. The frame counter starts with a dot at 1, resetting with opening the camera, and thereafter goes up in sixes. The shutter is cocked not by the frame advance itself, but by the metal sprocket wheel internally, meaning that without a film, this has to be rotated by hand to cock the shutter for testing. To load the camera, a spring catch on one side is pressed down and the camera body slides into two parts. To insert film, the pressure plate flips down to thread the film across, and this plate has a small cut out and corresponding protrusion inside the body to securely locate it; it also depresses a small pin just visible in the shot below, and, although I'm not sure as to the function of this, given the position, I assume that releasing this pin resets the frame counter.
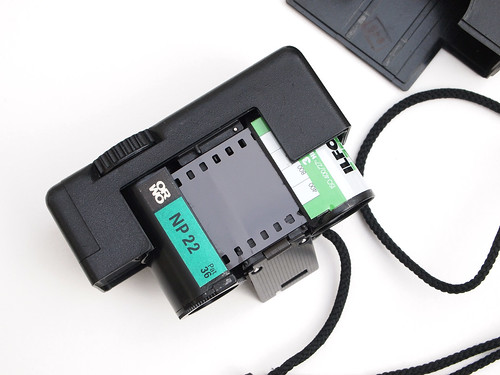
Agat 18K with 35mm cassette on take up side
The Agat 18K has a removable take-up spool; the receiving chamber is also designed to use a second 35mm cassette in its place (my camera came without the take up spool, but it did have a plastic cassette with an Orwo NP22 label). It is possible to use just an inner spool from a 35mm cassette in the take up side if the camera's removable spool is missing, but the film needs to be attached in some way, either with tape, or the spool can be modified with a slot cut into it to receive the film. However, I've only used it with two 35mm cassettes. When doing so, the take up cassette has to be put together with the internal spool upside down to make a mirror image of the cassette loaded with film. The camera's capacity to use two cassettes is something rarely mentioned in reviews; perhaps this design feature is a response to shooting double the amount of frames with the half-frame format, making it much more convenient to remove a part-used film. The manual shows cutting the typical 35mm film leader to a central tapering point to locate it in the small slot in the middle of an internal spool, but I've simply been taping the film instead, in much the same way as bulk-loading 35mm. Obviously it's still possible to rewind the film if using two cassettes in this way; to rewind film, the internal button on the advance knob has to be pushed in and turned to the red dot instead of the white dot for advancing film.
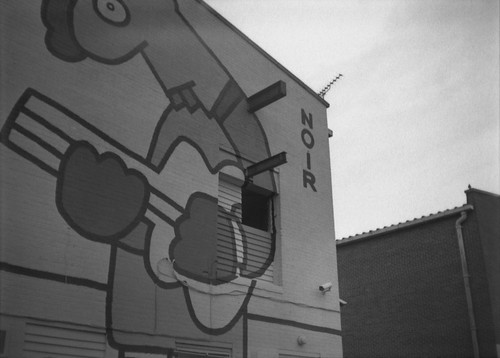
Agat 18K with Ilford FP4 Plus
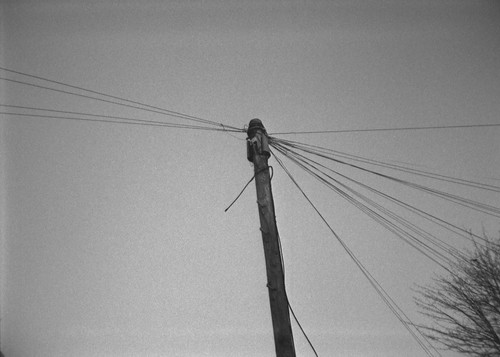
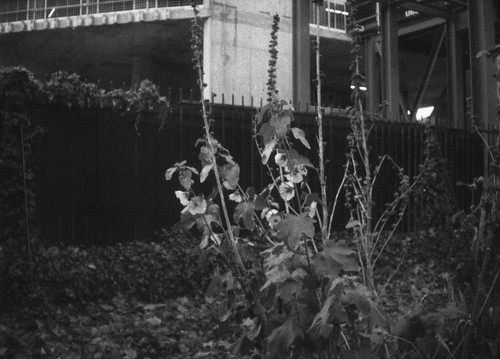
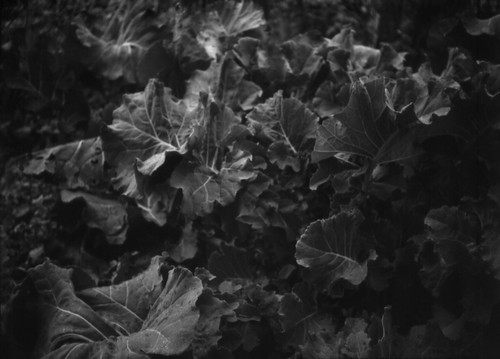
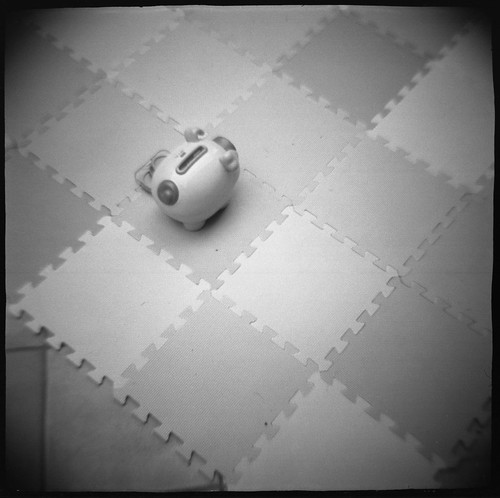
While testing, I had difficulties using the camera films in the poor light of cloudy days for the past week: there were almost no sunny periods to use smaller apertures and faster shutter speeds. The best results were with Ilford FP4 Plus; although I also shot some HP5 Plus, most of these frames were not exposed properly, due to my own error in not compensating for how weak early winter morning sun can be, although some of these shots, despite being underexposed, do give a small indication of what the lens might be like stopped down. I also used some Foma Retropan 320, but this gave very grainy images, more obtrusive than the HP5. Finally, with the low light levels over the weekend, I shot some Ilfodata HS23, rated 25: by necessity, every shot used the 'dark cloud' symbol setting, giving f2.8 at 25 ISO. With the Ilfodata film, grain is barely visible, but limitations of the lens' quality are much clearer when shot wide open. Also, with a very shallow depth of field, there was little compensation for inaccurate guess focussing. It does appear that the lens might not quite focus at infinity when wide open; this might be a quality control issue over the construction, although it might simply be that I didn't quite take enough care to make sure the lens was actually set dead on infinity. It is also very easy to accidentally rotate the focus on the lens as this seems very loose. There are also some shots with lens flare, but more obvious are internal reflections, something a few Soviet-era cameras are notorious for, given their shiny plastic insides. The exposure calculator does have some limitations: at the slowest ISO settings, it can't be rotated to the thundercloud or window symbols: at the other end of the scale, being unable to use the bright sun or beach symbol at 1600 ISO would mean overexposure by one or two stops, although I was very far from having this latter problem while making my tests.

The Agat 18K looks and feels like a toy camera in many aspects, but in its design, if not in its construction, it's far more ambitious than that, despite the caveats above. The features such as the focussing lens, the wide ISO range, the ability to remove film partially shot from cassette to cassette, and the exposure calculator coupled to both apertures and shutter speeds, more than just a 'sunny 16' set of symbols, there's also a hotshoe hidden under a sliding cover for flash: all these suggest something more than a toy. I've used an Olympus Pen EE3, which has been my half-frame camera that I've relied on for many years, and although the Agat 18K's Industar lens doesn't compare with the performance of the Pen's Zuiko, it does have a wider maximum aperture, a wider ISO range, and the ability to focus its lens. It's also a much lighter and smaller camera, and very pocketable: perhaps the fun of using it locates the Agat 18K in the toy camera category.
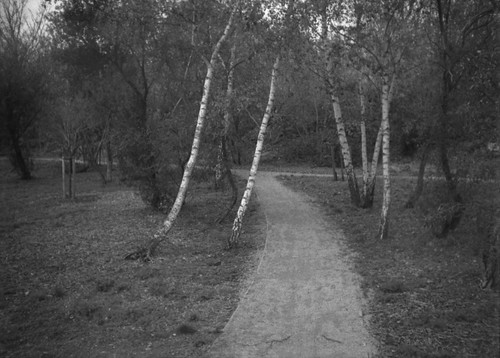
Agat 18K with Ilford FP4
Agat 18K with Ilford HP5 Plus
Agat 18K with Foma Retropan 320
Agat 18K with Ilfodata HS23 rated 25
Sources/further reading:
Agat 18K on SovietCams.com
Agat 18K manual in Russian 
Belomo cameras on Camera-Wiki
Agat 18 review on BKS Picture Blog

Wednesday, 21 October 2015

World Toy Camera Day 2015


Of the many different camera-themed days on the photographer's calendar one that I haven't previously marked is World Toy Camera Day. The precise definition of what constitutes a toy camera is slippery but it generally involves plastic construction, a lack of user controls and often incorporates some kind of promotional aspect or were cheap enough to be given away free. However these definitions are applied, the Diana has surely become the archetype of a toy camera. First made in Hong Kong in the 1960s, and subsequently attracting a small cult following, in recent years the cloned Diana F+ has become a mainstay of the contemporary Lomography fad.

For Saturday's World Toy Camera Day, I borrowed an original model Diana camera. This was complete with its (very battered) box and conceivably unused. The original camera does have a few advanced features for such a cheap camera: the lens can be focused and three aperture settings (full sun; half sun/cloudy; and cloudy) are provided by rotating a plate with holes behind the lens. The shutter has just a single speed, and although I have read that some (original?) Diana cameras have a B setting, the one I used did not. The camera takes medium format film, shooting negatives of roughly 4x4cm, meaning that it will provide 16 frames on a roll of film, but not in the more usual 6x4.5cm medium format frame size as the camera does not make full use of height of film (the negative is of course a 127 rollfilm format size). The plastic meniscus lens where the Diana stakes its claim to originality. From my results, the lens appears to exhibit a textbook list of aberrations (although I shot only black and white film, aberrations directly relating to colour can safely be assumed): spherical aberration; coma; (pincushion) distortion; astigmatism; and curvature of field.  

I shot three rolls of Ilford HP5 Plus on what was a typically overcast autumn day. Not knowing what the shutter speed was (due to manufacturing vagaries it is quoted as being in a range of 1/30th - 1/200th), judging from the results I possibly should have shot all the frames on the widest aperture setting (for some I used the 'half-cloudy' aperture, given the film speed) or pushed the films one stop in development (I didn't experience any of the much-stated light leaks). The simple box cameras I've used may be provided with fewer controls, but the provision of a moderately corrected doublet (glass) lens produces far superior results. It seems that one has to pay for worse quality these days: the basic model Diana F+ from the Lomography shop is £39 at the time of writing, more than I've paid for most of the (secondhand) cameras written about on this blog; the Diana is enjoyable to use, but I wouldn't pay the current premium for a new camera.


Friday, 16 October 2015

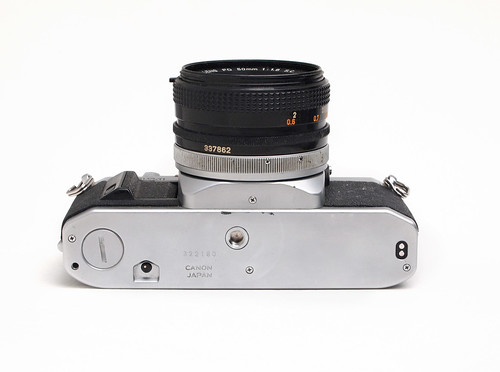
A minor fix for the Canon AV-1

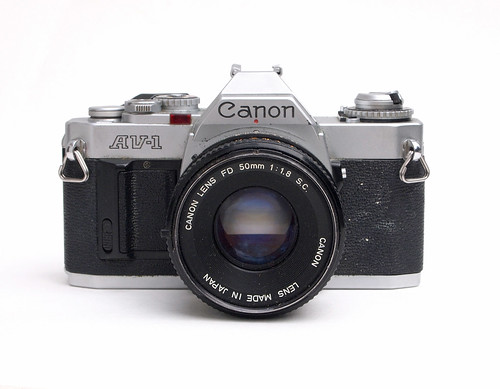
Canon AV-1 with 50mm f1.8 lens
Writing about the Canon A-1 SLR camera for my last post prompted my partner to find her old AV-1. This hadn't been used for well over ten years, and I had looked at the camera some time ago to find it apparently inoperable. The battery inside the camera was dead, but fortunately not corroded. Like the A-1, the AV-1 will not work without a battery, but on inserting a new battery, although the meter needle responded to light, the shutter would not fire, nor could the film advance lever be moved. At the time, it seemed like there was little else to do but put the camera away again as a 'non-shooter'.

The Canon AV-1 appeared in 1979, one year after the A-1, and three years after the AE-1, which it clearly draws upon, although there are a few similarities to the higher priced and fully-featured A-1. Canon's Camera Museum website describes the rationale behind the development of the AV-1:
Even though the camera would cost more, shutter speed-priority AE cameras were important to Canon since users could comprehend shutter speeds easier than aperture settings. However, in America and other overseas markets, aperture-priority AE 35mm cameras were in the majority.

Overseas distributors also clamored for an aperture-priority AE model. Canon responded with the AV-1.
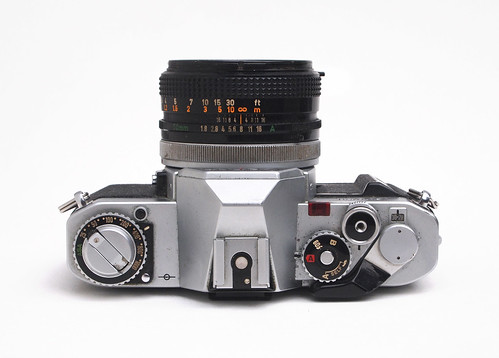
Named for Aperture Value, the Canon AV-1 shared much of the AE-1's design and construction, including the use of metalised plastics in its build, to make it both lighter and cheaper (it's around 200g lighter than the more robustly made A-1). However, the AV-1 isn't Canon's aperture-priority version of the AE-1: the design and functions of the camera have been further simplified. Although it has the same EV range (1 to 18 EV at 100 ISO), it lacks the top film speed setting of 3200, 1600 being the maximum (this is set on a dial around the rewind crank, more like the A-1's design). The exposure preview button on the side of the lens mount is missing, although the backlight correction button remains, giving an exposure adjustment of +1.5 stop. Exposure preview is by partially depressing the shutter release, which activates the meter and gives a preview of the shutter speed in the viewfinder, with a needle indicating a range from 2 seconds to 1/1000,  with under- and overexposure indicated at either end of the scale. 1/30th is marked with a black bar: with the needle at or below this speed is a warning of camera shake. The stopping down lever is also absent, as is the PC connection for flash. Flash sync is at 1/60th, a separate setting on the mode dial, which has a red-accented 'A' for automatic shutter speed, 'B' and both self-timer and self-timer-with-flash. The red LED on the AV-1's top plate is only used for the self-timer - like the A-1, but unlike the A-1 it's not used for the battery check function as well (pressing the battery check button raises the needle inside the viewfinder). According to prices given on the Canon Camera Museum, in 1979 the AV-1 cost 57,000 yen (with the 'New FD' 50mm f2 lens, designed to be a low-cost prime), as against the AE-1, which three years earlier was 81,000 yen (albeit with the more expensive 50mm f1.4 lens). As a point of comparison, the A-1 was 83,000 yen in 1978 for the body alone - and 114,000 yen with the 50mm f1.4 lens.

Canon AV-1 with 50mm f1.8 lens
What made me want to write this blog post, not as a full article or review on the Canon AV-1, was my experience in getting the shutter to fire again and the film advance to work. I searched online about how to free the shutter, and found much about the Canon AE-1, which came up in searches for the AV-1. From this information I had a general idea of what might be wrong, but pictures of the AE-1 with the bottom plate removed showed a slightly different layout. The following steps were what I did to release the shutter after being stuck and left for many years - this was very simple - but as I couldn't find the specific information relating to the AV-1, this may be of some use to others.

The first step is to ensure that the camera has a working battery: the shutter will not fire without one. The AV-1 requires a PX28 battery, like other A series SLRs. With the collar around the shutter release set to A, press the small black battery check button just in front of the film speed dial. If the camera's circuits respond, the needle inside the viewfinder will move, and, according to the manual, it should raise above the black bar next to the 1/30th speed (a weak current may move the needle but it may not be enough the trip the shutter). At this stage the shutter release would not trip the shutter, and neither could the film advance lever be moved. The following description of the steps I took to free the shutter mechanism are to be undertaken with caution and at one's (or one's camera's) own risk.

Canon AV-1 bottom plate
The bottom plate is removed by taking out the three small cross-head screws. The fourth screw below the lens mount is for a separate section of the casing and can remain in place. In reading around problems with the AE-1, it seemed the most common reason for the shutter to be jammed is the magnetic shutter release. In the AE-1, this is easier to access: on the AV-1 it is visible, but somewhat buried: in the image below it is located to the right of the tripod fitting underneath the red and black wires with a transparent plastic cover. The magnet itself has copper coiled around it. Perhaps it would have been best to give the camera a proper CLA and clean the magnet's contacts, but this requires more disassembly. I hoped that I could get the shutter to work again without going any further. At this stage it wasn't entirely clear to me whether the film advance or the shutter was stuck.

Canon AV-1 bottom plate removed
With the bottom plate removed it is possible to see whether the stutter is cocked or not. If it is cocked, the magnet circuit is closed: there is a metal release linkage just visible in the image above closing the circuit in contact with the magnet. Using a small screwdriver, I managed to get the shutter to release by forcing the lever on the left hand side (it pivots upwards to the right) which connects the film advance (the large toothed wheel on the left) to the shutter cocking mechanism. The shutter fired once, then stuck again. However by tripping the shutter a few times by forcing the lever with it intermittently sticking, after exercising it enough it stopped getting stuck and I felt confident that the shutter and film advance now worked freely - for the time being. I can't claim this to be an in-depth explanation of how to fix any shutter problems with the AV-1, but it may well be the first action to take to free a stuck shutter; beyond this step, the next would be to take out the tripod fitting and the black plastic next to it, and possibly the circuit board on the right hand side, in order to access the magnet and clean the surfaces that contact when this closes. The reason for the shutter being jammed may simply have been that it had been stored with the shutter cocked (i.e. wound on) for a number of years: when not in use for some time, it may be best practice to fire the shutter, then remove the battery.

Although the New FD mount lenses appeared at the same time as the Canon AV-1 (Canon Camera Museum: "When this camera appeared, a new type of FD lenses featuring instant mounting/demounting was also introduced"), this particular camera had an old breech-lock FD lens (although technically both new and old FD lenses are breech-lock, it appears to be common to refer to the new FD lenses as 'bayonet mounting'). With the shutter firing again, I re-attached the lens to find that it jammed the shutter - or more accurately, it prevented the mirror from fully returning somehow. The mirror did return when I partially loosened the breech-ring, and the lens had the same effect when mounted on my A-1. Looking at the old lens on the all-black A-1, I wonder whether the visual design of the New FD lenses were in part inspired by the look or the general design principles of the A-1, even if these lenses were released a year later, along with the AV-1. One oddity of FD lenses with an 'A' setting when used on the AV-1 is that this simply selects the smallest aperture - and meters for it.

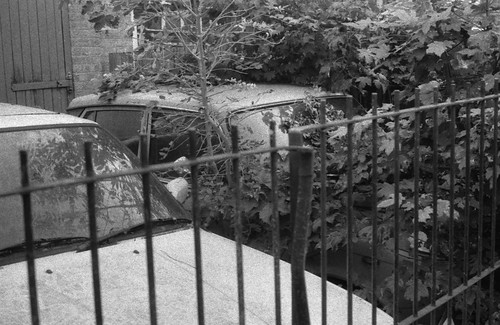
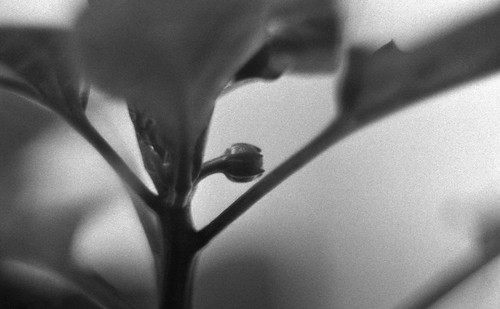
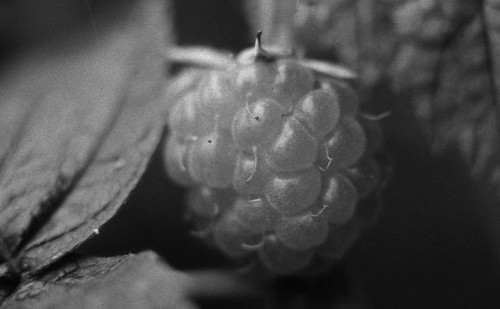
Researching the AV-1, I came across Bob Atkin's website which details Canon's date codes. According to the information listed, the AV-1's body dates to 1979, while my Canon A-1 is a year more recent in manufacture, to 1980. Having got the AV-1 working again, I ran a couple of short rolls of film through the camera, one of Retropan 320, and Ilford Mark V just to make sure everything was working as it should. The AV-1 had a 2x macro teleconverter with it, allowing for 1:1 image reproduction, such as in one of the close up images of plants below.

Sample image with f1.8 50mm lens and Foma Retropan 320
Sample image with f.18 50mm lens and 2x teleconverter on Retropan 320
Sample image with f.18 50mm lens and 2x teleconverter on Ilford Mark V
Sources/further reading:
Canon AV-1 manual (PDF)
Photography in Malaysia's Canon AV-1 pages 
Fix Old Cameras' AE-1 release magnet video 

Sunday, 11 October 2015

The Canon A-1

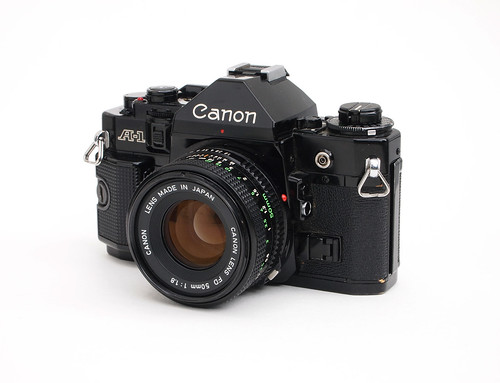
Canon A-1 with f1.8 50mm FD lens
One of my reasons for starting this blog four years ago was that I was becoming interested in cameras other than SLRs, and describing the experiences of using these cameras; in comparison, what I think of as classic film SLR cameras tend to be well-known and well-represented in blogs, articles and discussions on the internet, and that to add my own views might seem superfluous. However, for a couple of admittedly personal reasons, it seemed like perhaps time to add a post of my own on the Canon A-1.
My first 35mm SLR camera was a Praktica BC1, shortly to be replaced with a BCA body, which I used all through my student years and for some time afterwards; in 2001, with a small amount of money from a commission, I wanted to buy a more advanced 35mm SLR, but not the contemporary type of film cameras that were soon to give way to digital (in the 1990s, my Praktica was around a quarter of the price of a Canon SLR). Part of the reason for choosing the Canon A-1 was simply that I had been able to compare my Praktica against the A-1 of a fellow student at college, so a few years later it seemed an inevitable choice. My original Canon A-1 was stolen after a couple of years of use, but I replaced it with another some months later when I could afford to, and used it almost exclusively for about four or five years - mostly during the period when I didn't have access to a darkroom and shot colour or chromogenic black and white film. Part of the reason for writing a post about the camera now was a brief misconception that I had bought the camera a full fifteen years ago, before realising that it was fourteen years ago this month (the two shots below come from my first test roll); and it has been one of the cameras that I have been lending to students to use in an introduction to black and white film-based photography that I have been teaching - and being reminded of the quality of the results.

Canon A-1 with Kodak Portra 160NC - first test roll
The A-1 was already several years old when I first encountered it, older than my Prakticas. Canon introduced the camera in 1978, two years after the innovative Canon AE-1, and it was produced until c.1985. In the original manual, the A-1 is described as:
...the most exciting and advanced camera on the market. Canon has good reason to have unbounded confidence and pride in the A-1. Embodied in this camera are the qualities of the finest SLR cameras and into it went the most sophisticated electronics technology available in the world today.
This quote from the introduction to the 100-page manual may well have been more than just marketing hyperbole: Camera-wiki's page on the A-1 states that "Canon's competitors were considerably slower in introducing programmed SLRs: Minolta in 1982 with the X-700, Nikon with the FA and Pentax with the Super A in 1983 and Olympus with the OM-2S Program in 1984."

Canon A-1 with f1.8 50mm FD lens
The A-1's specifications were impressive for 1978: it has five automatic exposure modes plus full manual override: shutter speed priority AE; aperture priority AE; programmed AE (i.e. automatic selection of both shutter speed and aperture); AE flash photography with dedicated Canon flashes; and stopped-down aperture AE. The ASA dial has a very wide range from 6 ASA to 12800 ASA in third-stop increments, and provided with +/- two-stops exposure compensation, also with third-stop increments. The centre-emphasis TTL meter has an EV range from -2 to 18 at 100ASA. The viewfinder has an LED read-out for aperture and shutter speeds which automatically compensates for subject/viewfinder brightness. It also displays M for manual, buLb for 'B', and F or bu F for AE flash, with EEEE EE as an error message. In manual mode, the meter display shows the shutter speed selected on the Tv dial and shows the aperture (including intermediate half-stops) that will give correct exposure: the user then has to ensure that the aperture ring is set to this value - which does require taking the eye from the viewfinder. The LED read-out can be turned off using the collar switch around the battery check button on the left of the camera's top plate.

Canon A-1 with f1.8 50mm FD lens
Additional features include: a stopping-down lever with a lock position (this lock position activates the stopped-down AE mode, which meters from the currently selected aperture, rather than at full aperture as in other AE modes); exposure preview (in addition to lightly depressing the shutter release) and exposure lock buttons on the left of the lens mount; a hot shoe with contacts for dedicated Speedlite flashes, and PC socket; and a built-in eyepiece shutter to prevent light entering via the viewfinder in long exposures. It also has a film reminder slot on the rear of the camera and a film plane indicator on the left hand side of the top plate.

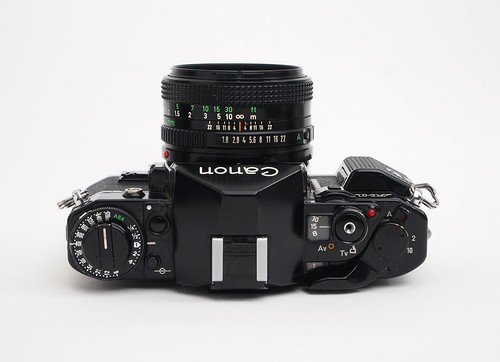
Canon A-1 main user controls
The main user controls are all located on the right-hand side top plate. The main switch around the film advance is used to turn the camera on - at A - off - at L (for Lock) - and two self-timer positions for 2 and 10 seconds. There is also a multiple exposure switch next to the 10 second self timer position. Around the shutter release (with cable release socket) is the AE mode selector, the AT dial: Av selects aperture priority (when FD lenses are set to A on the aperture ring) with aperture values appearing in the window; Tv for shutter speed priority, with the window showing shutter speeds. These dial settings are colour coded: black numbers on yellow for apertures, with a range from f1.4 to f22; white numbers on black for fractions of a second, orange for whole seconds, from 1/1000 to 30 seconds, plus 'B' and P for programmed automatic exposure. These values are changed using the dial on the front of the camera, which also has a guard which can be raised to prevent accidental movement of the dial. All these functions can be operated by finger and thumb, which, together with the 'action grip' makes for an intelligent, functional ergonomic design: the lens mount is slightly offset to the left of the camera's axis, which balances it rather nicely in the hand. Aesthetically, the camera was only available in black, unlike a number of Canon's other SLRs around the same period, with numerals and lettering picked out mostly in white, with a few limited uses of colour. These choices appear to have made the design date less obviously than later Canon SLRs through the 1980s, notably the T series.


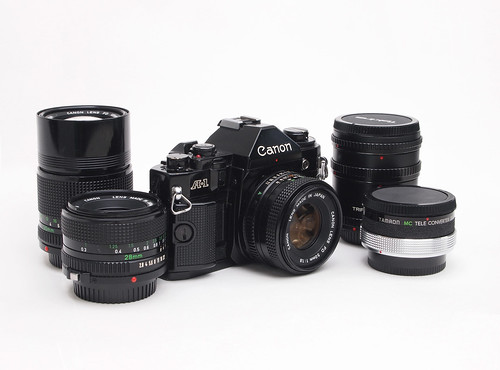
The Canon A-1 was designed to fit with all Canon's many FD, FL and R series lenses (with a few minor exceptions), and I acquired the common FD lenses, the f2.8 28mm and the f3.5 135mm; I did have a zoom for a time, but never took to using it. The f1.4 50mm lens and the faster f1.2 50mm lens are amongst the most sought after Canon FD fit prime lenses, and command high prices as a result; the standard f1.8 50mm lens that usually comes with the A-1 performs perfectly well. I also bought a (rarely used) extension tube set, and a 2x teleconverter. I was given a photocopy of the original comprehensive manual shortly after I bought the first A-1, useful to work out all the additional functions never or almost never used (I've never shot a double exposure with the camera, for example, and don't think I've ever really used the aperture priority mode). The manual provides illustrations of the many accessories provided for the A-1 and other Canon SLRs at the time, notably a data back, motor wind, magnifying eyepieces and so on. The only drawback to the Canon A-1 is that the electronic shutter is entirely dependent on battery power, a PX28 (although for others its fastest shutter speed of 'only' 1/1000th is also a cause for complaint). The electronic shutter can be a problem when a battery fails: many other SLR cameras of similar dates have at least one default mechanical shutter speed. On my current body, the battery door is cracked in two places - a common problem, looking at other descriptions online - but this is kept secure behind the action grip.

The Canon A-1 did (and continues to) live up to my expectations when I finally bought one, making the Praktica BCA look and feel very basic and primitive in comparison, although, for a first 35mm SLR camera, it had been both adequate and cheap (the secondhand price difference being much greater twenty years ago). In the course of writing this post, I've put a few more rolls of film through my A-1, and it's helped to remind me just how good the Canon A-1 is as a classic, manual-focus 35mm SLR camera.

Canon A-1 (50mm f1.8 lens) with Fuji Superia 200
Canon A-1 (50mm f1.8 lens) with Ilford XP2
Canon A-1 (50mm f1.8 lens) with Ilford HP5 Plus
Canon A-1 (50mm f1.8 lens with 20mm extension tube) with Fomapan 400
Canon A-1 (50mm f1.8 lens) with Ilford HP5 Plus, pushed processed to 800
Canon A-1 (50mm f1.8 lens) with Ilford HP5 Plus, push processed to 1600
Canon A-1 (50mm f1.8 lens) with Ilford Delta 3200
Canon A-1 (28mm f2.8 lens) with Ilford HP5 Plus
Canon A-1 (135mm f3.5 lens) with Ilford HP5 Plus
Sources/further reading:
Canon A-1 on Camera Wiki
Canon's Camera Museum
The Canon A-1 manual
The Casual Photophile review of the Canon A-1
Photography in Malaysia's excellent Canon A-1 pages
Canon A-1 on Photoethnography

Monday, 28 September 2015

Some Thoughts On Railway Stations


In the spring I travelled to Stockholm by rail. The reason for choosing this method of travel was that I could plot a route with stops at both Wuppertal and Hamburg, researching locations from two films by Wim Wenders: Alice In The Cities, and The American Friend. This parallel journey through the Germany of the 1970s was documented on a separate, dedicated blog. I have just recently updated the blog with the photographs taken on the journey - which took some time to develop and scan (I shot about fifty rolls of film - 35mm, 120 and 110). I took three cameras with me: the medium format Zodel Baldalux, 35mm Kodak Retina IIa and my Pentax Auto 110, with cartridges reloaded with Kodak WL Surveillance film - as well as taking the rest of the roll of 16mm film and a dark bag to reload the 110 cartridges each day of my journey - although none of the images on the blog are actually from the Pentax.

I have now recently updated the blog with two pages directly relating to locations used for scenes in both films, the pages marked Alice in the Cities and The American Friend, as well as interspersing relevant images through a number of the posts written on the journey itself, about the films, the research and the locations, and more generally about travelling from London to Stockholm by train. I haven't added images from the two films for comparison, but some of the locations in Hamburg are shown in the images from the film on the Cranes Are Flying blog about The American Friend. Due to the nature of formatting with Blogger, the blog entries are listed as most recent first, essentially presenting the journey in reverse order.


Monday, 31 August 2015

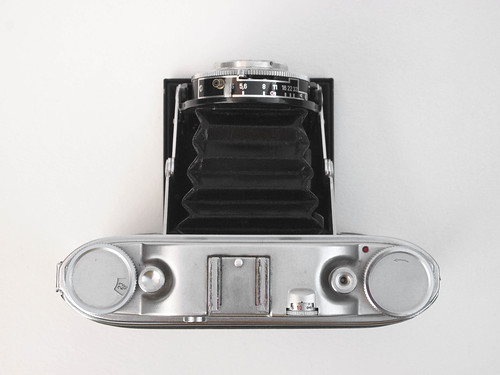
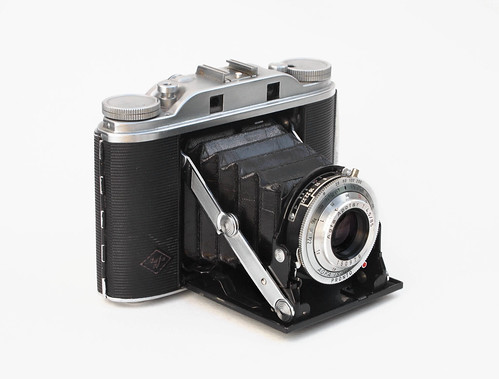
Agfa Isolette III

Agfa Isolette III
Agfa's Isolette range of 6x6 medium format folding cameras are still very much well-used and well-liked, judging by the numerous references and results among film photographers online, a good sixty years since the models were produced. My own experiences with the Isolette are limited and recent, having bought an Isolette III earlier this year at a Stockholm flea market for 200SEK, but I had used an Agfa Record I for a number of years, and the Isolette's construction, styling, design and user experience are all very similar to the Record 6x9 cameras. The Agfa Isolette cameras take 6x6 images, although a couple of the Isolette models had masks for smaller formats. The Isolette III was introduced in 1954, snd is essentially the same camera as the Isolette II with the addition of an uncoupled rangefinder.

The Isolette cameras were provided with lenses of both 75mm and 85mm focal lengths, which are dependent on the lens' widest aperture: f4.5 lenses on the Isolette are 85mm, while f3.5 lenses are 75mm. I've preciously had a couple of medium format cameras in the 6x6 image size with 75mm lenses, a common focal length, but I've sometimes felt it a little too wide on the format. However, it may be worth bearing in mind that the 6x6 format came about with the twin-lens reflex camera, the typical construction of which would not have been conducive to changing the camera's orientation had it shot a rectangular image, and so the square format allowed cropping in either orientation as much as being used full-frame. Using the full, square frame, I find achieving satisfactory compositions require more thought than a common rectangular photographic frame; conversely, it seems a shame to crop the image to do so and not make use of the whole negative's area.

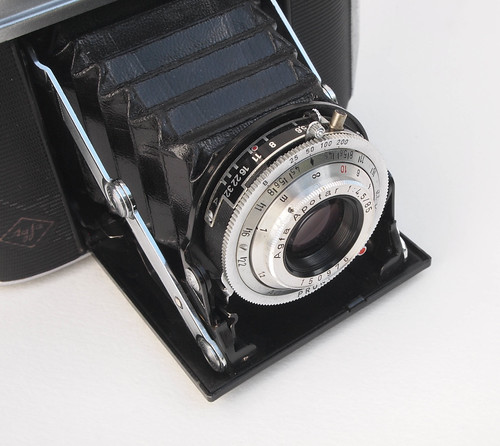
Agfa Isolette III lens and shutter detail
My model has Agfa's Apotar lens in a Pronto four-speed shutter, both being among the cheaper variants available. The Apotar is a triplet lens, but, being post-war, it is coated. The Apotar was the middle of the range of lenses: the lowest priced lens was the Agnar, the lens that my Record I came with, even so it did provide very good results on modern medium format films. The Isolette has focus below 1 metre, although the 1 metre is the last mark on the focus ring (possibly the lens focusses down to 3ft which would be marked on US - under the Ansco name - or UK export models). The marks at 3m and 10m are picked out in red. The Pronto shutter has four speeds 25th, 50th, 100th, 200th, plus B. The addition of the camera's rangefinder meant that unlike other Isolette models, the III no longer sports a T setting (I personally find shutters with a 'T' setting more useful then a 'B'). Other features mark my Isolette as a later version, from 1956 onwards: there is a film reminder dial on the top left of the camera instead of a depth-of-field calculator, the DOF indications are around the lens instead (the film reminder has old DIN speeds of 23/10 - 21/10 - 17/10 and COL T - COL K - COL NT). Film advance is manual, using a red window on the camera back but it does have a double exposure lock on the shutter release: after exposure a small round window shows red until the film is advanced and the lock disengages. The shutter can still be tripped by the lever around the lens when locked.

Agfa Isolette III top plate
The camera had two problems when I bought it: the camera back did not close tight at one side; and the rangefinder wheel was immovable. The first of these problems was solved by using pliers to bend inwards one of two prongs to provide a tighter fit with the camera back's latch (when in Stockholm itself I realised this might be a problem and simply held the back tight when shooting - although on some exposures I wasn't careful enough with this and some show the top right corner of the pressure plate not keeping the film in alignment, falling behind the plane of focus).

Detail of loose catch
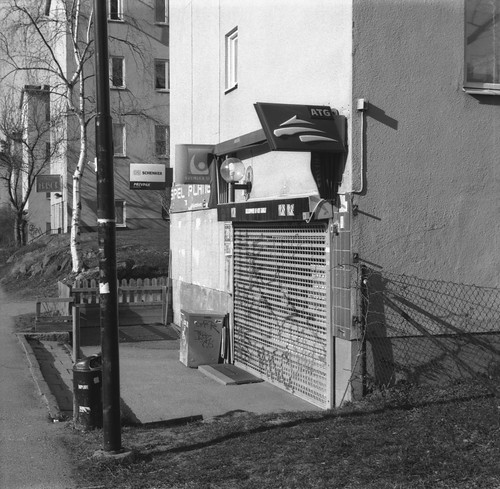
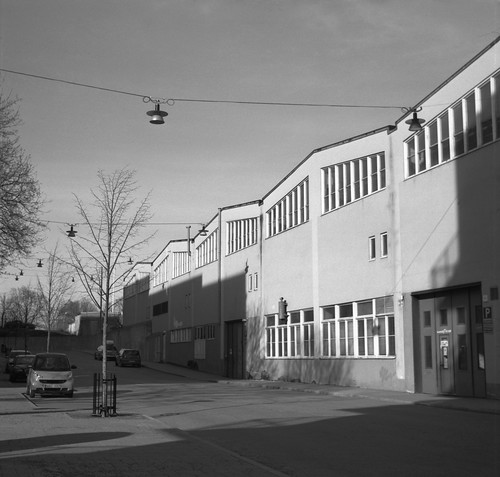
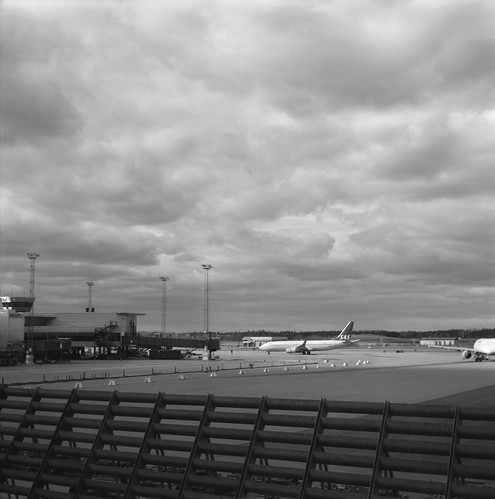
I didn't have the tools to attempt to fix this or the rangefinder while in Stockholm. However, as the rangefinder is uncoupled, the fact that it was stuck did not interfere with using the camera, it merely meant estimating distances, and paying more attention to the DOF scale around the lens. Despite these issues, I liked using the Isolette III enough to use it while in Stockholm rather than the Baldalux 6x9 camera I'd brought with me, and shot a number of different films with it, Rollei RPX 25 and 400, Fomapan 400, Superpan 200 and some Kodak Verichrome Pan with a "develop before" date of October 1969.

Sample image with Fomapan 400
Sample image with Superpan 200
Sample image with Rollei RPX 25
Sample image with Rollei RPX 400 at 1600
Sample image with Kodak Verichrome Pan, develop before date of 1969

Sources/further reading:
Isolette range on Camera-Wiki
Agfa/Ansco Isolettes by Andrew Yue
Isolette cameras on J. Noir's Camera Pages
Isolette III manual (first version)