Showing posts with label three colour process. Show all posts

Saturday, 5 December 2020

Three Colour 8mm Film

Three-colour process still

In writing a blog about film-based photography, there is always an unacknowledged (or perhaps underacknowledged) implicit understanding that any results are, by the nature of being shared digitally, a hybrid form. For some reason, I find this to be most acute in the moving image: the presence of the sheer physicality involved in projecting moving film becomes utterly absent once transferred into a digital form. The difference between a flat photographic print from a negative, and a screen-based display of that negative (whether scanned direct, or from a darkroom print) is great of course, but there is much recognisably the same about the experience of viewing (which, equally, is not to dismiss the real differences too). With physical moving images, the very apparatus of display plays a part in the viewer's experience; in the cinema, this is hidden from view, but in many other instances, the presence of the projector, screen, the sheer amount of material - reels of film, needed to kept, controlled as reels - impinges, bodily, on the viewer. This physicality has become somewhat fetishised in the visual arts: when shown in art galleries, films projected on 16mm or 35mm usually depend on the projector (and all the mechanisms for looping the film too) being present in the viewer's space.

A different kind of fetish is present when displaying such films in a digital form (something I am not immune from): the signs of the film's materiality, frame edges, perforations, dust and scratches - indeed, the very instability of the image, revealing that the apparent movement is comprised from numerous still images - are there as a guarantor of that materiality. I had been thinking of a way to use this digital hybridity in a playful way, that, in creating a digital version of a physical artefact, there was something more to use this for other than its convenience.  Last year, my interest in the three-colour process had been reawakened after assisting a student in creating images using the method, making colour images from three separate black and white negatives, shot through red, green, and blue process filters. I shot some still images with the Mycro IIIA a year ago using the technique (not posted to this blog), but also shot a short length of 8mm ciné film using the three colour filters.

Canon Cine Zoom 512 - Middlesex Filter Beds; Rollei 16 with Eastman Double-X film

For this, I finished the end of the roll of Orwo UP15 film that I had used for a number of other, very short films (Heatwave, Swinging Light), spooling off the shorter lengths as needed for each of these (I had also used a fair amount of the film for still photographs with subminiature cameras, notably the Mamiya 16 Automatic). This had a 'develop before' date of March 1976; using the film previously, I found an exposure index of 10 provided good results. I shot the film with the Canon Cine Zoom 512. Using a tripod, and a full wind of the motor, I framed the shot, depressed and locked the shutter release, and then held the red, green, and blue three-colour separation filters in front of the lens, for about 8 seconds each as the film ran through the camera continuously. I think that I may have shot the film at 8 frames per second in order to provide a slower shutter speed for the light needed to expose the film through the filters; the digitised footage itself plays at 12 fps. To compensate for the reduction in the transmission of the light through the filters, I metered the scene, then opened the aperture two stops. This meant that the sections of the footage in between the filters is over-exposed, and the section with the blue filter is underexposed, as the process blue filter transmits less light than the red and green filters.

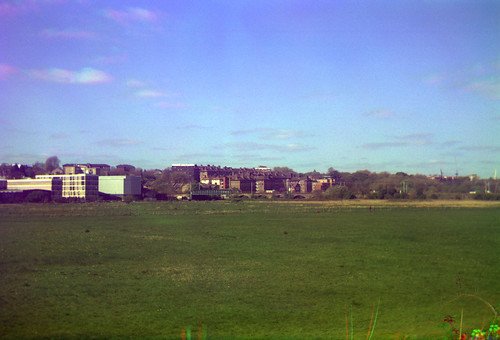
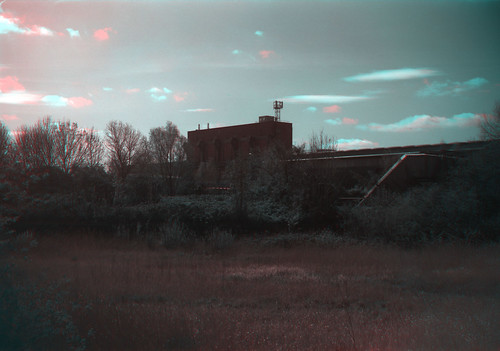
For a subject, I shot the film at the Middlesex Filter Beds (a unintentional reference), with the thought that the three-colour process would record the autumnal colours. This was not entirely successful as I was probably shooting it too early in Autumn, in mid-October - and with the blue-filtered section underexposed, the colour record would not be very accurate (it might have been possible to open the aperture one stop further at this point, but not especially practical, doing the whole operation with one one pair of hands, passing filters one to the other after holding each one up in front of the lens). I then developed the film as negative in Ilfotec LC29 diluted 1+19 for 6m30s at 20ºC. This was over a year ago; only recently did I have the film scanned.

As 2x8mm film is 16mm-wide and run through the camera twice, I shot the sequence twice. However, I didn't use a changing back when removing the film spools and turning them over to shoot the second side (the 2x8mm film format is designed to be daylight loading, but this does mean sacrificing either end of the film on the spool in loading and reloading, not a problem when using a whole roll, and taken into account by the manufacturers of both film and camera; a different matter with a 'short end' such as I was using here). As I result, although I didn't realise it at the time of shooting, the first run of the film through the camera entirely lost the frames with the third filter in being exposed to the light. The second run of the film through the camera was more successful, but the section with the third filter was on the very end of the film, which includes the identification code of the film stock, punched through the film itself. This section of the film would usually have no images on, as it would be exposed on loading and reloading; I unloaded the film from the camera in the changing bag before developing.

In the resulting black and white film (above), on casual viewing the section with the red and green filters do not look especially different, except perhaps in the sky; the blue section is clearly darker, but also much lower in contrast. I composited frames from the scanned film in Photoshop, placing each black and white image into the red, green, and blue channels in the RGB colour mode.

RGB composite from the black and white negative scan
I had the 2x8mm film scanned as 16mm, i.e., the whole width of the film between the perforations, rather than having the film spit into two 8mm widths; as a negative, the film itself would not be projected anyway, so there is no need for it to be split as would be the case with film developed with the reversal process to make a positive transparency. As can be seen from the image above, the first run of the film through the camera, upside down on the right is a composite of incorrectly-filtered sections (the same colour filters do not align on each side of the film, and the blue-filter section on this run is also missing).

In creating a full-colour composite, I could have simply edited the film to a few seconds, aligning the three sections shot through the three different filters. Instead, I wanted to show the process as a set of logical steps, and, as the length of the whole film is just twenty-seven seconds when played back at 12fps, this could be repeated through each step. With the film was scanned as 16mm, as well as the width of image, the height is also over twice that of a standard 8mm frame, meaning that it shows two whole frames on both sides of the film. Repeating the film three times across the frame, I decided to keep the height of the original scan as this avoid making the proportions of the whole frame too long and narrow.

To show the process that achieved the colour image, I wanted to stage a set of logical progressions such as it might be possible to intuit how the colour image is created from a strip of black and white film without it necessarily needing an explanation (this particular post notwithstanding of course). The first repetition shows the film, in black and white, repeated in sync across the width of the screen (I could possibly have begun the series of repetitions as a black and white negative, but this seemed unnecessary); the second repetition, still in sync, shows the film in red, green, and blue. The next repeat then staggers the starting times of the red, green, and blue segments so that the point at which the correct colour filter appears in each coloured section is now aligned temporally. Repeated again staggered in time, the three colours spatially align on the the screen at that point to create the colour image. Remaining overlaid, each staggered coloured section runs to its end. The steps are then repeated in reverse, ending up back at the black and white footage, and in theory this could then be looped in on itself. 
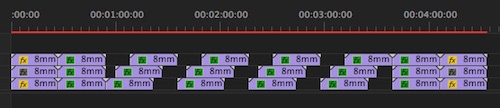
A screen shot of the timeline in Premiere shows the way that the sequence of progressions is arranged. Although created in a digital form, it would be possible to recreate the result using three prints of the film, three projectors and the RGB colour filters in front of the right lenses; some of the earliest colour moving images used a not dissimilar concept, but on a single strip of film, with alternating frames shot through different colour filters, which would then be projected back through those filters to create an optical mix. The film (below) is essentially just an experiment intended to demonstrate - but also disclose - the technique itself.


Thursday, 17 April 2014

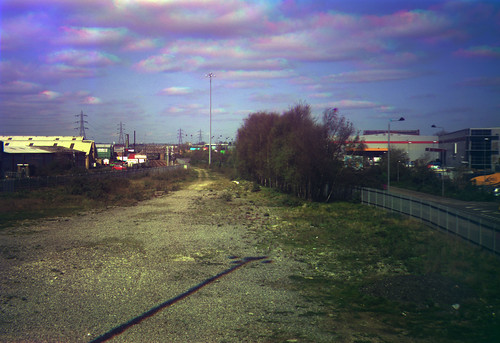
Recent three colour process images

Three colour process, separation negatives shot on Ilford Delta 100 with Zodel Baldalux,
colour RGB image composited in Photoshop CS2
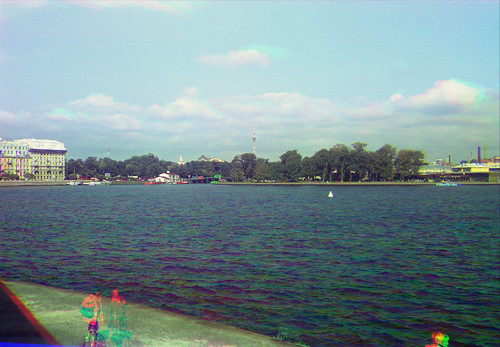
In my post last year, 'An Experiment with Three Colour Photography', I described the technique of using three black and white photographs to produce a colour image. For that experiment I used large format film, which meant the taking of each separate shot was inherently slowed down by the process of shooting sheet film. I also had problems when scanning the negatives to create the colour image, as I had to scan each in two halves, leaving problems with both alignment and balancing the colours in the three RGB channels. I subsequently took the tri-colour filter set with me to St Petersburg last September, but only used them for one medium format shot. By necessity this was hand held, and not much quicker than shooting large format, with the problem of holding the camera and the gelatin filters in front of the lens and then pressing the shutter button with two hands (while a stiff breeze threatened to blow the filters into the Neva river). Despite the results needing a good deal of cropping as each shot was not very well aligned through being hand-held, the very distinctive qualities of the three colour technique made me wish I had used it for a few more shots on this journey.

Hand held three colour process, separation negatives shot on HP5 Plus
with Zodel Baldalux, colour RGB image composited in Photoshop CS2
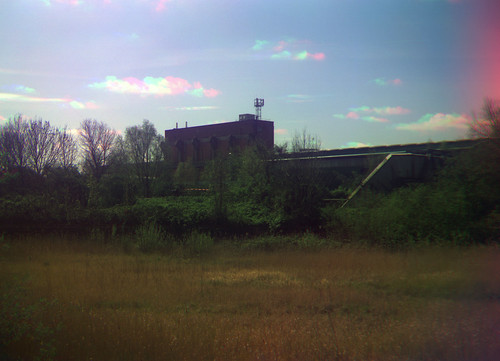
For the above image, a tripod would have ensured a better alignment of each colour. Using roll film rather than large format means that each shot can be taken with quicker succession, although I was still using a manual camera which required cocking the shutter and advancing the film using the red window between each shot. Anything moving in front of the camera shows the time taken between each frame, such as the figures and waves in the shot above, and the clouds. Recent good weather has provided the opportunity to take some more three-colour images. I had hoped for some cloud-free days, as these are the one aspect of the landscape shots which highlight the brief time discrepancy between each shot, but entirely cloudless days are rare. The image at the top of this post was the best of the recent shots; the photograph immediately below shows some problems with shooting into the sun with the filters held in front of the lens causing reflections. The tri-colour filters I have been using are unmounted squares of gelatin, which have the tendancy to pick up fingerprints very easily, and are difficult to clean and this particularly shows up when the sun hits the filter surfaces, and a slight soft-focus effect results.

Three colour process, separation negatives shot on Ilford Delta 100
with Zodel Baldalux, colour RGB image composited in Photoshop CS2
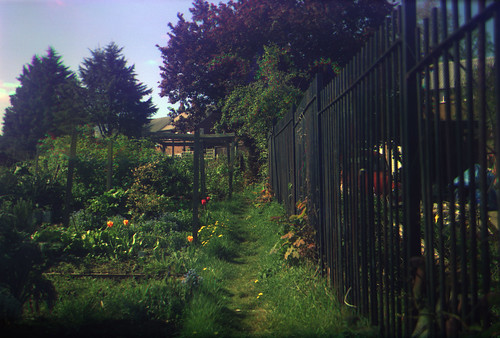
Three colour process, separation negatives shot on Ilford Delta 100
with Agfa Record I, colour RGB image composited in Photoshop CS2
Three colour process, separation negatives shot on Ilford Delta 100
with Agfa Record I, colour RGB image composited in Photoshop CS2
As the 6x9 format gives eight images on a roll of 120 film, this meant that I could shoot two sets of three colour separations, with two frames left on the film. On some of the films I used these frames to shoot second versions of some colours, but I also tried a two colour separation, shooting just through the red and green filters. When making the RGB composite I used the green filtered negative in both Green and Blue channels, essentially giving a red/cyan colour image. This effect was intended to mimic the two colour bipack systems used in the early part of the twentieth century for colour motion pictures (see the Wikipedia article on Bipack Colour).

Two colour process, separation negatives shot on Ilford Delta 100
with Zodel Baldalux, colour RGB image composited in Photoshop CS2

Friday, 15 March 2013

An Experiment with Three Colour Photography

The principles of colour photography are almost as old as photography itself, a three colour process being described by James Clerk Maxwell in 1855, and first demonstrated by Thomas Sutton under Maxwell's direction in 1861. James Clerk Maxwell's method was simple: using black and white emulsion, make three separate exposures with red, green and blue filters. The three photographs were then combined through an additive colour process, by projecting lantern slides of each photograph through the same red, green and blue filters, aligning the projections to create a colour image. This process became more successful when panchromatic emulsions, able to represent the whole spectrum of visible light, emerged around 1900. The most celebrated proponent of this technique was Sergey Prokudin-Gorsky, who documented the Russian Empire before the First World War. The three colour technique was superseded when a convenient, consumer-level colour photography was developed by a number of manufacturers, notably Kodak, during the 1930s with integral tripack colour films.

However, there has been renewed interest in the three-colour process in recent years, in part due to digitisation which makes for easy display of the images so produced. There's a large group on Flickr using the technique, commonly dubbed 'trichromy'. For my first attempt at this technique, I decided to take the approach of making it more difficult than it needed to be by using large format. With taking three separate exposures, I was aware that movement between the images would create ghosting: it would have been quicker to shoot three images in succession on rollfilm, and to shoot more of them, but the challenge of working with large format appealed to me.

Kodak Tri-Colour Filters
To take the photographs, I used my MPP Micro Technical Mk VI camera with Fomapan 400; I had a number of filters which came with a large format lens I'd bought, including a tri-colour set. I took three shots with the RGB filters, using the unsophisticated method of simply holding these over the lens (I took the blue image twice, as I was concerned that the first shot wasn't sufficiently shaded from the oblique sunlight; I also shot it on a glass plate for good measure). The negatives were developed in Rodinal diluted 1:50, for 11mins at 20ºC.

Red, green and blue exposures
Scanning the large format negatives was complicated by not having a scanner capable of taking 4x5 sheet film: I had to scan each negative in two halves. To begin with, I attempted to stitch the two halves of each negative together, and then combine them, but this led to problems with registration across the image, so instead I composited the top and bottom halves of the image separately, then stitched these together. To make the colour image, I used Photoshop to combine the three separate grayscale images by pasting each into a separate channel of a new file in multichannel mode, stacking the channels in the order of red-green-blue, then changing this image mode to RGB.

Uncropped RGB Composite
Despite taking all four exposures as rapidly as possible, I did realise that the movement of clouds in the sky would cause ghosting in the image; what I hadn't expected was how apparent the movement of the shadows is. With the three colour process,  movement between each exposure causes these ghosting effects, making it more appropriate for using with still subjects. Cameras were designed around this problem, initially with backs that could expose three plates in quick succession, followed by dedicated colour separation cameras, which used beam splitters to expose all three plates at same time, such as the Bermpohl Naturfarben Kamera.

RGB Composite
Rather than adjusting the colours in RGB, I made adjustments in each channel separately, feeling that this was more appropriate to the enterprise. The image as a whole suffers from being scanned in sections, leading to the colour being patchy and uneven, yet it works. As I've shot the image in large format, it's possible to look at some details at 100% of the 1200 dpi scan. In the detail of the houses which have reproduced well, the shadows of the trees show colour fringing, which could be due to the movement of the sun, but on reflection it's more likely to be wind in the trees. In the second detail below, looking across allotments to the recycling centre, the arm of a JCB is visible in three different positions, in three different colours.

Detail of houses in the upper left

Detail of JCB movement


Sources/further reading
Wikipedia entry on Colour Photography
James Clerk Maxwell and colour analysis on Wikipedia
Sergey Prokudin-Gorsky in the Library of Congress
Three-Color Camera on Camera-Wiki