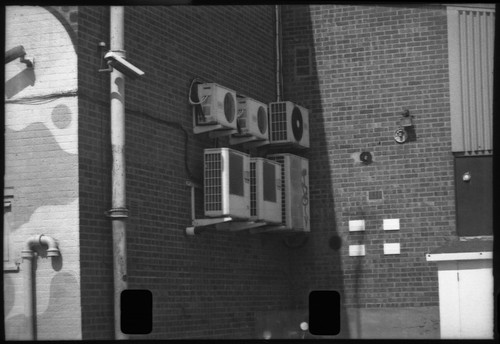
Wednesday, 29 October 2014

The Ilford Manual of Photography

"Light radiated from the sun travels through space and impinges upon the crowded surface of our world."
Although this opening line is redolent of an H.G. Wells novel, it is in fact the very first sentence from the Ilford Manual of Photography. The Manual was first published in 1890 (some sources give the date as 1891), ten years before the Britannia Works Company became Ilford, Limited. The original Manual of Photography was written by C.H. Bothamley, superseded by George E. Brown as editor in 1935. The next version of the Manual then edited by James Mitchell and published in October 1942, became the 'first' edition, despite all editions published during the previous fifty years. After four editions, Mitchell was subsequently replaced by Alan Herder as editor, who presided over the fifth edition of 1958, the last as the Ilford Manual of Photography, before Focal Press took over publishing. As the Manual of Photography, the tenth edition was published in 2011.

My copy here is the October 1946 reprint of 1944's second edition. What follows is not so much a review, but rather a series of observations from the hindsight of seventy years, as photographic practices has changed. The Manual is a comprehensive reference book, 484 pages in the 1946 printing, and goes beyond the scope of the keen amateur photographer; around the same period Ilford also produced the Selo Text Book of Amateur Photography, roughly half the size, containing many of the same illustrations. The illustrations from the Manual itself date from various previous editions, and make a stylistic hodge-podge (I've seen one of the Brown editions, which has many of the same illustrations, and some are wood engravings - notably in the 'Trimming, Mounting, and Framing' chapter - which must date as far back as the late 19th century editions). The Manual is also parochial in tone: inevitably, it is largely Ilford products that feature, apart from those aspects of photography outside of Ilford's remit as a manufacturer, most notably in the chapter on cameras. What is interesting is that this edition of the Manual was published during a long transitional phase when the technology of photography was changing, from plates to rollfilm, from the general use of larger formats to 35mm, from orthochromatic to panchromatic emulsions (including changing development from inspection to the time/temperature method) and from producing prints by contact to enlarging.

First Principles

After the poetic start, the book's first chapter, 'The Mechanism of Image Formation', describes the physics of light, which, through diffraction, leads on to explaining lenses, and provides a historical overview of camera lens development. The most up-to-date lens designs written about are Zeiss Tessars and Protars, fifty years old when the Manual was published, with a paragraph on the "long-sighted policy of the German Government of the day" in making grants to Abbe and Schott to research the properties of optical glasses.

Cameras

As there were no Ilford or Ilford-branded cameras at the time of publication (the troubled Witness camera was announced a year after my volume), the second chapter, 'Cameras' contains a general typology of cameras, mentioning some specific models, with illustrations, followed by a table detailing many more. The category miniature ("the graininess of the photographic emulsion is a constant enemy") encompasses 35mm but also negative sizes smaller than 6x9cm, so 6x6 on 120 film is a miniature format, the definition being about the size of the negative not the size of the film, which I presume is related to making prints by contact, rather than enlargement (this makes cameras such as the Rolleiflex and Rolleicord, and the VP Exakta with 127 film 'miniature' along with the Contax and Leica). At this period, Ilford did not use Kodak's descriptors for film formats, dropping the '1' from 120 and 127 (and other sizes), which become size '20' and '27' rollfilm, and 'Z' replaces the '6' in 620, becoming Z20 size.

The Recording Medium

The chapter on films and plates only lists Ilford materials. It is interesting to note that, in the mid-1940s, there are 19 emulsions available in glass plates, 11 as sheet film, and 4 each for 35mm and roll films (but not all four are the same). The film and plate emulsions are listed in order of contrast and a table details ideal uses for each with a small description and speeds in H&D and Scheiner numbers, and Ilford Speed Groups, with no ASA or DIN (incidentally, this has provided useful background information for some of my work with glass plates). The chapter makes special mention of HP3 and FP3, "two new plates recently introduced", HP3 being "the fastest panchromatic plate available". There are some discrepancies between this chapter's lists (p74-77) and the chapter on development which includes Empress and Press (Ortho) plates (p195). This chapter mentions in passing that Ilford supplies stock sizes up to 20x30 inches, and both films and plates are availble to order up to a huge 36x45 inches (over a metre wide), with sheet film larger still. Later on in the book, under development papers (p294), 'Negative Card' is mentioned, something I hadn't been aware of, "a low-priced substitute for plates or films for use in the camera", with two versions, Studio Negative Card and Outdoor Negative Card. Printing was by reflection, and one advantage of negative card was the ability to make prints from the negatives before these were dry.

Colour is treated in a separate chapter (pages 400-406) towards the end of the manual, after a chapter on the copying of business records, alongside sections on photomicrography and cinematography - and given very similar weight. It states "prints in colour to be viewed by reflection can even now be prepared only with some difficulty and by the exercise of considerable patience and skill". It details both Kodachrome and Agfacolor as reversal processes (mention is also given to Autochrome and Dufaycolor), but gives more space and explanation for the making of separation negatives with black and white emulsions to make colour prints, essentially similar to the three colour process.

Picture Making
"At one time cameras came in and out with seasonal regularity, and photography other than by daylight was a thing unheard of excepting by the professional photographer, who by reason of his expensive and elaborate lighting equipment was able to work by artificial light. Now, however, with fast plates and films and fast lenses, photography is an all-the-year-round activity..." (p.113)
Although this statement was unquestionably true at the time, it was also the case that many cheap snapshot-type cameras were still being made for years afterwards which did require sunny weather for optimal results, like the Instamatic I recently wrote about as 'My first camera'. Ilford did promote the first version of their Hypersensitve Panchromatic film for night photography in 1935, as reproduced on Photomemorabilia's Ilford chronology. It could be seen that Ilford used the advance of film technology as an opportunity to promote film sales: the advertisement begins: "The nights are drawing in. But that's no reason for putting away your camera." There are two separate chapters that cover the taking of photographs, one on 'The Technique of Picture Making', followed by 'Exposure'.

In the first of these, there are generally sound principles on composition (a keenness for the rule of thirds is demonstrated), although occasionally too dogmatic: "Never divide the picture into two approximately equal parts by a horizontal or vertical line" (p102). There are also assumptions that dictate how men and women should be photographed;"The addition of an undiffused spotlight introduces harsh shadows, giving a somewhat dramatic effect. This arrangement is suitable for character portraits of men." - although this is illustrated by a picture of a female model (p127). Oddly, there is a whole section on table top photography, photographing model trains, planes and so on, with suggestions for replicating surfaces such as snow (salt), concrete (French distemper), and "Surf from ship's propellers" ("Soap lather applied with artist's small paint brush"). Evidently in the 1940s there were limited options for home entertainment: "In table top photography the creative impulse can have full expression" (p117).

For exposure, three type of meter are described, actinometers ("some of these meters are still in use..."), extinction meters and photo-electric meters. There is also a very comprehensive set of exposure calculation tables, far more detailed than the Sunny 16 rule. The sum of values from five tables (film or plate speed; time of day for a given latitude; weather conditions; type of subject; aperture) provides the shutter speed in Table VI. There are also tables for artificial light, copying work, interior daylight with Selochrome, night scenes with HP3 and flash bulb, powder and magnesium ribbon.

The section on 'Holding the Hand-camera' suggests larger cameras ("such as quarter-plate reflex, or press camera", p121), being heavier, are more easily hand-held with longer exposures, 1/10th or as long as 1/4th "by those of steady hand". When I began to be interested in photography, I absorbed the rule of thumb of using a shutter speed, hand-held, numerically no smaller than the focal length of the lens (i.e, using 1/60th with a 50mm lens and so forth); larger cameras tend to have longer focal length lenses, so this rule contradicts the suggestions made about what shutter speeds to hand-hold - but I can't imagine having any confidence in using my MPP Micro-Technical camera at 1/10th of a second hand-held. The Manual's advice on using miniature cameras seems unnecessarily cautious in comparison: "It is doubtful whether anything longer than one-hundredth of a second is safe for a hand-held exposure by the average photographer using a miniature camera" (p37) and "For all exposures longer than 1/25th second, or those 1/50th second in the case of miniature cameras, it is necessary to rest the camera on a rigid support" (p48).

The Darkroom 


Before discussing development, there is a detailed chapter on 'The Darkroom'. One wonders how many people had darkrooms at home in the middle years of the 20th century. For purposes of review, I've reproduced some of the illustrations that are given as examples of how to organise any available space: "the amateur is, of course, often obliged to make temporary use of a room designed and normally used for other purposes, and generally chooses the bathroom..." This is one section of the Manual that is still very relevant for film photographers today as much of the requirements of a darkroom have not changed in decades.


The Manual includes information that extends to professional and commercial use, which later includes a whole chapter on 'The Developing and Printing of Amateur Films' which gives a "brief outline of an efficient system" for running a developing and printing business. The darkroom chapter includes plans for setting up a commercial darkroom.


Developing

The first method described in this chapter is development by inspection which requires the film to be orthochromatic, but also includes a brief section on desensitization, a practice I was not aware of, by which fast films and plates are treated with a solution (the Manual names Qualitol or Desensitizing Yellow) after exposure and before development which enables development to then be carried out under a green safelight. Although development by inspection is not common now that most photographic materials are panchromatic, the Manual does provide useful descriptions of the process and how to evaluate the negatives during development, worth quoting at length:
"If the highlights (e.g., sky) appear first and are followed gradually and steadily by the half-tones, and then by the darker parts of the subject, it may be taken that exposure has been reasonably correct.
When the highlights are slow in appearing, and the darker tones are also much slower in showing plainly, the film has been underexposed. If, on the other hand, highlights come up in appreciably less than half a minute, with half-tones showing almost at the same time, the film has been overexposed.
Development is continued until it is judged that the process has gone far enough. But it is not easy for the beginner to know when this point is reached. In general, the deepest shadows of the subject (the lightest parts of the negative) should show a slight greyish veil (with detail visible) when looking at the negative in the dish, and if the negative, when held up to the darkroom lamp (not too near), also appears almost opaque in the highlights, development may be considered to be sufficient. [...] At this stage, the edges of the negative, where the emulsion was protected from the action of the light by the mask of the camera, should be almost white. If they are greyish, it is a sign that the emulsion is beginning to fog, and that development should not be continued longer."(p191)
For tank development with the time and temperature method, times are given for temperatures of 13º, 18º, and 24º centigrade. Ilford's current recommendation of developing temperature, and one generally used for black and white processing, is 20ºC. Their time/temperature compensation table only goes down to 18ºC, and for many films, a temperature of 24ºC gives very short development times - Ilford currently do not recommended times shorter than 5 minutes as this may lead to uneven development (on the development table on p.195 in the Manual, some plates and films are given just one and a half minutes dish development at 24ºC).

The numerous film developers listed in the chapter are all given as recipes, each with an 'ID' number (I have only ever used ID-11, essentially the same as Kodak's D76), demonstrating how common it was to make up these from their constituent ingredients, although a few are mentioned as being available in powder form. The list of formulae and their uses are very useful if one wants to make up film developers from scratch. The only developer listed as being available in solution is Certinal "a highly concentrated developer of the paramidophenol type" which was Ilford's version of Rodinal.

In many references to developing in the Manual, this is usually followed by 'rinsing' rather than the use of an acid stop bath, although it is mentioned in the 'Fixing, Washing, Drying' chapter. This is followed by a very detailed chapter on 'Faults in Negatives', with a table and illustrations to help diagnosis. The description of fault number 56 below is, unintentionally or not, wryly amusing.


There are chapters on 'After-treatment of Negatives' and 'Preparation of Negatives for Printing'; after treatment includes intensification and reduction, and there are intensifying solutions formulae listed that contain potassium cyanide, mercuric chloride/iodide, and uranium nitrate, none of which would be recommended for use today. In comparison, Silverprint currently list chromium intensifier and selenium toner as intensifiers. Later in the manual, there is a description of how to make a mercury-vapour enlarger using asbestos sheets (p297). Also alarming, but less dangerous, is the section on hand after-treatment of negatives, which includes knife work directly on the emulsion, as well as the use of mild abrasives to reduce density, pencil and stump and watercolour for retouching, and varnishing the negative prior to working on it. One sees photographs from the mid-20th century, especially portraits, which have been extensively retouched; digital retouching is often, although not always, more subtle.

At the time of publication, gaslight paper was still in use, as well as bromide and chlorobromide papers. Plastika (a paper with a "characteristic curve with a long straight line") and Ilford Multigrade paper were both recent introductions. For each, formulae are given for making up different paper developers, just as in the chapter on developing films. Although attention is paid to contact printing, the Manual states that "enlarging has become the general practice among amateur photographers. In some degree the tendency has been fostered, or even forced, by the increasing popularity of small cameras." As well as describing the printing process, alternative processes, such as gum bichromate, carbon printing, bromoil are all discussed, and a whole chapter is given over to the making of lantern slides. This chapter lists three different types of lantern plate: Gaslight Lantern plates, Warm Black Lantern plates, and Special Lantern plates, the last type I've used successfully shot in a camera to obtain a negative (for the pinhole photography day earlier this year, but also at night); the Special Lantern plates are "the most rapid, though they are very slow in comparison with plates made for negative work" (p354).

The Manual ends with 'Useful Formulae' which collates those used through the book into one chapter, and appendices on reversal processing and 'Special Photographic Effects' describing unusual phenomena such as the Sabattier effect.

Although not necessarily a book to be read from cover to cover, the Ilford Manual of Photography must have been one of the most comprehensive reference works on photography ever published, and certainly in the middle years of the 20th century it was still possible to contain almost everything a professional, commercial or serious amateur photographer would need to know in a single volume.

References
The Ilford Manual of Photography, edited by James Mitchell, M.A., B.Sc., F.R.P.S., 1946
The Manual of Photography on Photomemorabilia
Photocornucopia: The Ilford Manual of Photography

Wednesday, 15 October 2014

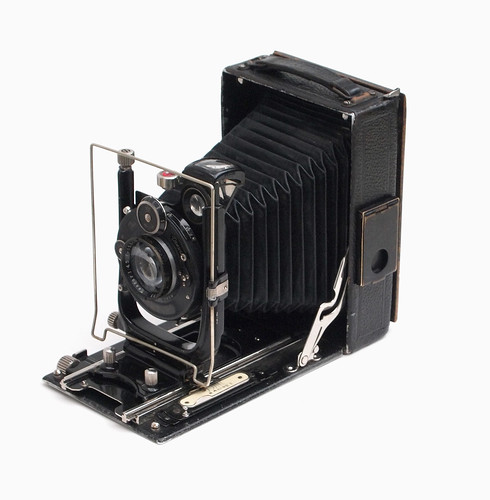
Ica Trona 210

Ica Trona 210
For some time I have been thinking about writing a post on 'small large format', to discuss my 9x12cm folding plate 'hand and stand' cameras, the Kodak Recomar 33 and Voigtländer Avus, but there always seemed too much information to convey in such a post and I hadn't used either camera enough, for a number of reasons. However, having begun developing films at home over the summer, rather than the darkroom I usually use (which is being refurbished), and having bought an Ica Trona 210, the ease and speed of turnover for developing sheet film (or glass plates) has meant, in a short space of time, I've used the camera quite a bit. One reason I was going to call the post on 9x12cm cameras 'small large format' was firstly that, although it is open to debate, and opinions differ, 9x12cm is considered the smallest sheet film format to be sufficiently large to be labelled such - if it's considered at all, that is. Many would use 4x5 inches as a starting point, but as 9x12cm is less common in the UK and US, it's hardly thought about as a format (the Wikipedia entry begins "Large format refers to any imaging format of 4×5 inches (102×127 mm) or larger..." then adds "Less common formats include [...] metric formats, including 9×12 cm"). Indeed, when I bought the Voigtländer Avus some years ago, I was not aware of it, yet in continental Europe it is not uncommon as a sheet film size (Ilford also manufactures film in 9x12cm, although possibly only during its annual ULF production run). I saw the Ica Trona in an online auction with a prominent warning that "it is NOT possible to obtain film which will work in this camera. It is sold for DISPLAY ONLY." At the time I had a mostly full box of Fomapan 100 and three boxes of HP3 glass plates in the size, the buyer's warning was a goad for me to place a bid on the camera, and the auction went for its starting price.

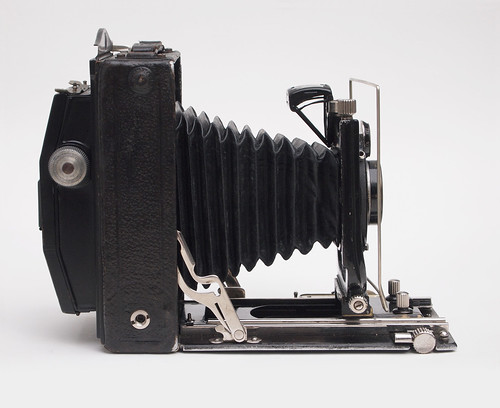
A second reason I was going to call the post 'small large format' was also the size of the cameras. By no means small in themselves, compared to most 4x5 inch cameras, these 9x12cm cameras are compact, being around the size of a thick paperback book (a doorstep airport novel, say): the Trona is 16 x 11.7 x 5cm when folded. One notable reason for these cameras' compactness is that most do not possess rotating backs, a feature which would make the cameras square to the longest dimension of the plate or film holders. My Ica Trona dates to the early 1920s, but the design of these folding plate cameras was remarkably similar across various manufacturers from the early years of the century until the later 1930s, when most of these cameras seem to have been discontinued, their functions being replaced by professional view and press cameras, while for amateur photography all kinds of rollfilm cameras had made the 'hand and stand' camera seem awkward and obsolete (a quick glance at the folding hand page of Early Photography shows how similar many of the cameras are).
I briefly wrote about Ica's history in my post about the Icarette; unlike the Icarette, the Trona was one of the cameras that Ica continued to manufacture from one of its founding companies, and, when Ica became combined into the new Zeiss Ikon, the Trona was continued (alongside many other similar models - Zeiss Ikon's range of cameras in the early 1930s contained numerous near-identical but different models, many of which had come from the once-rival companies which came together to  make up Zeiss Ikon). The '210' after the Trona name is the code for the camera's image size - the 210 is 9x12cm, while there was a 6.5x9cm model, the 110 (there was also a quarterplate model, apparently sold in the US and UK markets only). Zeiss Ikon continued these model codes, with variations. The 1925 Ica catalogue reproduced on Camera Eccentric lists the Trona 210 with a f4.5 Tessar at 218 marks, making it one of the more expensive models, after the Niklas and the Ideal.

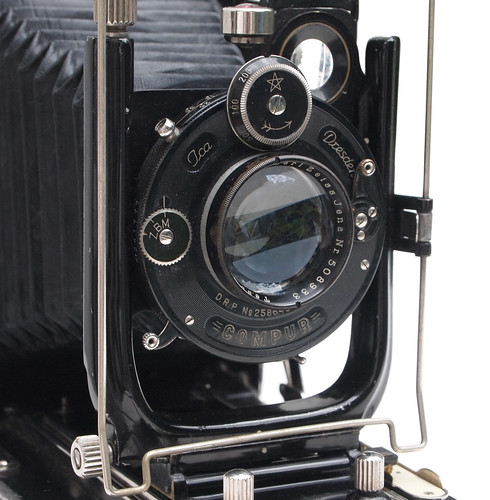
Conceived in the age of photographic plates, focus is by removable ground glass screen (the spring back appears to have been a later innovation), with each photographic plate loaded into individual plate holders. The Trona has features common to many 9x12cm folding plate cameras of a similar age: double extension bellows for a near 1:1 scale image when extended, front rise and cross movements, a rotating brilliant finder with spirit level, and a wire frame viewfinder. As with many pre-war cameras, the Trona was provided with a number of different lens and shutter combinations. My model has what would have been the top-of-the-range f4.5 13.5cm Tessar in a dial-set Compur shutter (later Zeiss Ikon Tronas were provided with a faster f3.5 Tessar). The shutter's rotating selector is marked 'ZBM', which seems an unusual variant, standing for Zeit, Bulb, Moment. Other Compur shutters I have of a similar age have 'D' for the German 'Dauer', rather than B, or 'TBI', standing for Time, Bulb, Instant - and some shutters have both. It appears that later Compur shutters were standardised with the letters representing the English terms.

Ica Trona lens and shutter detail
Although the ground glass screen has a wooden frame, the camera body and drop bed are both metal as are all the 9x12cm plate holders I've picked up over the past few years. Most of these work in all three of my cameras in this size, with the exception of two Kodak holders, which, oddly enough, do not fit the Kodak Recomar. The inter-war period appears to mark the transition from glass plate negatives to film, although in the 1940s Ilford were still producing many more different types of emulsions as glass plates rather than film. However the folding plate cameras of this era were provided with all the accessories needed to shoot film as well as glass. Firstly, film sheathes or septums were produced for film holders: to ensure flatness and the correct focal-plane distance, the sheathes hold sheet film in the place of a rigid glass plate. Secondly, film packs were made which held several sheets of film in an arrangement of light tight backing or covering paper (the special backs or holders for film packs often show up with the cameras themselves, not infrequently in the place of the ground glass screen). Thirdly, roll film backs were made to use medium format film.

Ica Trona with rollfilm back
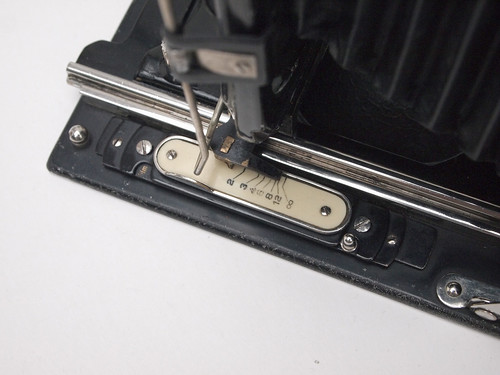
On the 9x12cm size, the rollfilm back does mean the image is cropped to 6x9cm, essentially a 'half-frame' size (one of my rollfilm holders also included masks for 6x6cm and 6x4.5cm frames, but this would mean sacrificing a large amount of the camera's size for a narrow angle of view to get more shots on a roll of film). The Ica Trona has a lever by the focus scale to switch this from Plate to Film, which moves the focus scale/infinity stop back by a very small amount. This only affects focus when using the scale itself, as it does not move the lens standard - unless this is locked into the infinity stop. Like most folding cameras from this era, the lens is not self-erecting, the lens needs to be pulled out by hand along the rails as far as the infinity stop, which then needs to be disengaged to use the rack and pinion focus. This is done by pulling out the sliding lever next to the focus knob which is connected to the focus scale on the other side of the drop bed. It can also be used to lock the focus knob at any point by pushing it back inwards.

Ica Trona focus scale
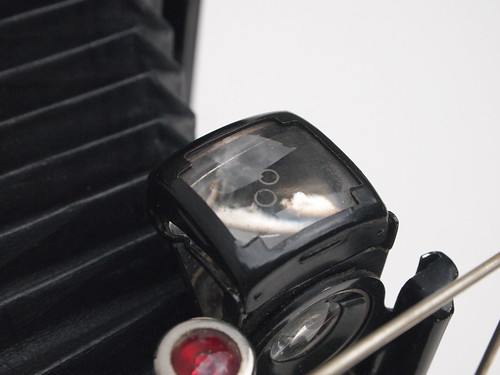
A reason to use such cameras today is their relative compactness for the large negative size, and the ease of hand held use - although historically large format press-type cameras were generally used hand held, I would not want to risk camera shake from trying to use my MPP Micro-Technical camera in the same way (by no means light, the Ica Trona is 1.2kg and the MPP 2.9kg). When shooting hand held, I have been using the ground glass screen to focus, then removing and replacing the screen with either a plateholder or the rollfim back, and framing the shot with the wire frame finder, or for a few shots, using the brilliant finder, holding the camera against my body for stability. The brilliant finder has a feature that I have seen on other cameras, but none of my other cameras with such finders possess: the glass is etched with two small circles which should be aligned to ensure that the framing of the finder is accurate and not at an oblique angle.

Brilliant finder with etched circles
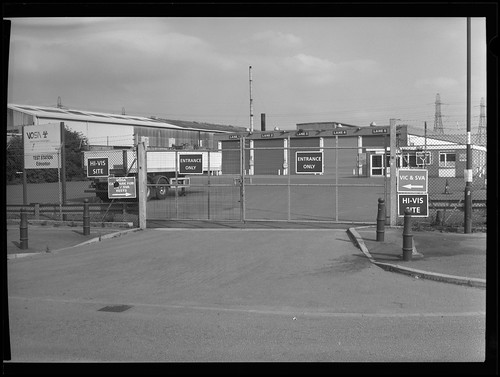
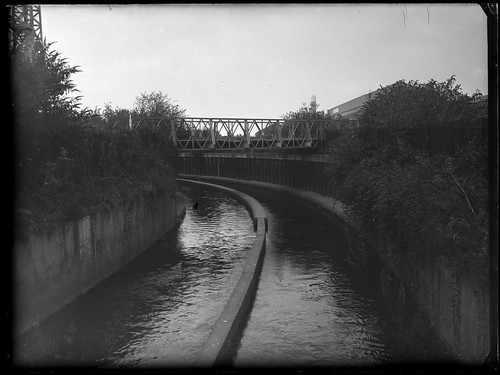
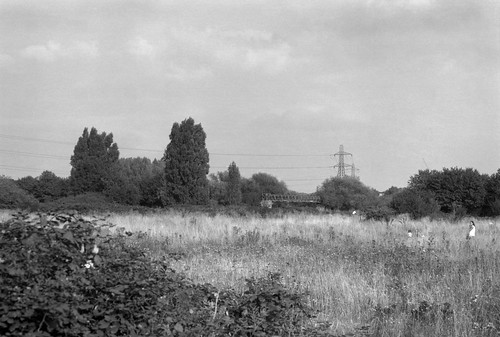
Some shots, notably the still life and studio photographs below, required a tripod for stability, but, more importantly, for accurate framing and focus. The Trona has one tripod screw fitting for landscape orientation, and two for portrait - one of these is placed towards the front of the drop bed to balance the camera when the lens is fully extended. The Tessar lens, although uncoated, is still capable of great definition and character. For initial tests with the camera, I shot a few Ilford HP3 glass plates from the early 1970s, which I was able to use hand held, rating them at 50 to compensate for age (most of the other plates I've been using are much slower), and Fomapan 100 sheet film and some rolls of Rollei RPX 100 in the rollfilm back. The dial-set Compur shutter has one advantage over the later rim-set designs in that it's useful to be able to switch between Z and M functions when focussing with the ground glass without having to change the shutter speeds on the dial.

Ica Trona with Fomapan 100
Ica Trona with HP3 glass plate
Ica Trona with Rollei RPX100 in rollfilm back
I was fortunate to have bright sunny weather for the photographs above, taken hand held with the Trona, which meant I was able to use relatively small apertures and faster shutter speeds. On a subsequent occasion, with lighting conditions less favourable, I rated the Fomapan 100 at 200. Developing with Ilfotec LC29, I couldn't find any times for a one stop push online, neither from Foma nor the Massive Dev Chart, so with a dilution of 1:19, I estimated a time of 12 minutes at 18ºC. The image below suffers from a lack of detail in the sky which a yellow filter may have helped to a degree, although the sky itself may have just been flat and overcast. The front lens standard is also not as rigid as it could be, and some of the photographs appear to show that, with wide apertures at least, if the lens isn't quite parallel to the film plain, the image isn't in focus across the whole surface of the negative, as the second image below demonstrates, as it becomes out of focus towards the left hand edge (some of my other old folding cameras seem to suffer from the same problem). This may in part be due to inadvertently pulling the lens with a backward motion while tripping the shutter, and being aware of this, with care can be avoided.

Ica Trona with Fomapan 100, push processed at 200
Although in the past I've used my Kodak Recomar 33 as a more portable large format camera, the Recomar has a more limited four-speed Telma shutter and a slower lens and, although most of the time the lens is stopped down for shooting, a faster lens is useful to focus and compose using the ground glass screen. The Avus had no ground glass screen when I bought it, having an empty film pack back in its place, which I did eventually convert into a ground glass screen, but the Avus also has a very stiff shutter dial, and, although trivial, the small clip which secures the plateholders, ground glass screen or rollfilm backs to the camera is very difficult to move in and out. In comparison, the spring clip on the Trona is designed to allow a plateholder to be inserted without pulling it aside as a separate action. The differences between all three cameras are small, but nonetheless, the Trona feels more sympathetic in use.

Ica Trona with Fomapan 100, push processed at 200
Ica Trona with HP3 glass plate
Ica Trona with Rollei RPX 100 in rollfilm adaptor
Sources/further reading:
Ica Trona on Early Photography
1925 Ica Catalogue

Monday, 15 September 2014

Rollei RPX 25 & 400 available in large format

Casually browsing Macodirect.de last night, I saw that two of the Rollei RPX films, RPX 25 and RPX 400 are now available as 4x5 inch sheet film. These are competitively priced, not as cheap as Fomapan sheet film, but considerably less than Ilford or Kodak large format films (at the time of writing only Macodirect.de is stocking the sheet versions of the films). Of the RPX range, I have particularly been impressed by the RPX 400, which is a very versatile fast black and white film; while RPX 25 I found needed more careful exposure and development, however, as all the other slow black and white films currently available are orthochromatic (Rollei and Adox), a panchromatic 25 ISO film is welcome.

Friday, 12 September 2014

Subminiature odds and ends

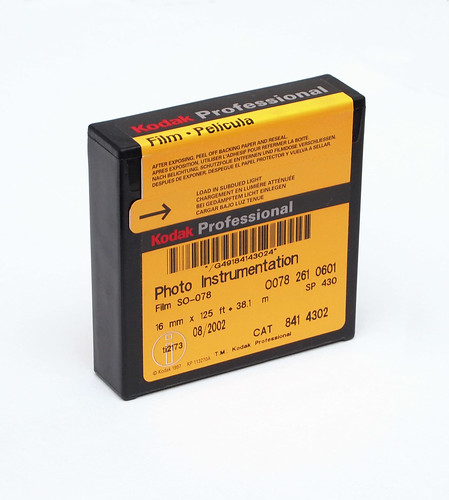
As I have shot a lot of film in my subminiature cameras over the past few months, it seemed timely to write a short summary of a few aspects of using them not covered in the posts about the individual cameras. Coming to the end of the 100ft-roll of Kodak WL Surveillance film, I bought a similar-looking box of Photo Instrumentation Film SO-078. This film was double-perforation, although I thought it was single when I bought it, the 'SP' on the box label clearly refers to something else. There was very little information online regarding the film (the seller had stated it to be 500 ISO); one obscure reference I did find was in a report from a NASA conference on atmospheric electricity where it was described as "a 400 ASA T-grain emulsion". As the film's SO number designates, this is a 'special order' film, which may mean that the emulsion itself could be the same as Kodak's TMAX 400 coated on a particular base and format. My first test showed that metering for 200 gave fuller negatives: exposed at 400 the negatives are thin, but the film is 12 years past its develop before date.

Kodak 16mm Photo Instrumentation Film SO-078
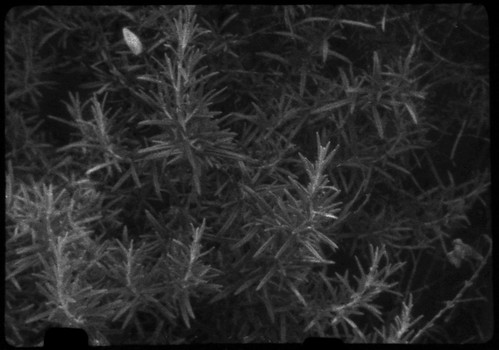
Having got 30 images from my first test roll using the Mamiya-16 Automatic, as against the 20 frames that the camera's cassettes are designed to be loaded with, I suspected that the Photo Instrumentation film was a little thinner that the surveillance film I've used previously. The box contains 125ft/38.1m of film on the same metal spool that usually contains 100ft. I shot the film at a range of exposure indexes, stand developing in Ilfotec LC29 at 1:100, and, as mentioned above, found rating it around 200 gave the best results.

Kodak Photo Instrumentation film SO-078 test roll
 Having perforations on both sides of the film, with the Mamiya-16 Automatic the lower holes were just on the edge of the bottom of the frame, if perfectly centred, although the scan of the film above shows the frames tilted on the film, which means the perforations occasionally intrude further into the image area. Scanning the negatives shows the Photo Instrumentation film as being fairly grainy, although as I have mentioned on other posts about the subminiature format, prints made in the darkroom would give a better representation of the film's qualities.

Kodak Photo Instrumentation Film SO-078 test shot, rated 400 EI
Kodak Photo Instrumentation Film SO-078 test shot, rated 200 EI
I also shot the film with the Kiev-30M, where the camera's larger frame size meant that the sprocket holes appeared at both top and bottom of the image. Depending on the subject matter, this can be more or less distracting, as in the examples shown below.

Kiev-30M with Kodak Photo Instrumentation Film SO-078
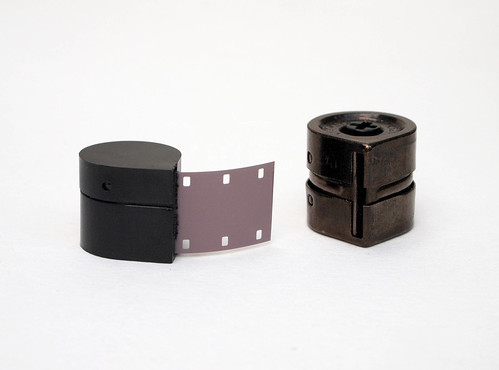
Although a number of different emulsions are still made in 16mm (and there is always the option of cutting film down to fit the format), one of the problems confronting the contemporary user of subminiature cameras is the scarcity of the propriety cassettes. Those made for the Kiev series of subminiature cameras appear to be most common, having been produced until around 1990. I found a cheap online seller of these, and, having bought ten cassettes, I decided to modify a couple to use with my Mamiya-16 Automatic. I already had two original metal cassettes, as well as a later plastic two-chambered one.  The metal cassettes are designed to fit both sides of the camera, and, being identical, each contain the spool used to advance or wind on the film. As the spool in the supply-side chamber is redundant, I cut the supply chamber from a couple of the plastic Kiev cassettes to feed the metal ones, as these were small enough to fit the Mamiya-16 Automatic. This now means that I can load three cassettes for the Mamiya camera, rather than just the two. I also cut an old yellow gelatin filter to fit the Mamiya-16 Automatic's filter holder as a substitute for the missing glass filter. As referred to im my post about the Minolta 16 QT, it's very handy having the filter built-in to the camera rather than an additional accessory to carry around.

Cut down Kiev cassette (left), with single Mamiya cassette
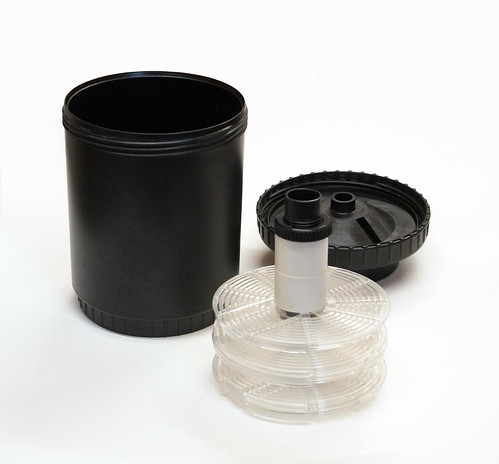
For about a year I had been developing 16mm film from the various subminiature cameras by taping it, emulsion side out, to 35mm film and loading it onto a normal Paterson reel. This hasn't been always consistent, and I have had problems with the 16mm film not being held taut enough against the 35mm for the developer to adeqautely reach the emulsion surface. Frequently, the tape would come off the film in its hour-long immersion when stand developed, with the usual result of having to fix the film loose. As my use of 16mm film has increased over the past few months, the solution to developing the films was a tank or reels that would actually fit 16mm, having only used Paterson tanks and reels for years. I found a very cheap 'universal' developing tank from the former Soviet Union, which uses reel ends separated by spacers which can be changed in their configuration to hold 35mm, medium format, or, as in the image below, 16mm, with an arrangement that can develop two films at the same time. The reels do not have ball bearings to drive the film around the spirals, so it requires a little more care when loading, but it's a useful addition to my darkroom equipment.

Universal Developing Tank, with reels in the 16mm configuration

Sunday, 7 September 2014

My first camera

Kodak Instamatic 25
The 126 'Kodapak' format introduced by Kodak in 1963 was in essence a reinvention of the point-and-shoot box camera. The easy-load, drop-in cartridge was marketed as an answer to common problems of loading roll film. The cartridge was designed to make this fool proof: it is asymmetric, so will only load the correct way around, winding is in one direction only, and it is also protects exposed film, except for the current frame, if the camera is opened. This two-chambered design does have the drawback of making the 126 cartridge bulky: its main competitors in terms of format when it was introduced would have been 127 rollfilm (Kodak was making many 127 cameras in the early 1960s) and 35mm, the films themselves being both much smaller. The Kodak Instamatic 25 was the second model in Kodak's Instamatic 126 range, manufactured in the UK. It is a basic snapshot camera, almost entirely plastic in construction: it features a fixed-focus 43mm lens, single aperture (f11), with two shutter speeds, represented by either a full sun symbol (1/90th), or half-sun/flash (1/40th). The camera, like earlier box cameras, was made for shooting outside in daylight, with film latitude to take care of variations in lighting, or flash for any other situation.

This was the first camera I ever took photographs with, at the age of eight, on holiday in the south of France thirty years ago. I used it again as a teenager until being given a Halina 35mm camera which was almost as basic (probably a Halina 260, possibly as a Christmas present in 1989), which I used until my first SLR camera as a student. After many years I found the Instamatic 25 camera again at the same time as the Pentax Auto 110. 126 film is no longer made, and it is hard to imagine sufficient demand for the cartridges to resurrect the format unlike 110 film. However, it is possible to reload and reuse 126 cartridges: the film used in 126 cameras is 35mm wide, but with just one perforation per frame, utilising a square image size of 28x28mm, although, like 110 film, 126 format also had smaller, pre-printed frames on the film, as seen on my photographs from last year's 126 Day.

126 backing paper
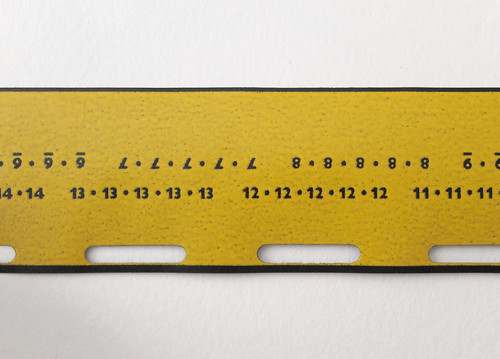
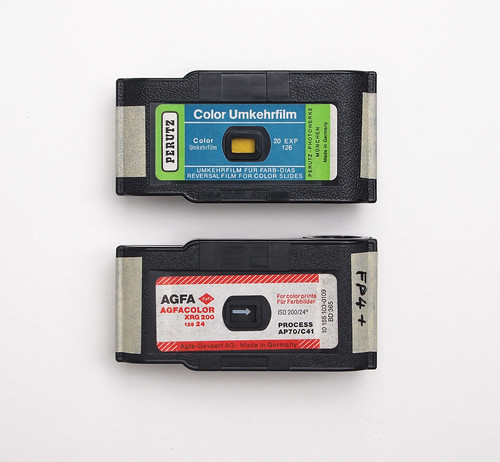
Although not made to be reused, I found the 126 cartridge is easy to force apart. The film has numbered backing paper with a generously long hole to register with the single perforation per frame on the film itself. There are two sets of numbers on the backing paper running both ways. The only explanation I can imagine for this is that some cameras might use the cartridge loaded the other way around, i.e. rotated through 180º, and the numbers count down the exposures rather than up, which would also require a different window to line up with the numbers. How much film can be loaded into the cartridge is limited by the length of backing paper: of the two cartridges that I had, the Perutz transparency film was 20 exposures long, while the Agfa film was 24. I have seen examples of 126 cartridge reloads online where the backing paper isn't used (the cartridge window then needs covering over) and 35mm film simply taped directly to the spool, but as the camera itself does not have a frame counter, and the backing paper may also help film flatness and prevent light leaks, it seems there's no good reason not to use it.

Reloading 126 cartridges with 35mm film
As the original film was 35mm wide, normal perforated 35mm will easily fit the cartridges. To reload the cartridges, I removed the internal spool with the backing paper, and taped the end of the 35mm film near to the end of the paper (as in the photograph above). Then, in a dark bag, I rolled the film together with the paper in all the way onto the spool to find the length and cut the film when the end of the paper is reached (the length of film which fits either 20 or 24 exposures will be shorter than the film in a 24 exposure 35mm cassette). Once cut to the correct length, I rolled the film and paper in the other direction to insert it into the supply chamber of the cartridge before closing the cartridge and taping it together at each end.

Reloaded 126 cartridges
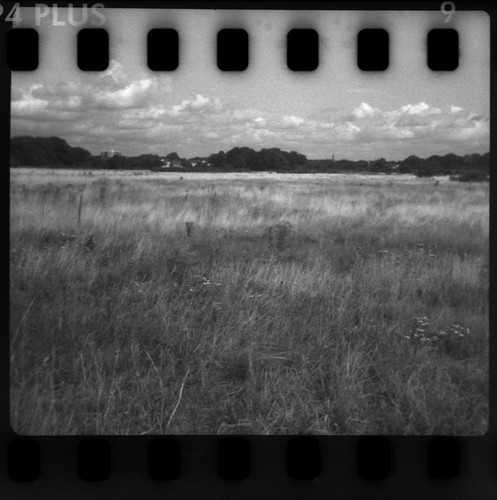
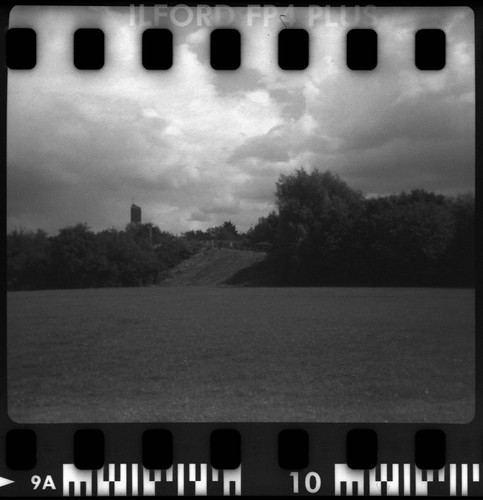
I shot both Ilford FP4 Plus and Mark V Motion Picture film in the reloaded cartridges. Although perforated 35mm film does fit the cartridges, it is not without considerations. Clearly, the perforations will appear across the top of the frame which has a very narrow rebate (the lower edge has a much deeper rebate), but I also found problems with overlapping and missed frames due to the camera's internal pin either failing to find a perforation to locate a frame, or locating a perforation too soon after the preceding frame. After shooting the first film, it became clear that, as long as the camera has wound on far enough to cock the shutter, it is probably better to use the numbers on the backing paper rather than rely on the advance wheel stopping at a frame with the pin located in a perforation. I attempted this approach on the second film and had less gaps between frames, although this won't necessarily prevent overlapping exposures.

Ilford FP4 Plus 126 cartridge reload
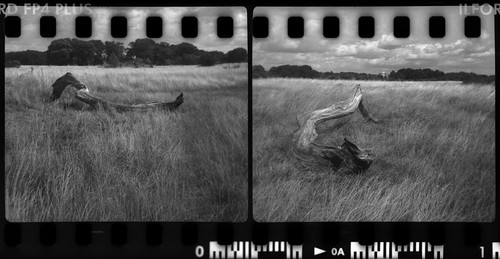
Once I had developed the two films, I scanned the first frame of FP4 and realised that the lens is not fixed at infinity, the horizon being just out of focus. The functions of the Instamatic camera are circumscribed by what it's designed for: taking photographs of people, family groups, but not strictly portraits, on a sunny day. The diptych of the two successive frames below demonstrates this: the fallen branch is relatively sharp, while the horizon behind just drops out of focus (a rough estimate of the camera's focus set around 3.5m would make everything from 2 to 10 metres in focus at an aperture of f11). Scanning the film and being able to enlarge it on a monitor emphasises this however; when made, most users of the Instamatic cameras probably would not see an image any bigger than a 4-inch square print, and the limitations of focus would be quite acceptable.

Ilford FP4 Plus 126 cartridge reload
The cartridge of Ilford FP4 Plus film I shot entirely on the 1/90th shutter speed setting as the lighting condtions were mostly full sun to being occasionally overcast and was developed at box speed in Ilfotec LC29 at a dilution of 1:19. I scanned the full width of the 35mm film to balance the perforations inside the frame with the rebate at the bottom, otherwise the composition appeared top heavy.

Ilford FP4 Plus 126 cartridge reload
The forty-year old Ilford Mark V motion picture film came out surprisingly well. I had used the 'half-sun' 1/40th shutter speed for some shots to bracket them and compensate for the film's age, although for most of the photographs this seemed unnecessary, perhaps due to the Mark V film's excellent latitude. I don't imagine that I will be using the Kodak Instamatic 25 with any frequency, as the camera and its format have too many drawbacks to be set against any of the advantages of the 126 cartridge, but it was an enjoyable exercise to shoot the camera once again after 25 years.

Ilford Mark V 126 cartridge reload
Sources/further reading:
126 Format on Camera-Wiki
Kodak Instamatics on Camera-Wiki
Instamatic 25 on Mischa Koning's Kodak Classics

Wednesday, 27 August 2014

A job lot of films and plates


Although I haven't written about my glass plate project recently, other than advertising the talk I am giving next week, I've shot a few plates over the past few weeks, and I have been continuing to look out for boxes of unexposed plates to use. One successful online bid for a collection of plates and paper was remarkable enough for me to write a post last year about it. From that particular box, I've used most of the HP3 plates, in adaptors, notably the 6x10.8cm plates, and some of the Kodak ones, although the Kodak plates were far more deteriorated with age. Since then I've found a few boxes, but yesterday I picked up a job lot of mostly sheet film from the 1960s-70s, with a couple of boxes of plates too. It was an online auction that went for its starting price of £4.99, probably in part to being 'collection only'. Even factoring in the cost of the trip to the coast to pick the lot up, I probably would have paid that just for the two 5x4 inch plateholders on their own. The three unopened boxes of FP4 (150 sheets in total) are promising; although I won't know the condition of the film until tested, I have used several rolls of Ilford FP4 from the 1970s for a couple of the 127 Days with good results.

The contents in full:
  • 3 boxes of Ilford FP4 sheet film, one 4x5 inch, two quarterplate size (3 1/4 x 4 1/4 inch), all unopened, all with the handwritten date "16/11/78".
  • 1 box of Ilford HP4 sheet film, 4x5 inch, previously opened, a handwritten number on the box could read either "4170" or "4/70". Box label has "K66".
  • 1 box of of Ilford Ilfoline IN.5 sheet film, 4x5 inch, previously opened, box printing has "H70".
  • 1 box of Kodak Panchro-Royal 4x5 inch sheet film, unopened, no information on dates
  • 1 box of Kodak Ektachrome Type B 9x12cm colour reversal film, unopened, process before Jan 1969, handwritten date "22/10/68".
  • 2 boxes of Ilford N5.31 Fine Grain Ordinary film, quarterplate size (3 1/4 x 4 1/4 inch), both previously opened, one with the handwritten date "-/10/67", the other "11/3/70"
  • 1 box of R.10 Ilford Soft Gradation Panchromatic plates (3 1/4 x 4 1/4 inch), previously opened, label style of late 1940s-1950.
  • I box of Kodak Kodalith Ortho Type 3 Photomechanical sheet film (3 1/4 x 4 1/4 inch), previously opened, develop before date Apr 1970.
  • 1 boxes of H.P.3 plates, previously opened, label style of late 1940s-1950.
  • 2 MPP 5x4 plateholders.
  • 5 quarterplate holders, four by Klito, one AP, two containing film sheathes or septums.

Monday, 25 August 2014

Pentax Auto 110

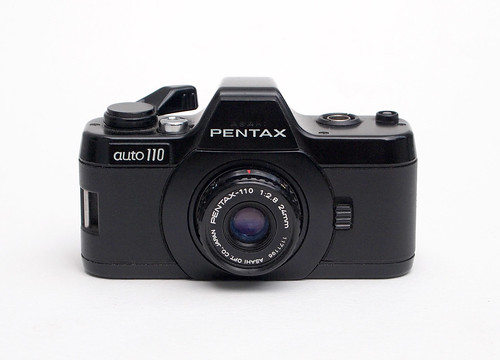
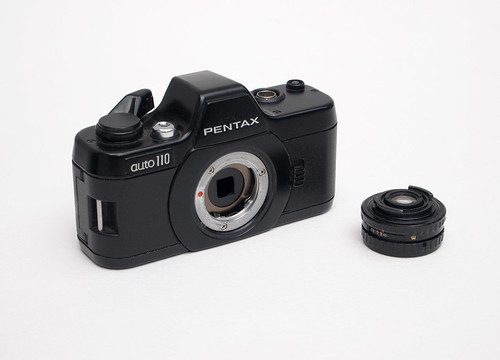
Pentax Auto 110 with 24mm lens
The Pentax Auto 110 is a remarkable single lens reflex camera on a miniature scale for the 110 format. Although the subminiature format was popular with many other Japanese manufacturers from the adoption of 16mm film for still picture cameras in the 1950s, through to the introduction of the 110 cartridge in the 1970s, Asahi/Pentax only entered the subminiature market with the Auto 110 in 1978. However, the Pentax Auto 110 was not the first SLR for the format: two years earlier, Minolta had produced their initial model of the Minolta 110 Zoom SLR. The Minolta cameras had a fixed zoom lens with aperture priority exposure and a range of ISO settings; by contrast, the Pentax was far more compact, measuring just 98x56x43mm with the 24mm lens, yet it has interchangeable lenses, fully automatic exposure, and a range of accessories.

As an SLR system camera, designated by Asahi simply as 'System 10', the Pentax Auto 110 was provided with a full range of lenses: as standard, the 24mm lens represents the 'normal' angle of view, and was complemented with the 18mm wide angle, 50mm 'portrait' lens, 70mm telephoto and 20-40mm zoom. Focus on all lenses except the fixed 'pan-focus' version of the 18mm is manual: the viewfinder has a split image central spot. As the unique two-bladed diaphragm combines both shutter and aperture and is an integral part of the camera body (shown in the image below), all lenses had to work with the same maximum aperture of f2.8, which stops down to the smallest aperture of f13.5 in the right conditions. There was also a third-party 1.7x teleconverter from Soligor, and a number of filters for the different lenses, including UV and skylight, but also close-up fliters. Other accessories include two different flash units, a power winder, and a belt clip.

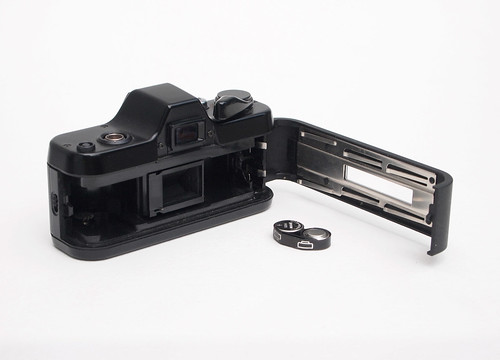
Pentax Auto 110 with lens removed
As the name suggests, the TTL exposure is entirely automatic: lightly pressing on the shutter button, an LED shows in the bottom right corner of the viewfinder, green for shutter speeds above 1/30th, yellow (for low-light) speeds below 1/30th. Exposures ranged from 1 second at f2.8 to 1/750th at f13.5. The Pentax Auto 110 does use the 110 cartridge's film speed tab to set exposure at either 80 or 400 ISO (some websites list the high speed setting as 320 ISO). As exposure is automatic, it's important to note that the camera does not work without batteries: the SLR mirror does flip up mechanically, but the shutter itself will not fire. Fortunately, the camera utilises two SR44/LR44 type batteries which are commonly available. The removable battery holder has a unique design with rotational symmetry which means it works inserted into the camera either way up.

Pentax Auto 110 with open back & battery holder removed
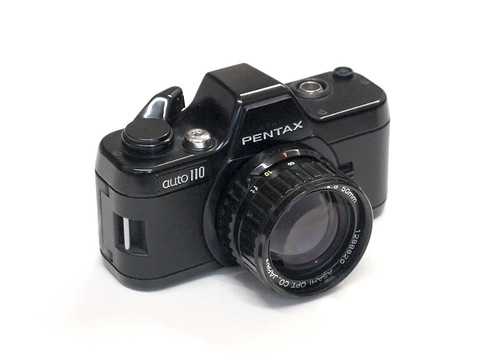
The Pentax Auto 110 in the images illustrating this post was left behind when a family member emigrated, and had evidently not been used for some time when I chanced upon it. Opening up the camera revealed two heavily furred batteries, but after cleaning the battery compartment and the contacts, I inserted two new batteries, and the light inside the viewfinder came on when lightly depressing the shutter button. The battery compartment also had some damage, where the plastic edge seperating the film chamber from the batteries had broken away, which may have been due to leaking battery acid. This does not appear to affect performance directly, but, as I later found, it may have meant that the batteries fit less securely. I very quickly found a 50mm lens online to supplement the 24mm, for just £7, so ordered this and a couple of film cartridges.

Pentax Auto 110 with 50mm lens
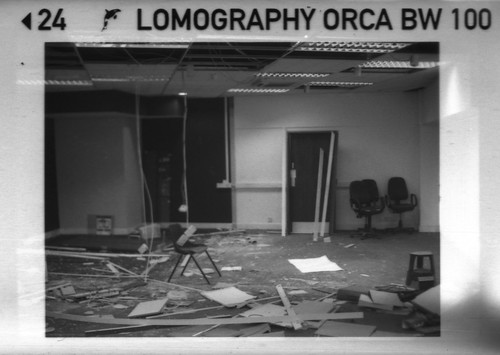
In a number of my posts about 16mm subminiature cameras, I have referenced the 110 format as a point of comparison. Kodak introduced the 'pocket instamatic' drop-in cartridge in 1972, essentially a smaller version of the earlier 126 cartridge, which succesfully competed with the various 16mm subminiature systems, and the format was very popular through the 1970s and into the 1980s. As a format commonly used for cheap snapshot cameras, like 126 and the short lived APS film, the 110 film cartridge was a casaulty of digital photography, and most companies had discontinued production by the mid-2000s, the last being in 2007, but since 2011 the format has been ressurrected with Lomography marketing both colour and black and white 110 films. The first production run of Lomography's black and white 'Orca' film cartridge didn't use backing paper, but subsequent batches do, which is useful to have when reloading the cartridge.
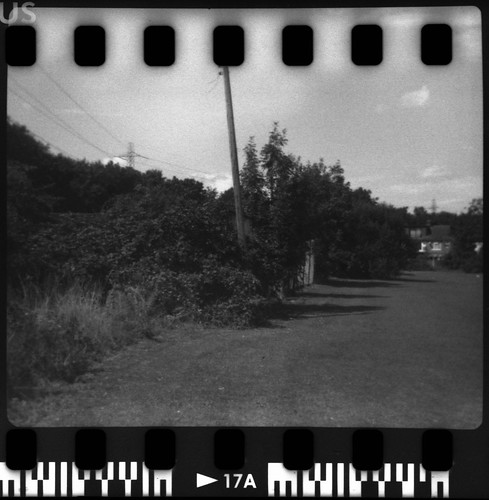
I bought a cartridge of the Lomography Orca film to test the Pentax Auto 110. After loading, I shot a few frames before realising that the exposure LED was not lit. This turned out to be poor battery contact, perhaps caused by the damage to the battery compartment. I removed the film cartridge (although later realised this could be done with it in place), and wedged a small piece of folded card to force the metal contacts tighter to the batteries. I also shot an old Kodak Verichrome Pan cartridge (with a develop before date of Sept 1978), this being the only black and white film originally made for the 110 format - until Lomography's reintroduction in 2011. This cartridge contained 12 frames, and due to the camera's fully automatic exposure, I was unable to compensate for the age of the film when shooting. I attempted to do so when developing, but with little success. Lomography's website has times for a number of film developers, but using the unlisted Ilfotec LC29, I choose to utilise stand development at a dilution of 1:100, for one hour with the Orca film, and two hours for the Verichrome Pan.
Lomography Orca 110 format film
One of the first things I noticed after developing and scanning the films was the clear presence of an overlap around the printed frames. This can be seen in the scan below, particularly in the lights around the top and sides of the frame. Kodak's original specifications for 110 film included this pre-exposed frame for the convenience of photo-lab printing. It was interesting to discover that the printed frames were not insignificantly smaller than the actual frame size that the camera uses. I attempted to measure the size of the pre-exposed frames from the scanned negatives, and got the following approximate measurements: Kodak's Verichrome Pan frames were 12.6x16.9mm; the Lomography Orca frames were practically the same at 12.7x17mm. However, without the pre-exposed frame, the Pentax Auto 110 has a negative size of 13.4x19.6mm. At the small scale of the 110 format negative, the extra 2mm width is not inconsiderate. In terms of area, the Orca negative is 215.9mm2, compared to 262.6mm2 without the frame, a difference of 21.6 per cent.
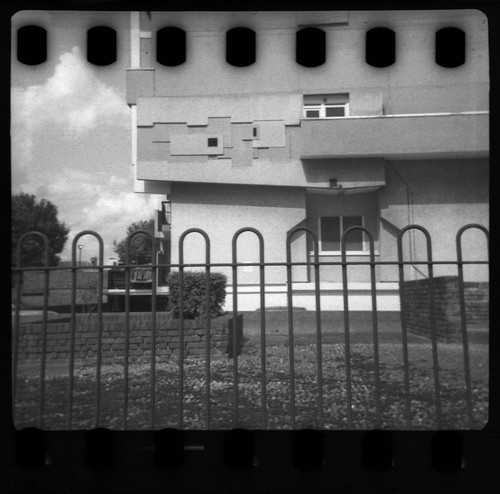
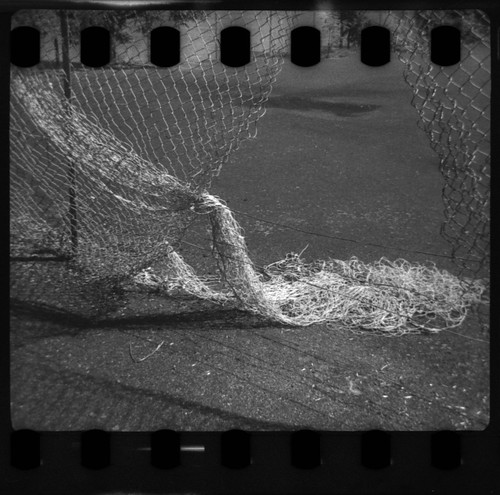
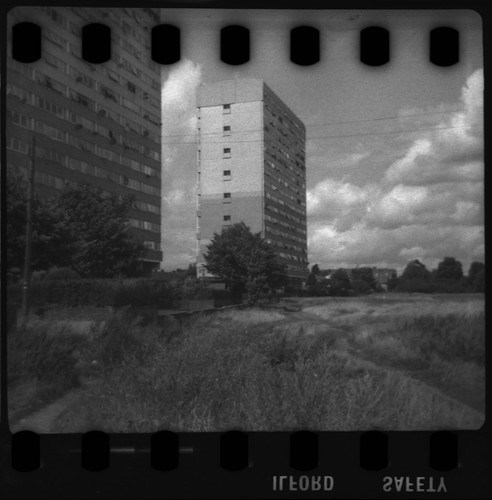
Orca 110 film, showing overlap with printed frame
Unlike the cassettes of the 16mm subminiature cameras I've used recently, the 110 cartridge is not designed to be reloaded with film and re-used. This I think represents something of a split between the formats, as, although the various different 16mm cassettes could be bought ready loaded with film, these cassettes were designed to be reloaded by the user - for example, my Kiev-30M box set came with two empty cassettes. The 110 cartridge is made to be used once, and handed in to be professionally processed. Although it may be fanciful to characterise this split as that between a consumer and an amateur, implying more the original sense of the word, reloading and reusing 16mm subminiature cassettes requires a certain level of commitment from the user, different from the spirit of the single-use drop-in cartridge. Additionally, the pre-exposed frames of the 110 format also impose limitations on camera manufacturers: by comparison, although there is a standard 35mm frame size, there are cameras which use different format frames, such as half frame, or the few odd cameras which take square format images. Likewise, 120 rollfilm cameras use 6x9, 6x7, 6x6, 6x4.5 framings, among others. 16mm subminiature cameras also had different frame sizes: generally, as the cameras were developed, frame sizes expanded, from cameras designed with frame sizes to fit between the holes of double-perforation film, to larger areas using nearly the full width of unperforated film. There was even a 16mm panoramic camera: the Viscawide-16.

Pentax Auto 110 with 24mm lens, cartridge reloaded with Kodak WL Surveillance film 2210
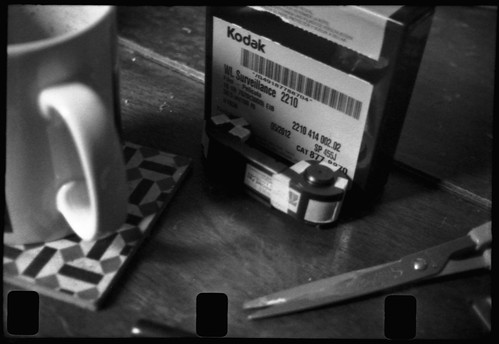
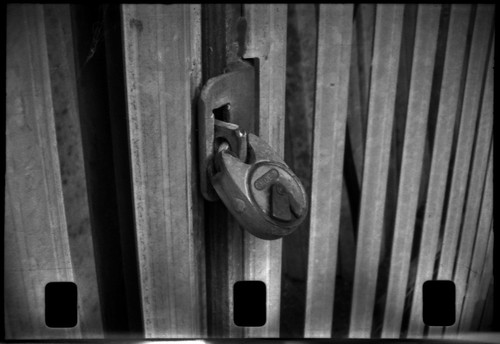
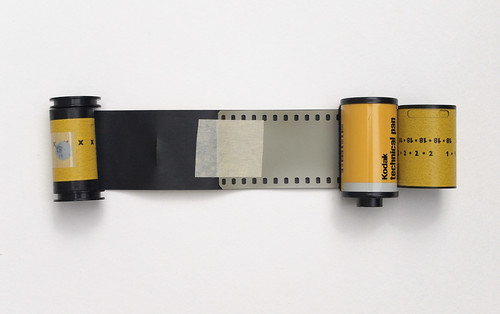
Having used two 110 cartridges and developed the films, the next step was to reload them. The website Instructables has a good guide to taking apart and reloading a 110 cartridge, which I looked at before my own attempts. The Orca cartridge came apart relatively easy after scoring the seams at each end and around the two chambers. The Kodak cartridge seemed more securely put together, and broke, although with each chamber intact, it could still be reloaded, and held together with more tape. There are some issues with reloading 110 cartridge with 16mm film. Ideally, unperforated film should be used, but the only unperforated film I currently have, Agfa Copex HDP 13, is too slow to be used in the Pentax Auto 110. I used Kodak WL Surveillance film, single perforated, with the perforations at the top of the cartridge, meaning that these would be at the lower edge of the frame. This also ensured that the pin to register 110's single perforation for each frame is not confused by the perforations along the edge of the 16mm film. This pin is used by the camera to stop film advance for each new frame, released when the shutter button is pressed. In some cameras, this pin is also used to cock the shutter, but this is not the case with the Pentax, where the shutter is cocked on the second stroke of its two stroke film advance. Without a perforation to register each frame, it is possible to shoot frames against the leader and trailer of the film's backing paper, providing that there is enough overlap of film, and it is also possible to wind the film through the camera without shooting a frame, as film advance doesn't stop on each unxposed frame. Additionally, some of the frames once developed show surge marks around the perforation holes, visible in the shot of the padlock further below.

Pentax Auto 110 with 50mm lens, Kodak WL Surveillance film 2210
I modified the Orca cassette to use it for high speed film by cutting down the tab, as I had been shooting the Kodak WL Surveillance film at EI400. For this first reloaded roll, I used stand development with Ilfotec LC29, diluted 1:100 for one hour. The test roll negatives looked dense, which suggested overexposure, but this may have been mitigated by the effects of stand development and the WL Surveillance's good latitude. Subsequent scans from the film above show a good tonal range, without blocking in the highlights. To check for a difference in exposure though, I shot another two rolls of reloaded Kodak WL Surveillance film, one in the unmodified Verichrome Pan cartridge, the other in the Orca cartridge, which should have meant that the camera would rate the VP cartridge at 80, the Orca at 400. Both films were stand developed (together) in Ilfotec LC29, with dilution increased to 1:150, and a slightly shorter time of 50 minutes. Both sets of negatives (shown immediately below) looked as though they had recieved the same exposure. As the Pentax Auto 110 does have the high speed/low speed switch, I concluded that this wasn't working, and both films were rated at 100. I may not have cut the film speed tab correctly, or perhaps, as the film speed switch is next to the battery compartment, its connections may have been damaged by leaking battery acid. Regardless, the WL Surveillance film worked well enough automatically exposed by the camera, and when I shot more reloaded cartridges, I used stand development at 1:100 again, for one hour.

Kodak WL Surveillance film, stand developed in Ilfotec LC29, 1:150
The limitations of the Pentax Auto 110 are essentially the limitations of the original 110 format specifications. With fully automatic exposure, it can only be used with films close to the two ISO settings, but as Lomography's currently available films are 100 and 200 ISO, this is only an issue when reloading cartridges For films of slower (or faster) speeds, development could be tailored to compensate for over or under exposure, but the use of much slower films with finer grain may not be advisable due to the effective push increasing contrast. There was a second version of the camera, introduced in 1983, the Pentax Auto 110 Super, which had a number of improvements, such as a single stroke advance lever, backlight compensation, self-timer, a shutter lock and a smaller minimum aperture. However, the Super was produced in much smaller numbers, as the popularity of the 110 format was already waning in the mid-1980s. Now 110 films are available once again, the Pentax Auto 110 SLR must be one of the best secondhand cameras around for the format.

Pentax Auto 110 with 24mm lens, Kodak WL Surveillance film 2210
Pentax Auto 110 with 50mm lens, Kodak WL Surveillance film 2210
Sources/further reading:
http://www.pentax110.co.uk/
http://www.photoethnography.com/ClassicCameras/AsahiPentaxAuto110.html
http://www.cameraquest.com/pentx110.htm

110 Format:
http://en.wikipedia.org/wiki/110_film
http://www.lomography.com/magazine/lifestyle/2012/06/18/the-demise-and-comeback-of-110-film
http://www.frugalphotographer.com/info-110.htm