Showing posts with label Kodak. Show all posts

Saturday, 13 August 2022

Kodalux L lightmeter (second version)

Kodak Kodalux L lightmeter and case

One of the peculiarities of the (admittedly niche) popularity of film photography and the perceived value of older film cameras in recent years (and the attendant high prices of secondhand equipment-especially when certain cameras gain a fashionable cache) is the emergence of a new class of shoe-mounted lightmeters. A decade or so ago, this might have seemed an unlikely proposition, but thanks to new manufacturing techniques, there are now a number of meters, largely deriving their design principles from the Voigtländer VC Meter I and II from the early 2000s.

For many years, I've used a hand-held Weston Master II whenever I've needed a lightmeter, although I do also use the 'sunny 16' rule relatively frequently, especially if I'm just taking snapshots when I'm not too concerned with critical accuracy in exposure. One of the features I've really appreciated about the Weston Master II is how low the ISO settings go, down to 2 ISO, useful for exposing photographic paper for paper negatives, and for the Kodak High Resolution Aerial Duplicating film, which I have been using at 2 ISO. However, when taking photographs in December, I dropped my lightmeter on the stone flags surrounding the Pole Hill obelisk on the day of the winter solstice-and it stopped working (it might simple be that the meter needle is stuck, but I have been wary so far in disassembling the Weston Master).
Kodalux L meter - showing diffuser
Looking for a new lightmeter as a consequence, I did consider the new shoe-mounted meters alluded to earlier, but searching for secondhand lightmeters online, I found the Kodak Kodalux L, and was able to pick one up pretty cheaply, around half the price of the cheaper of the new meters currently available. There are two models of the Kodalux L, with the second model being notably smaller than the first, and this made it the preferable choice.

Being a 1950s meter, the Kodalux L is powered by a selenium cell, covered with a typical honeycomb-glass. As I've written in previous posts, selenium cells do attract some negative opinions expressed online, but in my own personal experience, with numerous cameras (and the Weston Master II), I don't think I've actually encountered a non-working selenium cell, and, in general, they have been accurate enough for my preferred photographic medium, black and white negative film. The main caveat is that in low-enough light levels, selenium cells are simply not sensitive enough, but this would generally mean night photography. In addition, the design of most selenium cell meters would make them incompatible with a zone-exposure approach.
Kodalux L with case
The Kodalux L is a prime example of the precision of German manufacturing before their camera industry was supplanted by Japan: the meter measures slightly under 3cm high, including the shoe fitting, 3cm wide and 3.5cm deep. The meter is largely constructed from metal, with a plastic base, embossed with 'MADE IN GERMANY (WEST)'. My meter came with its dedicated 'ever-ready' case (approximately 4x4x5.5cm, with a couple of loops to fit to a thin strap), which has a accessory shoe fitting for use mounted in the case itself. Equally, it can be used mounted on the accessory or 'cold' shoe on a camera. Although branded Kodak (although the meter itself doesn't have the band name Kodak on it, but the case does), the Kodalux L was manufactured for Kodak by Gossen. The first model Kodalux meter is simply a rebranded Sixti; the second Kodalux appears to be a unique model, similar to the Gossen Sixtino or Pilot meter, but with significant differences. Gossen provided the lightmeters to the Kodak Retina and Retinette: the meter dials on some of these cameras appear almost identical to that of the Kodalux.

Kodalux L meter - top view
Use of the meter is simple: a white meter needle responds to light hitting the cell, and, with the correct ISO set, a milled ring or dial is turned to align a yellow pointer to the needle. One can then read the appropriate aperture/shutter speed combinations around the edge of this ring. Being familiar with manual and mechanical meters, I found it immediately instinctive to use; I did find a scan of the manual, which was useful when it came to calibrating the meter. Setting the meter, there is an inner disc, which turns with a stud, which has a window each side displaying film speed in DIN on one side and ASA (ISO) on the other. The ASA ranges from 5 to 1300, a good top film speed for its time. The ASA settings are picked out in what are largely obsolete numbers, at least at the faster end of the scale 160-320-650-1300, but these are divided with marks at thirds in between, so 400 ISO is one mark above 320 for example. Apertures run from 2 to 22; with shutter speeds from 500 down to 4 whole seconds, with whole seconds subtlety picked out in green. For its size, apertures are given in whole values, no half-settings, but one can extrapolate these. Aligning the yellow pointer to the white needle also gives a light value (LV) number in a window at the top of the disc, running from 2 to 18 in red numbers (this window is wide enough to show three readings, and, although it's easy to add or subtract 1 from the reading, this might possibly give a quick reference for over- and underexposure compensation. The meter also has a diffusing cover for incident reading, which slides from one side like a roll-top desk with a tiny metal catch.

Kodalux L showing zero setting screw
When I first got the Kodalux L, the meter did seem to be a little off in its readings. comparing it to readings from my digital camera and the readings from my Canon A-1. From the manual, there is a description of how to zero the meter. This involves completely covering the selenium cell: if correctly set, the needle should point to a blue dot at the far left of the meter window; if not, there is a small screw in the centre of the back of the meter which can be adjusted using a small screwdriver. There are other blue dots in the window, but the manual states that these are used for setting during assembly and "have no significance on exposure readings." I carefully adjusted the setting screw, and the meter now appears to read close to the other meters I have been comparing it to. I subsequently used the meter for filming 16mm (see 'Homage') and with some medium format, including in Dresden. In use, I usually keep the lightmeter inside its case, using it handheld, but, for the purposes of illustrating this post, I photographed the Kodalux L on the contemporaneous Kodak Retina IIa, an appropriately stylistic match.


Sunday, 11 June 2017

Kodak No.2A Brownie

Kodak No.2A Brownie
In the early years of photography, most negatives were printed by contact, which in turn, helped to define the size and design of cameras. This was essentially true with the burgeoning popularity of amateur photography at the end of the 19th century and the beginning of the 20th. Kodak definitively helped in this by producing extremely low-cost cameras, embodied by the Brownie range of box cameras. As the range expanded, cameras were made for larger image formats: the Kodak No.2A Brownie was introduced in 1907, and took 116 rollfilm, with a nominal negative size of 6.5x11cm (2½ x 4¼ inch). The original Brownie and the No.2 Brownie both had new rollfilm formats (117 and 120), with the same negative dimensions, 2¼ x 3¼ inch, but on different spools. For the larger negative size of the No.2A Brownie, the camera was designed to use the existing 116 film, which had been introduced a couple of years prior to the first Brownie camera, in 1899. As a result of the negative size, format and focal length, the No.2A Brownie is a moderately large box camera, measuring 13x8.5x15.5cm.

No.2 Brownie (front) with No.2A Brownie (rear)
Although it uses a different film format, the No.2A Brownie's specifications are very similar to the No.2 Brownie, which may be why it was named thus (and most of the detailed post I wrote about the No.2 Brownie could equally be applied to the No.2A); a No.3 Brownie followed in 1911 for 124 rollfilm, and a No.2C in 1917 for 130 film, both with larger negative sizes again (there wasn't a No.2B, a construction that Kodak appears not to have used for any of their cameras; the 'A' suffix is used for most 116 cameras, although not exclusively, while the 'C' was used for 130 film; following the success of the Vest Pocket Kodak, there was also a No.0 Brownie for the smaller format 127 film).

The original price for the No.2A Brownie was $3.00 (the No.2 was $2 when it was first marketed), and it seems that initially, at least, it shared a manual with the No.2 Brownie, although subsequently a manual for both the No.2A and the No.3, after the latter camera was produced. Thus, using the No.2A Brownie, apart from the film size, is the same as the No.2 Brownie: the rotary shutter has a single speed of around 1/30th and trips in both directions, while pulling a tab on the left above the lens provides a time setting for long exposures; there are three apertures punched in a metal strip that can be pulled into position using the central tab above the lens, approximately f11, f16, f22, but most likely non-standard, if the measurements I made for my No.2 Brownie's apertures were at all accurate; film advance is manual of course, using the bar winder with a red window for frame numbers; the vertical and horizontal reflecting viewfinders, although small and not very distinct, give a fair idea of composition. One difference between my No.2 Brownie, and the No. 2A is that the cardboard-bodied Brownie cameras do not have tripod fittings, unlike the later metal ones.

My version of the No.2A Brownie is the Model B, introduced in 1911, although, as I wrote in my post for this year's Take Your Box Camera To Work Day, details of the camera itself securely date its manufacture to some time between June and October 1917. On the Brownie Camera Page, the list of variations gives the following information- "June 1917: Film tension springs were moved from the center to the spool ends. Oct 1917: The case latches were improved with rounded ends and milled edges." My version of the No.2A Brownie does have what I would describe as the 'spool-end tension springs' (as can be seen in the images below), but the case latches have unmilled ends (this milling was a fine serration around the edge of the latch to improve grip).


Kodak No.2A Brownie with back removed for loading
The cardboard body model loads by removing the entire back. In the image above, a 120 spool with adaptors to fit 116 can be just seen in the supply side film chamber; the round hole at the bottom is for the winding key to be inserted into the take up spool end. The interior film carrier is made of metal. My version has a set of patent dates embossed in the metal; the patent for April 11 1899 must be for 116 film itself; with the other two dates, it's less obvious what these might relate to. In the early years of camera manufacture, Kodak was very liberal with prominently placing its patent dates all over its products, but generally these can't be used to date the cameras too securely.

Spring tension
One minor modification I made to my No.2A Brownie was to insert a piece of thin plastic sheet slightly wider than the take-up spool chamber to act as an additional pressure plate to ensure that the take-up spool is tightly wound. I added this specifically for 120 film, which is smaller in diameter than the original 116 spool that would be used in the camera, but kept it in the camera when I did use an old roll of 116 without any detrimental effect. When researching the Kodak Brownie 2A, I noted that the price list in the back of the manual lists two films for the No.2A - for six exposures or twelve exposures; later, 116 film was only available with eight exposures (similarly, 120 film was originally provided in six exposure lengths rather than eight). It's notable that in eight exposure rolls, the metal 116 spool ends are clearly wider than the diameter of film and backing paper; twelve exposure rolls would no doubt have much less of a gap.

Kodak No.2A Brownie case with dates and locations
Inside the crocodile-skin-effect case, a previous owner has written a list of places with dates, covering a span of 25 years, from 1927 to 1952 (with a large gap from the penultimate date of 1933 and the last in 1952; this final name is also in pen while the rest are in pencil, but it does appear to be the same handwriting). The camera was already ten years old at the beginning of the this list, although the reasons for this may be many and various; the camera may have been secondhand and imported, as all the locations are in England and Wales, yet the camera was made in America according to the details on the Brownie Camera Page. Although the No.2A Brownie was produced in UK from 1930-36, this was the later Model C version, with an aluminium rather than cardboard body, with a number of other refinements.

For a first test of the No.2A, I shot some Fomapan 200 using the adaptors that I had previously made to fit 120 film into 116 format cameras. When I developed the film, there were two clear problems: numerous scratches all along the film, but also there were light leaks from the red window along one edge of the negatives. The scratches were clearly from the rollers inside the camera, which I gave a good clean, although this did not entirely eliminate this problem, as was evident in later shots. The image below also shows a slight overlap of negatives on the right hand side where I did not get the frame spacing quite right. However, the first test roll did show that the size of the negative provided fairly good results with the meniscus lens; there is a small amount of barrel distortion to the image, perhaps exaggerated by the film not being held entirely flat.

No.2A Brownie with Fomapan 200 showing light leaks and scratches
The light leak appeared to be due to the fact that there's a very small gap between the edge of the 120 film, and the sides of the internal frame (nothing to do with the film being panchromatic as is sometimes stated when using cameras with red windows: the film's backing paper itself should be perfectly light tight). This small gap caused some internal reflections, but mostly what appears to be technically irradiation, as the light hits the very edge of the film from behind, and travels sideways into the film base and emulsion. My solution was to make a baffle, a mask insert from thin black card that would sit over the sides of the film and cover this small gap at the edge.

Mask for 120 film
Given the positioning of the frame numbers on 116 film, rather close to the edge of the backing paper itself, this baffle did partly obscure the frame numbers, but these are just visible. As I've previously written about in my post on the Zeiss Ikon Cocarette, with 120 film in a 116 camera, the 6x4.5 format numbers appear in the standard 116 red window, and I have been using the same sequence of numbers and marks: advance the film to the first circular mark before the number 3 appears for the first exposure, then 5, the first mark before number 8, the third mark before 10, the first mark before 13, and finally 15. This sequence is not perfect, as there are some slight overlaps between some frames, but it's the closest practical set to achieve six exposures on a roll of 120; being more generous with the film, one could easily get five exposures with no overlaps by just using the numbers 3, 6, 9, 12, 15.
Red window with 120 film and card mask
I tested this card mask I had made to solve the light leaks when I used the No.2A Brownie for this year's Take Your Box Camera To Work Day. Although I wasn't testing it in the brightest, sunniest weather, it does appear that this has solved the problems of light leaking when using 120 film; I did also shoot a couple of rolls of film taped to 116 backing paper, where this wasn't an issue, and I was therefore able to use the 116 numbers for the frame spacing. As I've written in relation to other box cameras, I believe it's a fallacy to think that one has to use a slow film with a box camera simply because these would have been the films available at the time. As the manual states, the for instantaneous exposures or snapshots, the widest aperture must be used and the subject should be in broad open sunlight; the middle aperture stop is for snow, sea and clouds settings with no heavy shadows. All other lighting conditions would have been using the time exposure and counted in seconds; for portraits outside the manual recommends using the middle or smallest stop and giving an exposure of one or two seconds. To replicate this experience, one could use a slow, currently available film like Rollei RPX 25, but this does seem restrictive for using an old box camera for most situations. With modern, faster films, it's therefore possible to use the camera hand-held in different conditions, with smaller apertures, other than for sunny exterior shots as designed.

No.2A Brownie with Kodacolor 116 film (process before July 1961)
However, when I shot the expired Kodacolor 116 film last year, I did just that. The film was originally 32 ISO when new; more than five decades after its process before date, I rated it at around 6, which meant that I couldn't use it hand held with the No.2A Brownie (I did shoot another roll of a similar age in the Zeiss Ikon Cocarette hand held, but that was due to its much faster lens). As the cardboard body isn't provided with tripod sockets, for these long exposures, I simply found any flat level surface that was convenient, benches, parapets on bridges, bollards; given that the No.2A has one entirely flat side and base, it's very easy to do this with the camera, covering the lens at the moment of tripping the shutter to eliminate any shake, and then letting it sit for the duration of a couple of seconds to a minute or so. When using 120 film in the camera, the slight cropping of the 116 frame makes for an image of attractive proportions and the meniscus lens proves more than adequate, with the large negative size being very forgiving set against the limitations of the simple box camera itself.

No.2A Brownie with Ilford FP4 Plus
No.2A Brownie with Ilford HP5 Plus
Sources/further reading:
No.2A Brownie on Early Photography
No.2A Brownie on the Brownie Camera Page
No.2A Brownie on Brownie-Camera.com
Kodak No.2A and No.3 Brownie manual (pdf) - May 1912

Tuesday, 19 July 2016

Vest Pocket Autographic Kodak

Vest Pocket Autographic Kodak
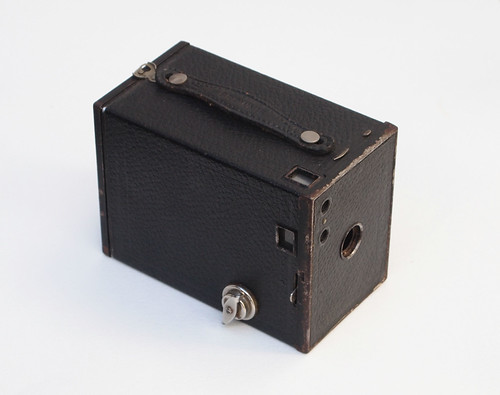
No matter how many cameras you may have, there are times when a vest pocket edition of your larger instrument will be appreciated. That's just what the Vest Pocket Kodak is- a miniature Kodak- so flat and smooth and small as to go readily into a vest pocket, so carefully made as to be capable of the highest grade of work.
Kodaks and Kodaks Supplies, 1912
Introduced in 1912, the Vest Pocket Kodak was the first camera to use a new paper-backed roll film format commonly known as Vest Pocket film - with 'vest' as in the American term for waistcoat - with this film later being denominated by Kodak as 
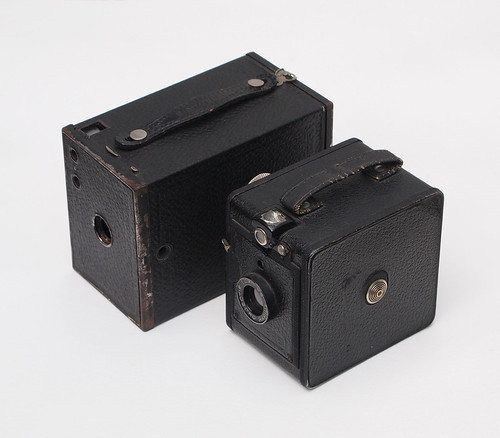
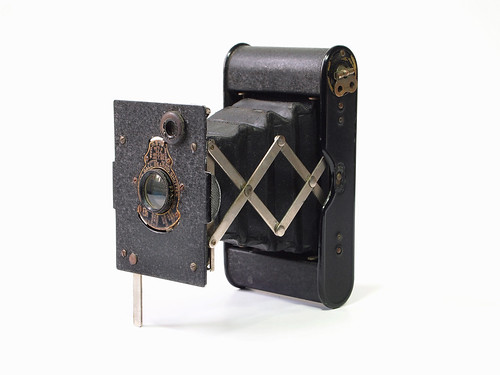
127. The camera takes images nominally 4x6cm in size (the negatives from my camera measure 44x66mm), with eight exposures on a roll of film, and the catalogue quoted above emphasises the ability of achieving postcard-sized enlargements from the negatives at a time most photographs would have been contact printed. The camera itself is very compact (120mm high, 64mm wide and 24mm depth when closed), and Kodak's catalogues illustrate this by showing the camera side-on captioned actual size on the page.

Vest Pocket Autographic Kodak
It opens like a flash, to a fixed focus, and instantly is ready for service. And then, just a slight pressure of the shutter release, at the upper right hand of the front standard, and your exposure is made.
Kodaks and Kodak Supplies, 1918
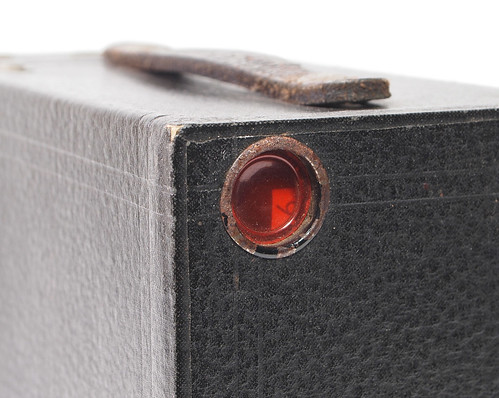
To operate the camera, the front standard is pulled out until the struts lock. With the shutter release located behind this standard, the shutter is prevented from being tripped while the camera is folded. Framing is by brilliant finder, also behind the front standard, which rotates through 90Âş for portrait or landscape shots. As with most cameras of this date, frame advance is manual, with an orange window in the centre of the back for frame numbers. The side (or top, depending on how the camera is held) of the camera removes for loading, and the film has to be firmly attached to the take up spool, and both spools slide into their respective slots with the paper backing stretched between them, not the easiest of operations compared to loading a camera where the back opens.

During its fourteen-year production run a number of changes were made to the Vest Pocket Kodak and different models improving on its original, limited specifications were made alongside the basic version. These changes help to date the cameras. Like many an early Kodak camera, the Vest Pocket Kodak has numerous patent dates: on my model there are three on the shutter, and several around the red window for patents in the USA, Britain, Canada and Australia. The last patent date is 1917; often Kodak patent dates refer to patents taken out some time before the cameras these appear on were made, and are not in themselves useful except in establishing a prior, earliest possible date. Other features are more secure in dating the Vest Pocket Kodak. In 1914, Kodak brought in Autographic film, a special feature in which a narrow window could be opened to inscribe with a stylus directly onto the backing paper: a thin tissue of cabon paper between film and the backing paper would transfer this writing to the negative rebate with development. Most Kodaks other than the cheap box cameras were provided with this feature, with the Vest Pocket Kodaks gaining the Autographic window in 1915, a year after its introduction. Kodak persisted with Autographic film until the 1930s; Mischa Konig's Kodak Classics site suggests that the feature was dropped due to the increased sensitivity of film emulsions.

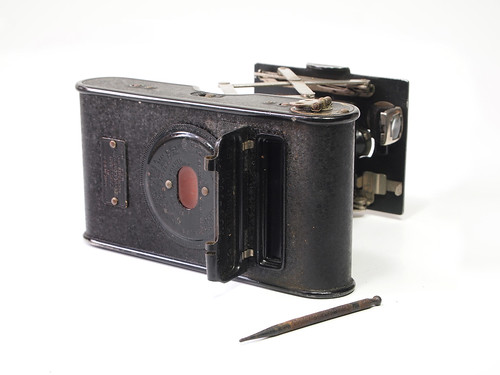
Vest Pocket Kodak with Autographic door open and stylus removed from holder
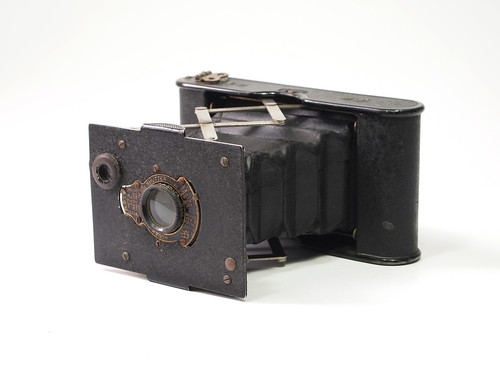
My example still has the Autographic stylus, often separated and lost, which is kept slotted into the edge of the opening door. The clearest identifying feature of my camera is the finish. Initially, the Vest Pocket Kodak was simply painted black enamel on all surfaces, but the Special version with better quality lenses was finished in leather. My camera has neither: it is finished with a craquelure effect which, according to Early Photography, was introduced in 1920. More secure dating may be due to the serial number - engraved on the fold out stand for portrait orientation - but I have yet to find an online resource for VPK serial numbers.

The first Vest Pocket Kodak came with a meniscus achromat lens in Kodak's ball bearing shutter; my version has the second cheapest lens option, a Rapid Rectilinear (this lens first appears in the 1918 catalogue; in 1920 a VPK with the lens was $10.58, as against the meniscus at $9.49, reduced to $9.50 and $8.00 respectively, in 1921 when the focusing Special was introduced). The apertures are marked in U.S. stops 8, 16 and 32, equivalent to f11, f16 and f22, although the lens' maximum aperture is clearly wider than the widest stop: as with the meniscus lens, the aperture was restricted to improve definition. The stops are also marked with Portrait/Average View, Distant View and Clouds/Marine View, as a guide for the user. The fixed focus lens appears to be set at a distance appropriate to group shots: the settings around the lens imply that infinity focus is not achievable by using the largest aperture, which I did find to be the case.

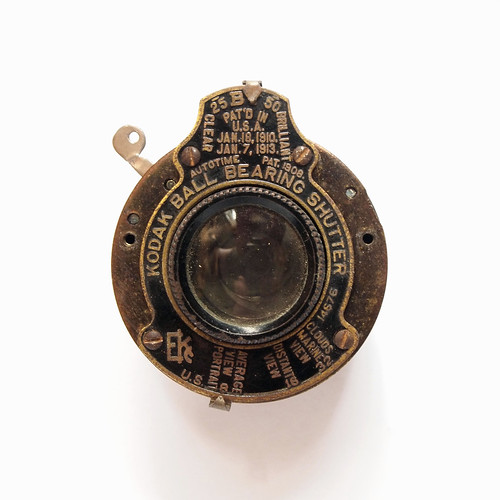
Rapid Rectilinear lens in Ball Bearing shutter
The Kodak Autotime Scale greatly reduces the liability of error in exposure, as it automatically indicates the proper time and stop opening for subjects under any condition of outdoor photography. It is exceedingly simple to use. The speed indicator is merely set at the point on the scale indicating the kind of light prevailing and the diaphragm indicator at the point indicating the character of the subject.
Kodaks and Kodak Supplies, 1912
The Ball Bearing shutter has just two speeds, 1/25th and 1/50th, marked Clear and Brilliant respectively, with both B and T settings. According to the manual, if "the subject is in the shadow, or during cloudy weather it will be necessary to make a timed exposure", which shows how limited the conditions wherw it was possible to use the camera handheld with the films of the time, especially bearing in mind the caveat that "The markings are for Summer at mid-day. During Winter or for morning or afternoon use next larger aperture than indicated". The advice for using the T or B settings are to use a 'stable support'. The Vest Pocket Kodak features neither cable release socket nor tripod mount, but adaptors for these were available as accessories; there is a detailed section in the manual for timed exposures, firstly in interiors, giving guide exposures based on the number of windows, colour of the walls, and the light outside, and then a shorter section for conditions for timed exposure outside.

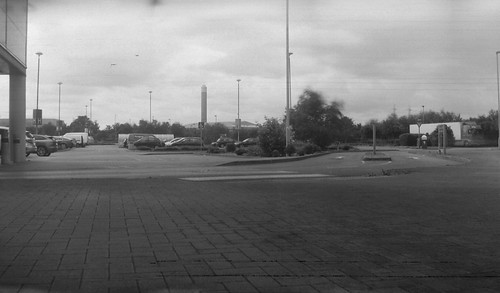
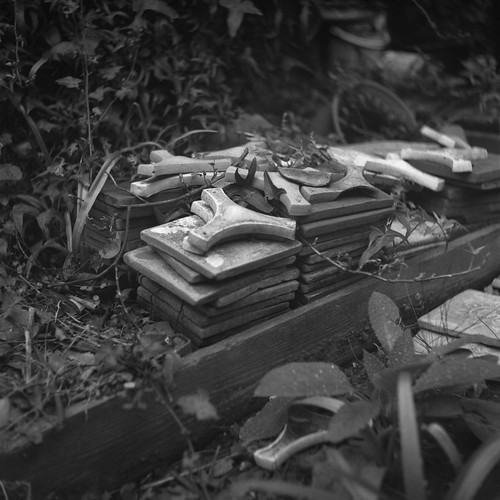
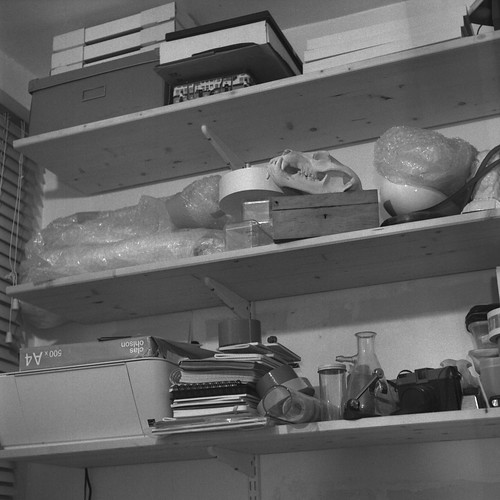
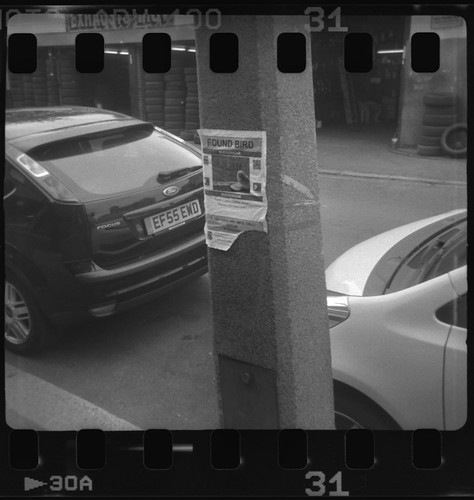
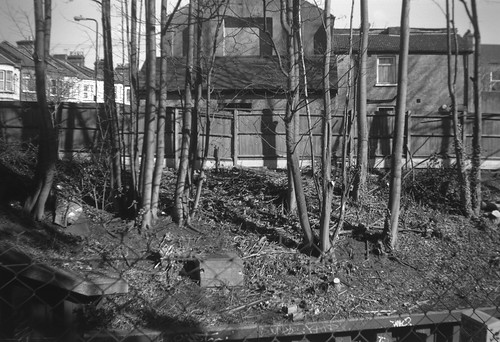
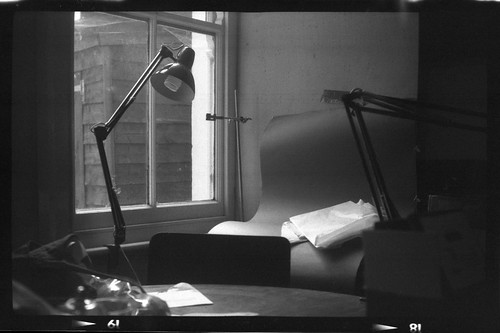
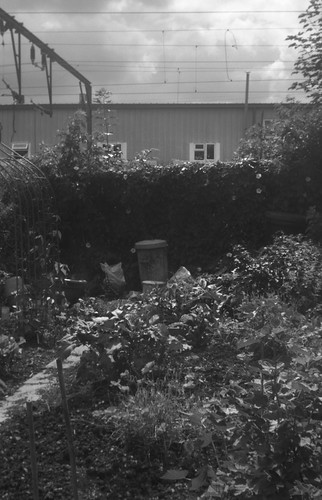
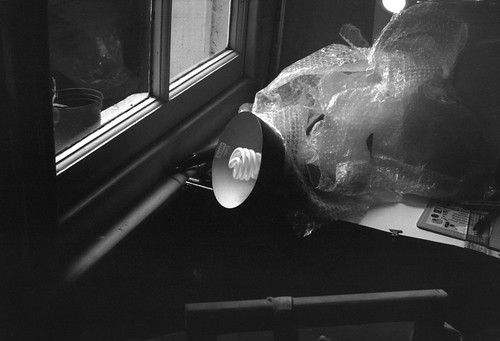
The first films I tested in the Vest Pocket Kodak showed some light leaks, but as these were largely from the edges of the negatives, this was possibly a result of cutting and re-rolling 120 film to 127 backing paper and spools, and perhaps not rolling these tightly enough, rather than problems with the camera itself. In the second image below, I used Ilford Delta 3200 to shoot handheld indoors, albeit close to a window, at the widest aperture, a relatively slow f11, which does seem to demonstrate how close the fixed focus is. It also shows that with modern, faster emulsions, an old camera with a slow lens becomes more flexible: when made, although equipped with a T setting for long exposures, it would have been primarily intended for taking photographs outside in sunny conditions. Faster films increase the situations that these cameras can be used in and at the same time I find that most films' latitude mitigates the effects of overexposure due to the limited shutter speeds.

Vest Pocket Kodak with Fomapan 200
Vest Pocket Kodak with Ilford Delta 3200
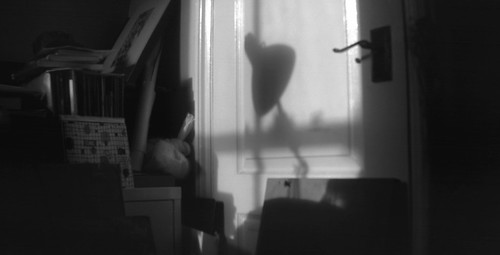
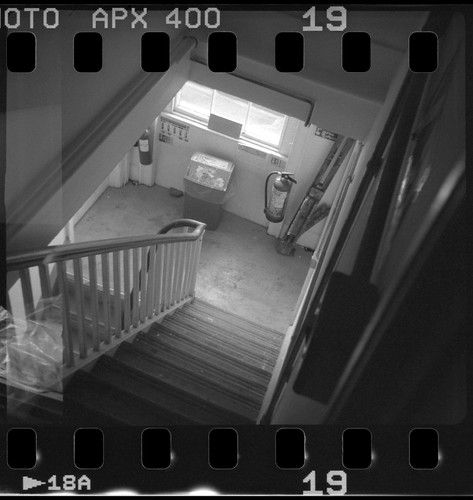
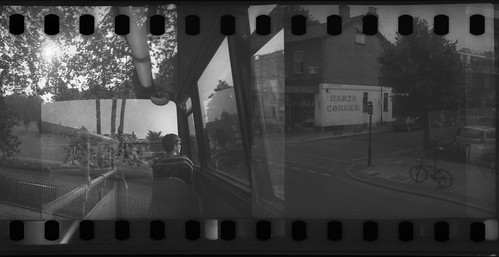
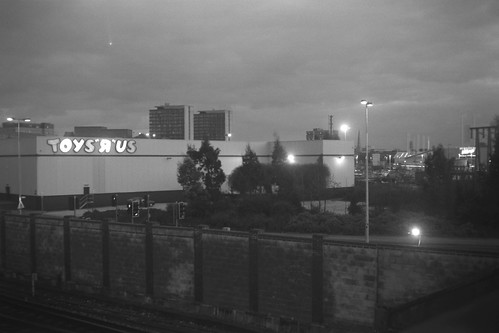
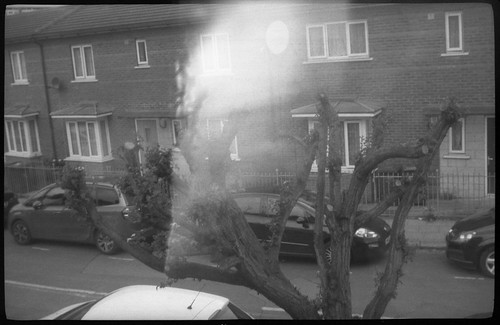
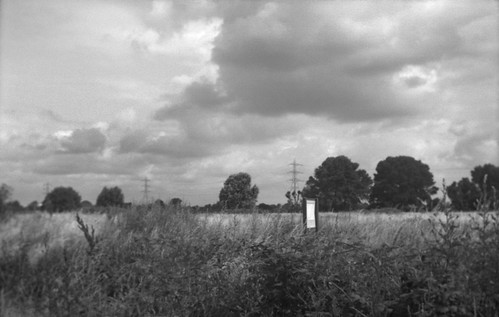
However, trying out some other films showed that there were more light leaks, which seemed to be getting worse, possibly due to the corners of the bellows being quite brittle and, with unfolding and folding the camera numerous times, these pinholes became more prominent, as in the image below. The leather at the corner folds of the bellows had mostly worn away to the fabric beneath. As the Vest Pocket Kodak does not open in the same way a more conventional folding camera does, it's provided with a circular door on the back which the red window sits in: this can be removed by rotating it and it provides access to the lens from the inside, probably for cleaning, but just conceivably to remove and replace it - although nothing I've read would suggest this was commonplace. However, this doesn't expose very much of the bellows from the inside, and so, to tackle the light leaks, I took the camera apart to better identify and attempt to fix them.

Vest Pocket Kodak with Ilford Delta 3200
To disassemble the camera, there are two screws on the bottom of the body that secures the section with the struts and bellows. Taking these screws out, once the top plate on the other side has been removed, as if for loading film, the whole bellows section slides out.

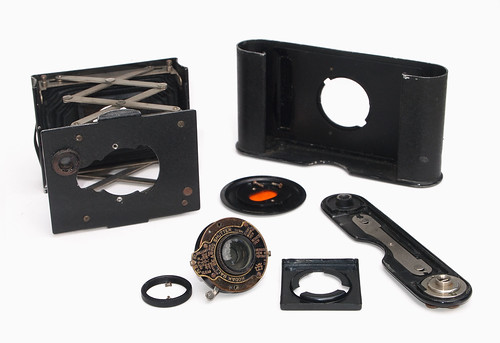
Vest Pocket Kodak - disassembled
I also used this opportunity to clean the lens. Two screws fix the shutter unit to the front standard of the camera, with the retaining ring on the rear of the lens securing it to the bellows with a square plate behind. The plate around the lens on the shutter is fixed with four screws - the two lower ones have sleeves - and once removed, I saw how easy it was to make the minor alteration needed to use the lens to its full aperture. The aperture lever ring (bottom left in the image below) has a small projecting stop to the left of the pointer; I simply flattened this stop so it would rotate fully (given that there is a gap to do so on the front standard) and open up the lens to f8 (or possibly f7.7, as with the Kodak Anastigmat lens that a more expensive version of the camera featured). I could see that there was a previous repair to the bellows on the inside to one corner. For my repair, as the bellows were still sound in themselves, I used acrylic ink to paint over the holes that I could see and fill the weave of the cloth.

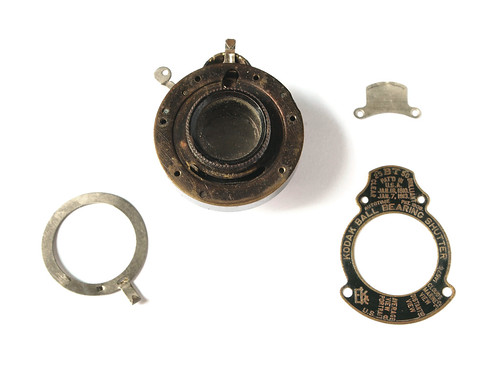
Rapid Rectilinear lens in Ball Bearing Shutter partially disassembled
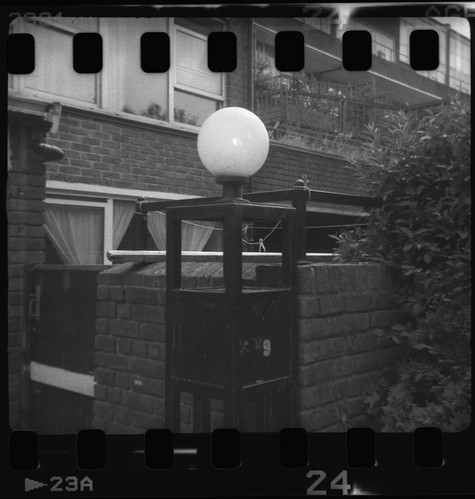
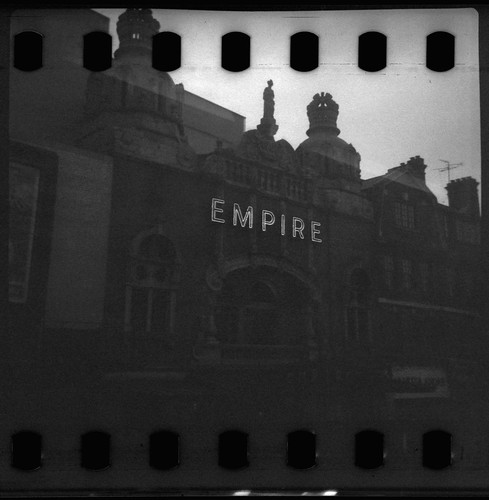
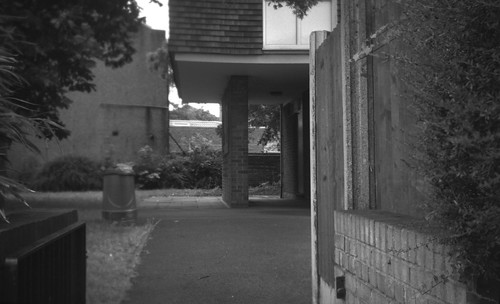
After reassembling the camera, I shot some 35mm Ilford Mark V film rolled with 127 backing paper as a test, which showed that the pinholes had been mitigated, but using the camera in bright sunlight still gave me some light leaks. As these seem to emanate from the corners of the bellows, taking the camera apart again, I ensured that I coated both the inside and outside of the corners with the acrylic ink once again, using a small torch to help to work out exactly where the light was getting in.

Vest Pocket Kodak with Ilford Mark V film
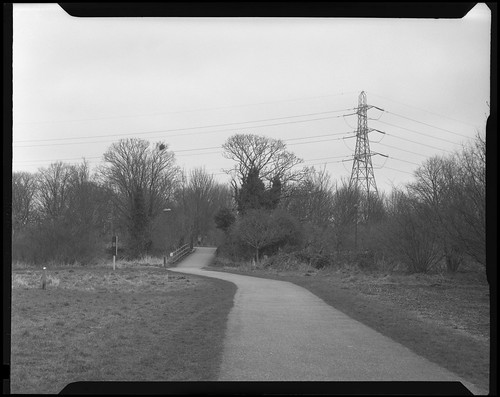
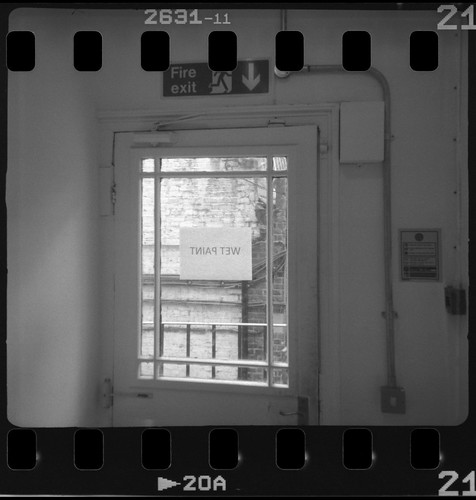
After making these repairs, I also taped over the inside of the Autographic window, and used the Vest Pocket Kodak on last week's 127 Day. There wasn't any evidence of light leaks, although I did take the precaution of keeping the camera folded between exposures. Shooting three full-length films (rather than short test lengths) in the camera demonstrated two other issues: problems with focus and film flatness. With the standard fully extended, the lens is not set to infinity: it appears to be focussed at around two metres. At the smallest aperture of f22, far distances are nearly in focus, no doubt to an acceptable amount for contact prints or small enlargements. One solution to using this fixed focus lens at wider apertures and to still be able to focus at distances would be not to extend the struts fully, difficult to achieve evenly on both sides of the camera, and pull the lens standard back by just 3-4mm by my calculations. The problems with film flatness show up in some of the straight lines being curved and distorted; there are linear pressure springs in both spool ends of the camera which could be tightened to help keep the tension on the film.

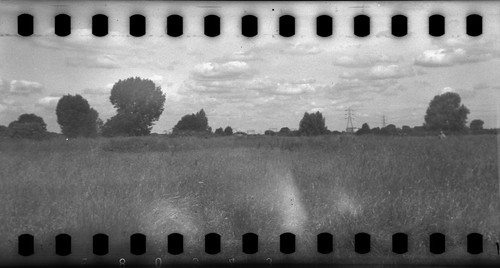
The Vest Pocket Autographic Kodak proved to be extremely popular: Camera-Wiki states that 1,750,000 were sold, making it relatively easy to find today, a century on. It also became known as the 'soldier's camera', its ubiquity in the First World War due to being compact and inconspicuous, even with the strictures placed on photography by the British Army (the German Army took a different attitude, with photography by private soldiers being encouraged to combat boredom and engender camaraderie), although most Vest Pocket Kodaks would have probably been carried by US soldiers after entering the war in 1917. The format and strut-folding design of the Vest Pocket Kodak inspired many other cameras - often better equipped - such as the Piccolette - and, in part, must have paved the way for smaller cameras and smaller film sizes, encouraging photographs to be enlarged, not contact printed. The Vest Pocket Kodak's legacy still lives on, if only just, after 104 years, in the admittedly very limited but continued production of 127 format film.

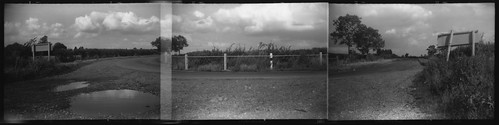
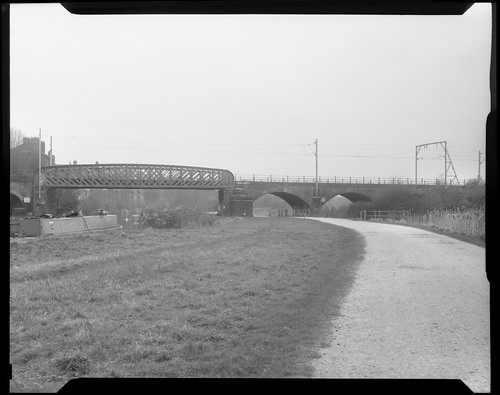
Vest Pocket Autographic Kodak with Ilford FP4 Plus
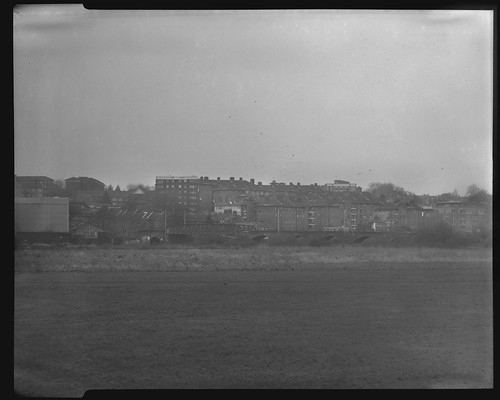
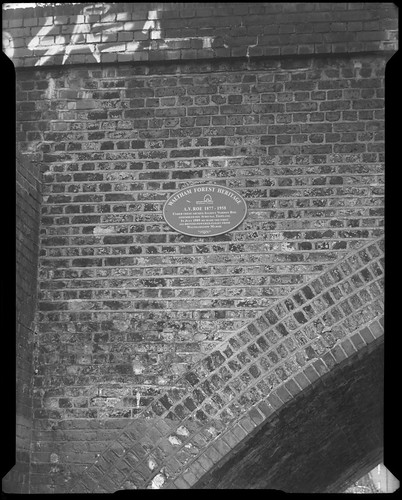
Vest Pocket Autographic Kodak with Ilford HP5 Plus

Sources/further reading:
The Vest Pocket Kodak website
Vest Pocket Kodak page on Early Photography
Vest Pocket Kodak on Camera-Wiki
Kodak Collector's Kodak Catalogues
Mischa Konig's Kodak Classics site

Friday, 18 March 2016

Expired Film Day 2016

Kodak Plus-X, develop before date of July 1972
Having missed the last couple of 127 Days for a variety of reasons, on the 15th this week I participated in the new Expired Film Day ('Take Your Box Camera To Play Day' also happens to be this weekend, 18th-20th March). I frequently use decades-old photographic emulsions, notably in glass plate night photography. I did consider shooting some glass plates on the day, but instead, as part of an unrelated ongoing project of large format photographs around Walthamstow Marshes, I used the opportunity of Expired Film Day to shoot some 4x5 sheet film with the MPP Micro-Technical Mk VI: a box of Ilford FP4 with a hand written date of 11/4/78; Kodak Plus-X with a develop before date of July 1972; and Kodak Panchro-Royal, not dated, but the box looks older than the Plus-X, possibly 1960s. I had previously tested all three films to get a usable exposure index: the FP4 was rated half box speed, while the other two were shot at an exposure index of 25.

Ilford FP4, with handwritten date 11/4/78
Both the FP4 and Plus-X provided results which do not look like forty-year old film (and as such wouldn't win the Expired Film Day prize categories 'Most Obviously Expired Film' or 'Best Use of Overexposure'), but the Panchro-Royal clearly shows characteristic deterioration with age. I used both the 16.5cm Tessar and the Bausch & Lomb Rapid Rectilinear which I've written about in the post Old Lenses; the Rapid Rectilinear is the oldest lens I have, and so it seemed appropriate to use it for the day.

Kodak Plus-X, develop before date July 1972
Kodak Panchro-Royal sheet film, possibly 1960s
There's very little information on Kodak Panchro-Royal online, and this gave the worst performance of the three films I shot (the FP4 and Panchro-Royal came from the same collection of photographic material, and may - or may not - have been stored in the same conditions). As well as having much more obvious fog, it also suffered from a good deal of cusping, the film being far from flat, and this made scanning more difficult. Some of the shots were taken using only the rear elements of the Rapid Rectilinear lens, as described in Old Lenses, as the Panchro-Royal image above, and the shot below on Plus-X. All the sheet film was stand developed in R09 One Shot diluted 1+100 for one hour, partly due to developing all the films together, but some unevenness was evident in the development discernible in the featureless skies of most of the negatives.

Kodak Plus-X, develop before date July 1972
In addition to the sheet film I also finished a part-used roll of medium format Kodak Plus-X, which had a develop before date of 03/2006 - a neat ten years out of date. This was exposed at box speed and developed in R09 One Shot diluted 1+29 for 9 minutes at 20ÂşC. Incidentally, I had intended to use this time and dilution with Ilfotec LC29, and only realised my mistake when the wrong developer was mixed and in the tank. However, the times and dilutions being relatively similar, I stuck with the time for Ilfotec LC29, which resulted in perfectly usable negatives.

Medium format Kodak Plus-X, develop before March 2006


Tuesday, 16 June 2015

126 Day 2015

Agfaphoto APX 400 126 cartridge reload
Having recently shot a reloaded 126 cartridge with the Kodak Instamatic 300 that I had found in the Hötorget flea market in Stockholm, I had found the 300 to be fairly unsympathetic to being used with 35mm film; results last year with a different model camera, an Instamatic 25, were much better, which I wrote about my post 'My first camera'. It was difficult to advance the reloaded film in the 300 model, resulting in overlapping frames and torn sprocket holes from the pin designed to locate the single perforation on 126 film. The Instamatic 25 is kinder on 35mm film: the negatives show stress on some of the perforations, and some scratching, but none of the tearing that the Instamatic 300 had, and film advancement was easier.

Last Friday, 12th June, the Kodak Instamatic 25 was the camera I chose to shoot for a '126 Day', not a camera or film format related day I usually observe, though I did shoot a roll of expired Perutz transparency film with an Instamatic camera two years ago. In the post 'My First Camera', I detailed how I reloaded the plastic 126 cartridge with 35mm film; last Friday I shot a cartridge reloaded with Agfaphoto APX 400 and one with Ilford Mark V. The Instamatic 25 has a single aperture, f11 and two shutter speeds, full sun at 1/90th, or half-sun/flash, 1/40th. Although a 400 ISO film might be too fast not to be overexposed for sunny conditions in the camera, the latitude of the film meant that the exposures, both interiors and exteriors came out well.

Agfaphoto APX 400 126 cartridge reload
As well as a cartridge with Agfaphoto APX 400, I also used some Ilford Mark V Motion Picture film, as I had done last year. Originally 250-500 ISO, after forty years this film has lost quite a bit of sensitivity and I shot this during the evening while the light was going, so the results were not as good. It also seemed to have a greater tendency for overlapping frames, possibly due to having different perforations to standard 35mm still camera film. Occasionally, the overlapping multiple exposures were worth scanning as a whole composition.

Ilford Mark V 126 cartridge reload

Monday, 9 March 2015

The Kodak No.2 Brownie

Kodak No.2 Brownie
"Simple, sturdy, reliable, these inexpensive little cameras have stood the test of years, and will be found in the hands of many thousands of people all over the world, who are making perfectly satisfactory pictures with them. They are especial favorites with the children on account of their great simplicity, but they are withal so practical that they have been readily taken up by grown-up people who wish to make pictures in the easiest possible manner and at the minimum of expense. Each has two finders, automatic shutter, carefully tested lens, and imitation leather covering. They [the Brownie No.2 and No.2A] differ from each other only in the size of the pictures they make and in their lenses."
Kodaks and Kodak Supplies / 1914 (Canadian Kodak Company)
Building on the premise of the first Kodak camera of 1888, the original Brownie was designed by Frank Brownell for Eastman Kodak to sell for just one dollar (the original Kodak was first priced at $25; at the time the Brownie appeared, a pocket Kodak was $5). This price reduction was achieved by a number of design and manufacturing processes, but chiefly by substituting the well constructed wooden body of the first Kodaks with leather covered cardboard for the Brownie. The original Brownie of 1900 was designated the No.1 once the No.2 was produced a year later. Like the original Kodak, it had no viewfinder, but V-shaped sightlines incised on the body to aid framing. A few months later an accessory finder was provided which the user could attach to the camera body; the No.2 Brownie had two integral finders for portrait and landscape orientation. The No.2 was originally priced at $2, quite possibly due to the inclusion of those two viewfinders. The significance of the No.2 Brownie of 1901 is due to Eastman Kodak introducing a paper-backed rollfilm format still widely used today: 120. The 120 format provides negatives of approximately 6x9cm; as prints were commonly made by contact at the time, a large negative was an advantage. During their first half century of camera manufacture, Kodak produced numerous film formats. Retrospectively assigned number codes in 1912, beginning sequentially from 100, there were 20 different formats by the time the Brownie No.2 appeared 1901. Although a number of the competing formats were continued for many years, for some reason, the c.62mm-wide paper-backed rollfilm of the No.2 Brownie emerged as the standard.

I've had two No.2 Brownie cameras, the first came from a car boot sale nearly twenty years ago priced £1, the second bought recently was £3 (unless in exceptional condition or a rare variant, Brownie cameras should not be expensive today, as some models had production runs in the millions). Illustrated here, I bought this second camera to create a film splitter, but after cleaning it and gluing down some of the leatherette, the camera seemed too good not to use . Both my No.2 Brownie cameras were the Model F, made from 1924 onwards. The significant change introduced with the Model F was that the card body was now made in metal. Additionally, two tripod sockets were added. According to the Brownie Camera site, my current Brownie camera can be identified by its fully detachable rear door as an early version from 1924-25.

Kodak No.2 Brownie, with film carrier removed
Operation of the camera is simplicity itself. Film is loaded by opening the back and removing the film carrier, threading the film onto the the take up spool and replacing this into the camera. The 10cm meniscus lens is focus-free, set, possibly at a hyperfocal distance, rather than at infinity, judging from some of my recent photographs with the camera. The rotary shutter fires at a single instantaneous speed on both the lever's upstroke and downstroke, while the time setting works on both by pulling up the small tab on the top of the camera on the opposite side from the viewfinder. The middle tab above the lens provides the three aperture stops, holes punched in a thin sheet of metal in front of the lens; the apertures are progressively smaller as this is pulled out. By simply measuring these three holes, these apertures are approximately f14, f18 and f32 (I've read online that these are either f11, f16, f22 or f16, f22, f32). The shutter speed is somewhere between 1/30th - 1/60th: on my particular Brownie, the shutter appears to move just perceptibly faster in one direction than the other. The animation below, with the front camera cover removed, shows how this simple shutter works. As the shutter lever is pressed down, the spring on the other side of the pivot pulls the shutter around until this circular motion is briefly interrupted by the T-shaped bar. This provides a small amount of tension, released once the tab on the shutter has passed the end of the 'T' and the open sector on the shutter rapidly rotates over the lens, exposing the film. The animation below is slowed to one-third of actual speed.

Kodak No.2 Brownie sector shutter
Given the sensitivity of film a century ago, the apertures do seem small: fast or sometimes named 'rapid' films of the time were in the range of 20-30 ISO. Picture Taking with the Brownie Camera No. 2 (1918) is instructive of how the camera would have been used at the time. This stresses several times that the smallest aperture stop is not to be used for instantaneous exposures, or 'snapshots':
"To take instantaneous pictures the object should be in the broad open sunlight, but the camera should not. The sun should be behind the back or over the shoulder of the operator. Snap shots should only be made when the largest stop is before the lens. If a smaller stop be used, the light will be so much reduced that it will not sufficiently impress the image on the film and failure will result. [...]
STOPS. The stops should be used as follows:
1. THE LARGEST For all ordinary instantaneous exposures.
2. THE MIDDLE For instantaneous exposures when the sunlight is unusually strong and there are no heavy shadows; such as in views on the sea shore, or on the water; also for interior time exposures, the time for which is given in the table on pages 16 and 17.
3. THE SMALLEST For time exposures out doors in cloudy weather. Not for instantaneous exposures. The time required for time exposures on cloudy days with smallest stop will range from one-half second to five seconds, according to the light. The smaller the stop the sharper the picture. When setting the stops always see that the one to be used is brought to the center of the lens, where it catches. If you use the smallest stop for instantaneous exposures absolute failure will result."
When introduced most films were either 'ordinary', that is, blue sensitive, or orthochromatic, and developed by inspection, and although Picture Taking with the Brownie Camera No. 2 describes using a 'Brownie Developing Box' or a film tank, it does also have a section on tray developing film. Developing by inspection would allow for compensation in under- (or over-) exposure with extending or contracting development time. Additionally, from reading photography books such as the Ilford Manual of Photography, I have the impression that the intensification and reduction of negatives was common, something I've never done, but Picture Taking with the Brownie Camera No. 2 does mention these techniques. Occasionally I have read opinions online that modern fast films are too fast for box cameras, designed as they were for the use of slow films, with slow shutter speeds to match. I have never found this to be the case. Most modern films have enough latitude to provide good results in a variety of lighting conditions with a box camera that has very limited exposure controls. With a fast film in the No.2 Brownie, the smallest stop can be used for instantaneous exposures in bright light, but, unless taking photographs in bright sunlight, the middle stop usually gives the best results (it is also possible that using the smallest stop may actually reduce image quality due to diffraction). Incidentally, I have been recently testing Agfa Superpan 200, and shot one roll in the No.2 Brownie; at 200 ISO, the speed of the film is a good match for instantaneous exposures and the film's sharpness and relatively high contrast appear to be excellent qualities to offset the softness of the Brownie's lens.

My first No.2 Brownie was my second medium format camera, my first being a Zeiss Ikon Ikoflex. Unlike the Ikoflex which had double-exposure prevention and an automatic film counter, I realised that advancing the film by using the red window in the Brownie, I could create overlapping exposures. I subsequently made a series of in-camera panoramic triptychs by rotating the camera on a tripod and advancing the film between each shot so that the exposures would just overlap and join together, creating an image spanning roughly 135 degrees. It would be possible to make a longer image with more exposures, but three overlapping shots are nearly ten inches wide, and as such fitted onto a sheet of 10x8-inch paper for contact prints, and this could also be enlarged using the large format 10x8 Durst enlarger that I had access to at college.

In-camera panoramic shot on Ilford HP5 Plus
Having used the No.2 Brownie for the most recent 'Take Your Box Camera to Work Day', I could draw some comparisons to the Lumière Scout Box that I've used previously: it is bigger than the Scout Box, partly due to having a slightly longer focal length, but also the shutter and aperture stops are in front of, rather than behind the lens; the No.2 Brownie's meniscus lens is fairly unremarkable and does display a small amount of barrel distortion and vignetting, but the 6x9cm size negative is quite forgiving for small enlargements (although I have not shot direct like-for-like comparisons, the Scout Box lens does appear to give better results).

The Kodak No.2 Brownie with (front) the Lumière Scout Box
The limitations of the No.2 Brownie are also what make it a pleasure to shoot with. Like all but the most sophisticated box cameras, a lack of user controls can be liberating, freeing the user to concentrate on the subject, and the small, basic finder also means a fair amount of uncertainty as to composition, which provides an element of surprise on development. With modern films, these point and shoot cameras from a hundred years ago can still be a joy to use.

Kodak No.2 Brownie with Rollei RPX400
Kodak No.2 Brownie with Agfa Superpan 200
Kodak No.2 Brownie with Ilford HP5 Plus
Sources/further reading:
Kodaks and Kodak Supplies 1914
, Canadian Kodak Co. Ltd

Picture Taking with the Brownie Camera No. 2, Canadian Kodak Co. Ltd, 1918
The early years of Eastman Kodak on Kodak.com
The No.2 Brownie on the Brownie Camera Page
No.2 Brownie on Early Photography
History of Kodak Cameras with film sizes, original prices and production dates
B is for Brownie at the National Media Museum
George Eastman House collection of Brownies