Showing posts with label Balda. Show all posts

Tuesday, 29 March 2022

A small adjustment to the Baldalux's double-exposure prevention mechanism

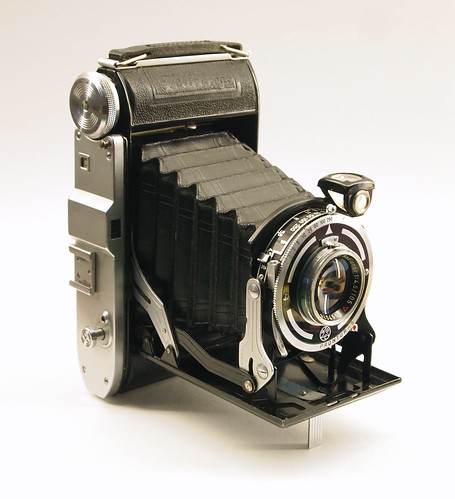
Zodel Baldalux–view of top plate
Anticipating a trip abroad in the near future, the first since the global pandemic, I was considering which medium format camera to take with me, and naturally thought of the 6x9 folding Zodel Baldalux camera. Over the past decade this has accompanied me on many trips, and usually provides fairly good results for its modest specifications. However, since I'd first acquired the camera, I'd always been using it with the double-exposure prevention disabled. I'd done this as it had begun to continually trip to the 'exposed' position, denoted by a red 'E' in the small square window on the camera's top plate. In this position, the shutter release on the body is prevented from being depressed and the only way to release the shutter is either with a cable release attached to the lens or, rather more clumsily, by pulling down the lever on the shutter which connects to the body shutter release linkage, and this is a good way to get one's fingers in front of the lens. I taped a small L-shaped piece of card in place to stop the mechanism from shifting to the 'E' position, which, at the time, seemed like a good–and reversible–intervention. At the time I wrote "I've yet to accidentally double-expose a frame, but I'm sure that this will happen." This did happen subsequently, not too often, but picking up the Baldalux once more, I decided to look at this again.

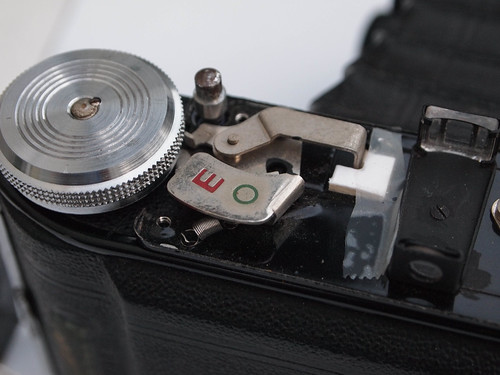
Double-exposure prevention mechanism disabled with card and tape
To remove the top plate of the camera, there are four screws, two at each end, which are fairly easily loosed. I found that it was simple enough to keep the top plate level, and not actually take them out from their respective holes. I could lift and pivot the plate on the shutter release (which pops up when the camera is unfolded) and remove the piece of card, which looked a little frayed at the edges after ten years. Before taking the plate off completely, the shutter release button needs to be removed. Opening the camera makes the shutter release stand proud of the top plate, which may make it easier to undo. In the centre of the release is a separate slotted screw cap which once undone, lifts off with the shutter button, itself sitting on the release pin that has a threaded top that the screw cap connects to.


Shutter release with slotted centre cap.
With the shutter release removed, the camera's top plate can be taken off, and, as mentioned, kept upright with the screws in their holes at either end. Underneath the top plate, loose, but on the shutter release pin, is a short arm that has the screw fitting for the cable release slot on the top plate. This can be simply lifted off.

Shutter release pin with cable release arm
At this point, although separate from the top plate, I removed the film advance knob. This is best seen in the image above showing how I originally disabled the mechanism: slightly off centre in the middle of the knob is a tiny screw–very easy to loose!–which needs to be unscrewed before the advance knob itself can be unscrew: the two images below show it positioned for unexposed ('O') and exposed ('E').

Double-exposure prevention mechanism in 'unexposed' position 'O'.

Double-exposure prevention mechanism in 'exposed' position 'E'.
The sequence of how the mechanism should work from the unexposed position, through exposed to unexposed again is as follows:
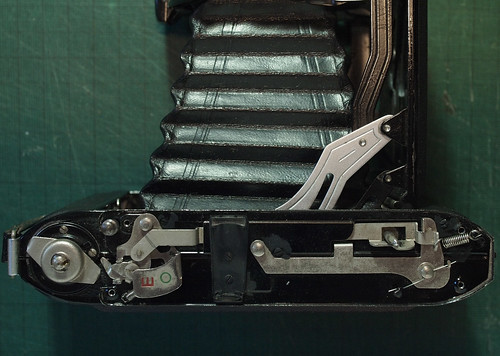
  1. Having first cocked the shutter, as the shutter release is depressed, the shaft under the button pushes against a detent in a vertical section of the forward arm (seen below the rectangular hole around the shutter release pin in the pictures above). For this to work once the top plate is removed, I placed the shutter release button onto the shutter release pin (this did not need to be fixed with the central screw plate to activate the mechanism).
  2. This pushes the forward arm down and away from the front of the camera: the right hand end of the arm is held in tension by a spring. This downward movement releases a small angled catch at the end of the arm which can then slip past a vertical section of the lower or rear arm, and is pulled taut past this vertical piece by the spring. A section of the detent on the forward arm is now underneath the shutter release button shaft, preventing its depression, and thus preventing double exposure.
  3. Simultaneously, the other end of the forward arm travels under the viewfinder to the left side of the mechanism where it pulls on a linkage to move the double-exposure indicator from 'O' to 'E'. This also causes a flat pin to protrude towards the film advance knob.
  4. To reset the mechanism, the film advance knob needs to be rotated. Under the advance knob (now removed), there is a kind of cap which sits over the shaft of the film advance column (which travels through the top of the camera body to the take-up spool inside). This has two arms either side with downward pointing ends.
  5. As the advance knob rotates, one of these arms pushes the flat pin of the indicator linkage towards the back of the camera body and in doing so this pulls the forward arm to slip its small catch over the vertical section of the rear arm. This pulls the detent away from the shutter release button shaft. The shutter can now be tripped again.
  6. Meanwhile the indicator linkage shifts from 'E' back to 'O' and the flat pin of the linkage slips out from the arm of the film advance cap and springs back to a position where the advance can now rotate freely without connecting with the pin.
With the camera top plate removed, turning the cap that would normally be hidden by the advance knob was pushing the flat pin in the indicator linkage, shifting the position from 'E' to 'O', but once released from the pressure of the arm, the mechanism sprang back to 'E', My initial thought was that the spring on the other end of the forward arm no longer held this in sufficient tension–hardly surprising after sixty-odd years–to pull it firmly back into the 'O' position, and the small catch at that end was loose enough to slip back past the upright which should stop it.

Detail of spring, catch and hook
I stretched a couple of loops of the spring over the hook to which it is attached to increase the tension, then reduced it to one loop as this felt too much. This did not solve the issue; I wondered whether it was the spring at the other end under the indicator linkage, but this is slightly more difficult to access. Manipulating the whole linkage here by hand, it looked as though the flat pin on the linkage did not travel far enough to lock this into the 'O' position. Removing the cap on the film advance column, I tried to bend the ends of the two arms so that these would flare slightly outwards, as in the picture below (I didn't take a 'before' photo). This seemed to have solved the problem: in this position, they push the flat pin of the indicator linkage further towards the back of the camera as they rotate, and the linkage now locks into the 'O' position until the shutter is released.

Cap with arms showing adjusted angle
Reassembly is a case of following the disassembly steps backwards: the cap should sit firmly over the advance column–the hole on top has squared-off ends in order to turn the advance, which correspond with the top of the film advance. Replacing the film advance knob, I found I needed to firmly hold the key inside the camera which sits in the end of the 120 film spool with pliers to screw the knob on tightly enough to get the two halves of the tiny screw hole to match so that the screw can be reinserted. Replacing the top plate merely needs the tiny arm for the cable release positioning correctly before reinserting the screws at both ends, then finally replacing the shutter button on its pin and screwing down the small plate at its centre to secure this. Before reassembly, I also polished the indicator plate, somewhat tarnished, particularly over the letter 'O'.


Thursday, 30 January 2014

Plaubel Roll-Op II

Plaubel Roll-Op II (6x4.5cm version)
Plaubel was one of the many German camera manufacturers started in the early 20th century. The company made their name with the iconic Makina, a strut-folding camera for plates and sheet film which went through many iterations over half a century. Plaubel was then sold to a Japanese buyer which produced medium format rangefinder cameras under the Makina name, which now command high prices secondhand.

The Roll-Op was Plaubel's more conventional medium format folding camera, a cheaper alternative to the Makina. There were both 6x6cm and 6x4.5cm versions. The camera's name is sometimes written 'Rollop', although on the camera itself the leather is imprinted 'Roll-Op' (this advert shows it written 'Rollop', so the name's different constructions seem to have been used interchangeably; there was a completely different camera by Lipca named the 'Rollop'). The Roll-Op article on Camera-wiki describes the original model with a reference to McKeown's, but the only examples of the camera that appear online are those of the second model, the rangefinder Roll-Op II. The camera body is actually that of the Balda Baldax with the rangefinder and lens assembly added by Plaubel. The rangefinder itself, the Plaubel Telemeter, comes from the Makina, and is coupled to the lens, which is unit focused.

For a folding camera from the mid-1930s, the Roll-Op's distinctive features are its automatic frame counter, rangefinder, and the fast 75mm f2.8 Anticomar lens. The automatic frame finder is the same design that Plaubel used for medium format roll-film backs (seen here on Early Photography). This requires the first frame number to be lined up with the red window on the back of the camera manually, and the frame counter on the body turned to '1'. After each exposure, the pivoting lever has to be released to advance the film, and the lever then catches a notch to stop the film at the required distance for the next frame. As the advance is not linked to the shutter, and the catch has to be released after each frame, it feels more like a 'semi-automatic' operation, essentially removing the need to watch for the frame numbers in the red window while advancing the film.


Plaubel Roll-Op II, showing frame counter
The rangefinder is coupled to the lens with unit focus and is a split window type, showing a limited angle of view, essentially cropped, due to the way the rangefinder is constructed: there are no lenses in its construction, only two mirrors, meaning that the split image is not reduced but life-size. There is a separate telescopic viewfinder positioned next to the rangefinder window which shows the lens' true angle of view. In operation, the rangefinder is used to accurately focus the lens, then the viewfinder window is used to compose the shot, which makes using the rangefinder slower than more modern types with a beamsplitter where the rangefinder image is superimposed inside the viewfinder.

75mm f2.8 Anticomar lens, in Compur shutter
The Anticomar lens used on the Roll-Op is the same lens as that developed for Plaubel's Makina. Important for me was that the f2.8 Anticomar was fast for a 1930s' medium format camera (most of my other medium format folding cameras have f4.5 lenses), which makes the Roll-Op better for hand-held low-light situations. There are differing views of the Anticomar, a four-element Tessar-type, which seems to have qualities typical of 1930s lens. In the example immediately below, shot on Ilford Delta 100, the image is acceptably sharp, but with a suggestion of flare from the bright sunlight patch of wall in the centre of the image, and a falling off of focus towards the edges of the frame (the view of rooftops lower down may be a better image from the lens stopped down further). However, with the aperture wide open, the image is relatively soft, as seen in the second image below. I've read somewhere online, in a reference that I cannot now find, that the Anticomar lens was designed to be soft when wide open for portraiture, to achieve the soft focus look popular in the 1930s. This may be just an apocryphal theory to excuse the Anticomar's shortcomings.

Plaubel Roll-Op II with Ilford Delta 100
Plaubel Roll-Op II with Fomapan 400
Although the Roll-Op is a fairly solid camera with the weight to match, I managed to break the advance mechanism twice, the first time almost immediately after I'd loaded the first roll of film into the camera. I lost the advance knob while boarding a train: I'd had the camera over one shoulder and the knob may have been loose, and knocking it against the back of a train seat was enough. It was still possible to advance the film, but hard on the nails to turn the small square-section peg that the advance knob would have been fixed to. However, I needed needle-nosed pliers to pull this out in order to remove the film from the camera once shot. Some months later, the shell of a Roll-Op without lens or rangefinder appeared on a well-known auction site, and as this had the original advance knob, I was able to use this to repair my camera. Around a year later, I dropped the camera, and the advance knob simply sheared off this time, so, reluctantly, I sold on the broken camera for repair.

Plaubel Roll-Op II with Fomapan 400
Plaubel Roll-Op II, with Fomapan 400
Plaubel Roll-Op II with Ilford Delta 3200

Sources/further reading:
Plaubel Roll-Op on Camera-wiki
Roll-Op II on Early Photography
Plaubel company history on J. Noir's Classic Cameras

Thursday, 29 March 2012

Zodel Baldalux*

Baldalux 6x9 folding camera
The Baldalux is a mid-range workaday 6x9 format folding camera, and I hadn't previously thought about writing a blog post about it until recent results from scanning a number of negatives I had shot while in Berlin last summer (although the posts on Delta 3200 and Verichrome were illustrated with images shot using the camera). The images made me re-evaluate the camera. I often like to have a 6x9 folding camera with me when travelling for landscape shots, and I've used my Agfa Record I camera for this purpose in the past, but the Baldalux has features to make me favour it over the Record. Some of these features are pretty mundane, such as having the original ever-ready case, and the fact I've got a yellow push-on filter that fits the lens; it does have a better shutter though, and although I haven't done any meaningful comparisons, the Baldalux's Radionar lens seems to perform better than the Record's Agnar.

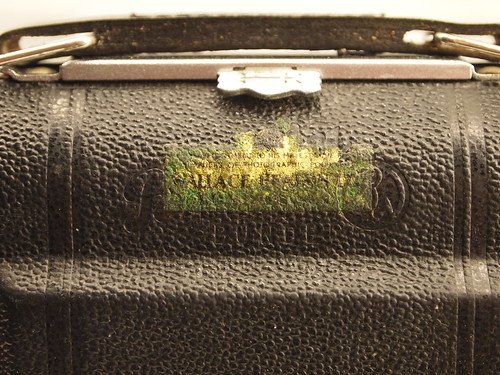
The Baldalux was manufactured by Balda-Werk Bünde, the West German company arising from the pre-war Balda, which was based in Dresden (the East German plant became Belca). Like a number of German camera makers, Balda-Werk Bünde products were often rebranded for sale by other distributors and export to other markets, and so appear under different names. This is the case here, although the camera model being called Baldalux clearly points to its origins. My camera has 'Zodel reg.' stamped on the leatherette on the front of the camera (I've seen other examples on the web where the lettering here is Baldalux - one wonders whether the superfluous 'reg.' was just added to make the text a better visual fit). It also has a fading water-slide transfer label for Wallace Heaton, obscuring the Balda-Werk Bünde branding. Zodel was a brand name used by Wallace Heaton, a London based distributor, to rebadge their cameras. I also have a 6.5x9 plate camera from the 1930s with the Zodel brand.

Wallace Heaton label covering Balda-Werk Bünde stamp
Looking at examples on the web, there are some production variations, although all seem to have a Schneider Kreuznach 105mm Radionar lens in either a Prontor-S or Prontor SVS shutter. Some have differences in the plate around the lens, with examples having a depth of field scale. My camera by comparison has a very plain front plate. It also came with the original 6x4.5 mask, allowing for 16 exposures on a roll of film. Some websites mention a 6x6 mask, although this would require a different arrangement of red windows on the back of the camera. It has frame lines in the viewfinder to indicate the 6x4.5 format, which are actually rather thick and do intrude on the viewfinder, which is very small, even for a camera of this age. I did remove the top plate to clean the viewfinder (as suggested by Flickr member fulvue) making it slightly easier to use. There is also a brilliant finder mounted to the lens, which can be rotated 90 degrees for both horizontal and vertical pictures, which seems to be quite a late date for this kind of finder, being more common on pre-war cameras.

A piece of card stops the double exposure prevention from working
Another feature is the double exposure prevention, with a window on the top plate indicating 'O' for unexposed, and 'E' for exposed. However I have disabled the double exposure prevention. Shortly after I started using the camera, this began not to work very well: after winding on, it would spring back to the 'exposed' setting, preventing the shutter release on the camera from being depressed (although the shutter can always be tripped by the lever around the lens). I taped a small piece of card inside the mechanism to block it, making a non-destructive alteration to the camera. I've yet to accidentally double-expose a frame, but I'm sure that this will happen.

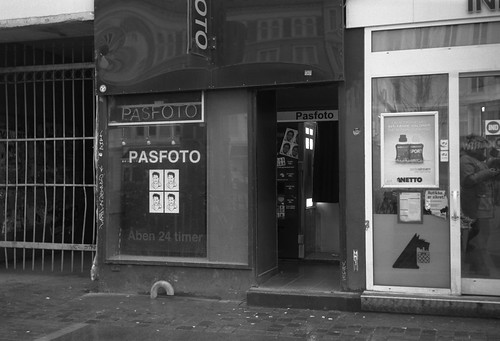
Roadworks, Berlin, shot on Ilford Delta 100
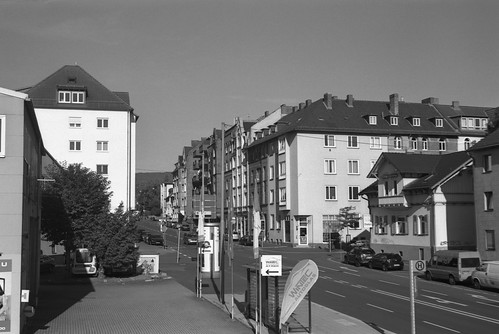
The first photographs I'd taken with the Baldalux I had shot with the 6x4.5 mask, and I was impressed by the sharpness of the image. The Radionar lens is a triplet design (I believe the red triangle on the lens mount denotes coating), and while the centre of the image is very sharp, towards the edges of the full 6x9 frame there is a noticeable softness, however this does perhaps add to its vintage character.

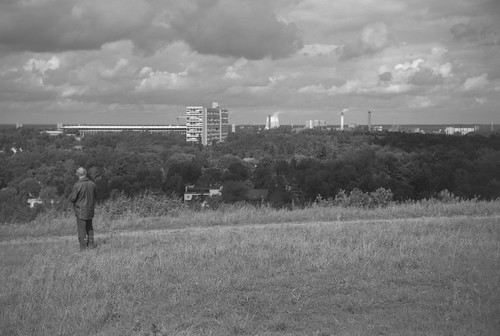
View from the Teufelsberg, Ilford HP5 with yellow filter
Klosterstraße, Berlin, shot on Ilford HP5
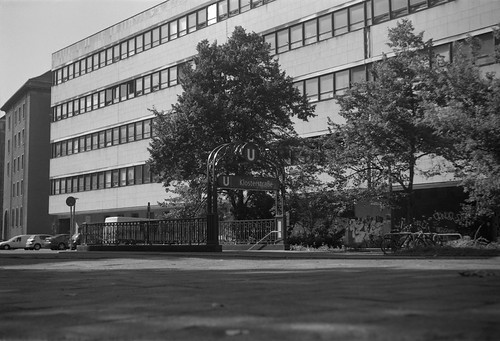
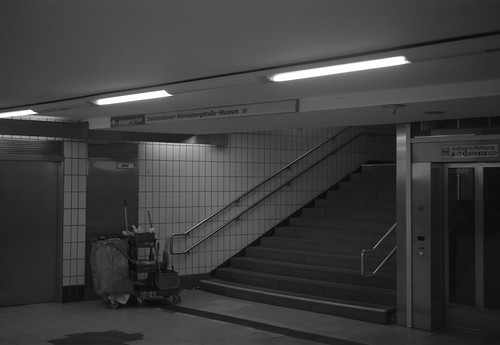
Bahnhof Berlin Oranienburger Straße, Ilford Delta 3200 with 6x4.5 mask
*I'm not actually sure that the camera was referred to as 'Zodel Baldalux', I've been searching online to no avail for old Wallace Heaton Blue Books which might show the camera.

Edit 28/2/18: more samples added.

Zodel Baldalux with Kodak Plus-X (develop before date 02/2007)
Zodel Baldalux with Ilford FP4 Plus
Zodel Baldalux with Agfa Superpan
Zodel Baldalux with Fujicolor Pro 400H
Zodel Baldalux with Rollei RPX400
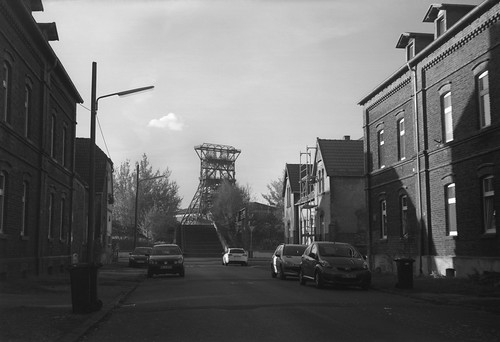
Zodel Baldalux with Rollei RPX400 pushed to 1600
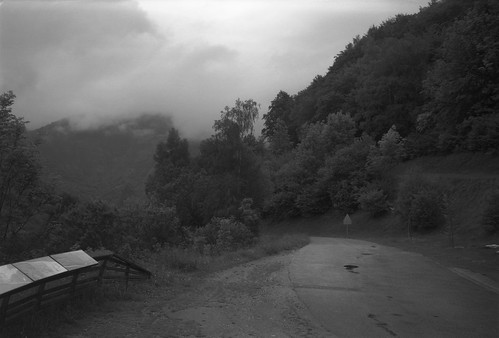
Zodel Baldalux with Ilford Delta 3200 pushed to 6400