Showing posts with label 6x9. Show all posts

Tuesday, 29 March 2022

A small adjustment to the Baldalux's double-exposure prevention mechanism

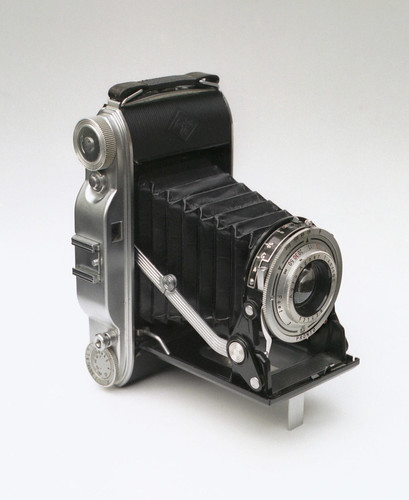
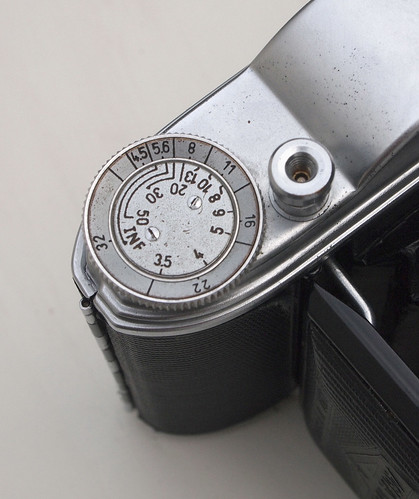
Zodel Baldalux–view of top plate
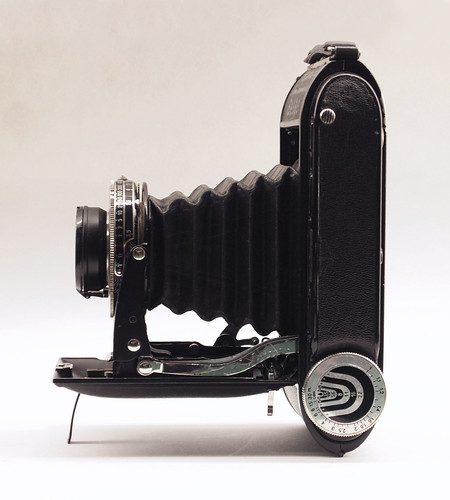
Anticipating a trip abroad in the near future, the first since the global pandemic, I was considering which medium format camera to take with me, and naturally thought of the 6x9 folding Zodel Baldalux camera. Over the past decade this has accompanied me on many trips, and usually provides fairly good results for its modest specifications. However, since I'd first acquired the camera, I'd always been using it with the double-exposure prevention disabled. I'd done this as it had begun to continually trip to the 'exposed' position, denoted by a red 'E' in the small square window on the camera's top plate. In this position, the shutter release on the body is prevented from being depressed and the only way to release the shutter is either with a cable release attached to the lens or, rather more clumsily, by pulling down the lever on the shutter which connects to the body shutter release linkage, and this is a good way to get one's fingers in front of the lens. I taped a small L-shaped piece of card in place to stop the mechanism from shifting to the 'E' position, which, at the time, seemed like a good–and reversible–intervention. At the time I wrote "I've yet to accidentally double-expose a frame, but I'm sure that this will happen." This did happen subsequently, not too often, but picking up the Baldalux once more, I decided to look at this again.

Double-exposure prevention mechanism disabled with card and tape
To remove the top plate of the camera, there are four screws, two at each end, which are fairly easily loosed. I found that it was simple enough to keep the top plate level, and not actually take them out from their respective holes. I could lift and pivot the plate on the shutter release (which pops up when the camera is unfolded) and remove the piece of card, which looked a little frayed at the edges after ten years. Before taking the plate off completely, the shutter release button needs to be removed. Opening the camera makes the shutter release stand proud of the top plate, which may make it easier to undo. In the centre of the release is a separate slotted screw cap which once undone, lifts off with the shutter button, itself sitting on the release pin that has a threaded top that the screw cap connects to.


Shutter release with slotted centre cap.
With the shutter release removed, the camera's top plate can be taken off, and, as mentioned, kept upright with the screws in their holes at either end. Underneath the top plate, loose, but on the shutter release pin, is a short arm that has the screw fitting for the cable release slot on the top plate. This can be simply lifted off.

Shutter release pin with cable release arm
At this point, although separate from the top plate, I removed the film advance knob. This is best seen in the image above showing how I originally disabled the mechanism: slightly off centre in the middle of the knob is a tiny screw–very easy to loose!–which needs to be unscrewed before the advance knob itself can be unscrew: the two images below show it positioned for unexposed ('O') and exposed ('E').

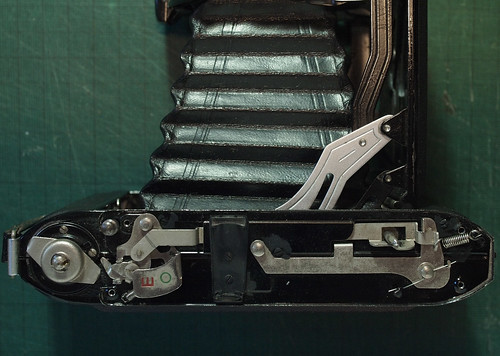
Double-exposure prevention mechanism in 'unexposed' position 'O'.

Double-exposure prevention mechanism in 'exposed' position 'E'.
The sequence of how the mechanism should work from the unexposed position, through exposed to unexposed again is as follows:
  1. Having first cocked the shutter, as the shutter release is depressed, the shaft under the button pushes against a detent in a vertical section of the forward arm (seen below the rectangular hole around the shutter release pin in the pictures above). For this to work once the top plate is removed, I placed the shutter release button onto the shutter release pin (this did not need to be fixed with the central screw plate to activate the mechanism).
  2. This pushes the forward arm down and away from the front of the camera: the right hand end of the arm is held in tension by a spring. This downward movement releases a small angled catch at the end of the arm which can then slip past a vertical section of the lower or rear arm, and is pulled taut past this vertical piece by the spring. A section of the detent on the forward arm is now underneath the shutter release button shaft, preventing its depression, and thus preventing double exposure.
  3. Simultaneously, the other end of the forward arm travels under the viewfinder to the left side of the mechanism where it pulls on a linkage to move the double-exposure indicator from 'O' to 'E'. This also causes a flat pin to protrude towards the film advance knob.
  4. To reset the mechanism, the film advance knob needs to be rotated. Under the advance knob (now removed), there is a kind of cap which sits over the shaft of the film advance column (which travels through the top of the camera body to the take-up spool inside). This has two arms either side with downward pointing ends.
  5. As the advance knob rotates, one of these arms pushes the flat pin of the indicator linkage towards the back of the camera body and in doing so this pulls the forward arm to slip its small catch over the vertical section of the rear arm. This pulls the detent away from the shutter release button shaft. The shutter can now be tripped again.
  6. Meanwhile the indicator linkage shifts from 'E' back to 'O' and the flat pin of the linkage slips out from the arm of the film advance cap and springs back to a position where the advance can now rotate freely without connecting with the pin.
With the camera top plate removed, turning the cap that would normally be hidden by the advance knob was pushing the flat pin in the indicator linkage, shifting the position from 'E' to 'O', but once released from the pressure of the arm, the mechanism sprang back to 'E', My initial thought was that the spring on the other end of the forward arm no longer held this in sufficient tension–hardly surprising after sixty-odd years–to pull it firmly back into the 'O' position, and the small catch at that end was loose enough to slip back past the upright which should stop it.

Detail of spring, catch and hook
I stretched a couple of loops of the spring over the hook to which it is attached to increase the tension, then reduced it to one loop as this felt too much. This did not solve the issue; I wondered whether it was the spring at the other end under the indicator linkage, but this is slightly more difficult to access. Manipulating the whole linkage here by hand, it looked as though the flat pin on the linkage did not travel far enough to lock this into the 'O' position. Removing the cap on the film advance column, I tried to bend the ends of the two arms so that these would flare slightly outwards, as in the picture below (I didn't take a 'before' photo). This seemed to have solved the problem: in this position, they push the flat pin of the indicator linkage further towards the back of the camera as they rotate, and the linkage now locks into the 'O' position until the shutter is released.

Cap with arms showing adjusted angle
Reassembly is a case of following the disassembly steps backwards: the cap should sit firmly over the advance column–the hole on top has squared-off ends in order to turn the advance, which correspond with the top of the film advance. Replacing the film advance knob, I found I needed to firmly hold the key inside the camera which sits in the end of the 120 film spool with pliers to screw the knob on tightly enough to get the two halves of the tiny screw hole to match so that the screw can be reinserted. Replacing the top plate merely needs the tiny arm for the cable release positioning correctly before reinserting the screws at both ends, then finally replacing the shutter button on its pin and screwing down the small plate at its centre to secure this. Before reassembly, I also polished the indicator plate, somewhat tarnished, particularly over the letter 'O'.


Friday, 13 May 2016

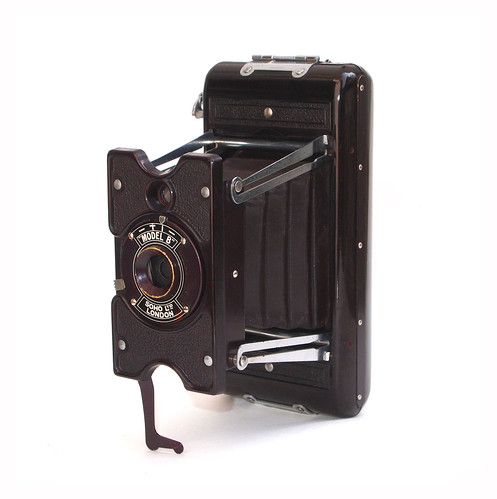
Soho Cadet Model B

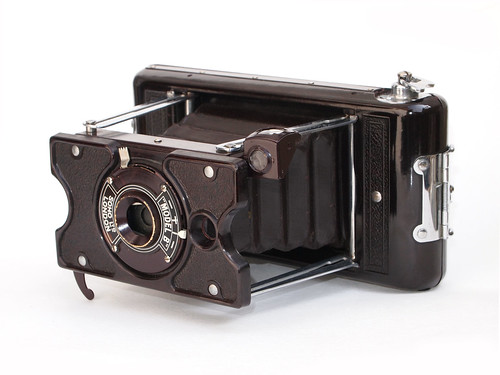
Soho Cadet Model B
The materials that cameras have been made from has evolved to suit the technology of image production as it has developed historically. The first cameras were hand built largely from wood, with relatively small volumes of production. With increasing popularity and ease of use, other materials were needed: cardboard for cameras like the cheap Kodak Brownies, metal for smaller, more precise formats which could be cast and machined and produced in greater numbers. Plastic first appeared as a material for camera production in the 1920s (although celluloid was already in use as a base for photographic emulsion itself in the earliest flexible films); notably with the Rajar No. 6, a Bakelite strut-folder made in 1929. Of the early plastics, Bakelite was well suited to camera construction, being easy to mould but hard and rigid once set, and can be drilled and cut. The Rajar No. 6 produced a number of imitators in the 1930s, and, as a material, Bakelite seems to embody Art Deco modernity. However, as other plastics were developed better suited to the task, Bakelite quickly fell out of use for camera bodies, as well as for many other purposes.

The Rajar camera was made by APM which had been formed by the merger of a number of companies largely concerned with the manufacture of film, plates and paper; APM was later split into APEM to continue this line, while cameras were made by Soho. The Soho Cadet Model B clearly owes much of its design to the Rajar No. 6, although it was ultimately derived from the Soho Cadet, a more traditional medium format folding-bed camera from 1930. The Early Photography website dates the Model B to 1931 (other sites give a date of c.1935); the camera itself does not use the name Cadet anywhere, marked simply "Model B" above the lens, but the front and back body sections (as well as some of the metal fixings) appear to be almost the same as those used in the original Cadet: a small amount of alteration may have been made to the Cadet mouldings for the Model B. Instead of the folding bed, the Model B is a strut-folding version with a lens panel not dissimilar to the Rajar No. 6. The back section of the body removes entirely for loading; inside the back is the statement: "Takes any standard film 2 1/4 x 3 1/4 inches or 6x9cms" with the same patent number as that inside the original Cadet (however, Red Bellows describes the Model B as having a different patent number inside). Incidentally, the Rajar camera uses medium format film, but with Rajar's own propriety spool, possibly making the description 'standard film' more apposite than it might at first seem. Frame advance is by red window and there is no pressure plate, which may affect film flatness. Some of the metal parts, such as the two pivoting stands for horizontal and vertical orientation are painted deep maroon to match the Bakelite body and front, the bellows also being maroon too; the remaining metal components are very brightly chromed.

Soho Cadet Model B opened for loading
The Model B has a fixed-focus lens unlike the original Cadet, which could be focussed by the position of the lens panel on the rails of the folding bed. The Cadet was also provided with a (limited) range of shutter and lens options; like the basic Cadet, the Model B has a meniscus lens in an everset shutter with 'I' for Instant and 'B' for Bulb: in bulb mode the shutter fires with the shutter lever tripped in both directions. Although not measured, I estimate that the shutter fires at about 1/40th - and it can sometimes be a little sluggish when the shutter lever is pressed in the down direction: it seems that gravity works against it when held in certain ways. From my rough measurements, the camera has a focal length of around 100mm, making the aperture about f14.

Soho Cadet Model B with vertical stand
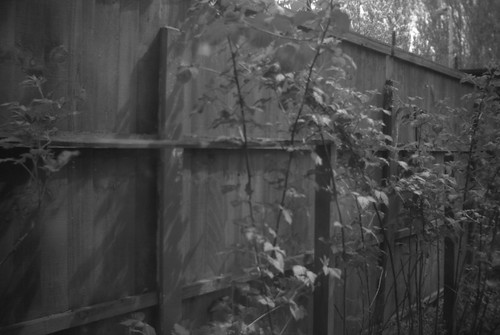
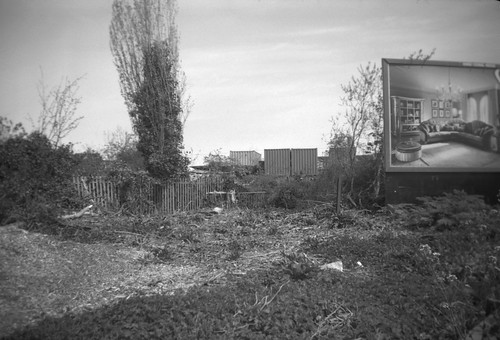
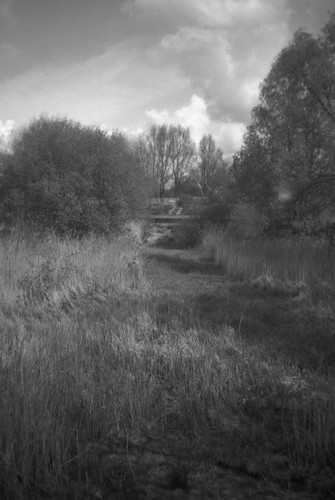
My example of the Model B came in a job lot of cameras, and may have been the least interesting of them, but I did want to try it with film. I shot a couple of rolls of Fomapan 200, possibly a stop or two too fast for conditions with bright sunlight, the latitude of the film coped with this well enough. The camera uses a brilliant finder, but one of the smallest I've used, making it difficult to compose a shot. Held vertically, the finder is located directly above the lens behind the lens board, but pivots out through 90 degrees for horizontal shots. The results show all the shortcomings one might expect from a simple meniscus lens: vignetting, astigmatism, barrel distortion, and coma - as well as what appears to be some internal reflection.

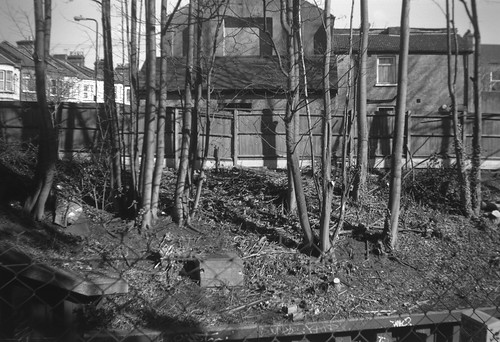
Soho Cadet Model B with Fomapan 200
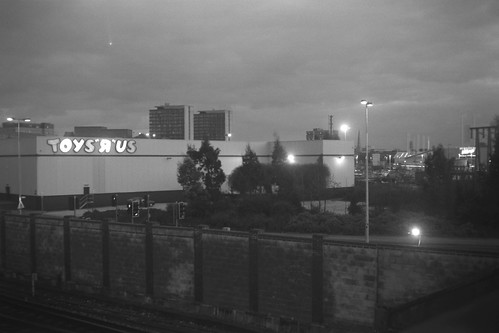
Interestingly, the lens' curvature of field aberration means that at the very edges of the frame near objects are more in focus: in the image above, the oblique fence recedes away from the lens into focus at the right - but at far left is also in focus. This effect can also seen in the image below in the bottom right. The Soho Cadet Model B is essentially a snapshot camera, no more sophisticated than contemporary box cameras and indeed with less user controls than many. The shortcomings of the lens are a little compensated for by the large image size: this was probably perfectly adequate for contact prints made from the negatives in the 1930s. Today, the camera is probably of more interest of collectors of Bakelite than the film photographer.

Soho Cadet Model B with Fomapan 200
Sources/further reading
Soho Cadet on Early Photography
Soho Cadet on Red Bellows
Soho on Camera Wiki
Marriotworld's The Bakelite Story

Monday, 23 March 2015

Take Your Box Camera To Play Day 2015

Kodak No.2 Brownie Model F with Fomapan 400
Last year's 'Take Your Box Camera To Play Day' was repeated this weekend. Having used the Kodak No.2 Brownie recently, I shot just one roll of Fomapan 400 on Saturday. The weather was cloudy with very occasional and brief spells of hazy sunshine, such as in the shot above. The rest of the photographs were shot on the widest aperture. The negatives suffered more from the scratches that had been visible in the photographs from 'Take Your Box Camera To Work Day', which may be partly that these are more visible on thinner negatives (and it maybe that some films are more susceptible to scratching).

Kodak No.2 Brownie Model F with Fomapan 400


Monday, 9 March 2015

The Kodak No.2 Brownie

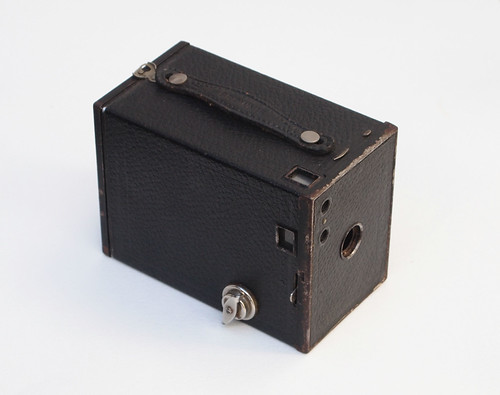
Kodak No.2 Brownie
"Simple, sturdy, reliable, these inexpensive little cameras have stood the test of years, and will be found in the hands of many thousands of people all over the world, who are making perfectly satisfactory pictures with them. They are especial favorites with the children on account of their great simplicity, but they are withal so practical that they have been readily taken up by grown-up people who wish to make pictures in the easiest possible manner and at the minimum of expense. Each has two finders, automatic shutter, carefully tested lens, and imitation leather covering. They [the Brownie No.2 and No.2A] differ from each other only in the size of the pictures they make and in their lenses."
Kodaks and Kodak Supplies / 1914 (Canadian Kodak Company)
Building on the premise of the first Kodak camera of 1888, the original Brownie was designed by Frank Brownell for Eastman Kodak to sell for just one dollar (the original Kodak was first priced at $25; at the time the Brownie appeared, a pocket Kodak was $5). This price reduction was achieved by a number of design and manufacturing processes, but chiefly by substituting the well constructed wooden body of the first Kodaks with leather covered cardboard for the Brownie. The original Brownie of 1900 was designated the No.1 once the No.2 was produced a year later. Like the original Kodak, it had no viewfinder, but V-shaped sightlines incised on the body to aid framing. A few months later an accessory finder was provided which the user could attach to the camera body; the No.2 Brownie had two integral finders for portrait and landscape orientation. The No.2 was originally priced at $2, quite possibly due to the inclusion of those two viewfinders. The significance of the No.2 Brownie of 1901 is due to Eastman Kodak introducing a paper-backed rollfilm format still widely used today: 120. The 120 format provides negatives of approximately 6x9cm; as prints were commonly made by contact at the time, a large negative was an advantage. During their first half century of camera manufacture, Kodak produced numerous film formats. Retrospectively assigned number codes in 1912, beginning sequentially from 100, there were 20 different formats by the time the Brownie No.2 appeared 1901. Although a number of the competing formats were continued for many years, for some reason, the c.62mm-wide paper-backed rollfilm of the No.2 Brownie emerged as the standard.

I've had two No.2 Brownie cameras, the first came from a car boot sale nearly twenty years ago priced £1, the second bought recently was £3 (unless in exceptional condition or a rare variant, Brownie cameras should not be expensive today, as some models had production runs in the millions). Illustrated here, I bought this second camera to create a film splitter, but after cleaning it and gluing down some of the leatherette, the camera seemed too good not to use . Both my No.2 Brownie cameras were the Model F, made from 1924 onwards. The significant change introduced with the Model F was that the card body was now made in metal. Additionally, two tripod sockets were added. According to the Brownie Camera site, my current Brownie camera can be identified by its fully detachable rear door as an early version from 1924-25.
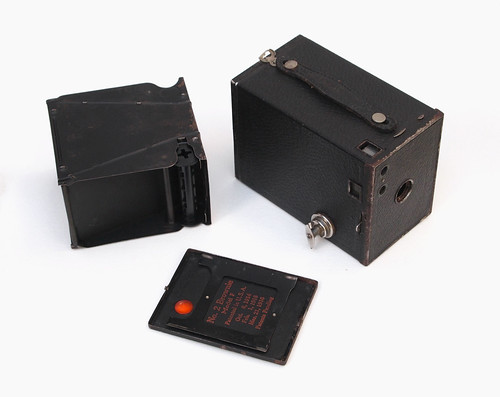
Kodak No.2 Brownie, with film carrier removed
Operation of the camera is simplicity itself. Film is loaded by opening the back and removing the film carrier, threading the film onto the the take up spool and replacing this into the camera. The 10cm meniscus lens is focus-free, set, possibly at a hyperfocal distance, rather than at infinity, judging from some of my recent photographs with the camera. The rotary shutter fires at a single instantaneous speed on both the lever's upstroke and downstroke, while the time setting works on both by pulling up the small tab on the top of the camera on the opposite side from the viewfinder. The middle tab above the lens provides the three aperture stops, holes punched in a thin sheet of metal in front of the lens; the apertures are progressively smaller as this is pulled out. By simply measuring these three holes, these apertures are approximately f14, f18 and f32 (I've read online that these are either f11, f16, f22 or f16, f22, f32). The shutter speed is somewhere between 1/30th - 1/60th: on my particular Brownie, the shutter appears to move just perceptibly faster in one direction than the other. The animation below, with the front camera cover removed, shows how this simple shutter works. As the shutter lever is pressed down, the spring on the other side of the pivot pulls the shutter around until this circular motion is briefly interrupted by the T-shaped bar. This provides a small amount of tension, released once the tab on the shutter has passed the end of the 'T' and the open sector on the shutter rapidly rotates over the lens, exposing the film. The animation below is slowed to one-third of actual speed.

Kodak No.2 Brownie sector shutter
Given the sensitivity of film a century ago, the apertures do seem small: fast or sometimes named 'rapid' films of the time were in the range of 20-30 ISO. Picture Taking with the Brownie Camera No. 2 (1918) is instructive of how the camera would have been used at the time. This stresses several times that the smallest aperture stop is not to be used for instantaneous exposures, or 'snapshots':
"To take instantaneous pictures the object should be in the broad open sunlight, but the camera should not. The sun should be behind the back or over the shoulder of the operator. Snap shots should only be made when the largest stop is before the lens. If a smaller stop be used, the light will be so much reduced that it will not sufficiently impress the image on the film and failure will result. [...]
STOPS. The stops should be used as follows:
1. THE LARGEST For all ordinary instantaneous exposures.
2. THE MIDDLE For instantaneous exposures when the sunlight is unusually strong and there are no heavy shadows; such as in views on the sea shore, or on the water; also for interior time exposures, the time for which is given in the table on pages 16 and 17.
3. THE SMALLEST For time exposures out doors in cloudy weather. Not for instantaneous exposures. The time required for time exposures on cloudy days with smallest stop will range from one-half second to five seconds, according to the light. The smaller the stop the sharper the picture. When setting the stops always see that the one to be used is brought to the center of the lens, where it catches. If you use the smallest stop for instantaneous exposures absolute failure will result."
When introduced most films were either 'ordinary', that is, blue sensitive, or orthochromatic, and developed by inspection, and although Picture Taking with the Brownie Camera No. 2 describes using a 'Brownie Developing Box' or a film tank, it does also have a section on tray developing film. Developing by inspection would allow for compensation in under- (or over-) exposure with extending or contracting development time. Additionally, from reading photography books such as the Ilford Manual of Photography, I have the impression that the intensification and reduction of negatives was common, something I've never done, but Picture Taking with the Brownie Camera No. 2 does mention these techniques. Occasionally I have read opinions online that modern fast films are too fast for box cameras, designed as they were for the use of slow films, with slow shutter speeds to match. I have never found this to be the case. Most modern films have enough latitude to provide good results in a variety of lighting conditions with a box camera that has very limited exposure controls. With a fast film in the No.2 Brownie, the smallest stop can be used for instantaneous exposures in bright light, but, unless taking photographs in bright sunlight, the middle stop usually gives the best results (it is also possible that using the smallest stop may actually reduce image quality due to diffraction). Incidentally, I have been recently testing Agfa Superpan 200, and shot one roll in the No.2 Brownie; at 200 ISO, the speed of the film is a good match for instantaneous exposures and the film's sharpness and relatively high contrast appear to be excellent qualities to offset the softness of the Brownie's lens.

My first No.2 Brownie was my second medium format camera, my first being a Zeiss Ikon Ikoflex. Unlike the Ikoflex which had double-exposure prevention and an automatic film counter, I realised that advancing the film by using the red window in the Brownie, I could create overlapping exposures. I subsequently made a series of in-camera panoramic triptychs by rotating the camera on a tripod and advancing the film between each shot so that the exposures would just overlap and join together, creating an image spanning roughly 135 degrees. It would be possible to make a longer image with more exposures, but three overlapping shots are nearly ten inches wide, and as such fitted onto a sheet of 10x8-inch paper for contact prints, and this could also be enlarged using the large format 10x8 Durst enlarger that I had access to at college.
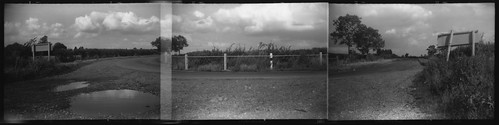
In-camera panoramic shot on Ilford HP5 Plus
Having used the No.2 Brownie for the most recent 'Take Your Box Camera to Work Day', I could draw some comparisons to the Lumière Scout Box that I've used previously: it is bigger than the Scout Box, partly due to having a slightly longer focal length, but also the shutter and aperture stops are in front of, rather than behind the lens; the No.2 Brownie's meniscus lens is fairly unremarkable and does display a small amount of barrel distortion and vignetting, but the 6x9cm size negative is quite forgiving for small enlargements (although I have not shot direct like-for-like comparisons, the Scout Box lens does appear to give better results).
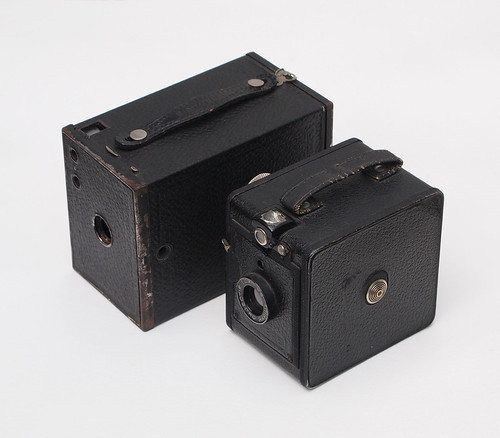
The Kodak No.2 Brownie with (front) the Lumière Scout Box
The limitations of the No.2 Brownie are also what make it a pleasure to shoot with. Like all but the most sophisticated box cameras, a lack of user controls can be liberating, freeing the user to concentrate on the subject, and the small, basic finder also means a fair amount of uncertainty as to composition, which provides an element of surprise on development. With modern films, these point and shoot cameras from a hundred years ago can still be a joy to use.

Kodak No.2 Brownie with Rollei RPX400
Kodak No.2 Brownie with Agfa Superpan 200
Kodak No.2 Brownie with Ilford HP5 Plus
Sources/further reading:
Kodaks and Kodak Supplies 1914
, Canadian Kodak Co. Ltd

Picture Taking with the Brownie Camera No. 2, Canadian Kodak Co. Ltd, 1918
The early years of Eastman Kodak on Kodak.com
The No.2 Brownie on the Brownie Camera Page
No.2 Brownie on Early Photography
History of Kodak Cameras with film sizes, original prices and production dates
B is for Brownie at the National Media Museum
George Eastman House collection of Brownies

Monday, 2 March 2015

Take Your Box Camera To Work Day 2015

Kodak No.2 Brownie with Rollei RPX 400
For this year's Take Your Box Camera To Work Day last Friday, I used a different camera to previous years. I had recently bought a cheap Kodak No.2 Brownie, with the intention of making this into a film slitter. I did temporarily use this as a means to cut down film, for this January's 127 Day, but after cleaning the Brownie, and finding it to be in good working condition, I decided to use it for shooting. Composing the shots was rather down to guesswork, as between the two brilliant finders, there was one loose mirror which had lost most of its silvering, with the result that very little showed on the small ground glass finder. I shot three rolls of Rollei RPX400, two of which were developed in Ilfotec LC29, and one in R09 One Shot. As it was a sunny day, the interior photographs with sunlight in were shot on the instant setting, while others were shot for a number of seconds on 'time', and the latitude of RPX400 made up for the wide variations in exposure. When scanning I realised that the negatives had been scratched, which I thought may have been while advancing the film in the camera, or possibly in handling them after washing, and some of the worst scratches have been mitigated digitally.

Kodak No.2 Brownie with Rollei RPX 400
See the whole set of photographs on Flickr.

Friday, 13 June 2014

Agfa Record I

Agfa Record I
The Agfa Record I was the camera that got me into the 6x9cm format. I had previously used a Zeiss Ikon Nettar camera, which was my first folding camera, picked up form a charity shop, but found the 75mm focal length on the 6x6cm negative just a little wide, and I've also thought that the square format does require more consideration when composing the image. 6x9cm was the negative size that 120 medium format film was initially designed for, introduced with Kodak's No.2 Brownie camera in 1901. At the time most amateur photographs were contact printed from negatives rather than enlarged (a fact which lead to much larger roll negative sizes, such as the 122 postcard format); 6x9cm, although small by modern standards, was just acceptably large enough for snapshots. As I've previously written about in my post for the Baldalux camera, the folding 6x9 format camera is an ideal travelling companion, a good compromise between portability and negative size.

There were three models of Agfa Record cameras: the Record I was the least expensive model; models II and III were not successive designs of the Record, but contemporaneous, more sophisticated and expensive models with better lenses and shutters (the top-of-the-range Record III also featured an uncoupled rangefinder). The Record I was supplied with a 105mm f4.5 Agnar lens, Agfa's own triplet lens, which has front element focus down to 3 feet, and stops down to f32 (an aperture setting which I may never have used), in a four speed Pronto shutter (25, 50, 100, 200 plus B).

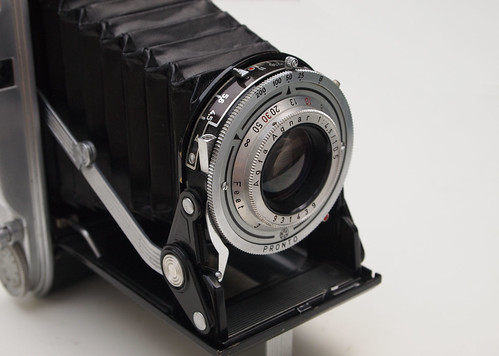
Agfa Record I - Lens and shutter detail
The camera is simply and robustly constructed. The metal body is covered in leatherette with a pattern of fine cording, providing a good grip. To open the camera, the front catch button is nestled beside the large winding knob, and when pressed the lens pops out into position with a snap, and the shutter release on the body also pops up. The arms lock to hold the lens and shutter quite rigid.  Unlike the Voigtländer Bessa RF from my previous post, the shutter linkage is a solid bar along the bed underneath the lens. The viewfinder is relatively large compared to other folding cameras of similar date. Focus is by estimation: there are markings around the lens of distances in feet, with 30 and 10 picked out in red; there is also a red dot next to f11. These settings must be for 'view' and 'group' shots: with the focus set for 30 feet, at f11, depth of field extends from infinity to just short of 13 feet; set at 10 feet, it's a bit broader than 8 to 13 feet.

Depth of field scale
Using both the Nettar and subsequently the Record I were amongst my earliest experiences of using guess focus. I did also have a Lomo LCA at the time, but this has a wide angle lens on a small format: with the longer focal lengths of medium format folding cameras, compared to standard lenses on 35mm, for the first time calculating depth of field became very important. The Agfa Record's depth of field scale (in the image above) was extremely useful. The outer ring rotates so it is possible to align the small tick in the aperture section on the outside against the focus setting inside. With experience, guess focus for anything other than near scenes at wider apertures is relatively easy, but when I began using the camera, this small scale calculator was a welcome reassurance. I used the camera very frequently over a period of about three years, taking it abroad and on a number of protests and demonstrations. I inadvertently dropped it onto the pavement during the first of the student fees protests in 2010, which put a dent in the bottom, deforming the body just a little to make opening and closing the camera rather more tight than previously, but otherwise it still worked fine. Despite being fitted with the lowest specification lens, the negative size is very forgiving, especially when used with smaller apertures. The Pronto's four shutter speeds were restricting on occasion but I found, for its simplicity, the Agfa Record a pleasant camera to use.

Agfa Record I with Ilford Delta 100
Agfa Record I with Adox CHS 100
Agfa Record I with Ilford Delta 400
Agfa Record I with Ilford HP5 Plus
Agfa Record I with Fomapan 400
Sources/further reading:
Agfa Record cameras at Camera-Wiki
Agfa Record I at Historic Camera
Agfa Record and Billy Record Cameras at Certo 6

Wednesday, 4 June 2014

Voigtländer Bessa RF

Voigtländer Bessa Entfernungsmesser or Rangefinder
The Bessa Rangefinder or Bessa RF (also known as the Bessa E or Bessa E Messer, from Entfernungsmesser, the German for 'rangefinder') was introduced in 1936, one of a long-running series of Bessa folding cameras made by Voigtländer (the Bessa name has also been recently revived by Cosina for their Voigtländer-branded 35mm and medium format rangefinders).  It is a 6x9 folder using 120 roll film, with a mask for 6x4.5 pictures. It was available with three different lenses, the most expensive variant carrying the Heliar lens, all with a hinged filter. Production of the Bessa RF was restarted after the second world war, until the model was superceded by a 1950s Bessa Rangefinder, the Bessa II.
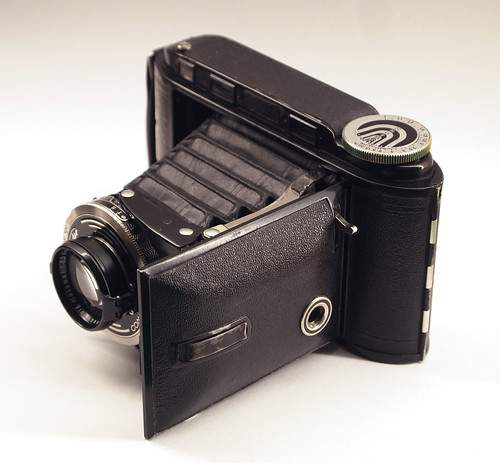
Having used the Bessa RF to shoot the expired Verichrome 620 film which was the subject of my last post, I thought this would be a good opportunity to write about the camera. Voigtländer had previously produced the Prominent, a fully-featured 6x9 rangefinder, but the rather Baroque design must have been expensive to manufacture. The Bessa design represents a complete rethink: it was based around the body of an optical-finder Bessa that Voigtländer made to replace their earlier Inos folding cameras. One aspect that remained the same is like the Prominent, the Bessa's rangefinder also has both windows offset from the eyepiece, not a common arrangement. Unlike the Prominent, the rangefinder and viewfinder are both housed under the camera's top plate, which is uncluttered except for the focus knob. On the other end of the top plate is a small button with a ridged grip. This is used to rotate a mask hidden inside the viewfinder to narrow the view from the 6x9 format down to 6x4.5 proportions when using with the internal mask. The camera's black painted trim and other components, rounded corners and curving lines lend the Bessa RF a touch of Art Deco elegance (compare, for example, the contemporaneous Super Ikonta, with similar features in a very different arrangement).
To open the camera there is a small release button on the bottom plate. The lens is self-erecting, although with my camera the front standard needed to be securely locked into place manually, it may have had more spring when new. The metal tab underneath the lens is depressed to unlock it and close the camera. When opened, the unusual shutter release is erected from the slot in the hinge-side of the door close to the body, shown in the image below. This shutter release trigger was a common feature to Voigtländer's folding cameras of the 1930s and 40s, and one which the company patented.

Voigtländer Bessa RF
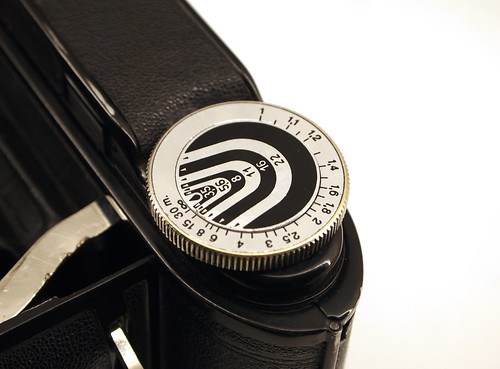
The split image rangefinder is a separate window from the viewfinder, but it is coupled to the lens. As the rangefinder eyepiece shows a magnified and cropped image, allowing for very accurate focus, the separate viewfinder is needed for framing. Focussing is by turning the knob on the top plate which also provides a depth of field scale. This moves the whole lens and shutter unit forwards on two brass rails inside the bed. Interestingly, the camera can be focussed when closed, and as a result the focus does not have to be set to inifinity when closing the camera, unlike some rangefinders. The camera focuses down to just under 1 metre.

Detail of focus knob and depth of field scale
One of the curious effects of the Bessa's layout is that the user controls are on the left hand side of the camera, which makes for odd ergonomics for a right-handed person. However, I have read somewhere that the reason for this was that it designed to be used comfortably when held vertical, in the portrait format. I habitually use the 6x9 format for landscapes, but turning the camera through 90º this makes sense: the user's right hand can support the camera with either fore- or middle finder on the shutter release, while the left hand can rotate the focus wheel. In the horizontal format, one has to use the same hand to focus, then depress the shutter. The controls around the lens are placed in such a way that these can be easy adjusted in either vertical or horizontal position when looking down at the camera. In particular, the shutter speeds are represented on two scales, visible from the front, as is standard with Compur rim-set shutters, but also just above the aperture settings on the side of the shutter.

Voigtländer Bessa RF in vertical format
My camera has the Helomar f3.5 105mm lens, which was the least expensive option; the Bessa RF was also supplied with a Skopar, or, the most prized, a Heliar lens. According to this scan of the  British Journal Photographic Almanac 1939, there was a £5 difference between the bottom of the range Bessa RF with the Helomar lens, and that with the Heliar lens, which does not sound like much, but the cheapest optical-finder Bessa was just £2.17.6. The results I've had from this camera demonstrate that the Helomar lens performs as might be expected from a pre-war uncoated triplet: soft at the edges at wider apertures but still very capable of resolving fine detail in the central image area, as shown in the recent tests of Rollei RPX 25 shot with this film; stopped down beyond f8 the Helomar is acceptably sharp, especially in relation to the size of a 6x9 negative (such as the example shot on Fomapan 400 below, possibly shot at f16). Incidentally, the lens is dated to 1936, the year the Bessa RF was introduced, although the shutter's serial number is dated two years later, to 1938.

Voigtländer Bessa RF sample image with Fomapan 400
When using the Bessa RF there are a few quirks to watch out for. My camera has seen a fair amount of use, judging from the paint losses and other signs of wear. As well as having to ensure that the lens is rigidly locked in place on opening, the shutter linkage sometimes needs to be reset: the pivoting arm which trips the release lever on the shutter has a pin connecting to a slot which descends when the shutter trigger is pressed. This pin sometimes comes loose and needs to be located back in the slot by hand. I don't know if this is a common problem with old Bessas, a weak point in the design: there does appear to be a fair bit of play with these components, which no doubt has increased with use. I also found when I first received the camera that the shutter release was not very 'soft', which meant that I had to use faster shutter speeds to ensure against camera shake, and as a consequence I had to use the lens at wider apertures to compensate. This was resolved by loosening the retaining ring inside the camera and turning the whole shutter and lens assembly by just a small amount, to reduce the distance the pivoting linkage arm has to travel to trip the shutter (existing scratches on the retaining ring were evidence that the lens and shutter had be removed at some point, and perhaps not positioned entirely right when replaced). One of the shots on Rollei RPX 25 was hand-held at 1/50th, taken after this adjustment, which I wouldn't have been confident about previously. My Bessa is missing the yellow filter, but still has the hinged filter ring, so it may be possible to finder a filter to fit this. It is also missing the 6x4.5 mask, and I may attempt to make one to fit the camera at some point. The main reason I haven't used the Voigtländer Bessa RF more is that it is bigger and heavier than my other 6x9 folding cameras, such as the Baldalux, and when shooting the kind of landscape or cityscape photography I typically use this format for, the ability to judge focus accurately with the rangefinder is less critical. However, I did find that it was invaluable when using 620 film due to the way the spools fit in the cradle of the supply-side, something none of my other medium format cameras are capable, with the exception of the Lumière Scout Box.

Voigtlander Bessa RF, close-focussed sample image with Fomapan 400
Voigtländer Bessa RF sample image with HP5 Plus
Voigtländer Bessa RF sample image with Rollei RPX 400
Voigtländer Bessa RF sample image with expired Verichrome Pan
Voigtländer Bessa RF sample image with Fomapan 400
Sources/further reading:
Bessa RF on Camera-Wiki
Early Photography's page on the Bessa RF