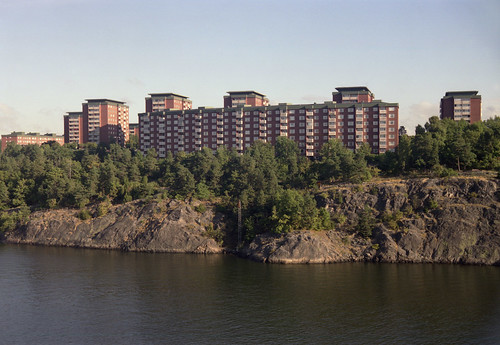
Showing posts with label Baldalux. Show all posts

Tuesday, 29 March 2022

A small adjustment to the Baldalux's double-exposure prevention mechanism

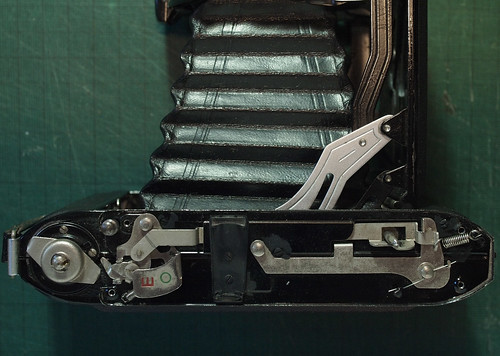
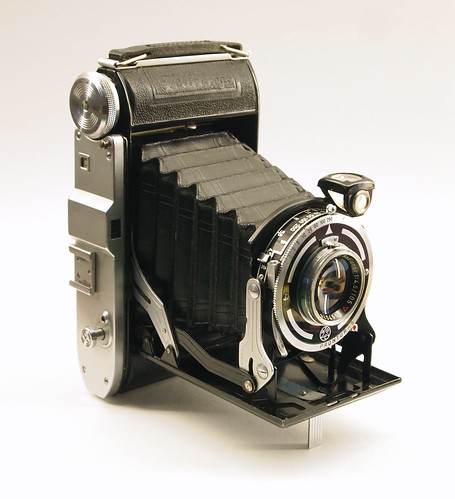
Zodel Baldalux–view of top plate
Anticipating a trip abroad in the near future, the first since the global pandemic, I was considering which medium format camera to take with me, and naturally thought of the 6x9 folding Zodel Baldalux camera. Over the past decade this has accompanied me on many trips, and usually provides fairly good results for its modest specifications. However, since I'd first acquired the camera, I'd always been using it with the double-exposure prevention disabled. I'd done this as it had begun to continually trip to the 'exposed' position, denoted by a red 'E' in the small square window on the camera's top plate. In this position, the shutter release on the body is prevented from being depressed and the only way to release the shutter is either with a cable release attached to the lens or, rather more clumsily, by pulling down the lever on the shutter which connects to the body shutter release linkage, and this is a good way to get one's fingers in front of the lens. I taped a small L-shaped piece of card in place to stop the mechanism from shifting to the 'E' position, which, at the time, seemed like a good–and reversible–intervention. At the time I wrote "I've yet to accidentally double-expose a frame, but I'm sure that this will happen." This did happen subsequently, not too often, but picking up the Baldalux once more, I decided to look at this again.

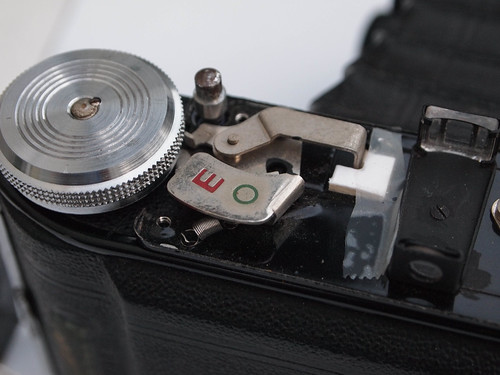
Double-exposure prevention mechanism disabled with card and tape
To remove the top plate of the camera, there are four screws, two at each end, which are fairly easily loosed. I found that it was simple enough to keep the top plate level, and not actually take them out from their respective holes. I could lift and pivot the plate on the shutter release (which pops up when the camera is unfolded) and remove the piece of card, which looked a little frayed at the edges after ten years. Before taking the plate off completely, the shutter release button needs to be removed. Opening the camera makes the shutter release stand proud of the top plate, which may make it easier to undo. In the centre of the release is a separate slotted screw cap which once undone, lifts off with the shutter button, itself sitting on the release pin that has a threaded top that the screw cap connects to.


Shutter release with slotted centre cap.
With the shutter release removed, the camera's top plate can be taken off, and, as mentioned, kept upright with the screws in their holes at either end. Underneath the top plate, loose, but on the shutter release pin, is a short arm that has the screw fitting for the cable release slot on the top plate. This can be simply lifted off.

Shutter release pin with cable release arm
At this point, although separate from the top plate, I removed the film advance knob. This is best seen in the image above showing how I originally disabled the mechanism: slightly off centre in the middle of the knob is a tiny screw–very easy to loose!–which needs to be unscrewed before the advance knob itself can be unscrew: the two images below show it positioned for unexposed ('O') and exposed ('E').

Double-exposure prevention mechanism in 'unexposed' position 'O'.

Double-exposure prevention mechanism in 'exposed' position 'E'.
The sequence of how the mechanism should work from the unexposed position, through exposed to unexposed again is as follows:
  1. Having first cocked the shutter, as the shutter release is depressed, the shaft under the button pushes against a detent in a vertical section of the forward arm (seen below the rectangular hole around the shutter release pin in the pictures above). For this to work once the top plate is removed, I placed the shutter release button onto the shutter release pin (this did not need to be fixed with the central screw plate to activate the mechanism).
  2. This pushes the forward arm down and away from the front of the camera: the right hand end of the arm is held in tension by a spring. This downward movement releases a small angled catch at the end of the arm which can then slip past a vertical section of the lower or rear arm, and is pulled taut past this vertical piece by the spring. A section of the detent on the forward arm is now underneath the shutter release button shaft, preventing its depression, and thus preventing double exposure.
  3. Simultaneously, the other end of the forward arm travels under the viewfinder to the left side of the mechanism where it pulls on a linkage to move the double-exposure indicator from 'O' to 'E'. This also causes a flat pin to protrude towards the film advance knob.
  4. To reset the mechanism, the film advance knob needs to be rotated. Under the advance knob (now removed), there is a kind of cap which sits over the shaft of the film advance column (which travels through the top of the camera body to the take-up spool inside). This has two arms either side with downward pointing ends.
  5. As the advance knob rotates, one of these arms pushes the flat pin of the indicator linkage towards the back of the camera body and in doing so this pulls the forward arm to slip its small catch over the vertical section of the rear arm. This pulls the detent away from the shutter release button shaft. The shutter can now be tripped again.
  6. Meanwhile the indicator linkage shifts from 'E' back to 'O' and the flat pin of the linkage slips out from the arm of the film advance cap and springs back to a position where the advance can now rotate freely without connecting with the pin.
With the camera top plate removed, turning the cap that would normally be hidden by the advance knob was pushing the flat pin in the indicator linkage, shifting the position from 'E' to 'O', but once released from the pressure of the arm, the mechanism sprang back to 'E', My initial thought was that the spring on the other end of the forward arm no longer held this in sufficient tension–hardly surprising after sixty-odd years–to pull it firmly back into the 'O' position, and the small catch at that end was loose enough to slip back past the upright which should stop it.

Detail of spring, catch and hook
I stretched a couple of loops of the spring over the hook to which it is attached to increase the tension, then reduced it to one loop as this felt too much. This did not solve the issue; I wondered whether it was the spring at the other end under the indicator linkage, but this is slightly more difficult to access. Manipulating the whole linkage here by hand, it looked as though the flat pin on the linkage did not travel far enough to lock this into the 'O' position. Removing the cap on the film advance column, I tried to bend the ends of the two arms so that these would flare slightly outwards, as in the picture below (I didn't take a 'before' photo). This seemed to have solved the problem: in this position, they push the flat pin of the indicator linkage further towards the back of the camera as they rotate, and the linkage now locks into the 'O' position until the shutter is released.

Cap with arms showing adjusted angle
Reassembly is a case of following the disassembly steps backwards: the cap should sit firmly over the advance column–the hole on top has squared-off ends in order to turn the advance, which correspond with the top of the film advance. Replacing the film advance knob, I found I needed to firmly hold the key inside the camera which sits in the end of the 120 film spool with pliers to screw the knob on tightly enough to get the two halves of the tiny screw hole to match so that the screw can be reinserted. Replacing the top plate merely needs the tiny arm for the cable release positioning correctly before reinserting the screws at both ends, then finally replacing the shutter button on its pin and screwing down the small plate at its centre to secure this. Before reassembly, I also polished the indicator plate, somewhat tarnished, particularly over the letter 'O'.


Monday, 28 September 2015

Some Thoughts On Railway Stations


In the spring I travelled to Stockholm by rail. The reason for choosing this method of travel was that I could plot a route with stops at both Wuppertal and Hamburg, researching locations from two films by Wim Wenders: Alice In The Cities, and The American Friend. This parallel journey through the Germany of the 1970s was documented on a separate, dedicated blog. I have just recently updated the blog with the photographs taken on the journey - which took some time to develop and scan (I shot about fifty rolls of film - 35mm, 120 and 110). I took three cameras with me: the medium format Zodel Baldalux, 35mm Kodak Retina IIa and my Pentax Auto 110, with cartridges reloaded with Kodak WL Surveillance film - as well as taking the rest of the roll of 16mm film and a dark bag to reload the 110 cartridges each day of my journey - although none of the images on the blog are actually from the Pentax.

I have now recently updated the blog with two pages directly relating to locations used for scenes in both films, the pages marked Alice in the Cities and The American Friend, as well as interspersing relevant images through a number of the posts written on the journey itself, about the films, the research and the locations, and more generally about travelling from London to Stockholm by train. I haven't added images from the two films for comparison, but some of the locations in Hamburg are shown in the images from the film on the Cranes Are Flying blog about The American Friend. Due to the nature of formatting with Blogger, the blog entries are listed as most recent first, essentially presenting the journey in reverse order.


Wednesday, 10 June 2015

Agfa/Rollei Superpan 200

Superpan 200 in 35mm and medium format
There are very few black and white films manufactured with a nominal speed of 200; currently, just three: Fomapan 200, Ilford SFX 200 Creative, and Agfa Superpan 200Fomapan 200 was discontinued for a few years, but was recently reintroduced in a new formulation; Ilford's SFX 200 shares some characteristics with Agfa Superpan 200: the name denotes that the Agfa film is superpanchromatic, with extended red sensitivity beyond normal panchromatic films, to near infra-red, and with the right filters (like SFX 200) it can produce similar effects to true infra-red film. Of the three films, all are available in 35mm and medium format rollfilm, additionally, Fomapan 200 is also available in large format sheet film. There are few stockists in the UK for Superpan 200, West End Cameras currently has the film in stock; when asked about in Silverprint, they hadn't heard of the film. Superpan 200 is sold by Maco but is produced (as Aviphot Pan 200) by Agfa-Gevaert in Belgium, and Maco's website uses Agfa-Gevaert's Aviphot Pan 200 technical information sheet. As can be seen in the photograph above, the film packaging uses both Agfa and Rollei brand names for the medium format film, while the 35mm labels do not use the Rollei name (the 35mm film is also not DX-coded). In the film rebates, on the medium format version, Rollei is used, while 35mm has just the name Superpan 200.

Agfa-Gevaert's data sheet describes Aviphot Pan 200's applications as:
Aerial photography assignments from low to medium altitudes, for gathering, interpreting and processing information intended for cartography, inventory purposes and exploration studies. This film can be used in industrial recording systems, such as equipment for plotting graphs in control and monitoring devices. It can also be used in stereo image recording devices, either airborne or in ground-based facilities for subsequent production of three-dimensional plans, maps, etc.
Characteristics
With its expanded colour sensitivity into the near infra-red range of the colour spectrum, Aviphot Pan 200 offers excellent penetration through haze, fog and other atmospheric conditions liable to affect the image quality. Obviously, this yields an improved image contrast and therefore more information. With the uniform distribution of the panchromatic sensitivity within the range of visible light, the terrain can be imaged very faithfully without having to revert to the use of special spectral recording filters. Yellow filters can be used to get a higher image contrast. They also decrease the overall film sensitivity.
As with previous film tests I shot a roll of 35mm Superpan using an Olympus OM10 SLR, with a range of meter settings of 25, 50, 100, 200, 400, 800 for film latitude. With no published development times for Ilfotec LC29, the developer I used, on neither the data sheet from Maco, nor the Massive Dev Chart, I used stand development, with a dilution of 1+100 for one hour.

First latitude test contact sheet, stand developed in Ilfotec LC29
The first test showed the film to have narrow latitude, with the best exposure indexes of between 50-200, but developed in Ilfotec LC29, rating the film at 100 (or a little under) seemed to give the best results (the original data sheet states that "Aviphot Pan 200 can be exposed as a 125 to 250 ASA film," although this is with Agfa's G74c developer). Stand development is usually a good technique to get straight negatives from a properly exposed film, but the first results were a little disappointing.

I used the same camera and exposure settings for a second roll, repeating the latitude test of metering for 25, 50, 100, 200, 400, 800, but this time developed the film with R09 One Shot, diluted 1+:25 for Maco's published time of 8 minutes at 20ºC. The results with R09 One Shot were better than the first test, but using normal agitation does appear to have increased the contrast of the film, although lighting conditions were different, with some winter sunlight providing bright highlights.

Second latitude test, developed in R09 One Shot
The two tests show that the latitude range of Superpan 200 is relatively narrow (compare for example, Adox Silvermax's wide latitude range): exposed at 25 and 50, the highlights and midtones begin to lose separation, while with underexposure, the shadows quickly lose detail. The scans below have been adjusted to pull the maximum amount of detail from highlights and shadows: as is typical with black and white negative film, overexposure does give better results than underexposure, but Superpan 200 is less flexible in this regard than some other films.

Agfa Superpan 200, rated 25, developed in R09 One Shot 1+25
Agfa Superpan 200, rated 800, developed in R09 One Shot 1+25
I also shot a first roll in medium format in my Voigtländer Bessa RF, developing this in R09 One Shot at 1+25 for 8 minutes at 20ºC. For this, I relied on the 'Sunny 16' rule for exposure, which I often use for cameras without built-in lightmeters, but as a result, a number of the negatives were rather thin, partly a result of trying to calculate exposure settings for winter sunlight. Despite this, at medium format, Superpan 200's qualities are immediately apparent - its sharpness, relatively tight grain structure, its clear base with very little curl once processed and the contrast; the results were reminiscent of Rollei RPX 25 - despite the difference in speed, both films have a very similar look.
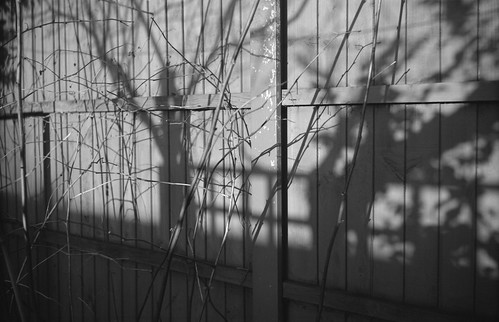
Voigtländer Bessa RF, R09 One Shot 1+25, 8m at 20ºC
Having developed Superpan 200 in both Ilfotec LC29 and R09 One Shot, I suspected that R09 One Shot at higher dilutions would provide better results, notably with higher-contrast scenes; I shot some more 35mm Superpan 200 with both the Kodak Retina IIa, and my Agfa Optima Sensor, and developed at a dilution of 1+50, for 17 minutes at 20ºC. As it's easier to increase contrast in printing or scanning, with a film like Superpan 200, it is important to expose and develop to keep both shadow and highlight detail - as with all films, but some emulsions have greater latitude and lower contrast, making it easier to achieve good negatives while being less exact in approach.
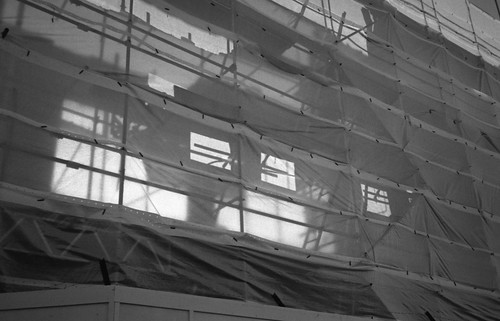
Agfa Optima Sensor with Superpan 200, R09 One Shot 1+50, 17m at 20ºC
The first tests that I made with Superpan 200 reflected the fact that these were not shot in the best lighting conditions, in the middle of winter; with more available light and higher dilutions of developer, the subsequent results in 35mm were better. I also shot medium format film in both the No.2 Brownie and the Ica Trona: even with simple Brownie meniscus lens and the uncoated Tessar on the Ica Trona, the results were good, possibly the inherent contrast of Superpan 200 complements the softness of these old lenses. On a precautionary note, the rolls of film that I shot in medium format showed that the emulsion is easily scratched if not carefully handled and the synthetic base is susceptible to 'light piping' - Maco's website does include a warning about this, and it's important to make sure the medium format films are tightly wound on their spools when removing after exposure in the camera.

Kodak No.2 Brownie with Superpan 200, R09 One Shot, 1+50, 17m at 20ºC
Ica Trona 210 with Superpan 200, R09 One Shot, 1+50, 17m at 20ºC
As well as higher dilutions, I also wanted to try developing the film at lower temperatures in Rodinal. Having used Rodinal, or R09 One Shot, for a number of years, it does seem that some of its best qualities are facilitated by using higher dilutions and lower temperatures: one or two degrees below 20ºC does seem to negate some of the 'roughness' associated with the appearance of grain when developing faster films in Rodinal. This does start to extend development times; for the shot below I used 20 minutes diluted 1+50 at 18ºC. Not having an infra-red filter, one aspect of Superpan 200 that I did not test was the ability to achieve an 'infra-red look', but even without such filtering it's a very apt film for landscape photography. The extended red sensitivity, its "excellent penetration through haze, fog and other atmospheric conditions" provide a good rendition of both skies and distances, even unfiltered; for some of the later medium format shots I used a yellow filter.

Ica Trona 210 with Superpan 200, R09 One Shot, 1+50, 20m at 18ºC
Having made enough tests, Superpan 200 was one of the films that I took with me - in medium format only - on a recent trip through Europe to Stockholm. The medium format camera that I took was the folding Zodel Baldalux, which I've frequently used for travelling. At the Loppmarknaden flea market in Stockholm, I bought an Agfa Isolette III, so shot a few rolls of Superpan 200 with this camera. As with the tests that I had made a couple of months earlier, I found myself taking lots of photographs in low slanting sun, and some of the contrasts between bright sunlight and deep shadows, such as in the third image below, needed careful metering (I used my hand-held Weston meter rather more than usual when shooting Superpan 200). These last few rolls of Superpan 200 I developed in R09 One Shot at 1+50, and used a time of 19 minutes at 19ºC - an easy relationship of time to temperature to remember.
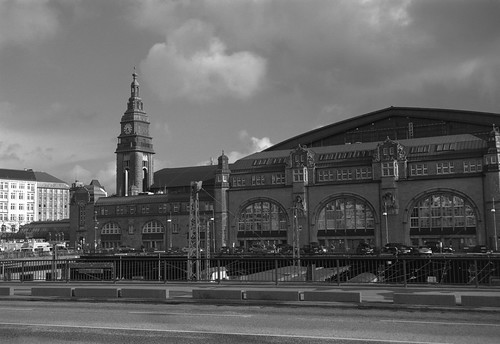
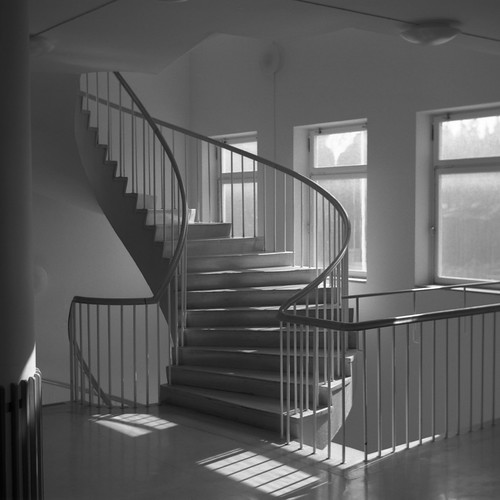
Zodel Baldalux with Rollei Superpan 200 with yellow filter, R09 One Shot 1+50, 19m at 19ºC

Agfa Isolette III with Rollei Superpan 200, R09 One Shot 1+50, 19m at 19ºC
Sources/further reading:  
Agfa's Aviphot product pages
Aviphot Pan 200 data sheet (PDF)
Maco developing times for Superpan 200 (PDF)
Extensive review on 125px

Thursday, 17 April 2014

Recent three colour process images

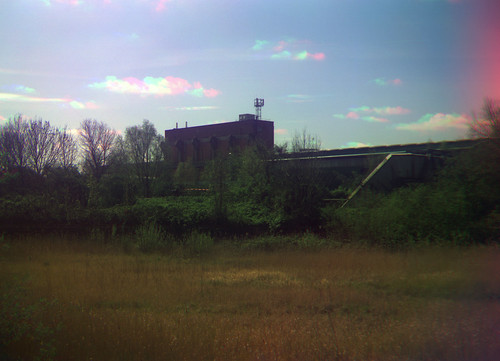
Three colour process, separation negatives shot on Ilford Delta 100 with Zodel Baldalux,
colour RGB image composited in Photoshop CS2
In my post last year, 'An Experiment with Three Colour Photography', I described the technique of using three black and white photographs to produce a colour image. For that experiment I used large format film, which meant the taking of each separate shot was inherently slowed down by the process of shooting sheet film. I also had problems when scanning the negatives to create the colour image, as I had to scan each in two halves, leaving problems with both alignment and balancing the colours in the three RGB channels. I subsequently took the tri-colour filter set with me to St Petersburg last September, but only used them for one medium format shot. By necessity this was hand held, and not much quicker than shooting large format, with the problem of holding the camera and the gelatin filters in front of the lens and then pressing the shutter button with two hands (while a stiff breeze threatened to blow the filters into the Neva river). Despite the results needing a good deal of cropping as each shot was not very well aligned through being hand-held, the very distinctive qualities of the three colour technique made me wish I had used it for a few more shots on this journey.

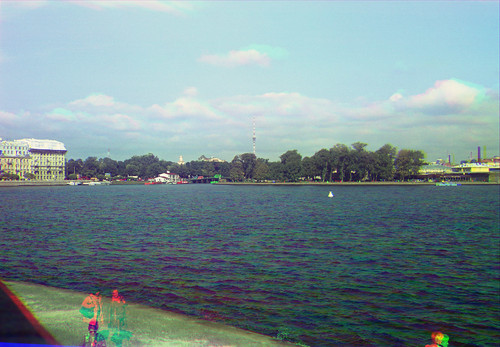
Hand held three colour process, separation negatives shot on HP5 Plus
with Zodel Baldalux, colour RGB image composited in Photoshop CS2
For the above image, a tripod would have ensured a better alignment of each colour. Using roll film rather than large format means that each shot can be taken with quicker succession, although I was still using a manual camera which required cocking the shutter and advancing the film using the red window between each shot. Anything moving in front of the camera shows the time taken between each frame, such as the figures and waves in the shot above, and the clouds. Recent good weather has provided the opportunity to take some more three-colour images. I had hoped for some cloud-free days, as these are the one aspect of the landscape shots which highlight the brief time discrepancy between each shot, but entirely cloudless days are rare. The image at the top of this post was the best of the recent shots; the photograph immediately below shows some problems with shooting into the sun with the filters held in front of the lens causing reflections. The tri-colour filters I have been using are unmounted squares of gelatin, which have the tendancy to pick up fingerprints very easily, and are difficult to clean and this particularly shows up when the sun hits the filter surfaces, and a slight soft-focus effect results.

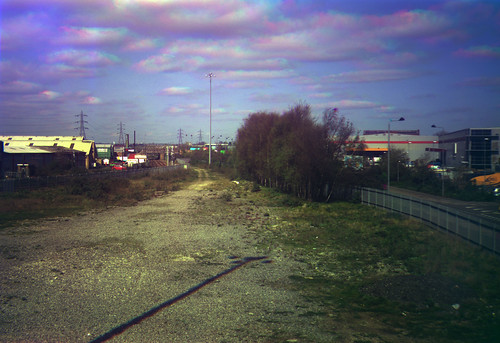
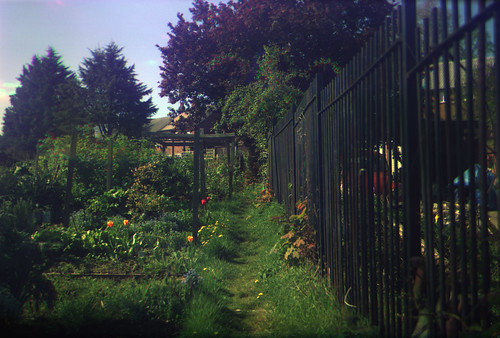
Three colour process, separation negatives shot on Ilford Delta 100
with Zodel Baldalux, colour RGB image composited in Photoshop CS2
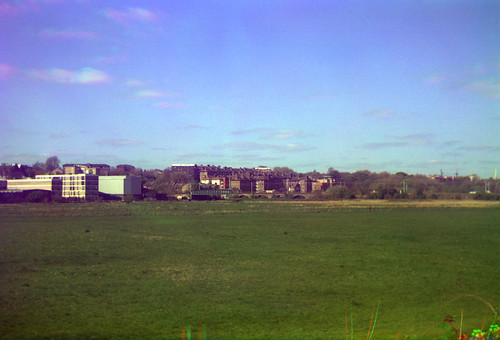
Three colour process, separation negatives shot on Ilford Delta 100
with Agfa Record I, colour RGB image composited in Photoshop CS2
Three colour process, separation negatives shot on Ilford Delta 100
with Agfa Record I, colour RGB image composited in Photoshop CS2
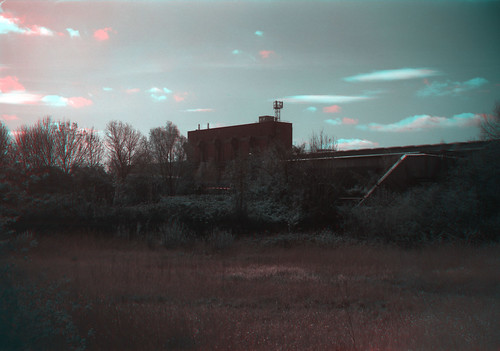
As the 6x9 format gives eight images on a roll of 120 film, this meant that I could shoot two sets of three colour separations, with two frames left on the film. On some of the films I used these frames to shoot second versions of some colours, but I also tried a two colour separation, shooting just through the red and green filters. When making the RGB composite I used the green filtered negative in both Green and Blue channels, essentially giving a red/cyan colour image. This effect was intended to mimic the two colour bipack systems used in the early part of the twentieth century for colour motion pictures (see the Wikipedia article on Bipack Colour).

Two colour process, separation negatives shot on Ilford Delta 100
with Zodel Baldalux, colour RGB image composited in Photoshop CS2

Thursday, 25 October 2012

Kodak Technical Pan

Kodak Technical Pan in 35mm & 120 medium format
It was announced in 2003 that Kodak Technical Pan (or simply 'Tech Pan') had been discontinued. The announcement confirmed that the film had not been manufactured for some time and Kodak had been simply selling their existing stock: "The last Tech Pan coating was several years ago. Since that time, the old coating room has been shut down, the gels used in the product formulation have become obsolete, and we no longer manufacture the ESTAR support on which the 35 mm product was coated."

The information leaflet that comes inside the film box states:
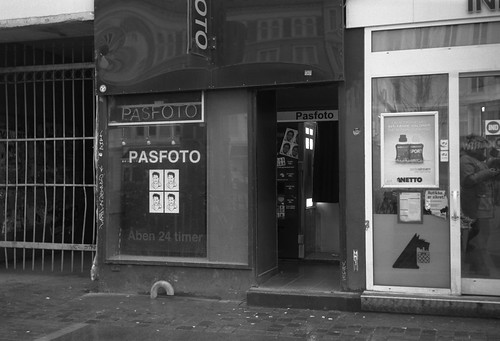
This is a black-and-white panchromatic film with extended red sensitivity. It has micro-fine or extremely fine grain (depending on the developer used), extremely high resolving power, and a wide contrast range for pictorial, scientific, technical, and reversal-processing applications.
Kodak's technical data sheet P-255 lists the range of applications as:
  • Pictorial photography
  • Photomicrography
  • Microphotography (Microfilming)
  • Solar photography
  • Photographing electrophoteric gels
  • Laser recording
  • Other applications such as slidemaking, copying, and microfilming that require high or moderately high contrast combined with fine grain and high resolving power
35mm Technical Pan with information leaflet
The leaflet gives a suggestion of exposure index settings and specific contrast indexes, from 16 to 200. For 'pictorial applications' it suggests an EI of 25 and development with Technidol. Having picked up a handful of rolls of Tech Pan from online auctions, on one of the sunniest days of the summer, I shot a roll of 35mm Tech Pan in my Werra camera, exposed at 25 EI. The bright conditions were needed to shoot hand-held with a low exposure index (using the 'sunny 16' rule at 25 EI, bright sunshine would indicate an exposure of 1/25th at f16, although I would tend to give bright sunshine in the UK one stop more exposure, which in practice meant shooting at 1/50th at f8 or 1/100th at f5.6). 

The Massive Dev Chart has a section on discontinued film which includes Tech Pan. I developed the film in Rodinal 1:150 for 13 minutes at 20ºC, much longer than the recommended 7 minutes from the Massive Dev Chart. The results do appear overdeveloped, but a dilution of 1:150 for Rodinal seemed very low and the film was 16 years past its 'process before' date. However, judging by the results, the age of the film does not appear to have needed compensating for in development. At these high dilutions of Rodinal, consideration must be given to the capacity of the developing tank: Agfa, Rodinal's original manufacturer, recommended a minimum of 10ml per film, no matter the dilution used, which at 1:150 would mean a litre and a half of working solution. In practice a smaller amount of Rodinal works perfectly well; I used 6ml of developer to 900ml of water in a 3-reel Paterson tank.

The Banks of the Thames near Erith, Kodak Tech Pan (35mm), rated EI 25. Developed in Rodinal 1:150, 13mins at 20ºC.
In the scanned negatives, grain is not discernible. Presumably the grain is beyond the limit of the optical resolution of the flatbed scanners I've used. There is what looks like grain in the sky of some shots, but it appears to be noise introduced by the scanner. Having shot the photographs in bright sunlight, the images were always going to be high in contrast, regardless of the qualities of the film used. However, the blue skies reproduced darker in tone than might be expected with heightened contrast. In the section about pictorial photography in the data sheet, it states that "the extended red sensitivity has a haze-cutting effect in photographs of distant landscapes and in aerial shots." As well as cutting haze, this extended red sensitivity presumably compensates for the usual over-sensitivity to the blue end of the spectrum that normal panchromatic film has.

Concrete Defences near Thamesmead, Kodak Tech Pan (35mm), rated EI 25.
Developed in Rodinal 1:150, 13mins at 20ºC.
I subsequently shot a roll of Tech Pan in medium format using my Baldalux camera, exposed at 25 EI and developed in Rodinal at 1:150 again, but for 12 minutes at 18ºC (roughly equivalent to 10 minutes at 20ºC; this film had a 'process before' date of 02/1995).

Roding Lane South Pumping Station, Kodak Tech Pan (medium format) rated 25 EI.
Developed in Rodinal, 1:150, 12mins at 18ºC.
The contrast of the images is still there, perhaps a higher dilution of developer would provide lower contrast (the Massive Dev Chart does list times for dilutions of 1:300 for Rodinal). Interestingly, the absence of discernible grain in the sky proved a problem in scanning and processing some of the negatives. In the photograph of the River Roding below, there is some banding in the image, noticeable in towards the top corners partly due to vignetting; attempts to reduce the vignetting using Photoshop's lens correction filter made the banding worse. The solution to banding in smooth tonal gradations in a digital image is to introduce noise, which I haven't done.

River Roding, Kodak Tech Pan (medium format), rated EI 25.
Developed in Rodinal 1:150, 12mins at 18ºC.
Gants Hill Telephone Exchange, Kodak Tech Pan (medium format), rated EI 25.
Developed in Rodinal 1:150, 12mins at 18ºC.
London Defensive Ring, Kodak Tech Pan (medium format) rated EI 25.
Developed in Rodinal, 1:150, 12mins at 18ºC.
Newbury Park Tank Traps, Kodak Tech Pan film (medium format) rated 25 EI.
Developed in Rodinal, 1:150, 12mins at 18ºC.
Notes/Sources

Technical Pan data sheet P-255 (PDF file)

http://en.wikipedia.org/wiki/Technical_Pan
http://unblinkingeye.com/Articles/Times/TechPan/techpan.html

The nearest equivalent in terms of Tech Pan's characteristics currently in production is Rollei ATP

Thursday, 29 March 2012

Zodel Baldalux*

Baldalux 6x9 folding camera
The Baldalux is a mid-range workaday 6x9 format folding camera, and I hadn't previously thought about writing a blog post about it until recent results from scanning a number of negatives I had shot while in Berlin last summer (although the posts on Delta 3200 and Verichrome were illustrated with images shot using the camera). The images made me re-evaluate the camera. I often like to have a 6x9 folding camera with me when travelling for landscape shots, and I've used my Agfa Record I camera for this purpose in the past, but the Baldalux has features to make me favour it over the Record. Some of these features are pretty mundane, such as having the original ever-ready case, and the fact I've got a yellow push-on filter that fits the lens; it does have a better shutter though, and although I haven't done any meaningful comparisons, the Baldalux's Radionar lens seems to perform better than the Record's Agnar.

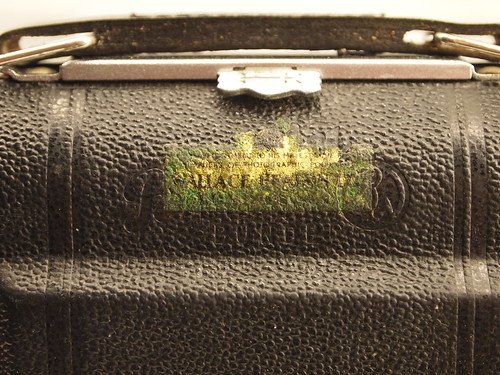
The Baldalux was manufactured by Balda-Werk Bünde, the West German company arising from the pre-war Balda, which was based in Dresden (the East German plant became Belca). Like a number of German camera makers, Balda-Werk Bünde products were often rebranded for sale by other distributors and export to other markets, and so appear under different names. This is the case here, although the camera model being called Baldalux clearly points to its origins. My camera has 'Zodel reg.' stamped on the leatherette on the front of the camera (I've seen other examples on the web where the lettering here is Baldalux - one wonders whether the superfluous 'reg.' was just added to make the text a better visual fit). It also has a fading water-slide transfer label for Wallace Heaton, obscuring the Balda-Werk Bünde branding. Zodel was a brand name used by Wallace Heaton, a London based distributor, to rebadge their cameras. I also have a 6.5x9 plate camera from the 1930s with the Zodel brand.

Wallace Heaton label covering Balda-Werk Bünde stamp
Looking at examples on the web, there are some production variations, although all seem to have a Schneider Kreuznach 105mm Radionar lens in either a Prontor-S or Prontor SVS shutter. Some have differences in the plate around the lens, with examples having a depth of field scale. My camera by comparison has a very plain front plate. It also came with the original 6x4.5 mask, allowing for 16 exposures on a roll of film. Some websites mention a 6x6 mask, although this would require a different arrangement of red windows on the back of the camera. It has frame lines in the viewfinder to indicate the 6x4.5 format, which are actually rather thick and do intrude on the viewfinder, which is very small, even for a camera of this age. I did remove the top plate to clean the viewfinder (as suggested by Flickr member fulvue) making it slightly easier to use. There is also a brilliant finder mounted to the lens, which can be rotated 90 degrees for both horizontal and vertical pictures, which seems to be quite a late date for this kind of finder, being more common on pre-war cameras.

A piece of card stops the double exposure prevention from working
Another feature is the double exposure prevention, with a window on the top plate indicating 'O' for unexposed, and 'E' for exposed. However I have disabled the double exposure prevention. Shortly after I started using the camera, this began not to work very well: after winding on, it would spring back to the 'exposed' setting, preventing the shutter release on the camera from being depressed (although the shutter can always be tripped by the lever around the lens). I taped a small piece of card inside the mechanism to block it, making a non-destructive alteration to the camera. I've yet to accidentally double-expose a frame, but I'm sure that this will happen.

Roadworks, Berlin, shot on Ilford Delta 100
The first photographs I'd taken with the Baldalux I had shot with the 6x4.5 mask, and I was impressed by the sharpness of the image. The Radionar lens is a triplet design (I believe the red triangle on the lens mount denotes coating), and while the centre of the image is very sharp, towards the edges of the full 6x9 frame there is a noticeable softness, however this does perhaps add to its vintage character.

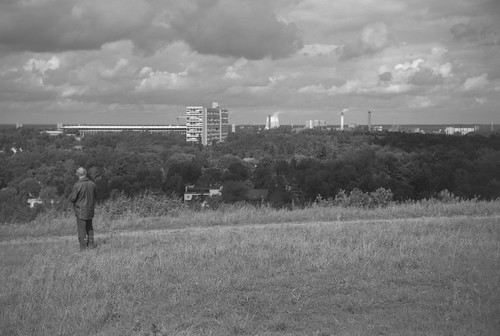
View from the Teufelsberg, Ilford HP5 with yellow filter
Klosterstraße, Berlin, shot on Ilford HP5
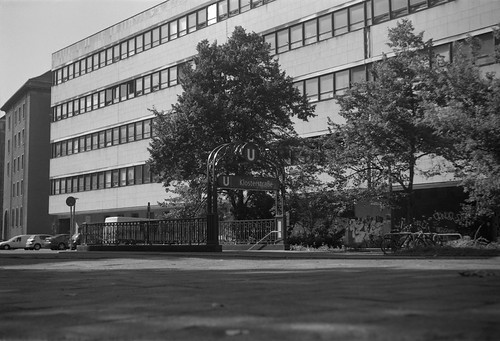
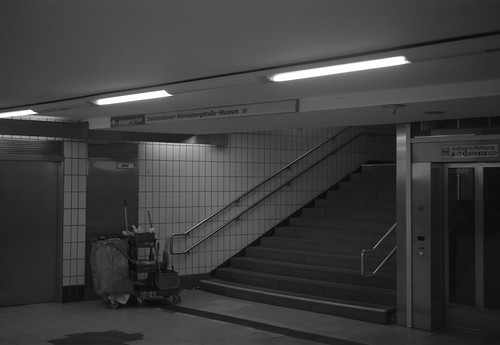
Bahnhof Berlin Oranienburger Straße, Ilford Delta 3200 with 6x4.5 mask
*I'm not actually sure that the camera was referred to as 'Zodel Baldalux', I've been searching online to no avail for old Wallace Heaton Blue Books which might show the camera.

Edit 28/2/18: more samples added.

Zodel Baldalux with Kodak Plus-X (develop before date 02/2007)
Zodel Baldalux with Ilford FP4 Plus
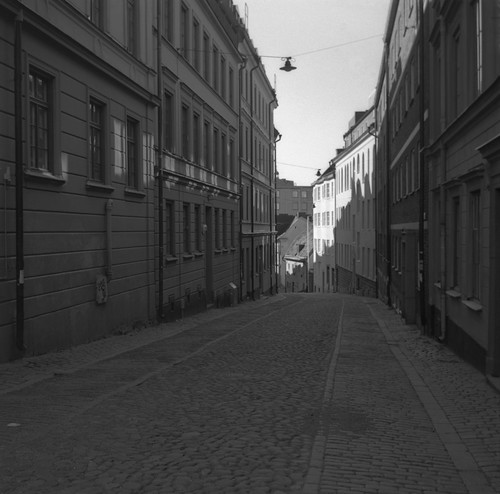
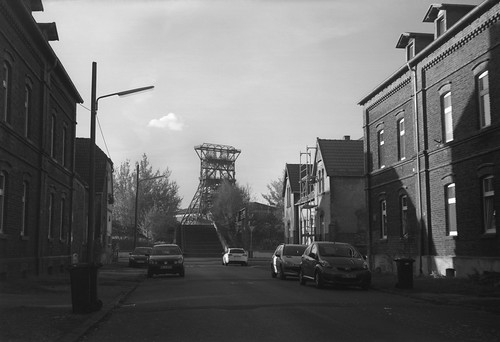
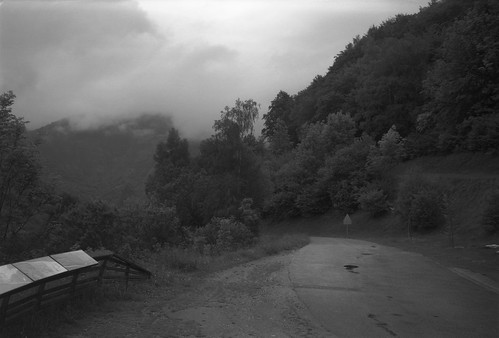
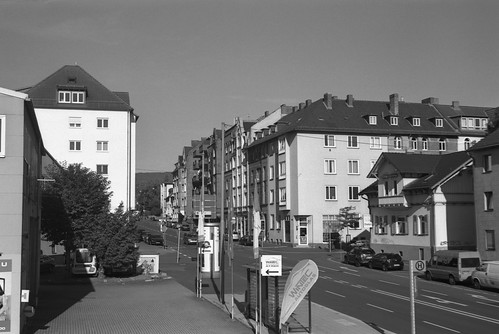
Zodel Baldalux with Agfa Superpan
Zodel Baldalux with Fujicolor Pro 400H
Zodel Baldalux with Rollei RPX400
Zodel Baldalux with Rollei RPX400 pushed to 1600
Zodel Baldalux with Ilford Delta 3200 pushed to 6400