Showing posts with label Eastman Double-X. Show all posts

Sunday, 10 May 2020

Eastman Double-X - Part Two

In the three years since my post on Eastman Double-X film, observing interest online, the popularity of this motion picture film stock amongst still photographers has steadily increased. As a motion picture stock Eastman Kodak produce Double-X in 35mm and 16mm in bulk lengths, the minimum length being 100ft/33m in 16mm; since my previous post about Double-X, a number of companies now provide 35mm canisters ready loaded with the films for still photographers (I previously bought a 100ft roll of 35mm to load my own canisters); the film is marketed as CineStill BwXX, Film Photography Project's X2, as Double-X from Camera Film Photo, and Nik & Trick among others. My motivation for revisiting Double-X in this post came about through using the film with a different developer from those I'd used previously - D96. D96 is Kodak's recommended developer for black and white negative motion picture stock - which now comprises of just Double-X; comments on my original blog post recommended that I use D96 after my somewhat ambivalent conclusion to the film from using it in 35mm for the best part of a year. It didn't seem particularly fine-grained for its speed, and the speed itself didn't seem fast enough to make it a good all-round film in comparison with 400 ISO films on one side, or finer grained 100 speed films on the other.

Formulas for making D96 from its raw ingredients are readily available online, and it has also been available as a powder, but recently Bellini have produced a liquid version of D96. Evidently there are many advantages to the convenience of liquid developer, especially as a stock solution; my habitual developers are Rodinal/R09 and Ilfotec LC29, which I have used for a number of years: it makes sense, especially when starting out with developing black and white film, not to change too many variables at any point, one of these obviously being film developer. However, I recently shot two rolls of 2x8mm Double-X (reperforated for the format and repackaged by the Film Photography Project) in a Bolex ciné camera, and, wanting to develop the films myself, it seemed wise to try the manufacturer's recommended developer with the film, especially given the small size of the 8mm frame. The short film below was shot on 2x8mm Double-X and developed in D96; for reasons too complicated to detail here, I pushed the film three stops in development, which does account for the contrast, while the appearance of the grain is mostly down to the degree of enlargement necessary from the tiny 8mm frame.

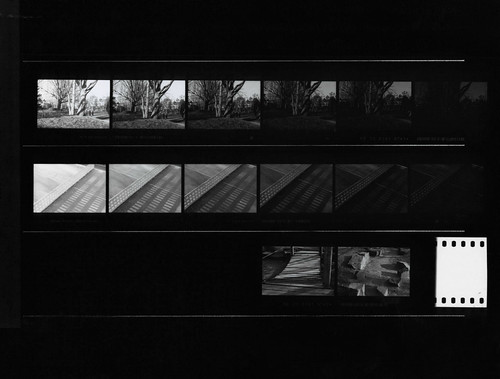
Having used the D96 for a couple of rolls of 2x8mm Double-X, having a litre of D96, I wanted to test the film in 35mm with the developer and it seemed timely to revisit Double-X for a new blog post. For a first test with 35mm, I shot a roll with in a Canon A-1 SLR for a latitude test, rating the film at successive exposure indexes of 64, 125, 250, 500, 1000, 2000 for two sets of six exposures, as seen in the first and second rows below, and developed the film for 6 minutes in stock D96 at 21ºC.

Eastman Double-X latitude test, developed in D96
Eastman Double-X latitude test, developed in Ilfotec LC29
Comparison with the same film developed in Ilfotec LC29 (above) from my previous tests appears to show greater latitude when developed in D96, although the conditions with the Ilfotec LC29 were higher in contrast; the same film when developed in Ilfotec LC29 looks as though the shadow detail drops away faster. It's also possible that the test film developed in D96 is slightly underdeveloped: Kodak's published time for Double-X is 7 minutes at 21ºC (rather than the more usual 20ºC); my notes indicate I developed the film for just 6 minutes at 21ºC.

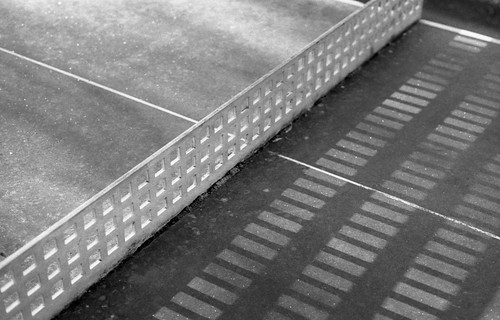
Double-X at EI 64 (two stops overexposed)
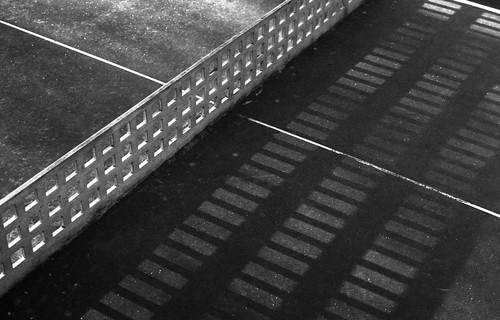
Double-X at EI 2000 (three stops underexposed)
I was a little surprised at the latitude range which this test demonstrated as evidenced in the two shots from either end of the scale above: scanning the film, I was able to pull out as much detail as possible from the negatives when underexposed. This was easier than the equivalent exposures with Ilfotec LC29. Overexposure did compress the tonal range from mid-tones to highlights, giving the images more of a flat look than the lighting alone. The latitude in this test is no doubt due in part to the diffused, low contrast lighting when I shot the the film to try D96, as well as the developer itself.

When I'd previously used the film, I did try pushing it one, two and three stops, with very uneven results at two and three stops. Published times for Double-X in D96 are very limited, but the Massive Dev Chart and Bellini's own data sheet give a time of 25 minutes at 20ºC when rated at 1600. I shot a roll at 1600 in (mostly) challenging lighting conditions. This test was possibly overdeveloped, using 21ºC for 25 minutes, rather than 20ºC.

Double-X at EI 1600
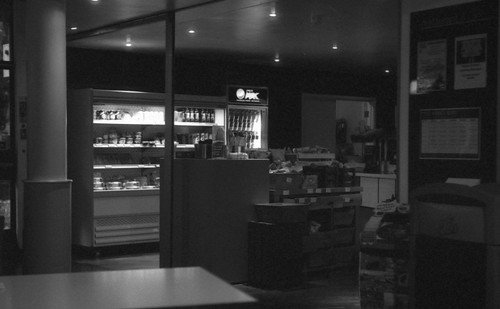
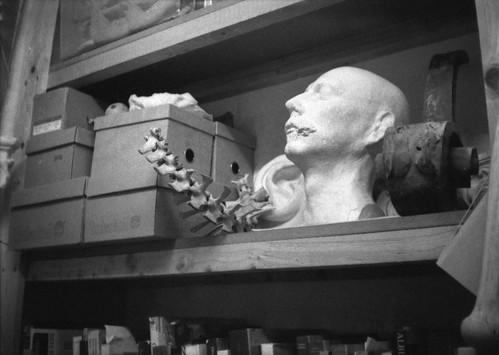
Most of these shots were taken under artificial light, in a low-lit museum setting, with spot-lit displays creating inherently high contrast subjects, the above image being a good example; the Double-X rated 1600 did give relatively good results in these difficult circumstances. There were only a couple of shots that I took under daylight conditions, and these on a fairly dark day in February, not enough to draw any meaningful conclusions, but the results look good enough, as below; generally, daylight would of course give enough light to rate the film at 250. Although the times for push-processing Double-X in D96 are limited, it would be possible to make reasonable guesses for one and two stops, perhaps around 12 minutes to rate the film at 400 and 18 minutes for 800, although I haven't tested for these times.

Double-X at EI 1600
As well as trying 35mm Double-X with D96, I also wanted to see how it would perform in 16mm for various subminiature cameras, notably the Rollei 16 camera (this has reputedly one of the sharpest lenses on any subminiature camera). The results on this post are scanned from the negatives; printing in the darkroom, it might be possibly to resolve more detail from the 12x17mm negative. The best of the shots from the Rollei 16, such as that below, showed D96 to give fairly fine-grained development: with the negative very nearly a quarter of the size of a standard 35mm frame, at a modest enlargement, the quality does hold up (albeit perhaps suggesting the grain of a faster film, but I think the general point holds true).

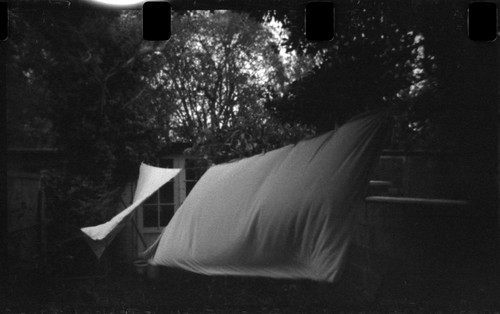
Rollei 16 with Eastman Double-X
As a motion-picture negative developer, fine grain is paramount. Grain is inherent to the film's emulsion, but obviously, the appearance of the grain is affected by a number of factors. D96 contains sodium sulfite, which acts as a solvent (as well as a preservative), softening the look of the grain; equally, some of the fineness of the grain in my results may be in part due to the developer's low contrast, particularly on a micro level, smoothing out the look of the grain. This also makes it a good choice of developer for using Double-X in half-frame cameras, as well as subminiature cameras. I did shoot some Double-X in a couple of half-frame cameras for this post, but, again, under fairly poor lighting conditions, which perhaps didn't provide the best conditions for testing the film.

Olympus Pen EE3 (half-frame) with Eastman Double-X
Belomo Agat 18K (half-frame) with Eastman Double-X
I had been fairly ambivalent about Eastman Double-X prior to using it with D96: it almost felt like a different film, testing it again with a more sympathetic developer. The grain appears finer, the film does seem to have better latitude, and, on my limited tests, it pushes better, with more consistent results. However, a few further reflections on using D96 might be apposite here. The developers I have mostly used for black and white films - Rodinal and Ilfotec LC29 - I have treated as 'one-shot' developers, Rodinal, which I've generally used as Compard's R09 One Shot clearly being so, but also Ilfotec LC29, which Ilford recommend using as a one-shot developer when diluted 1+29, or indeed for best results. At lower dilutions, 1+9 or 1+19, I've tended to use it for just one session, but have developed a number of rolls of film, one after the other. Using a stock solution such as D96 does provide some consideration, namely around temperature and exhaustion. With a highly concentrated one-shot solution, I get the water to dilute the film developer up to temperature simply by adding hot and cold together until these reach 20ºC, then add the concentrated developer. Even if this is cold, adding one 30th part at 15ºC for example, 12ml to 300ml, will not significantly alter the temperature. With D96, I found warming the bottle of stock solution took more care, especially when using this early in the year, when the stock solution might be at less than 10ºC off the shelf. Plunging this into a jug of water somewhat warmer than 20 or 21ºC to bring it up to a working temperature more quickly often meant it would get too warm, and then would need to cool before use. The other consideration, exhaustion, was more difficult to calculate. I bought my bottle of Bellini D96 from Nik & Trick; on their website, the suggestion is that a litre of D96 will process "about 100ft". Presumably this is 35mm film. I developed two lengths of 25ft 2x8mm film, 16mm wide, which probably equates to 25ft of 35mm; I also shot four rolls of 27-exposure 35mm film, and some 16mm film with both the Rollei 16 and Mamiya 16 subminiature cameras. In addition, I used the D96 for some Plus-X too, and the FP4 Plus that I'd shot in the Bolex. With the FP4 film, I developed half the film and the negatives were very thin. This might be partly due to user error of course - most of the roll of Double-X I shot with the Agat 18K produced thin negatives, but this was one of the first rolls of film I developed in D96. Returning to comments earlier in this post about not changing too many variables, obviously, using several different cameras, with different metering systems or none, and also developing different emulsions with the same stock solution of D96 made it more difficult to see when the developer was beginning to exhaust: the last films I was developing with the D96, I found myself having to double their published times in order to get good results - clearly, accurate record keeping would have helped here. Comments about developer exhaustion notwithstanding, using Eastman Double-X film with D96 has lead me to reappraise this film stock - and understand the enthusiasm that still photographers do have for it.

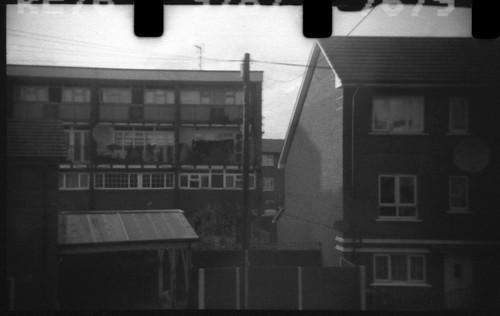
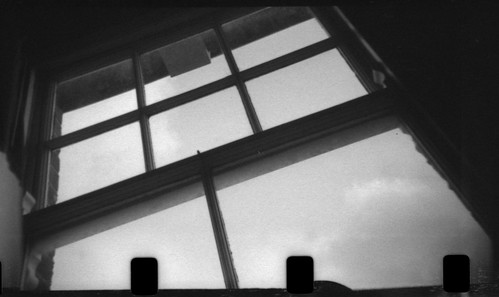
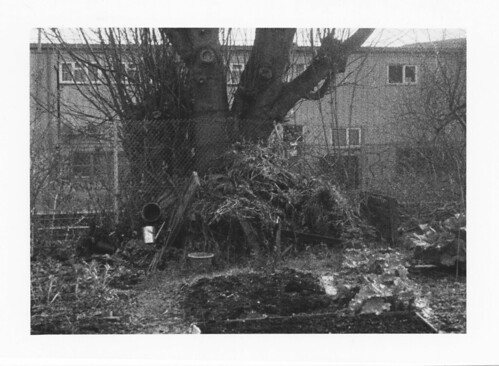
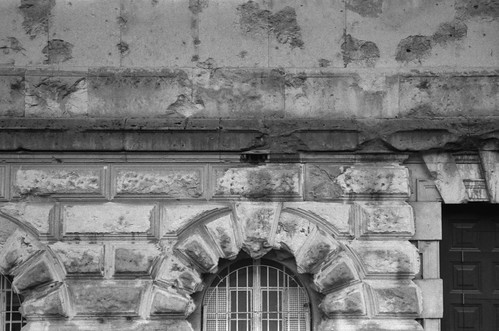
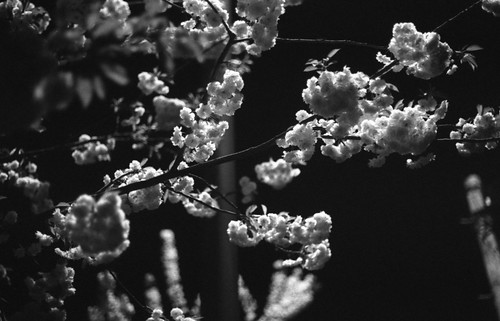
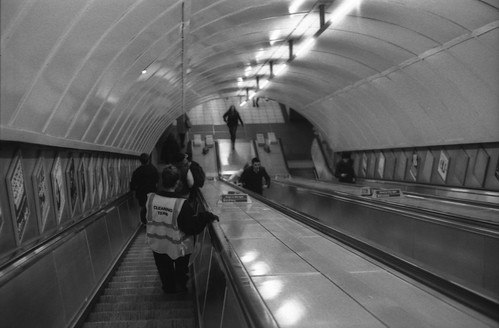
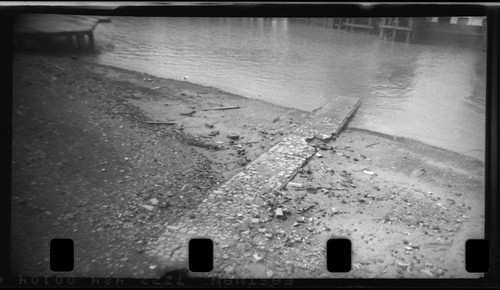
Rollei 16 (16mm subminiature) with Eastman Kodak Double-X rated 200
Belomo Agat 18K (half-frame) with Eastman Kodak Double-X rated 250
Olympus Pen EE3 (half-frame) with Eastman Kodak Double-X rated 250
Kodak Retina IIa with Eastman Kodak Double-X, rated 250
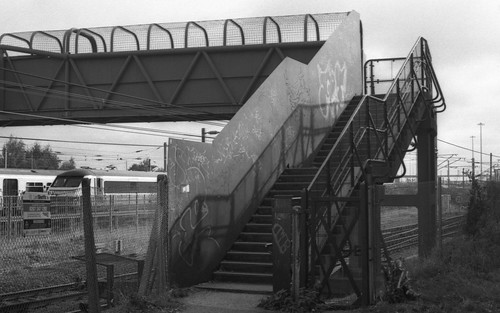
Canon A-1 with Eastman Kodak Double-X rated 250
Canon A-1 with Eastman Kodak Double-X rated 1600

Saturday, 30 June 2018

Micro 110

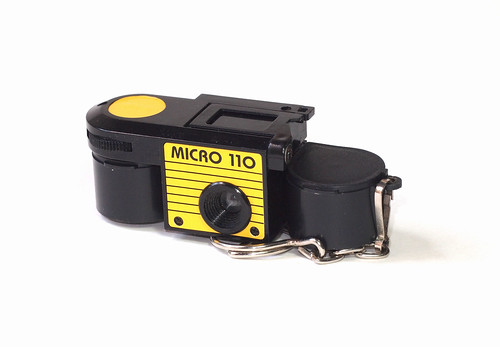
Micro 110 with coin box and key chain
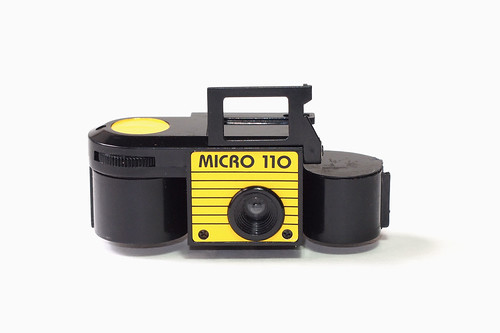
The Micro 110, like many a plastic toy or novelty camera, has little evidence pointing to its origin. There's no markings on the camera itself other than the name. There are a number of small, plastic 110 cameras with very similar designs under a number of different names; the model here as the Micro 110 was also sold with a 'Gemstar' nameplate, and, inevitably, there are promotional variants - Kellogs and Kitkat versions both appear online. There are versions of the Micro 110 with a number of small differences, from the name/faceplate, to cameras with a small central point in the viewfinder frame, cameras where the top plate covers both sides of the 110 cartridge, and one-sided variants which fold down to be even more compact. Contemporary versions of this camera appear under Powershovel Ltd's Superheadz brand, no doubt trading on the resurgence of the 110 film format after it was resurrected by Lomography. Haking made a Halina Micro 110 camera, larger than this Micro 110 camera, enclosing more of the 110 cartridge, but perhaps the progenitor of the general design. Its ancestor is undoubtedly the Hit camera of the late 1940s-1950s, thousands of which would have been given as novelty gifts, and many of which were never used to take photographs.
Micro 110
There's very little to say about the Micro 110's specifications: as the name indicates, it takes 110 cartridge film and the camera's body encloses only the central section of the 110 cartridge while its top section extends to one side to connect to the cartridge's film advance gearwheel. This means that the cartridge is loaded upside down relative to its normal orientation - the film advance wheel is on the front of the camera to the user's right hand side, with its gearwheel directly underneath this. There is a sticker on the back of the camera to this effect. The back of the camera is hinged for loading, and is held in place once closed by a small tab on the camera's underside. The camera has a fixed-focus, fixed-aperture meniscus lens, reportedly f8, possibly smaller (there is an internal stop for the aperture); and a single shutter speed, possibly around 1/125th, perhaps slower. The viewfinder is a simple flip-up plastic frame. This has a small tab to make erecting it easier, and when folded down, sits flush into a recess on the top of the camera.
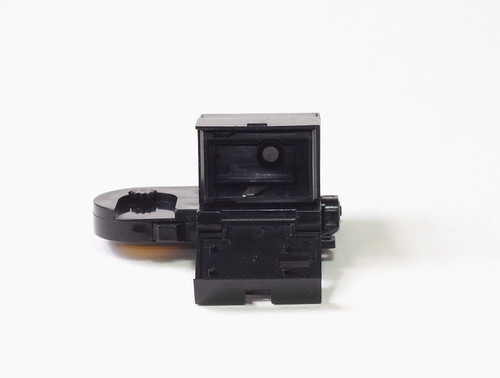
Micro 110 opened for loading (upside down) showing the pin which tensions the shutter
As with most 110 format cameras, the Micro 110's film advance requires the internal pin to locate the single perforation for each frame. Without this, the frame advance wheel will keep turning. This internal pin also tensions the shutter: with the pin located in a perforation, advancing the film pulls the pin to one edge of the inside of the camera. When the shutter button is pressed, the pin moves inwards the same amount, slips out of the perforation, springs back into its original position and trips the shutter. Without a cartridge loaded in the camera, depressing the small square shutter button feels quite unsatisfactory - there's a small amount of give, and no feeling that the button is actually doing anything; however, once loaded and with the film advanced to tension the internal pin, the shutter button has quite a bit of snap to it.
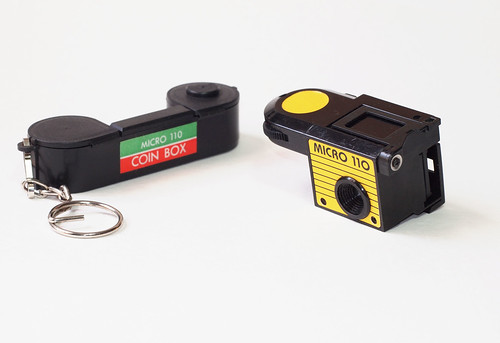
Micro 110 with original coin box
The camera came with a 'coin box', shaped like a 110 cartridge, with each chamber opening from the top (the green and red colours of the sticker on the coin box appear to be deliberately reminiscent of Fuji's film packaging). The coin box itself has a loop to attach the key chain; there is also a loop on the camera itself. The presence of the coin box suggests an earliest date for the camera's first appearance - 1983, with the introduction of the one pound coin in the UK, replacing the pound note. One pound coins fit perfectly into the coin box; if originally made by Haking, based in Hong Kong (or indeed any other Hong Kong manufacturers) while still under UK rule in the 1980s, there would be a certain appropriate design synergy to this aspect of the Micro 110 - although of course there may be many other territories where coins of significant denomination would fit. When the one pound coin entered circulation, cheap, novelty key ring coin keepers were very popular - the kind of gift that might appear in a Christmas cracker.
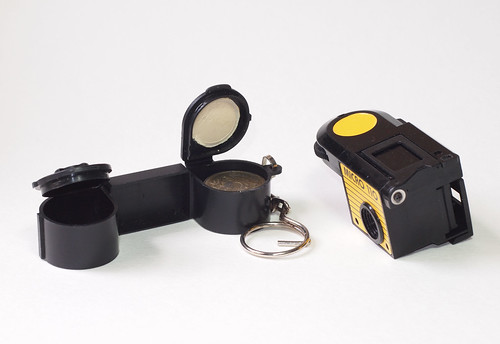
Micro 110 with coin box opened
The camera is 62mm wide without a cartridge - or the coin box. When loaded, it's as wide as a 110 cartridge, 80mm, and 33mm high (with the viewfinder folded down), 31mm deep. With the coin box, the camera is slightly wider, as the 'supply side' of the coin box is bigger than that of a 110 cartridge; it's symmetrical in size in order to fit coins of the same size in each chamber. The camera is very pocketable as a result. There are places where it is described as "the world's smallest camera", which, although a great claim, was certainly never true. It is not, for example, as small as its near namesake, the Mycro IIIA, but, as a cheap, novelty camera, it may have been the smallest camera commonly available at the time it was first made.
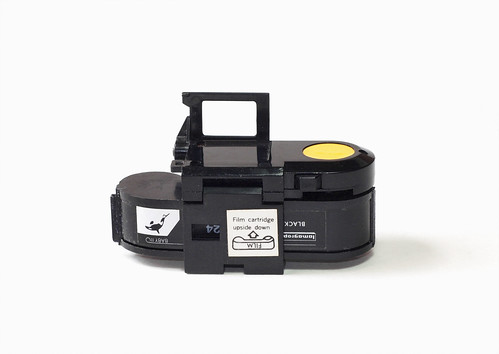
Micro 110 with Lomography Orca cartridge
The Micro 110 was my choice for this month's '#Shitty Camera Challenge' - I bought the camera specifically to take part. The definition given for a 'shitty camera' is one that's worth less than the roll of film inside it. I paid a whole £6.50 for my Micro 110 camera (which included postage); had this been a 35mm camera, I could well have bought a roll of film for less than that, but the prices of 110 film being what they are, means that the definition stands. The Micro 110 certainly fits the spirit of the '#Shitty Camera Challenge' as much as the given definition, but I shot reloaded 110 cartridges rather than new film. I wrote about reloading 110 cartridges in my post on the Pentax Auto 110; there are a number of resources online illustrating how to reload the cartridges.

Micro 110 with Eastman Double-X film
For the first cartridge, I loaded a length of 16mm Eastman Double-X film. As the 110 cartridge is loaded upside down, the single perforated Double-X film has the perforations along the bottom of the image; with most 110 cameras, these would run across the top. On development, a number of issues were evident. There were overlapping frames, which I had thought likely: I had advanced the film twice per frame by taking a 'blank' shot after each frame and winding on again, but this was not enough. There were also lots of light leaks. As the Micro 110 does not cover the whole cartridge, light leaks are almost inevitable, especially with reloaded cartridges, split along the seams of the two main parts of the plastic cartridge. As the week progressed, and I developed the films throughout, I attempted to prevent the light leaks as best I could, beginning by fully taping up all the seams of the cartridges, but there were still vertical bands present.
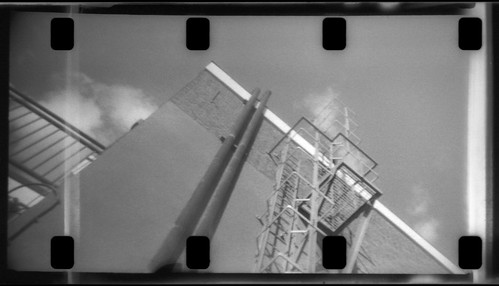
Micro 110 with Kodak Photo Instrumentation film
It soon became evident that this particular light leak was due to the camera design itself: I began shielding the camera when I advanced the blank frames, and the vertical line appeared on the right hand edge of every frame. This was aligned to the perforations, and I initially thought that it might be caused by them, but this didn't seem right. That this appeared once per frame where it did was due to a very slight gap between the camera body and film cartridge on the user's left, the side where the top of the cartridge isn't covered. This gap is very small; putting a fold of tape into the gap on loading made this better, but this tape was generally in the way of loading and unloading the cartridges, and the gap itself is so narrow that's it is actually difficult to fill.

Another light leak that was easy to solve was caused by the pinholes from the Lomography Orca backing paper, as were very clear in the films shot with the Minolta Weathermatic A. I took two approaches to this. For one cartridge, I created a new length of backing paper by cutting a strip of appropriate width from some Ilford medium format backing paper, which seemed to work. The simpler approach was to tape over the window that shows the backing paper; both procedures forfeited the frame numbers, of course. Having developed the first film, it was clear that the negative area was large enough to cover the distance between four perforations, and, as the pin does appear to locate each perforation (and in some instances had scratches to show this), after every shot I took three blank shots. This also meant that the frame numbers were no longer important for spacing. One other artefact that I noticed appearing in all my images was the shadow of the shutter pin itself: the small wedge-shaped mark at the bottom of the frame. In some images this is sharper, while in others there's is little motion blur, which suggests that the shutter speed is not consistent, hardly surprising..
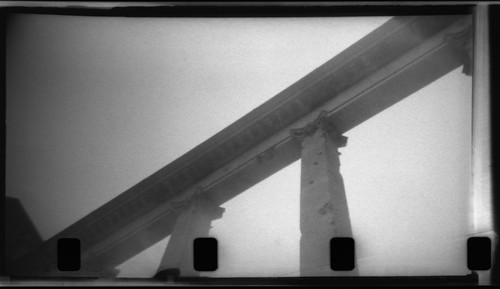
Micro 110 with Double-X, showing shutter pin
As I've written previously in conjunction with other 110 cameras, 110 film has pre-printed frames; the cameras themselves project a larger image than the 110 frame. When using reloaded cartridges, it's possible to make use of the whole image area, albeit with the presence of whichever perforations in the film used. The Micro 110 has the largest frame size of any 110 camera I've used: 14.3mm high by 25mm wide. The 110 pre-printed frame is roughly 12.7x17mm, making the Micro 110 considerably wider. The vertical light leak written about above would also have been within the pre-printed frame, and, only stopping on each 110 perforation, it may not have been necessary to shield the camera when advancing, provided this was done relatively quickly.

Pre-printed 110 frame size superimposed on the Micro 110 frame
However, using the entire frame of the Micro 110 shows up the lens' limitations very clearly. The lens is not centred to the frame itself (which it would be with the pre-printed frame), and, as the image circle of the lens falls off in terms of illumination and definition quite sharply, the left hand side of the image suffers greatly from this. Pincushion distortion is also evident. The image above shows an approximation of the size and positioning of the 110 frame to the whole Micro 110 negative. It also means that framing using the viewfinder is even less accurate than it might have been. Despite the perhaps undesirable characteristics revealed, for this post I have not cropped the images; for some images I have attempted to balance the uneven illumination with dodging on the left of the image, and occasionally burning in on the right; in others it felt appropriate to leave the falling-off intact. All the photographs on this post were scanned rather than printed in the darkroom, but the emulated dodging and burning no doubt could be replicated.
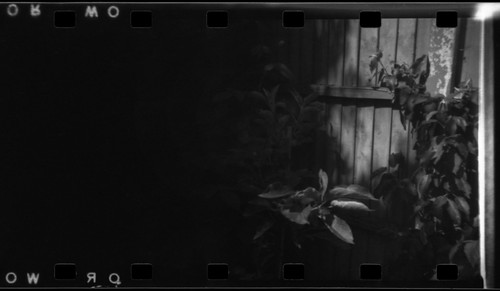
Micro 110 camera with Orwo UP21
As well as using both single- and double-perforated 16mm film stock, I also tried a double Super 8 stock. Double Super 8 film is 16mm wide, with Super 8 perforations along each edge; the format was designed for cameras in which a spool of film is used in the same manner as 'standard' or 2x8mm film, rather than actually using a Super 8 cartridge: half the width of the roll was exposed in the camera, then removed, turned over, and the other half exposed. After development, the film was then split down the centre to provide two lengths of Super 8 for projection. The Super 8 perforations are smaller than 16mm perforations, but, as I found with testing a reloaded cartridge, the camera's pin was positioned such that most of the time, it connected with the perforations, and so could be used (occasionally, the film needed a fair bit of winding before the pin would catch a perforation, but once located subsequent exposures were generally fine).
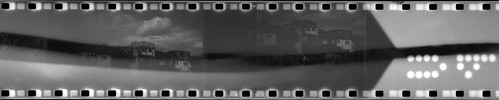
Micro 110 with Orwo UP21 Double Super 8 film
The DS8 stock I used was Orwo UP21; as I had discovered with Orwo UP15 (as shot on Expired Film Day this year), another Orwo black and white reversal stock, the absence of a colloidal silver anti-halation layer, meant that the film could be developed to the negative stage and fixed, rather than bleaching and subsequent second development to provide a positive transparency for projection. For the first reloaded cartridge, I used an untested roll of UP21 in error - the start of this roll showed that it had been opened to the light at some point. Double Super 8, like standard 8, does not have a separate leader: the end of the film is simply exposed on loading and reloading. In the image from the start of the film, one can see where the film has been wrapped around itself on the spool, the chevron-shaped mark indicating the very end of the film, with the punched lettering 'UP' exposing the film underneath, as with the perforations; the wavy line across the film is from a rubber band around the reel.
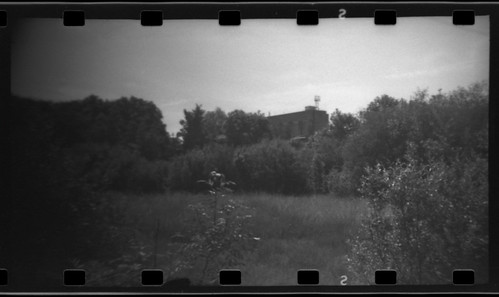
Micro 110 with Orwo UP21
Although the Super 8 perforations have a different pitch or distance between them from those with 16mm film, making for 6, nearer to 7, per frame, I found that if I kept to shooting three blank frames for every photograph meant that the negatives did not overlap. For subsequent reloaded cartridges after the first test cartridge, I used a different reel of Orwo UP21 which I had already tested. This still had its original box, with a develop 'before date' of April 1991 (suggesting that it was manufactured before the reunification of Germany). The UP21 film was originally 100 ISO; a previous test with the film suggested that a two-stop increase in exposure (i.e., rating the film at 25 rather than 100 ISO) was needed to compensate for the loss of sensitivity with age. Despite the age of the film and its loss of sensitivity, the UP21 was still very fine-grained in comparison to the other stocks used.
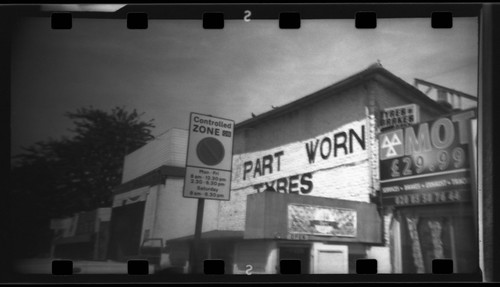
Micro 110 camera with Orwo UP21
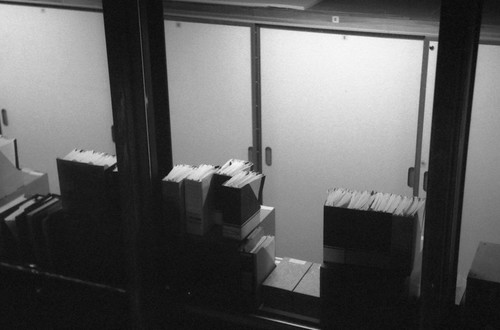
The Micro 110 camera is designed to by used with a medium speed film in good daylight. With a single shutter speed and aperture, the film's latitude is necessary to cover any variation in exposure. This meant that the Double-X film was often over-exposed - for much of the week of shooting with the Micro 110, the weather was bright and sunny - to gain more control over the results, I could have pull processed the film one stop, and could have used filters, with a deep yellow or neutral density filter to reduce exposure. However, the Micro 110 does not lend itself to the use of filters (these could have been taped on), and I wanted to use the camera in a number of different lighting situations, so did not pull the film - and so it was possible to achieve images such as the one immediately below (unsurprisingly, this images also shows up some lens flare). Although an interior, obviously the subject of the photograph is the windows, but these are bright enough to illuminate some of the architectural features inside. The second image below was an interior shot, with some natural light from above, but on an overcast evening. There was just enough information on the negative to pull out from the darkness around the subject.
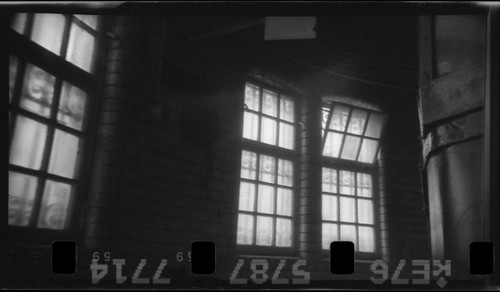
Micro 110 with Eastman Double-X
The Photo Instrumentation film was originally rated 500 ISO, twice the speed of Double-X, but more than a decade and a half after the date on its box (it's not written as a 'process before' date, so it may be a date of manufacture, though this is not specified), I've found that it's best used at an exposure index of 100. The Photo Instrumentation also has a relatively low contrast and good latitude, and so gave relatively good illumination across the frame, reducing the effect of the lens' vignetting as seen in the images below.
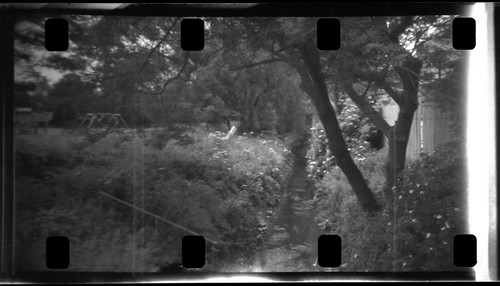
Micro 110 with Photo Instrumentation film
By contrast, the Orwo UP21 film was sufficiently less sensitive than the other two film stocks used to mean that I tried to use cartridges reloaded with this only on the brightest days. When testing the film previously, I had chosen an arbitrary developing time which appeared to work well enough, but when using the Micro 110 and being unable to change the exposure, I increased the developing time, essentially push-processing the film. One effect of this was to increase the effect of the lens' vignetting through the inevitable increase of contrast, and the possibility of highlights blocking out. The image below is a good example of these effects. These factors - the high contrast, vignetting - could be used intentionally, such as with the second image below, where these effectively isolate the lit subject. On problem that I did have with the Orwo UP21 film was when scanning the film, it had a pronounced curl on development, not in the direction of the reel's winding, but across the width of the film. This may have negatively affected the focus of the scans.
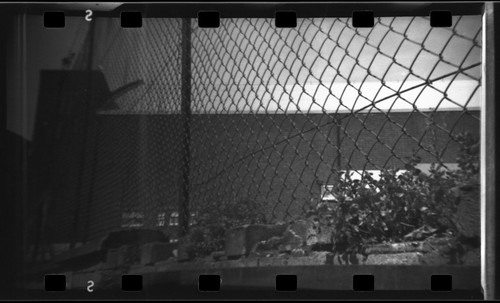
Micro 110 with Orwo UP21
The entry for the Micro 110 on Ollinger's Camera Collection ends with the remarks: "I've got a couple of these, but never used them so I can't attest to the quality. Considering that it uses 110 film, the bar is set so low to begin with that it probably doesn't matter." Having spent nine days inclusive using the Micro 110 for the #shittycamerachallenge, these remarks are not unfounded. In terms of image quality, it's the worst 110 format camera of the small sample that I've used in the last few years, thanks to the meniscus lens and the absence of aperture or shutter speed controls, combined with the format's small negative size. The inherent light leaks which affected most of my images appear unlikely to show with 110 film rather than reloaded cartridges. Of course, a of these drawbacks must be set against the small size of the camera itself, the one feature that must be its sole recommendation (other than its cheapness) - but there are other small 110 cameras which are not much larger than would be far better than the Micro 110.
Micro 110 with Eastman Double-X
Micro 110 with Photo Instrumentation film
Micro 110 with Orwo UP21
Sources/further reading:
Micro 110 on Ollinger's Camera Collection
Micro 110 - My First Camera
The Haking Micro 110 on Camera-Wiki
Halina Micro 110 on Austerity Photo

Sunday, 22 October 2017

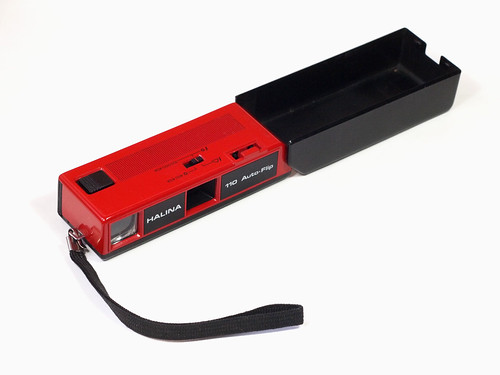
World Toy Camera Day 2017/Halina 110 Auto-Flip

Halina 110 Auto-Flip with Kodak Photo Instrumentation film
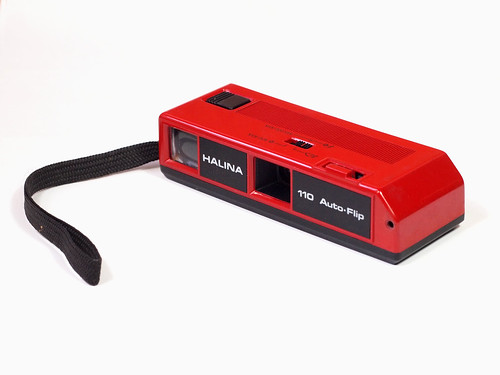
For yesterday's World Toy Camera Day, I chose a Halina 110 Auto-Flip as my camera for the day. After having used a relatively sophisticated 110 format camera recently in the Agfa Optima 6000 Pocket Sensor, it was instructive to compare that camera to what would have been the opposite end of the spectrum in terms of price and quality. Although what precisely defines a 'toy' camera is subjective and debatable, the 110 Auto-Flip has many qualifying characteristics: it is almost entirely constructed from plastic, fixed-focus, and, other than the shutter release and film advance wheel, the only user control that affects results is a sliding switch for the film's ASA setting, which simply changes between two apertures. The camera is also brightly coloured, a sure denotation that it is not to be taken seriously.


Halina 110 Auto-Flip
The camera has a single shutter speed, not marked, but probably around 1/60th. There are two apertures, again not defined; the switch on the top slides a plate with a smaller aperture behind the lens. The larger aperture setting is marked for flash or full sun for 100/200 ASA, and flash or cloudy conditions for 400 ASA; the smaller aperture is marked for full sun at 400 ASA. On the top of the camera is a socket for a flip-flash, with distance settings for the flash printed on the transparent window that also functions as the catch to open the door for the film chamber (distance settings are given as 4-9 feet for 100 ASA, or 5-15 feet for 400 ASA). The flip cover is easily detachable; it pivots to an acute angle in relation to the camera itself and supposedly functions as a handle to steady the camera: although the top of the cover has a ruled, grip-like top, the ergonomics are pretty poor. The camera also has a wrist strap.

Halina 110 Auto-Flip with open cover
The lens would appear to be a simple meniscus type; in a number of the photographs taken with the Auto-Flip, some pincushion distortion is evident, with moderate sharpness in the centre. The apertures are relatively small, perhaps f11 and f16, providing reasonable depth of field to the fixed focus lens. The shutter release button is stiff, depressing it gives quite a hard 'click', which must risk some camera shake. The viewfinder, in an odd design quirk is square, despite the 110 negative format being clearly rectangular. However, with the limitations of the Auto-Flip, the main consideration of the viewfinder is simply to ensure the subject is centred, as no accurate framing is possible. As I shot two cartridges reloaded with 16mm film, rather than new 110 stock, as I've written about before, the lack of preprinted frames on the film allows the whole negative area to be used. With the Auto-Flip, the negative is approximately 23mm wide - much wider than the preprinted frame size of around 17mm. However, the image is severely vignetted on the right hand side, which no doubt would be entirely covered by the 110 preprinted frame.

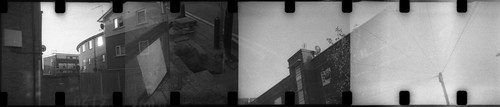
Halina 110 Auto-Flip with Kodak Photo Instrumention film showing overlapping frames
As with the Agfa Optima 6000, the Auto-Flip relies on an internal pin locating the 110 perforations to reset the shutter when advancing the film; unlike the Optima 6000, the pin connects with every 16mm perforation (as in the image above): instead of shooting one blank frame to advance the reloaded film the correct distance, I found it necessary to release the shutter twice after each shot, covering the lens, and even then, thanks to width of the Auto-Flip frame, the frame edges were still butted against each other, although the vignetting at one side of the frame generally made this less noticeable. I shot almost all the photographs on the wider aperture setting; of the two films I used, I've found that the Kodak Photo Instrumentation film gives the best results at an exposure index of 100; subsequently shooting a cartridge reloaded with Eastman Double-X as it was beginning to get dark meant the conditions mitigated against using the smaller aperture setting. The weather conditions were not ideal yesterday, but the Photo Instrumentation film's latitude helped to compensate for this.
Halina 110 Auto-Flip with cover closed
The Halina 110 Auto-Flip is entirely typical of a cheap point-and-shoot snapshot model that would be an archetypal 'first camera' from the late 1970s through to the 1980s (indeed, while I first took photographs with a 126 Instamatic, one of my brothers had a 110 'Pocket Instamatic' very much like the Auto-Flip as his first camera). Cheap to buy and very simple to use, the camera would have produced passable results in good lighting conditions on small-scale photo-lab prints; retrospectively, it's sometimes a wonder that such photos, not very sharp, grainy, often underexposed, from a first camera, didn't put people off photography, but the fact that these cameras were designed to be so easy to use, and, that they did simply produce results, was enough to satisfy the desire to take the photographs in the first place.
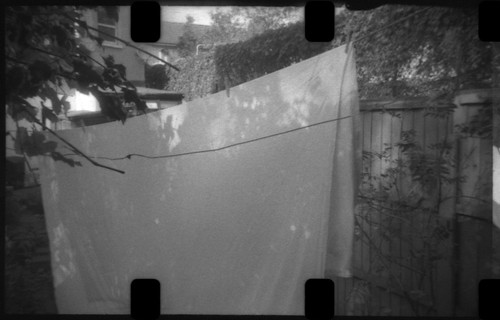
Halina 110 Auto-Flip with Kodak Photo Instrumentation film
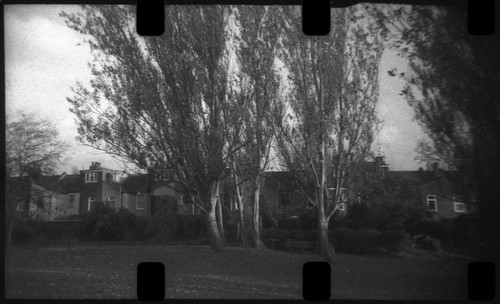
Halina 110 Auto-Flip with Eastman Kodak Double-X film

Sources/further reading
Haking_Grip-C/Halina 110 Auto-Flip on Camera-Wiki

Wednesday, 7 June 2017

Eastman Double-X

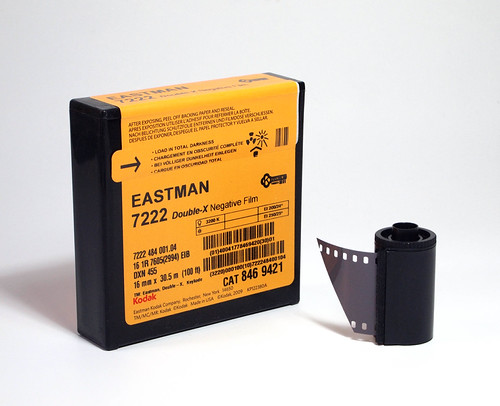
Eastman Double-X film in 16mm (7222) and 35mm (5222)
With the discontinuation of Plus-X, Eastman Double-X is Eastman Kodak's last surviving black and white motion picture film in 35mm (Tri-X Reversal is available in 16mm and super-8 cartridges). The film is often referred to online in full as Eastman Double-X 5222, but this explicitly refers to the 35mm film stock; I have also been using the 16mm version in various subminiature cameras, which is given the 7222 suffix: this post is titled Eastman Double-X to include both formats. As mentioned under my post for Ilford Mark V, motion picture negative film has a different perforation shape to standard 35mm camera film, but this is not significant enough to cause any problems when using it for still photography. Double-X's speed is half way between Plus-X at 125 ISO and Tri-X, originally 320, but rated 400 ISO in all but sheet film now. Kodak also made a fast 4-X film which was 500 ISO, although this film was discontinued around 1990.

Eastman Double-X latitude test
Double-X appears to have quite a following among still photographers posting their images online, with numerous discussions about different developing practices. As a motion picture film, Kodak's recommendations are naturally limited: an exposure index at 250 for daylight and 200 for tungsten light; the recommended developer is D96. However, the Massive Dev Chart currently has a fairly wide range of listed developers, dilutions and times (the listings do give the 5222 suffix, but the 16mm film has the same emulsion, and the information should be equally applicable). Given the relatively limited availability of new 16mm film stocks, I had already bought some 16mm Double-X for use in my subminiature cameras, but I wanted to try the film in 35mm. There are a number of sources online which sell Double-X: from Kodak as a motion picture stock, it's provided in 400ft or 1000ft lengths of 35mm; but there are resellers which either cut and package shorter lengths (I bought a 100ft roll), and a few that provide Double-X in standard 35mm canisters, such as the Film Photography Project.

For an initial test with the 35mm film, I made a series of exposures to test Double-X for latitude, using my Canon A-1. In the contact sheet above, I shot the top two rows at ratings of 64, 125, 250, 500, 1000, 2000 and developed the film in Ilfotec LC29 at a dilution of 1+29 for 8 minutes at 20ºC (the two shots on the end of the film were rated 250). Although the contact sheet above shows a steep drop off at the higher end of underexposure, in scanning the negatives I was able to pull out some detail, although at two to three stops under, there wasn't much shadow detail (it's instructive to compare the test above to that of Adox Silvermax, which has excellent latitude). The exposures at 64 appear to have very little highlight detail in the contact sheet, but this was generally present and could be preserved in scanning, although the highlights in some of my tests do appear to block out easily. Notably, of the two subjects shot for the test, the second (an outdoor table-tennis net) had lower contrast, and the results were better.

Double-X at EI 64 (two stops overexposed)
Double-X at EI 2000 (three stops underexposed)
Double-X's recommendations for exposure, with different indexes for daylight and tungsten, most likely holds true for any normal panchromatic film (excepting superpanchromatic films with extended red sensitivity like Agfa Superpan 200); I imagine that this is made explicit due to is intended use as a motion picture negative stock. For most still photographers, the difference between an exposure index of 200 or 250 whether under tungsten or daylight would no doubt fall well within an acceptable range of negative densities. In some of the tests I shot I did occasionally change the rating to depend on the type of light I was shooting in, but generally I either exposed the whole roll at 200 or 250, apart from tests in push processing. For a more rigorous testing of Double-X, I could have shot the same film in both daylight and tungsten light and used both recommended exposure indexes to get an accurate comparison, but this did feel unnecessary. However, in terms of looking at the film's spectral response, I did shoot some frames with a yellow filter, which I generally use to aid definition in skies with black and white films, but, in the image below, this appeared to affect the rendering of the green foliage more than I might have expected. Again, more tests would have helped to determine how Double-X precisely translates colour into black and white, although the few shots taken with a yellow filter looked promising.

Eastman Double-X, Canon A-1 with yellow filter
The rationalisation of Kodak's black and white motion picture film around Double-X appears in part to be a demonstration of the film's versatility (or at least Kodak's faith in its versatility); in the field of colour, Kodak still has (essentially) a range of three different negatives sensitivities from 50 to 500. Although making direct comparisons between the use of Double-X as a motion picture negative stock and its use for still photography is perhaps problematic, there's many examples online of Double-X being pushed by a number of stops to counter differing lighting conditions (less common is pull-processing, although some times for ratings as low as 25 are listed on the Massive Dev Chart). Part of testing the film led me to attempt to push the film as far as 3200. Some of the examples of rating Double-X at 1600 or 3200 appear to be simply underexposed - with almost no shadow detail, the highlights and mid-tones essentially carry the image alone.

Eastman Double-X rated 3200, Kiev-4, Ilfotec DD-X 1+4
Part of the problem in judging these results however is due to shooting the film in generally higher-contrast lighting situations, such as at night, and this complicates the results. My test roll shot at 3200 and developed in Ilfotec DD-X had few useable frames overall, with scanning able to pull out as much detail as possible from the shadow areas. The negatives would, I imagine, be tricky to print in the darkroom (when rating the film at 800 and 1600 the results were better, but not by a significant degree), but in general terms, Double-X does not seem an ideal film for pushing more than one stop. Other than contact prints, I have only made prints from Double-X in 16mm so far, largely because scanning from subminiature negatives doesn't quite provide enough clarity to the images. With the small size of these negatives, the film's grain is very pronounced and the difference between using R09 or Ilfotec LC29 as a developer also appears to be visible, with Ilfotec LC29 providing a little smoother look to the grain. In some of the results shot on 35mm, the grain appears quite pronounced for the speed of the film, compared to other 200 ISO films currently available. Over and above the inherent grain of any film, its appearance depends on a number of factors, but developer is perhaps the most important, as well as differences in scanning or printing.

Having used the film for around a year, testing it with a few different developers, shooting it at a good range of exposure indexes, as well as printing a few 16mm negatives, I still feel undecided about Double-X: some of the results feel quite mixed to me, and I don't think that the film is necessarily distinct enough to be sought out as a film for regular use. On reflection, in the course of writing up this post, I realise that I neglected to explore shooting the film below its nominal speed and adjusting development accordingly, which may have modified how I feel about the film; having now shot all the 100ft roll of 35mm that I bought a year ago, I may try this in 16mm, but it wouldn't be a good comparison. Although Double-X has many fans, I can't help thinking that it is a shame for Kodak not to have kept Plus-X as a motion picture stock, as I found this a much more sympathetic film to work with as a still photographer.

Edit 10/05/20 - see also: Eastman Double-X Part Two, in which I reappraise Double-X with D96 developer.


Canon A-1 with Double-X. rated 200, Ilfotec LC29, 1+29
Kodak Retina IIa with Double-X, rated 200, Ilfotec LC29, 1+29
Agat 18K (half frame) with Double-X, rated 200, Ilfotec LC29, 1+29
Mamiya-16 Automatic with Double-X (16mm), rated 200, Ilfotec LC29. 1+29
Kiev-30M with Double-X (16mm), rated 200, Ilfotec LC29, 1+29
Rollei 16 with Double-X (16mm), rated 200, R09 One Shot, 1+25
Agat 18K (half-frame) with Double-X, rated 250, developed in R09 One Shot 1+25
Agat 18K (half frame) with Double-X, rated 250, Ilfotec LC29, 1+29
Voigtländer Vito CL with Double-X, rated 250, Ilfotec LC29, 1+29
Mamiya-16 Automatic with Double-X (16mm), rated 400, R09 One Shot, 1+50
Kiev-4 with Double-X, rated 400, R09 One Shot 1+50
Canon FTb-N with Double-X, rated 800, R09 One Shot 1+50
Canon A-1 with Double-X, rated 1600, R09 One Shot 1+20
Kiev-4 with Double-X, rated 3200, Ilfotec DD-X 1+4

Sources/further reading:

Eastman Double-X data sheet
Project Double-X (archived)
Eastman Double-X on Down The Road
Eastman Double-X on Alex Luyckx Blog