“It is not possible to describe for you the beauty of it in words: all painting is dead in comparison, for here is life itself, or something more noble, if only it did not lack words. Figure, contour, and movement come together naturally therein, in a way that is altogether pleasing.”
Constantijn Huygens, in a letter to his parents, 13th April 1622, quoted in Wolfgang Lefèvre ‘The Optical Camera Obscura: A Short Exposition’
Travelling to Delft at the turn of the year, many months now from the time of writing, I took the components to construct a camera obscura while staying in the city. The camera obscura was of simple construction, made from greyboard and black mountcard, using a plastic magnifying glass as a lens, and, for the viewing screen, a square of glass I’d ground myself, cut from an old photographic plate the night before leaving London to take an early train to Amsterdam. To focus the lens, the camera was made as a box inside a box, the internal one sliding in and out to change the distance between lens and screen. As it was made from cardboard, I was not convinced how well this would travel once constructed, with the necessity of carrying it in a rucksack, and so I found myself putting together the camera obscura in Delft from its constitutive parts. Although this was done for entirely pragmatic reasons, I decided to film this activity on 8mm, compressed into a sequence of short successive shots, edited ‘in camera’.
Had I designed this camera obscura from scratch, the size and shape would have been a little different. The size of the ground glass screen would have taken into account the lens’ coverage, and the depth of the camera would have been sufficient that, when collapsed, the lens would be focussed at infinity. However, this camera obscura was a recreation of one I’d made as a teenager. That camera obscura came out of my interest in optical phenomena then, although no doubt not so clearly expressed, and the use of the device by artists before the invention of a fixable, chemical photography.

I had made this first camera obscura with only a rudimentary understanding of what I was doing—I made no attempt, other than a crude approximation, to work out the focal length or the image circle that the magnifying glass projected, which would have provided the box with logical dimensions: I constructed a cube, with another cube nested inside, which could be withdrawn to focus the lens. As made, the camera collapses a little smaller than the infinity focus of the lens: no doubt, it should have collapsed either smaller still for convenience and portability (though this camera obscura is by no means large, being around 12cm square), or, when pushed together, the lens should be focused at infinity for a different kind of convenience. It was made from cardboard, joined with gumstrip, painted black inside to cut down on internal reflections (the reconstruction used black mountcard for its internal section). I used tracing paper for the original camera obscura’s screen, and ‘oiled’ it (using Windsor & Newton Liquin rather than actual oil) to improve its translucency; in the new camera obscura, I decided to use ground glass instead, hoping to get a better image, but I didn’t want to ‘improve’ the design in any significant way.

The lens was a magnifying glass from WHSmith, and I used this for the new camera obscura, above. The choice of this magnifying glass was determined by pure contingency: my father had exactly the same one, largely for examining prints (although he used an engineer’s loupe for any critical work); as children I and my brothers frequently borrowed this magnifying glass, and used it chiefly, in my memory at least, to burn holes in newspapers on sunny days. The paper would only burn where there was ink; at the time, I’m not sure whether I observed the images of clouds passing through the sky, projected onto the paper, nor if I really understood that the focussed point of light smouldering through text and half-tone photos was an image of the sun.

Compiling images for this post, I recently found a drawing I’d made from this camera obscura. Pasted into a sketchbook, the drawing’s position in it dates from 1990: without the evidence of the location of the page, or the juvenile handwriting under the drawing, in my memory, my attempts to use this camera obscura to draw from was somewhat later–not many more years, but I’d located, or, perhaps more accurately,
relocated it to around the time I would have been studying for my A-levels two or three years later. [Edit 10/04/23: Re-reading old diaries, I found that the original cardboard camera obscura I
had made in September 1993, just after my A-levels: I think the drawing above, in a sketchbook from 1990, was made using a set-up with a magnifying glass lens from my father, which he may have set up as a camera obscura.] Then I'd been looking at Vermeer as part of the ‘personal study’ component of my Art & Design A-level: this began with Caravaggio and the Caravaggisti, and the Dutch Tenebrists, as representing a certain idea of a realism in painting that appealed to me then. Vermeer’s earliest dated paintings featured as the end of a stylistic line through Carel Fabritius as a pupil of Rembrandt: Rembrandt was aware of Caravaggio’s work, although most likely only through prints. I made a copy of Vermeer’s
Christ in the House of Martha and Mary at the time, using the reproduction from Arthur K. Wheelock Jr’s monograph on Vermeer, which catalogued all the paintings then accepted as genuine, and also includes a discussion on the possible use of optics by artists in the seventeenth century, with Vermeer’s links to figures such as Antonie van Leeuwenhoek. Coincidentally, during my A-levels the National Gallery in London put Vermeer’s
Little Street on display against Pieter de Hoogh’s 1658
The Courtyard of a House in Delft in its ‘Brief Encounters’ series of small exhibitions. This also included Fabritius’
A View of Delft (sometimes titled
A View in Delft), which is mentioned in Wheelock’s book in relation to optics, Wheelock stating that it suggests the artist experimented with wide angle lenses: this can be readily appreciated when confronted by the scene itself in Delft–standing on the corner between the street and canal where this viewpoint is located, the Nieuwe Kerk appears much, much closer, and dominates to such an extent that I found it impossible to compose a photograph that replicates Fabritius’ painting with a 50mm lens, considered a ‘normal’ angle on a 35mm frame–as in the photograph below. At the time of my A-levels, I was grasping for a 'realism' which retrospectively perhaps contained something ‘optical’ in all these very different painters. As it was, I didn’t use my camera obscura then to turn its projected images into a painting like those by Vermeer, or Fabritius’ view: it had little practical use, other than a very general ‘proof of concept’.

After my A-levels, at college and with access to a darkroom, I made a new back for the camera obscura into which I could slip a small piece of photographic paper in an attempt to fix the image seen on the tracing paper. Although I had been using the darkroom to develop my own film and printing negatives, I was working from a position of ignorance and assumptions, and my first attempts came out completely black, clearly as a result of overexposure. I had no real grasp of the interaction of the aperture of the lens, the intensity of light, and the sensitivity of photographic paper–all things one could readily look up online now, but such knowledge rather less easy to access then–and instead of trying shorter exposure times (nor constructing any form of aperture control), I thought the attempt a failure, when this was really a failure in not thinking through the implications of my first attempts and making some change in method.

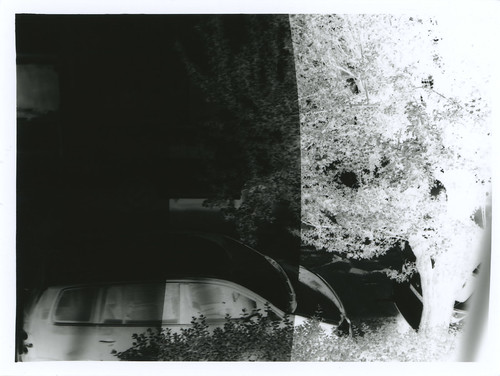
A second attempt, around a year later while studying on my degree, worked rather better given the circumstances: I set the camera on a floor in a dark corridor, just outside the darkroom, the exposure times were longer as a result, and I used a thin piece of zinc that could be slipped behind the lens as a shutter. I then printed the paper negatives by contact onto another sheet of photographic paper in the darkroom as above. There was a lot of guesswork in these photographs as I had to focus the camera, measure or mark the distance that the back with the tracing paper was extended, then take the camera obscura into the darkroom, replace the back with the one loaded with photographic paper, place the camera back to where I had focused it, and extend the back with the photographic paper to the same distance, and then remove and replace the zinc shutter. I tried taking a couple of other photographs in the studios themselves, below, but being lit rather more brightly, these were overexposed (in remaking the camera obscura, I measured the focal length at infinity, which is around 13.5cm; with an aperture of 3.3cm, the resulting f-stop is very approximately f4, relatively fast even with photographic paper when the shutter is a piece of zinc to be raised and lowered behind the lens).

After these few photographs, I didn’t use the camera obscura again to make images, but it moved house with me several times through my student years and after, although the back for exposing photographic paper was damaged and discarded. I continued to be interested in the prehistory of photography however, and this vague interest in artists’ uses of the camera obscura was sharpened by the appearance in 2001 by David Hockney’s book
Secret Knowledge: Rediscovering the Lost Techniques of the Old Masters, and the accompanying BBC film, in which he uses a projection inside a room-sized camera obscura to recreate (in drawing) the composition of Caravaggio’s
The Cardsharps. Also featured in the programme was a contribution from Philip Steadman, whose book
Vermeer’s Camera appeared the same year, the culmination of years of research, and this research had also been the subject of a television programme over ten years earlier.
Hockney and Steadman both demonstrated the practicalities of using a camera obscura to work from, a world away from my cardboard box and magnifying glass. The use of larger lenses with longer focal lengths allow the artist to be
inside the camera itself, with paper or canvas in place of the ground glass screen (one of the revelations of Hockney’s book and programme was the (re)discovery of the mirror lens, used to explain how artists could have used projected images prior to the development of sufficiently sophisticated glass lenses in the latter sixteenth century to allow for the room-sized camera obscura); spurred on by these books, I had many conversations with a friend who was studying photography at the time, and we tentatively drew up an outline of a research project, going so far as to meet Philip Steadman at UCL, but our lives pulled in different directions, and the project fizzled out.

I did however use a camera obscura to make a single painting around 2002: this was achieved with a large magnifying glass placed on a stand and painted directly onto canvas from the projected image. This method wasn’t something I pursued any further, but it demonstrated the possibility of using a camera obscura as an aid to artists: this was painted rather quickly in one sitting (I spent more time making the stand for the magnifying glass), essentially establishing the composition, blocking in the tonal masses; it would be easy then to add detail and refine the painting, with further recourse to the projection of the camera obscura, or direct from the motif itself. It was clear to me that with practice and application one could learn to paint using even the simplest camera obscura set up. Despite my interest, and these tentative experiments, it was many years before I experienced a room-sized camera obscura, visiting Bristol around ten years ago, and going to the camera obscura in the Bristol Observatory on the Downs overlooking the suspension bridge. The construction of this camera obscura–with a rotating turret containing both lens and mirror to project the world outside correctly orientated onto a horizontal concave screen–was immediately redolent of the scene in Powell and Pressburger’s
A Matter of Life and Death, where June visits Dr Reeves in his camera obscura. Here, it seems to stand as an analogy for cinema itself: secluded in the dark, inside the camera obscura, Dr Reeves watches the inhabitants of the village at a distance, unobserved. Perhaps this scene, where Dr Reeves first appears, is also intended as a subtle allusion to the idea that the power of doctors over matters of life and death is ‘god-like’, further reinforced by Reeves’ fate later in the film.

Returning to the Bristol Observatory last year, I was able to making a tracing of a small detail from the projection of the camera obscura in a notebook there, although also noting that the camera obscura’s angle of view seems to have changed from its historical horizon-following circuit, seen in the reproductions of nineteenth century prints, to now pointing below the horizon, no doubt in order to contain the suspension bridge fully in view, the chief landmark closest to this viewpoint on the downs. Of course, one does not need such an elaborate construction to experience the camera obscura effect: in the early weeks of lockdown in the spring there was something of a craze of creating camera obscuras in domestic spaces, with or without lenses, appropriate to the restrictions of the time, but also, in the UK at least, helped by the bright sunny weather. It’s something I’d done in a hotel room in Granada, Spain many years ago: the room had both curtains and blinds which could be co-ordinated together to make a suitably small aperture, while the bright morning light on the cathedral over the roof tops across the town square made the perfect subject, rotated 180º in the image below (I think I may have seen Abelardo Morrell’s series of hotel room camera obscuras not too long before).

In Amsterdam, prior to travelling to Delft, I had seen Vermeer’s painting
A Maidservant Pouring Milk, these days more commonly known as
The Milkmaid in the Rijksmuseum (the figure is clearly a domestic servant, not a milkmaid, but the latter title has stuck in recent years, very much in the way that the
Girl with a Pearl Earring is now the title for Vermeer’s painting: when highlights of the Maurithuis collection toured in the early 1980s, the catalogue titles this iconic painting as simply
Head of a Girl, elsewhere described as
Head of a Young Girl; it’s hard to imagine this painting reverting to these titles now). Seeing
A Maidservant Pouring Milk in the Rijksmuseum, I felt as though it had the opposite effect often experienced with reproductions of ‘realistic’ paintings: it looked
more ‘photographic’ in real life, inverting the homogenising effect of reproduction, which removes the materiality of paint and flattening this to pure image. The effect seemed greater at a little distance, glanced across the room in company with the paintings surrounding it, even against the other two Vermeer paintings accompanying
A Maidservant Pouring Milk.
A few days later, in Delft, I made another tracing from a camera obscura, this time in the Vermeercentrum. Despite having no paintings by the artist, the Vermeercentrum does provide a good introduction into Delft’s artistic milieu, and contains a display of high-quality reproductions of all the generally accepted Vermeer paintings at actual size, together. There is also a display on techniques and materials, and a camera obscura. This looks out through the wall of the building into the street, towards the market square and the statue of Grotius–and, on the right, towards the site of Mechelen, the inn that Vermeer’s father owned and where Vermeer grew up. The Vermeercentrum itself is housed in a recreation of the Guild of St Luke, of which Vermeer was elected head in 1662; the original building was demolished in 1879, replaced by a school. This camera obscura tracing, below, was a very quick sketch, and by necessity tracing
through the page of the notebook, laid on the ground glass of the camera obscura. The paper was rather too thick to give anything other than the broad masses of light and dark, unlike the tracing from the Bristol camera obscura, where the image was projected
onto the paper.
A Maidservant Pouring Milk is one of the paintings frequently cited as evidence of Vermeer’s use of the camera obscura, generally in relation to the rendering of the prominent still-life element in the foreground (“More ink has flowed to describe the poetic and optical qualities of this still life than perhaps for any other detail in Vermeer's oeuvre. The bread, basket, pitcher and bowl display such vibrancy and tactility that they effectively vie with the woman as the focus of the painting." Jonathan Janson, 'Essential Vermeer'). This is generally interpreted as displaying an imitation in paint of the circles of confusion seen in a camera obscura from point sources of light away from the plane of focus. Charles Seymour Jr. in ‘Dark Chamber and Light Filled Room: Vermeer and the Camera Obscura’ explicitly states that: “In order to paint this optical phenomenon Vermeer must have seen it, and it must be assumed that he could not have seen it with direct vision, for this is a phenomenon of refracted light.” To expand on Seymour’s statement, Daniel A. Fink, in discussing the fact that of “most” of Vermeer’s paintings demonstrate a principal plane of focus and that objects either side of this plane exhibit circles of confusion which “respect” that plane, that this is difficult to apprehend with the human eye, and impossible to ‘use’ creatively: “…one might be able to notice circles of confusion forming on the retina, but experimentation shows that the out-of-focus image formed on the retina is useless for picture-making purposes even if one is aware of its existence.”
Although much of the commentary on
A Maidservant Pouring Milk does concentrate on the still-life element, with its pontillist rendering, it is the milk in Vermeer’s painting which strikes me as being quietly remarkable - in the same manner that the spinning wheel in Velazquez’s
Las Hilanderas is: the paintings are almost exactly contemporary and both demonstrate a pre-photographic feat of observation, Velazquez’s painting of a spinning wheel blurred by motion more obviously so than the thin stream of milk in Vermeer’s picture. Other paintings of the seventeenth century show moving liquids in more generalised, approximate depictions (Ruisdael’s waterfalls come to mind here). Vermeer
could have observed the stream of milk in a camera obscura, and, pouring slowly and steadily enough, this movement can approach the phenomenon of laminar flow, where it almost looks as though the milk isn't moving, as if it's a still image: it would be technically possible to trace this image rather than simply observing it (the latter of course being more likely), looking like a solid, non-moving pictorial element, its opacity as if of pure light. In the Rijksmuseum, the caption to the painting (in English) states that “except for the stream of milk, everything else is still”; of course, this is a painting, so all is ‘still’, yet, as an observed scene, the stream of milk could
appear nearly as still. Indeed, as an action, in the pouring of milk, what moves more than the milk itself, is the angle of the vessel as its contents empty. Perhaps observing the near-stillness of a stream of pouring milk was the inciting incident in the creation of this painting.
These thoughts around Vermeer’s
A Maidservant Pouring Milk led me to the filming of a performative gesture, a film of milk from a contemporary Dutch carton being poured into a blue-glazed ceramic bowl, with some bread from a Dutch supermarket to one side, an action enacted in the city of Delft–and then filmed (again) as a projection on the ground glass of the camera obscura I’d taken from London to Delft via Amsterdam in pieces and then built there. The duration of the film was determined by one measure of how long the average picture is looked at in an art gallery: 37 seconds (although different methods of designating that ‘looking’ generate different times in other studies); this necessitated a slow and steady pour, and, in doing so, this gave the stream of milk a more fixed aspect. The ground glass image was kept upside down, an abstracting effect useful for a disinterested observation, breaking the recognisable image down into patches of colour and tone.
I shot the film on
Eastman Double-X black and white negative film. With an ISO of 250 in daylight, it’s a fast film for 8mm: historically, at the times these cameras were in common use, in the 1950s and 60s, less sensitive, finer-grained emulsions used for cine film would have been more typical. However, this granularity was in some senses appropriate to the subject through a series of visual analogies. I felt there was a visual equivalence between the grain of the ground glass (being home-made, this is not especially fine) and the grain of the 8mm film, thanks to the small frame size, (as well as having been pushed it three stops in the processing); materially, there is also the ground pigment in Vermeer's painting which makes up the image, and the still-life section of
A Maidservant Pouring Milk famously has the specular highlights which suggested the use of the camera obscura; and in my own initial encounters with Vermeer’s work, through reproduction and the granular qualities of half-tone printing.
Filming the image on the ground glass screen was difficult due to the Bolex B8 having a non-reflex viewfinder: this caused two problems which required educated guesswork, the first being parallax–as the viewfinder is offset from the taking lens, the angle of view is different, and parallax error increases the nearer to the subject that the camera is placed. I simply lined up the lens to the centre of the ground glass screen as best I could, ignoring the viewfinder for this shot. The second problem was focus: in order to film the frame with the ground glass screen, I needed to focus closer than the minimum distance that the Bolex’s 13mm lens would allow, which is three-quarters of a foot or 9 inches, very close, but not close enough. For this I used a
Proxar close-up filter; as I couldn’t see through the lens to check the focus, I had to estimate the difference of using this close-up from the power of the Proxar lens, which, with a power of 2, halves the focal distance, and I measured for this. The dimness of the ground glass screen meant that I needed to shoot with the lens wide open, thus not being able to stop down the aperture to gain a greater depth of field–which at such close focus was negligible–and also use a slower frame rate to achieve a slower shutter speed, shooting at just 8fps here. I actually shot this sequence twice: the first was not close enough; the second was, but is partly obscured by a developing error where the film on the spiral reel of the development tank came into contact with itself, thus preventing the developer acting on the surface for a few frames. This also shows the out-of-focus reflection on the ground glass of the camera itself filming–which I was unable to see due to the parallax issues already mentioned–perhaps it could be said that this reflection therefore divulges the means of its own making (as an insurance, I did also shoot the camera obscura image with an iPhone, but this was less satisfying: the digital compression of the close tones of the camera obscura image was somehow less satisfying than the grainy obscurity of the film image).
Returning from the Netherlands, I developed a different roll of Double-X shot with the same camera first. I’d bought some
D96 developer in liquid form, a developer I’d not used before and these first results looked very underdeveloped, although, after testing some 16mm Double-X in the camera, I realised that this was actually underexposed. I made several tests with the same camera and 16mm Double-X before forming the hypothesis that the problem arose with the Bolex’s variable shutter. The lever to change the settings was stuck on the camera when I bought it, and, I had assumed, stuck in the open setting; after puzzling over a number of tests, I concluded that this was stuck near to being closed, and was underexposing the film by the equivalent of three stops. The roll of film containing the pouring milk sequences was developed with this in mind, with the result that the negatives were much higher in contrast than I would have liked, and this contrast emphasises the grain.

I made some prints in the darkroom from the negative, to check whether I’d successfully recovered the latent images on the film before sending the roll to be scanned professionally; when printing in the darkroom using Ilford Multigrade paper, with the lowest contrast filter I could achieve something like the tonal rendition I would have wanted for the film. The results from scanning were higher in contrast than the darkroom prints but acceptable (the film of constructing the camera obscura at the top of this post was shot on the same roll, but lit by a south-facing windows, while the pouring milk was filmed with a north-lit window, the less diffused south light here blocks up the highlights more, with little shadow detail in these sequences).

Returning from Delft, I made a new back for the reconstructed camera obscura to take some photographs with it on photographic paper, this time building in a darkslide to cover the sheet of paper for loading and unloading the camera. Attempting to make images of moderately close subjects, the definition from the lens was very poor, as above, not helped by the fact that it is difficult to ensure the distance from the lens to the paper matches that from lens to ground glass when swapping backs. To counter this, for the image below, I made an aperture plate from a piece of card with a hole punched through it which significantly improved the definition of the image. As a subject for these photographs, to test the new back for the camera obscura, I used my ticket from the Vermeercentrum–a cut-out of the figure of the
Maidservant Pouring Milk.
Bibliography
Ian Christie, A Matter of Life and Death, British Film Institute, London 2000
Daniel A. Fink, 'Vermeer’s Use of the Camera Obscura - A Comparative Study', The Art Bulletin, Vol. 53, No. 4 (Dec., 1971) pp. 493-505
David Hockney, Secret Knowledge: Rediscovering the Lost Techniques of the Old Masters, Thames and Hudson 2001, and BBC television film
Tim Jonze ‘Honey, I flipped the garden: how I turned my house into a camera obscura’, The Guardian, Firday 24th April 2020. Retrieved from https://www.theguardian.com/culture/2020/apr/24/lockdown-culture-camera-obscura-photography 28/9/20
Martin Kemp, 'The Science of Art'
Wolfgang Lefèvre ‘The Optical Camera Obscura: A Short Exposition’, in Wolfgang Lefèvre (ed.) Inside the Camera Obscura – Optics and Art under the Spell of the Projected Image, Max Planck Institute for the History of Science 2007, p6
Jonathon Janson, 'Essential Vermeer' website: http://www.essentialvermeer.com/
Abelardo Morell, ‘Camera Obscura’ series, 1991-2019. https://www.abelardomorell.net/project/camera-obscura/
Charles Seymour, Jr., 'Dark Chamber and Light-Filled Room: Vermeer and the Camera Obscura', The Art Bulletin, Vol. 46, No. 3 (September 1964), pp.323-331
Philip Steadman, Vermeer’s Camera, Oxford University Press, 2001
Arthur K. Wheelock Jr, Vermeer, Thames and Hudson, London 1988