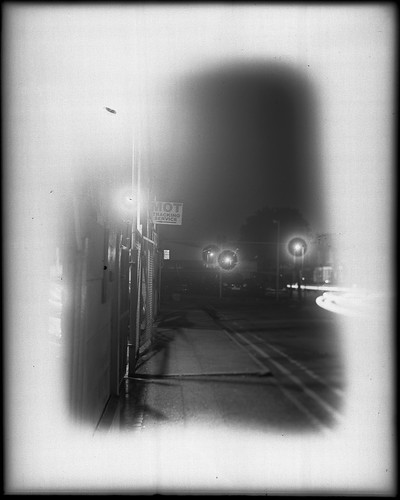
|
| 'Quarantine', 9x12cm paper negatives, first 28 days |
In my post two months ago for '
Expired Film Day 2020', I referenced the current coronavirus pandemic, the full restrictions of which had come into force between taking the photographs, and then developing, scanning, and posting two weeks later. UK-wide restrictions were much less stringent than in other countries: even at the height of the pandemic, I
could have left the house every day to take photographs, on my daily exercise or on essential shopping trips; in my post on
Worldwide Pinhole Photography Day, I did reference that I couldn't go out to take photographs. The inference in this statement was that with a large format camera and long exposures, going out specifically to take photographs, with stopping for long periods with a camera on a tripod, would appear to be against the spirit of the rules then, if not the letter.
 |
| Unfixed paper negative, digitally inverted, Kodak Recomar 33 |
Instead, as with a number of photographers, I have been taking photographs at home for the duration. One participatory project initiated online by the artist
William Arnold Goldstrom, 'Lockdown Living Spaces' uses the tag
#covidobscura on Instagram. He invited artists to make long-exposures on photographic paper of their domestic spaces during lockdown - essentially, lumen prints, as the image below - which would then be scanned unfixed, digitally inverted into positives.
 |
| Unfixed paper negative lumen print, Kodak Recomar 33 |
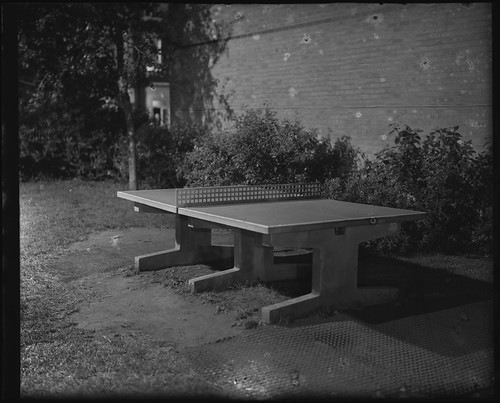
I took part with a variety of cameras and formats - large format, quarterplate, 116 - with exposures ranging from one to three weeks, and for the two months from the 24th March, had at least one camera exposing at any one time. I also used three different types of photographic paper - Ilford Multigrade IV, Adox MCP 310, and grade 2 Ilfospeed paper from the 1970s. Photographing domestic spaces, for most of the cameras I used wide angle lenses or supplementary lenses: the image above, shot on Ilfospeed paper with a
Kodak Recomar 33, used a
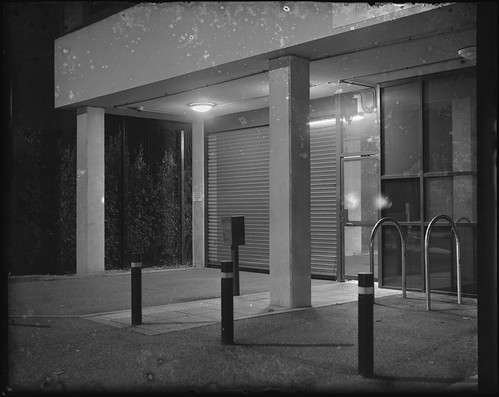
Proxar supplementary lens; the image below, on Adox MCP paper, used a 75mm Dehel Manar lens on my
MPP Micro-Technical Mk VIII.
 |
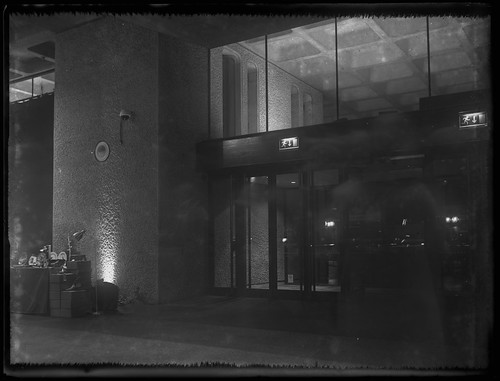
| Unfixed paper negative, digitally inverted, MPP Micro-Technical Mk VIII |
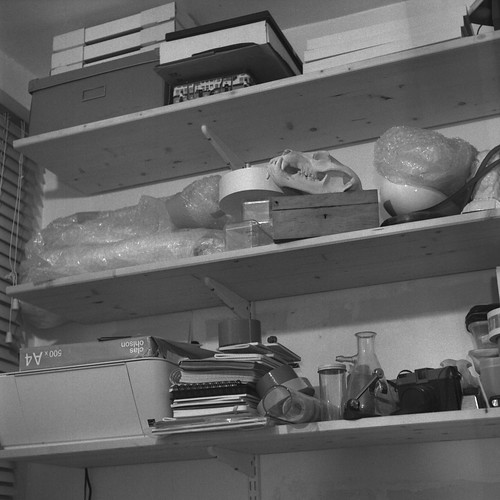
Being fortunate enough to be able to work from home, documenting this time through long exposures of the domestic space as a work environment show traces of activity and the passing of time, while the human figure moves too quickly to register (although there is a faint indication of a blur in front of the monitor in the first image above). I found with slower lenses, as with the
Kodak No.2A Brownie and the
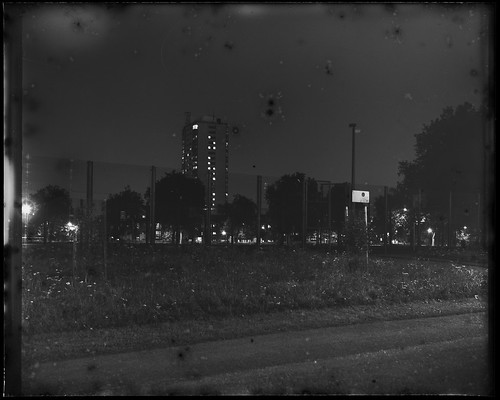
Cameo, two or three weeks were needed to give an image good enough for scanning; I also found that the scanning process darkened all of the paper considerably, as well as time outside the camera of course. I did fix some of the paper after scanning, but the images became much lighter after fixing. The best results were those using the Adox MCP paper; those using Ilford Multigrade produced a wider range of colours (on black and white paper) - not having much experience with lumen prints, this was a little surprising to me at least: the first two images below are on Multigrade; the Kodak Recomar shot is on Ilfospeed grade 2, while the other photographs use Adox MCP paper.
 |
| Unfixed paper negative, digitally inverted, Kodak No.2A Brownie |
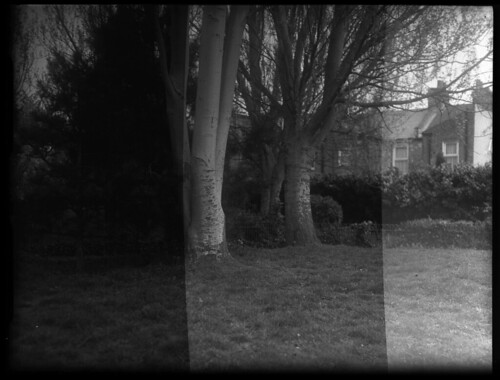
 |
| Unfixed paper negative, digitally inverted, Butcher's Cameo |
 |
| Unfixed paper negative, digitally inverted, Butcher's Cameo |
 |
| Unfixed paper negative, digitally inverted, MPP Micro-Technical Mk VI |
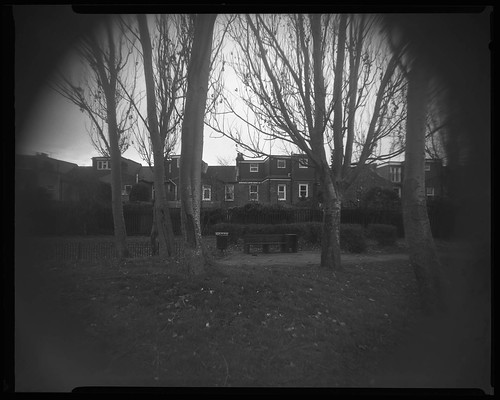
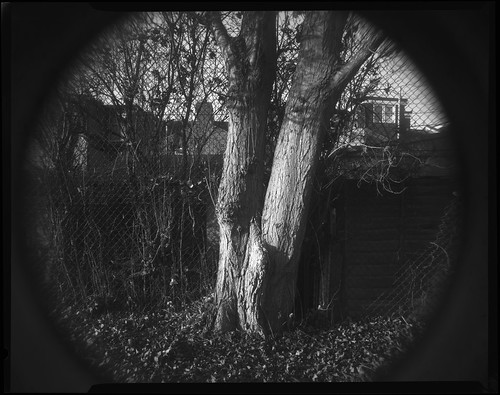
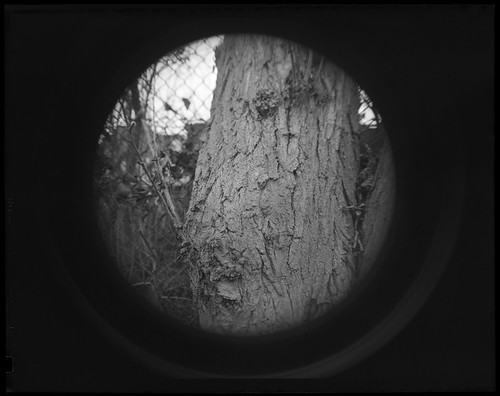
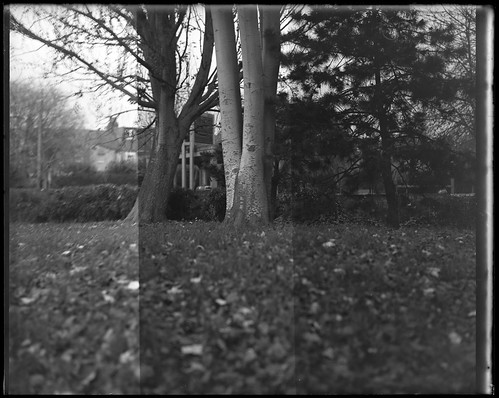
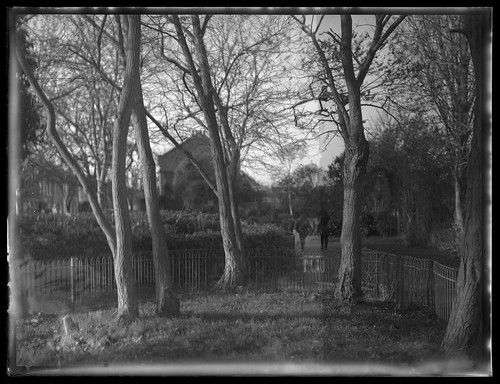
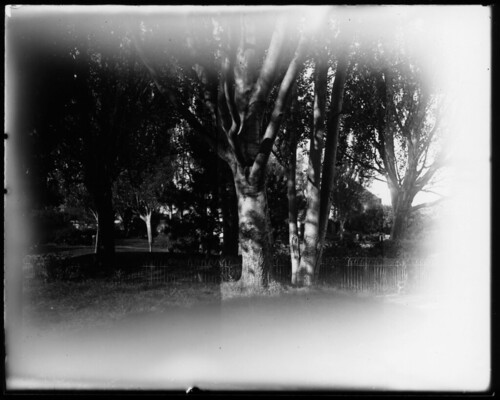
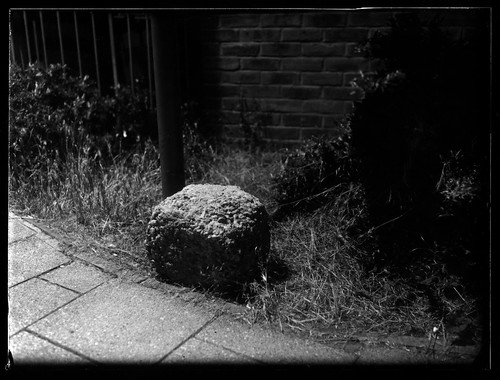
The day after setting up a couple of cameras for the #covidobscura project, I embarked on another series of photographs under the provisional title of 'Quaratine'. Looking for a subject in that fourth week of March, I noticed that the tree outside my window was just coming into leaf: I have been photographing it every day since as spring gives way to summer, the clocks went forward, the evenings get lighter, the full leaves on the tree being followed by blossom, which has now come and gone.
 |
| 'Quarantine', 9x12cm paper negatives, weeks 5-8 |
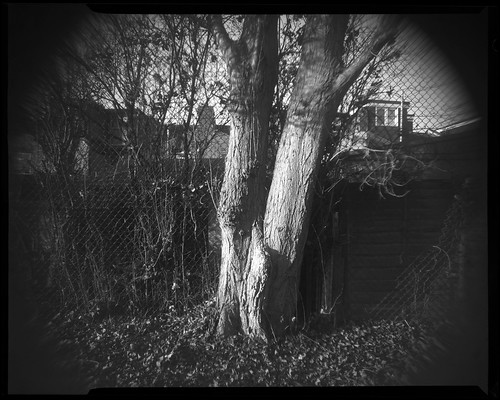
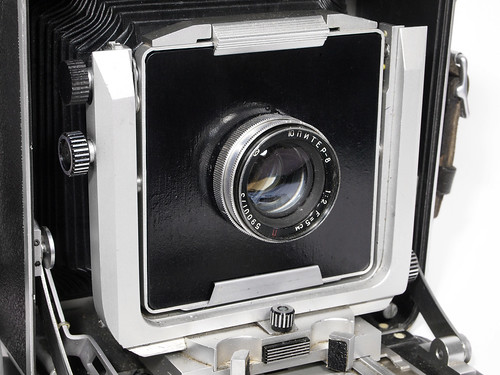
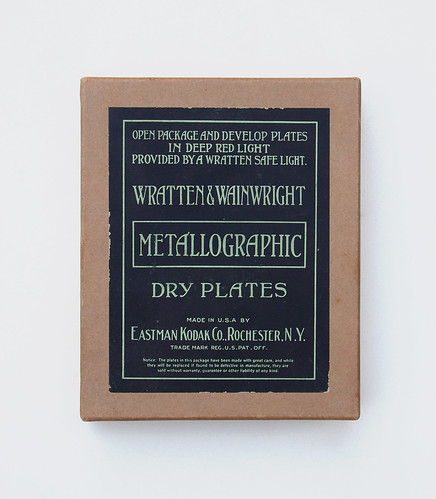
These photographs were shot on photographic paper, with the intention of developing the paper, unlike the #covidobscura images. I used a Rietzschel Heli-Clack 9x12cm large format folding plate camera for these photographs. Prior to the lockdown, I had shot some paper negatives with this camera using the same Ilfospeed paper stock that I'd used for the #covidobscura lumen images. One reason for using this paper was simply that it was 3 1/2 x 5 inches, 8.9x12.7cm, which meant I only needed to cut 7mm from one side of the paper to fit the 9x12cm plateholders (although in the event cutting the paper to 11.9cm fits the film sheathes better).
 |
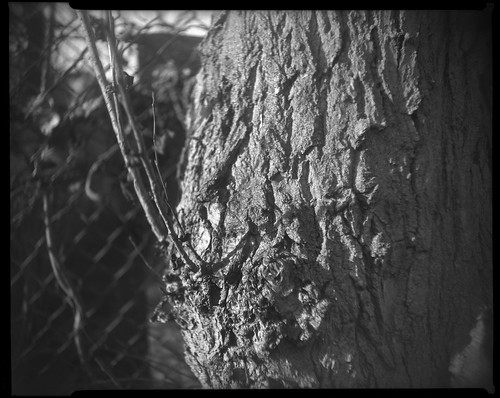
| 'Quarantine', 9x12cm paper negative on Ilfospeed grade 2 RC paper |
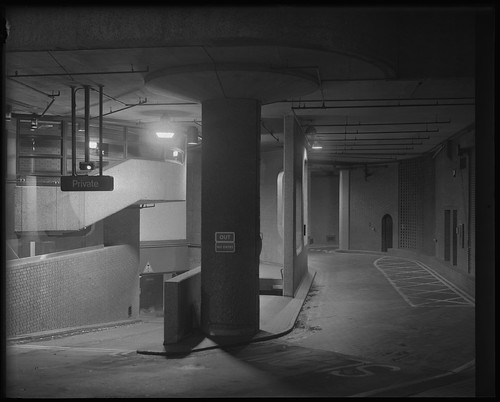
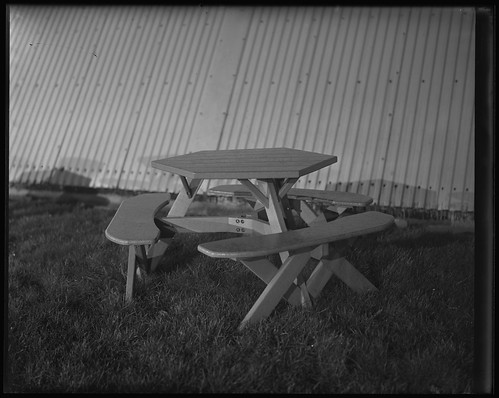
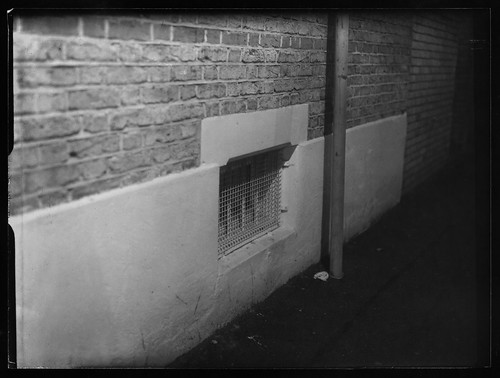
Being grade 2, I shot the Ilfospeed paper rated 6, which gave fairly consistent results without flashing or filtering. The box dates back to the late 1970s, but the only sign of age with the paper appears to be a slight yellowing to the base, which is not unattractive. I decided to take two shots each day, to guard against any mistakes, and providing the opportunity to choose the best of the two; I quickly used up the remaining sheets in the Ilfospeed box. The next photographs were shot on Adox MCP 310 paper. As a variable contrast paper, the results were generally higher in contrast than the grade 2 paper, but the Adox MCP paper does seem to be good at retaining highlight detail, and I shot this at an exposure index of either 10 or 12.
 |
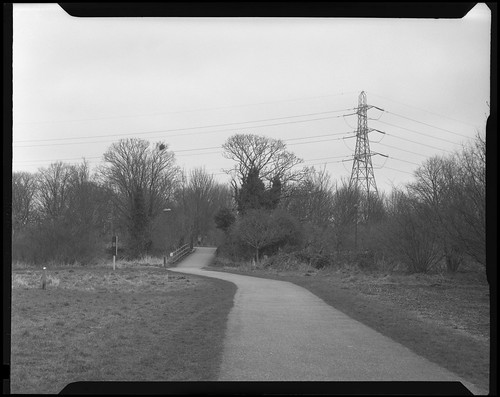
| 'Quarantine', 9x12cm paper negative on Adox MCP 310 RC paper |
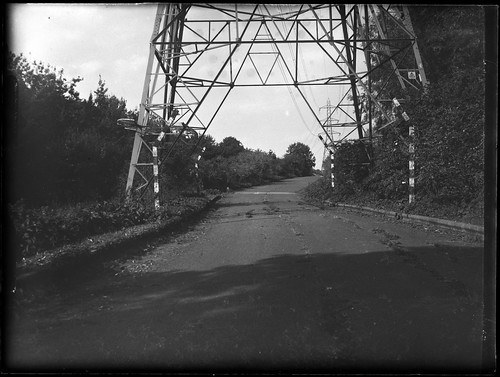
However, the Adox paper was cut down from much larger sheets; this paper has been discontinued from the start of this year and there seemed to be little available online when looking for a replacement as this started to run low. I switched to using Ilford Multigrade IV paper, having bought a box of 8.9x14cm specifically for the project, which, again, needs just one cut to fit the film sheathes. Unlike both the Ilfospeed and Adox papers, I found Multigrade IV to be too high in contrast to use 'straight' in the camera. I made a couple of tests before using this paper for the project, having researched online the different approaches taken to shooting paper negatives. In the lower of the two tests below, the difference a green filter makes is quite marked; the green filter was used as a 'minus-magenta' filter. It would have been possible to use Multigrade filters with the paper to control contrast, but as the high contrast layers in the paper are sensitive to magenta light, using a light green filter worked perfectly well.
 |
| Ilford Multigrade IV RC paper test rated 12/6/3 right to left |
 |
| Ilford Multigrade IV paper test with light green filter rated 12/6/3 (adjusted for filter) right to left |
I developed the paper negatives in Ilford Multigrade paper developer, with dilutions from 1+9 to around 1+30 or even 1+50; I had thought that high dilutions of the developer might also have an affect on the contrast, but this mainly seems to affect developing time. What this does mean is that it was easier to pull paper negatives from the developer early if these appeared to be developing too dark due to overexposure. However, as a general rule, this often showed as uneven development, and in most cases, I achieved more consistent results from allowing development to complete, and attempt to get the best exposure, within practical terms, when shooting the paper.
 |
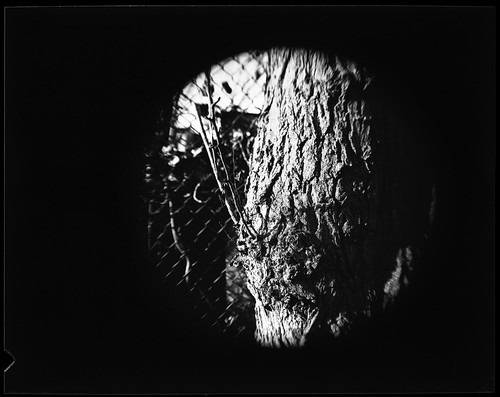
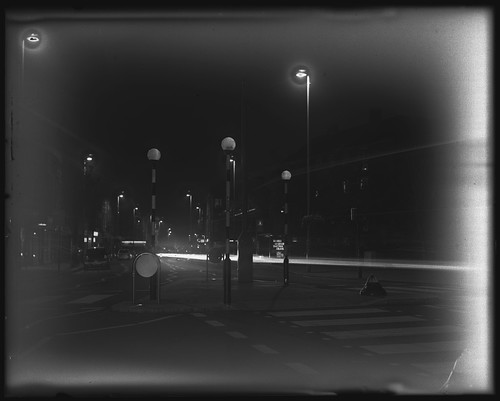
| 'Quarantine', 9x12cm paper negative on Ilford Multigrade IV RC (green filter) |
Initially, I hadn't made any conscious decisions about how these photographs were to be displayed when I began taking them, but after developing the first batch, the quality of the negatives themselves seemed
promising: I liked the
distance as photograph it provides, and it also meant that I could use a direct product of the camera, due to the relatively large negative size and the fact that it was shot on paper. If exhibited, these paper negatives would be presented as grids of images, their number marking the days of confinement and the passing of time evidenced in the changes of the natural world.
 |
| 'Quarantine', 9x12cm paper negative on Ilford Multigrade IV RC (green filter) |
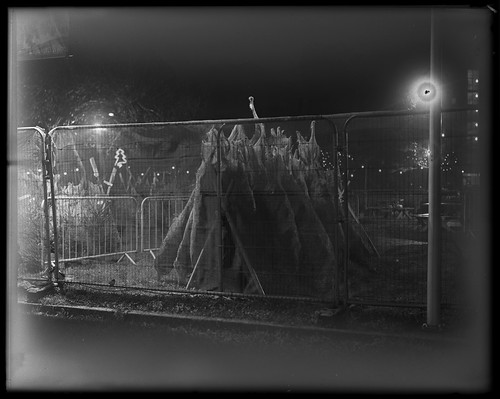
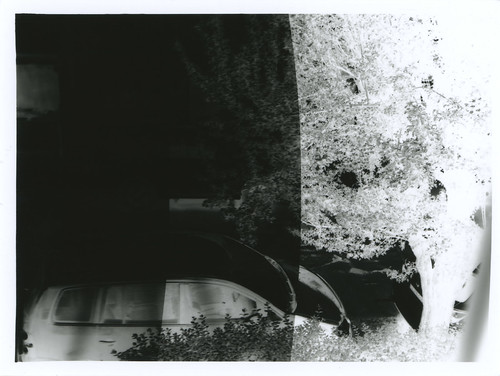
Having decided to show the Quarantine photographs as paper negatives, rather than either make positives by contact printing these, or digital positives, this also affected the way I continued to shoot the paper. Having experimented with 'flashing' some of the paper, I preferred the look of this - although the image above would no doubt work well as a negative to obtain a positive, aesthetically, I find the shadow areas rather 'bright', and so used flashing to bring up the shadow areas, which also helps reduce contrast. I had been keeping a log of all the exposure details of this set of paper negatives, but, frustratingly, the text file I had been adding to every day got corrupted 8 weeks in and I was only able to recover some of the information. It's easy to see the difference between the three papers I used, less easy to see which were flashed, in camera, in the darkroom, or before or after exposure. The image below is, I think, one of the flashed paper negatives: the shadow areas have just a little more density than in the negative above.
 |
| 'Quarantine', 9x12cm paper negative on Ilford Multigrade IV RC (flashed?) |
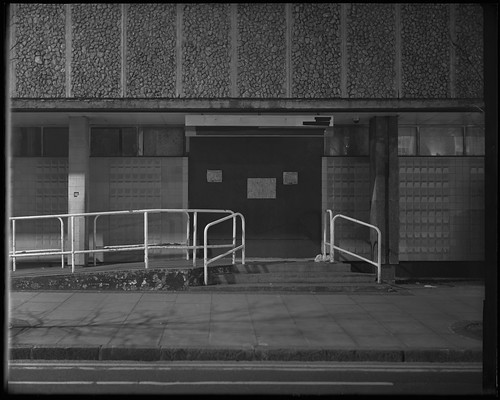
Having spent some time trying to get the best results from the Multigrade paper, I found a couple of boxes of Ilfospeed grade 2 paper online. of a similar vintage to the first box, with which to continue the project for several more weeks. As it was impractical to keep the camera set up on a tripod to take the same shot day after day, week after week, this has forced me to attempt different ways of photographing the subject each day, or, conversely, repeating compositions and framing specifically to show the passing of time. As previously mentioned, the restrictions of movement due to the pandemic have been much less strict in the UK than other countries, although the measures announced on March 23rd did provide a clear start to the 'lockdown'; what's less clear is what might mark the end, and so the end of this particular project. Tomorrow, June 1st, is the beginning of another round of restrictions being eased, but by no means the end of them and so I am inclined to continue with the daily ritual of photographing from my window for the time being.
 |
| 'Quarantine', 9x12cm paper negatives |