Wednesday, 30 October 2013

Air Ministry Plates

Box of Panchromatic Photographic Plates produced for the Air Ministry
In my post Recent Glass Plate Work-part two I mentioned that 5x4 plates don't appear in auctions very often in comparison to other sizes. Since then I've only found one box of 5x4 inch glass plates, but one that's an interesting curiousity. The plates in the sealed box are described simply as 'Plates, Photographic Panchromatic'. The label is printed with the initials 'A. M.' which, with the crown symbol, stands for the Air Ministry; the Air Ministry existed from 1918-1964 before being subsumed into the UK's Ministry of Defence. The box has a maker's identification number ('TE12') which could be used to discover which company made the plates, but this isn't the sort of information that can be readily found on the internet. The date of coating appears to be '12/5/34' (it's just possible that the partially stamped digit is a '5' for '54' but comparing it to the '5' present, it does look like a '3'). These are the oldest securely dated glass plates I have used (the box of Mimosa Porträtyp-Antihalo plates might be older, but are not dated like this box).

As I wasn't expecting much from the plates at this age, I didn't do a test before shooting a couple of plates, on the same night as I shot some more Ilford G.30 Chromatic plates. I stand developed all the plates in Rodinal 1:150 for 1 hour 20 minutes (using the dilution of 1:150 rather than 1:100 in an attempt to keep the contrast of the night scenes down). Having low expectations, I was surprised by the results, which were a little thin, but printable. What was also notable was the backing: on most other plates I've used this washes off during the developing process. I also usually soak the plates in water before stand development for 2-5 minutes, but with the Air Ministry plates, the backing is thick and gelatinous, and during the final wash stage I had to take each plate out of the wash individually and use my fingers to rub away the backing.

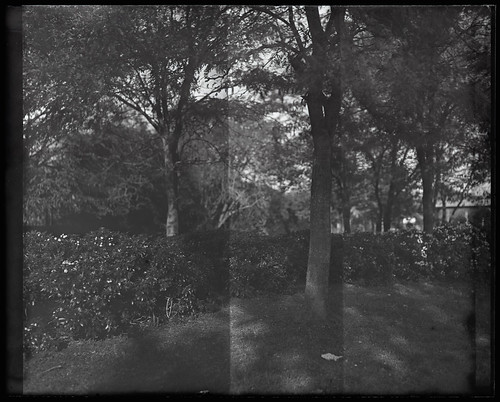
Air Ministry plate, MPP Micro Technical Mk VI with Schneider Kreuznach Xenar 150mm f4.5 lens.
Scan from contact print.
Air Ministry plate, MPP Micro Technical Mk VI with Schneider Kreuznach Xenar 150mm f4.5 lens.
Scan from contact print.
After the initial results, I decided to use one plate to make test exposures in order to determine a working exposure index. The box gives no indication of the original speed of the plates, but comparing the exposures of the first two plates against the results of Ilford G.30 Chromatic plates previously shot, I reckoned the Air Ministry plates to be around half as sensitive.  For the test, I metered the scene at 6 EI, and made three successive exposures on the plate to give 6, 3 and 1.5 exposure indexes. It is a little hard to judge the results, partly as the background fog pulls up the shadow values, at 6 EI there is a lack of shadow detail, but the middle exposure at 3 EI looks to be printable (the image from the plate below is a scan from the negative).

Air Ministry plate test. Three successive exposures at 6 EI.
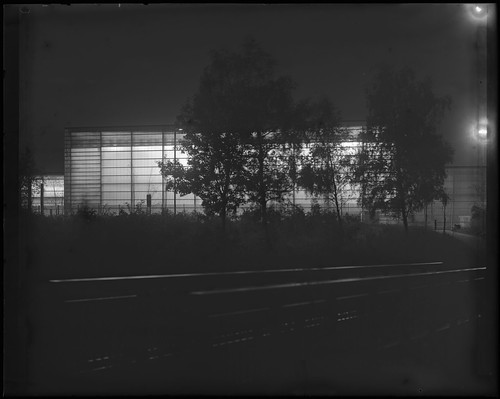
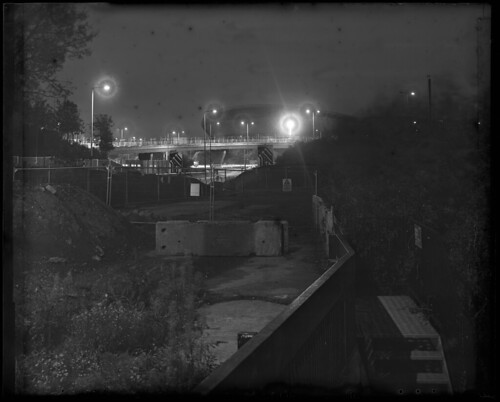
I subsequently shot another couple of the Air Ministry plates at night, choosing for the first plate a difficult subject with the brightly lit building against a foreground which is almost featureless; the second plate, a longer exposure to use a smaller aperture for greater depth of field (18 minutes at f8) shows more effects of age on the plate. Apart from a few spots, all the plates show marks from the cardboard runners holding the edges of the plates in pairs in the wrapping, but generally, for glass plates which might be 79 years old, the results are impressive.

Air Ministry plate, MPP Micro Technical Mk VI with Carl Zeiss Jena Tessar 16.5cm f5.3 lens.

Thursday, 17 October 2013

Ilford FP4 Plus

Ilford FP4 Plus in medium format rollfilm, 35mm and large format sheet film
FP4 Plus is Ilford's fine-grained medium speed complementary to HP5 Plus. Ilford introduced emulsions at different times in different formats, and according to the product index in Silver By The Ton, the earliest emulsion given the name Fine Grain Panchromatic appeared as sheet film in 1930, rated 30 ISO, with rollfilm formats following in 1935, and glass plates in 1937. The name FP4 was first used for glass plates in 1955, with the full name Fine Grain High Speed Panchromatic and a speed rating of 160 ASA (post 1960 revision in film speeds), although according to Photomemorablia this was not the same emulsion as the film version, available from 1968. The rollfilm FP4 emulsion was rated 125 ISO, which it remains to this day in its current 'Plus' iteration, introduced in 1990. (There was also an FP Special glass plate introduced in 1949, with a speed of 80 ASA). FP4 Plus is currently available in 35mm, 120, and numerous sheet film sizes.

In my post on HP5 Plus I wrote that it had been the default black and white film for me at one point, and, partly due to the kind of photographs I used to take, I tended not to use films slower than 400 ISO. This was the case for many years (when I didn't have access to a darkroom I mainly used Ilford XP2), until I returned to developing films myself. Subsequently, using Rodinal as a film developer has led me to be a little more discerning over my choice of the films due to its effects on grain, and, although I still use HP5 often, I started using FP4 around the same time.

FP4 Plus has many characteristics similar to HP5 Plus: although it is slower and finer grained, the film still possesses good latitude, and, as a traditional cubic-type emulsion, it has a similar look. The Ilford FP4 Plus technical information sheet gives a recommended range of meter settings from 50-200; it also gives development times for 'accidental exposure' at 25 and 400 EI with a couple of specific developers (on the Massive Dev Chart, there are ratings from 25-1000 EI, depending on the developer used). I've only developed FP4 Plus with Rodinal, and usually at box speed (although with my Olympus Pen EE3 half frame camera, I like the look of the film with a slight push to 200 EI). Using Rodinal, particularly in 35mm, the results I've usually liked best are those at higher dilutions, mostly at 1:50, but also I particularly like FP4 when stand developed in Rodinal diluted at 1:100. Additionally, I usually develop at sightly lower temperatures than the standard of 20ºC as this also has a bearing on the appearance of grain. With the exception of the first example below (a demonstration print made for a black & white film photography introduction), the rest of the images are scanned from the negatives.

Ilford FP4 Plus (35mm half-frame), rated 200 EI, developed in Rodinal 1:50, 25 minutes at 18ºC.
Scan from print on Ilford MGIV RC.

FP4 Plus (35mm), developed in Rodinal 1:50, 18m30s at 18ºC.
FP4 Plus (35mm), developed in Rodinal 1:25, 10 minutes at 19ºC.
FP4 Plus (6x9 medium format), shot at box speed, developed in Rodinal 1:50, 18m30s at 18ºC.
FP4 Plus (35mm half-frame), shot at 200 EI, developed in Rodinal, 1:50
Grand Palais, Paris; FP4 Plus (6x4.5cm medium format), rated 125 ISO, developed as 200 EI in Rodinal, 1:50, 24m45s at 18ºC


Sources

Silver by the Ton - A History of Ilford Limited 1879-1979, RJ Hercock and GA Jones
www.ilfordphoto.com
http://www.photomemorabilia.co.uk/Ilford/Chronology.html

Friday, 13 September 2013

A visit to the Lubitel Shop

In St Petersburg, visiting Loft Project ETAGI, at the ground floor entrance to the building, there's a shop called Photo Lubitel ('Lubitel' is the name of a Russian-made twin lens reflex camera which was the budget medium format camera of choice when I was at college nearly twenty years ago, and produced by the St Petersburg/Leningrad based factory GOMZ, later renamed LOMO). They have a website, http://b-w-foto.ru/en/, which doesn't have a lot of information in English, as more seems to be on their VKontakte site in Russian (they also have a second shop in St Petersburg, in Bolshi Gostiny Dvor). The shop had lots of FED and Zenit camera bodies, with a bargain bucket of them for 200 roubles apiece, as well as a good general range of secondhand Russian and Eastern Bloc cameras of all types. What caught my eye in one display case was a Kiev subminiature camera with a 350 roubles price ticket. Attempting to ask to see the camera, a boxed Kiev-30M was brought out from under the counter (it looked as though there were many such boxed sets in stock) for 700 roubles, although after trying it out, the advance was rather sticky, so another box was produced, this one for 750 roubles, which seemed to work fine. The first box had three rolls of Svema film inside, and, with the lack of a common language between me and the shop assistant, I bought the second box, and got them to throw in the three rolls of film from the first. Incidentally, the shop looks like a good place to buy film in the city, with a range of 35mm and medium format Foma, Ilford and Kodak films (although I wasn't buying any film, as I didn't use all I'd brought with me as detailed in my previous post).

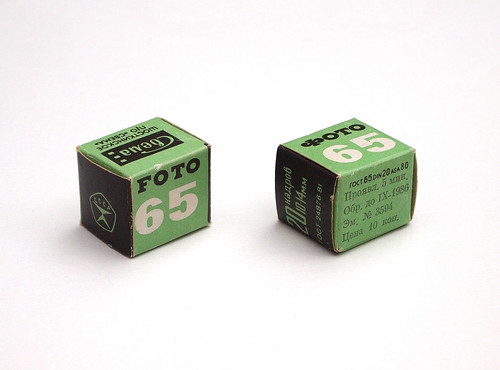
Svema Foto 65 16mm refills

It seemed a shame not to shoot the Kiev-30M with the Svema film in St Petersburg while I was there. Inside the boxes of film, there's a sealed packet of black paper and foil containing a length of unperforated film; without a darkroom to load the film into the cartridges, I had to improvise by using the hotel wardrobe: inside, at night, with the door closed and all the lights off outside, it was dark enough to load the film. I loaded and shot both cartridges. Developing the film, on my initial inspection, it looked as though nothing had come out, but although very heavily fogged, some images were visible (the clearest image, despite heavy scratching, was at the very end of the second film, shot after my return). The best of the frames from St Petersburg are below.

Kiev-30M with expired Svema 64 film
Sources/further reading:
Soviet-era subminiature camera list on Commie Cameras
Kiev-30M variations on Fotoua.com
Kiev-30M on USSRPhoto.com

Saturday, 31 August 2013

Packing A Camera Bag

For a number of years, whenever I've had the good fortune and finances to travel abroad, I've taken more than one film camera to cater for what I want to achieve in my photographs. I did go through a number of trips when I deliberately restricted myself to just one camera, and, eccentrically, chose the Stereocrafters Videon to make stereo shots, but more recently I've always taken a 6x9 folding camera, the perfect combination of portability and negative size for landscape shots (which for a time was my Agfa Record I), and, for 'snapshots', a half-frame camera to get the most out of a roll of 35mm. However, I've since added a 35mm folding camera to my bag for general photography.


On a forthcoming trip to St Petersburg by train and boat, I'm taking three cameras I've written blog posts about: the Zodel Baldalux, Kodak Retina IIa and my Olympus Pen EE3. For film, I am taking: 5 rolls of HP5 Plus medium format; 3 rolls in 35mm; 3 rolls of Ilford Delta 3200 in medium format; Ilford Delta 100, also medium format, 4 rolls; 3 rolls FP4 Plus in 35mm, 1 roll medium format; 2 rolls of Ilfodata HS23; my last roll of Kodak Tech Pan; and some vintage film in 620 format to use in the Zodel Baldalux (which also requires taking a few spare 120 spools, as the 620 spools won't fit in the take up side of the Baldalux), which are: 2 rolls of Verichrome, with 'develop before' dates of October 1948 and May 1949; 1 roll of Verichrome Pan, (March 1986) and 1 roll of Ilford Selochrome (March 1950).

1940s vintage Kodak Verichrome
Although I very rarely shoot colour, I'm also packing a couple of rolls of recently expired Fuji medium format colour film. This may be an excessive amount of film for an eleven day trip. Additional equipment includes: a Weston II lightmeter; a yellow filter to get the most from skies such as in this shot (which happens to be a 32mm push-on filter, which fits the 50mm f2 lens on the Retina, and rather conveniently, the 105mm f4.5 lens on the Baldalux); and gelatin tricolour filters if I want to attempt three-colour composites. I may also take the Mamiya-16 Automatic as it doesn't take up very much space.

Wednesday, 28 August 2013

Mamiya-16 Automatic

Mamiya-16 Automatic
In photography, the term subminiature refers to a class of cameras using a film format smaller than 35mm (as, when introduced, 35mm film was considered a 'miniature' format compared to plates or sheet films). Although subminiature cameras pre-date the second world war, their popularity was greatest in the immediate post-war years, most notably in Japan, with the Hit camera and its various copies. These cameras used 17.5mm film and were generally 'point-and-shoot' types, with a single shutter speed, aperture and fixed focus meniscus lenses. The desire for greater sophistication and control was met with a generation of cameras using 16mm film which emerged in the 1950s and 60s. These cameras were designed around proprietary cassettes or cartridges, which in most cases were incompatible with those of other manufacturers. These various subminiature standards were essentially supplanted by Kodak's 110 format, which utilised paper-backed 16mm film in plastic cartridges. With Kodak behind it, the 110 cartridge became widely adopted, with many manufacturers producing cameras for it.

The Mamiya-16 Automatic was first produced in 1959, and evolved from previous Mamiya-16 subminiature cameras; the 'Automatic' in the name refers to the use of the selenium meter to determine the correct aperture, done manually, but more convenient than the use of hand-held light meters. The inclusion of the meter makes the Mamiya-16 Automatic about half as big again as the preceding models, but it is still only 104mm wide by 32mm high and 48mm deep. The camera is of all-metal construction, and feels reassuringly heavy for its small size: this is a fully featured camera of its day. All the user controls are located on the top plate of the camera, as seen clearly set out in the picture below.

View of the Mamiya-16 Automatic top plate
The camera has a 25mm f2.8 Mamiya-Sekor lens. Focus is by estimating the subject distance which is set on the slider above the camera's name. Framing is done by the bright line viewfinder which folds down when not in use. Many subminiature cameras have a fixed focus lens: the main rival to the Mamiya-16 series seems to have been the Minolta-16 cameras, which were fixed focus, until the last Minolta subminiature model in the 1970s, the QT. As the lens is of short focal length, it has a very good depth of focus, and there's a small circle to indicate the hyperfocal distance between 6ft and infinity. The lens is protected by a sliding cover, which also locks the shutter when closed. Shutter speeds run from 1/200th to 1/5th and B (early production models also have a 1/2th second) and are set in the large wheel in the middle of the top plate. Apertures are selected by rotating the exposure calculator dial using the semi-circular tab. The exposure meter has an ASA range from 10 to 1600 (I believe the fastest film available at the time the Mamiya-16 Automatic was produced would have been Ilford HPS, at 800 ISO, which means the light meter would be designed to allow a one-stop push). As seen in the close up shot below, matching the shutter speed to the selenium meter needle selects the correct aperture, shown in the window directly above the shutter speed dial.

Close up of the meter dial
Other features of the camera include: a built-in filter, which slides over the lens, and can be changed by opening a cover on the underneath; PC socket for flash on the underneath of the camera; a tripod socket on both the bottom plate as well as on the side, located on the accessory shoe, which doubles as a fixing for the camera's wrist strap; and a film reminder above the wind on, with "Color/Black & White/Empty" printed on it.

The original Mamiya-16 camera used two metal cartridges, with the 16mm film travelling from one cartridge on the feed side into a second on the take-up side, meaning that the film doesn't need to be rewound once shot, and the empty supply-side cartridge is then transferred to the take-up chamber. The Mamiya-16 Automatic was designed for a new two chamber cartridge, not dissimilar to that of the 110 format, but the camera was still compatible with the earlier single cartridges. My example of the camera had a two chambered cartridge inside when I bought it, but I also found a pair of original single cartridges for the camera. The two chambered cartridge has spooless supply side, into which 45mm/18 inches film fits, taped to the take up spool in the other side. The Mamiya-16 Automatic's frame counter goes up to 20, but I've found that it's fairly easily to shoot 24 frames in practice, although with a longer length of film it becomes too stiff to advance (as the supply chamber doesn't have a spool, more film will fit into this than the chamber with the spool). Incidentally, the frame counter is not automatically reset when loading/unloading, the manual instructs the user to advance the empty camera to 18, helpfully picked out in red, and after loading, to take two shots to be ready to shoot the film.

Mamiya-16 Cartridges
For the first few test rolls that I shot with the Mamiya-16 Automatic, I used 35mm Rollei ATO 2.1, cut down to 16mm width using a ruler and craft knife, as, due to being orthochromatic, it's easy to do so under a red safelight (also loading the camera under a safelight means not losing the first couple of frames due to exposing the film when loading). I developed the film by taping it, emulsion side outwards, to some unwanted 35mm film and used standard Paterson spirals and tanks to process the film (dedicated 16mm tanks for subminiature cameras were produced, but without one this is the easiest way to develop the film, although I did have to untape it from the 35mm film to fully wash out the antihalation backing once developed and fixed).

Rollei ATO 2.1 (scan from print)
I was disappointed with the quality of the results of scanning my first negatives, as the flatbed scanner I was using is not quite capable of resolving the fine detail of the film; this is much less noticeable in larger formats of course. I made some prints on Ilford MG paper instead from some of the negatives of the first couple of films shot in the Mamiya-16 Automatic (I rarely print my photographs these days, almost all the images on this blog and my Flickr photostream are scanned from the negatives for convenience). One of the things that I wanted to do with the first couple of films I shot was to test the camera's ability to focus down to 1 foot. To do so, I photographed a page from a type catalogue, seen below, and measured the distance to the film plane indicator on the camera with a ruler for accuracy, necessary for close focus. The type size at the top of the page is 6pt; with close focus, there is considerable parallax error, and although there are marks in the finder to indicate this, it's a good idea to make sure the important parts of the composition are in the lower right portion of the viewfinder: in my shot of the type catalogue I had thought that the top of the page with the name of the typeface was included (Garamond, incidentally). This ability to close focus the Mamiya-16 Automatic also just happens to tally with the association of subminiature cameras to espionage in the popular imagination: as well as being small enough for easy concealment, it's also perfect for copying plans and documents.

Rollei ATO 2.1 (scanned from print)
Rollei ATO 2.1 (scanned from negative)
Having successfully shot a few rolls of the cut down Rollei ATO 2.1 film, I bought some 16mm film to use in the camera, not wanting to rely on being able to cut film to the correct width in the darkroom. 16mm film is still widely available, thanks to the format being used for movie cameras. For motion picture purposes, 16mm film comes in a number of lengths, the shortest being 100ft/30.5m, and it's available unperforated, and single and double perforated. When using single perforated 16mm, it's advisable to ensure the perforations run at the top of the images, as there's a wider rebate to the negatives at the top, which leads me to think that the camera was designed to accept single perforated film, although the perforations aren't used to advance the frames. As the image projected inside the camera is reversed top-to-bottom, in practice this means the perforated edge is nearest to the bottom plate. In the plastic two chambered cartridge, the perforated edge runs next to the plastic bridge between the two chambers. 

Kodak WL Surveillance 2210 film
From a well-known online auction site, I purchased a roll of 16mm Kodak WL Surveillance 2210 film, a fast film with wide exposure latitude. Even accounting for plenty of wastage, 100ft of film should provide well over 50 cartridges of film, making each very cheap (I paid £15.50 for the film). I rated the film at 400, and stand developed it in Rodinal 1:100 for one hour. The first test of the WL Surveillance film was largely spoilt by a light leak thanks to the top cap of the plastic cassette staying in the camera body when I pulled the cartridge out, a reminder to be more careful to put tape around the caps to hold these in place. By contrast, the metal cassettes have ball locks on the caps on either end, as well as being heavier, so they drop out of the camera with greater ease.

Kodak WL Surveillance film
The results from the Kodak WL Surveillance film inevitably display more pronounced grain than the Rollei ATO film, but the film's faster speed, latitude and longer tonal scale balance this for purposes of ease of use. As is common to subminiature cameras as a format, the ratio of a small frame size to the size of film grain and its resolving power is large determinant of subminiature image quality. However, these cameras were made with portability and economy of film as priorities, long before the emergence of compact 35mm cameras such as the Minox 35 removed one of their chief attractions.  Using 16mm subminiature cameras today, the main stumbling block is not the availability of film, but the different cassettes for each brand of camera: compared to the Mamiya-16 series, the Minolta-16 cameras appear less scarce and also had the dubious honour of having an Eastern Bloc copy, the Kiev Vega (it strikes me that making new proprietary cassettes could be one niche the much-forecasted 3D printer revolution could be good for). 16mm subminiature cameras also retain an advantage over the 110 format in the fact that, although the 110 cartridge also uses 16mm film, it has its own arrangement of perforations, and it's much more difficult replicate this as opposed to using 16mm film or cutting down other sizes.

Sources/further reading:

Mamiya-16 Automatic on Camera-Wiki
Mamiya-16 review on Dominic's Classic Cameras
Mamiya-16 cameras on Submin.com
The Subclub page on the Mamiya-16 Automatic

Friday, 9 August 2013

A box of vintage plates and paper

In my post 'Recent Glass Plate Work - part one', I speculated that vintage photographic plates are a finite resource. The size of this resource is a great unknown, and I mentioned in that post that boxes of glass plates appear frequently in online auctions, generally singularly, or sometimes in two or three. However, a recent successful bid yielded a box worth of vintage plates, films and papers - exceptional enough to write a post about - which arrived yesterday and should keep me in glass plates, along with those I already have, for several months. Dating the contents from the label designs of the various boxes, most of the plates are from the 1940s to 50s (it's possible some may be from the 1930s); the flashbulbs are from the 60s.


The contents in full:
  • 2 boxes of Kodak P1200 Super Panchro-Press plates (3 1/4 x 4 1/4 inch), one sealed, one with the handwritten note: "4 Good Plates".
  • 1 box of Kodak O800 Super Speed Orthochromatic plates (3 1/4 x 4 1/4 inch), sealed.
  • 1 box of Kodak P300 Rapid Panchromatic plates (3 1/4 x 4 1/4 inch), with "2 New fil. 14/63" written on the box lid.
  • 5 boxes of Ilford Soft Gradation Panchromatic plates (3 1/4 x 4 1/4 inch), four boxes with the 'paddle steamer' trademark, (1940s), three  boxes sealed, one with "6 new" written on the label. One box, previously opened with R.10 label (late 1940s-1950s). One box in 6.5x9cm size, with R.10 label.
  • 3 boxes of H.P.3 plates (all previously opened), two with 1950s labels, one 3 1/4 x 4 1/4 inch, one 4 1/3 x 6 1/2. One box with 'paddle steamer' trademark, stereo plates 6x13cm (?) size.
  • 4 boxes of Ilford film, all 3 1/4 x 4 1/4 inch size, all previously opened. Two H.P.3, one with paddle steamer trademark, one without; one F.P.3; one Selochrome with paddle steamer trademark.
  • 11 boxes, all unopened, of unbranded Normal Glossy bromide paper (100 sheets) 3 1/2 x 5 1/2 inches.
  • 1 box Ilford Bromide Postcard paper, previously opened, with paddle steamer trademark.
  • 1 packet Ilford Bromide Photographic Paper, 25 sheets, unopened, 3 1/2 x 5 1/2 inches.
  • 2 packets Ilford Bromide Photographic Paper, 25 sheets, one unopened, one opened, 8 x 10 inches.
  • 1 box Kodak Bromide WGS. 1. S. Photographic Paper, 50 sheets, previously opened, 8 x10 inches.
  • 1 box Ilford Dark Room Safelights, 7x5 inches, the label on the box ("Variety S For Lantern Plates, Bromide Plastika and Multigrade Paper.") printed with 'J 44' (October 1944); inside one red, one green with a Kodak 'Wratten' 0A label.
  • 1 box Sylvania AG3b flashbulbs.
  • 1 Chelico film splicer.
  • 2 manuals: Minolta Autocord and Walzflex M-500 TLR cameras.

Thursday, 25 July 2013

127 Day July 2013

Stairs Down, Baby Ikonta, Efke R100
For this summer's 127 Day a couple of weeks ago, I had one roll of Efke R100 left, the last new roll of 127 film. With production of 127 format film ending last year, I also shot some 35mm Rollei ATO 2.1, cut and rolled with backing paper I'd been keeping from all the 127 film I've used previously. As I mentioned in my previous post, for pictorial contrast, I pre-exposed some of the ATO film to raise the shadow values in an attempt to lower the film's innate contrast. As ATO is orthochromatic, it was a simple matter to cut the appropriate length of film and tape it to the backing paper under a red safelight. The images that result are cropped from the full frame size and include the sprocket holes, not a look I'm generally that keen on, but the convenience of using 35mm film in this way meant I could take more shots on the day.

Beckton Alp, Baby Ikonta, Rollei ATO 2.1 with pre-exposure
I used my Baby Ikonta camera, and also the Foth Derby (although I have yet to develop the film from it, so the images illustrating this post are all from the Baby Ikonta). I took the Greenway from Old Ford Lock to Beckton, to the Beckton Alp (or Alps), a mound of contaminated waste from the gasworks which featured a dry ski slope where I once learned to ski. The dry ski slope was removed some years ago, and the hill is derelict, the viewing platform at the peak having been removed, and it is essentially closed to public access, although I found a gap in the fence where a gate was missing, and the graffiti, litter and fire damage to the remaining wooden structures suggest it is frequently visited. Reputedly the largest artificial hill in London, the views from the top are panoramic.

Remains of the Dry Ski Slope, Baby Ikonta, Rollei ATO 2.1 with pre-exposure
Beckton Retail Park, Baby Ikonta, Rollei ATO 2.1 with pre-exposure
The Greenway, Baby Ikonta, Rollei ATO 2.1 (no pre-exposure)