Thursday, 30 January 2014

Plaubel Roll-Op II

Plaubel Roll-Op II (6x4.5cm version)
Plaubel was one of the many German camera manufacturers started in the early 20th century. The company made their name with the iconic Makina, a strut-folding camera for plates and sheet film which went through many iterations over half a century. Plaubel was then sold to a Japanese buyer which produced medium format rangefinder cameras under the Makina name, which now command high prices secondhand.

The Roll-Op was Plaubel's more conventional medium format folding camera, a cheaper alternative to the Makina. There were both 6x6cm and 6x4.5cm versions. The camera's name is sometimes written 'Rollop', although on the camera itself the leather is imprinted 'Roll-Op' (this advert shows it written 'Rollop', so the name's different constructions seem to have been used interchangeably; there was a completely different camera by Lipca named the 'Rollop'). The Roll-Op article on Camera-wiki describes the original model with a reference to McKeown's, but the only examples of the camera that appear online are those of the second model, the rangefinder Roll-Op II. The camera body is actually that of the Balda Baldax with the rangefinder and lens assembly added by Plaubel. The rangefinder itself, the Plaubel Telemeter, comes from the Makina, and is coupled to the lens, which is unit focused.

For a folding camera from the mid-1930s, the Roll-Op's distinctive features are its automatic frame counter, rangefinder, and the fast 75mm f2.8 Anticomar lens. The automatic frame finder is the same design that Plaubel used for medium format roll-film backs (seen here on Early Photography). This requires the first frame number to be lined up with the red window on the back of the camera manually, and the frame counter on the body turned to '1'. After each exposure, the pivoting lever has to be released to advance the film, and the lever then catches a notch to stop the film at the required distance for the next frame. As the advance is not linked to the shutter, and the catch has to be released after each frame, it feels more like a 'semi-automatic' operation, essentially removing the need to watch for the frame numbers in the red window while advancing the film.


Plaubel Roll-Op II, showing frame counter
The rangefinder is coupled to the lens with unit focus and is a split window type, showing a limited angle of view, essentially cropped, due to the way the rangefinder is constructed: there are no lenses in its construction, only two mirrors, meaning that the split image is not reduced but life-size. There is a separate telescopic viewfinder positioned next to the rangefinder window which shows the lens' true angle of view. In operation, the rangefinder is used to accurately focus the lens, then the viewfinder window is used to compose the shot, which makes using the rangefinder slower than more modern types with a beamsplitter where the rangefinder image is superimposed inside the viewfinder.

75mm f2.8 Anticomar lens, in Compur shutter
The Anticomar lens used on the Roll-Op is the same lens as that developed for Plaubel's Makina. Important for me was that the f2.8 Anticomar was fast for a 1930s' medium format camera (most of my other medium format folding cameras have f4.5 lenses), which makes the Roll-Op better for hand-held low-light situations. There are differing views of the Anticomar, a four-element Tessar-type, which seems to have qualities typical of 1930s lens. In the example immediately below, shot on Ilford Delta 100, the image is acceptably sharp, but with a suggestion of flare from the bright sunlight patch of wall in the centre of the image, and a falling off of focus towards the edges of the frame (the view of rooftops lower down may be a better image from the lens stopped down further). However, with the aperture wide open, the image is relatively soft, as seen in the second image below. I've read somewhere online, in a reference that I cannot now find, that the Anticomar lens was designed to be soft when wide open for portraiture, to achieve the soft focus look popular in the 1930s. This may be just an apocryphal theory to excuse the Anticomar's shortcomings.

Plaubel Roll-Op II with Ilford Delta 100
Plaubel Roll-Op II with Fomapan 400
Although the Roll-Op is a fairly solid camera with the weight to match, I managed to break the advance mechanism twice, the first time almost immediately after I'd loaded the first roll of film into the camera. I lost the advance knob while boarding a train: I'd had the camera over one shoulder and the knob may have been loose, and knocking it against the back of a train seat was enough. It was still possible to advance the film, but hard on the nails to turn the small square-section peg that the advance knob would have been fixed to. However, I needed needle-nosed pliers to pull this out in order to remove the film from the camera once shot. Some months later, the shell of a Roll-Op without lens or rangefinder appeared on a well-known auction site, and as this had the original advance knob, I was able to use this to repair my camera. Around a year later, I dropped the camera, and the advance knob simply sheared off this time, so, reluctantly, I sold on the broken camera for repair.

Plaubel Roll-Op II with Fomapan 400
Plaubel Roll-Op II, with Fomapan 400
Plaubel Roll-Op II with Ilford Delta 3200

Sources/further reading:
Plaubel Roll-Op on Camera-wiki
Roll-Op II on Early Photography
Plaubel company history on J. Noir's Classic Cameras

Friday, 20 December 2013

Twenty Years Since

Twenty years ago I received my first SLR camera, a secondhand Praktica BC1, as a Christmas present. I'd had a Halina point-and-shoot camera for three or four years, which, although I used it avidly, provided fairly indifferent results. At the time, Prakticas were much cheaper than any other secondhand SLR cameras (I don't recall seeing Zenits around then) and the price differential was greater than it is now. What had provoked the desire for an SLR camera was, as a student at the time, a couple of months earlier I'd had a basic introduction to photography as part of my Foundation course in art and design.

For this introduction to photography, I shared a camera and a roll of film with four other students. I was first to have the camera and shot five full frames on the start of the roll of film. I did write notes in my sketchbook at the time, but did not make a note of either the camera used (a manual SLR, possibly a Pentax K1000) or the film (Fuji 400-PR in the rebate), or the developer (probably ID11). The photographs were shot during my lunchbreak before I handed the camera to the next student to use it. When thinking about writing this post, I couldn't remember the details of this introduction, but as I kept a diary at the time I've been able to look back at it. I had forgotten was that I was the demonstrator for the rest of the students: the photography technician had his arm in a sling, so I had to sit at the front of the class and demonstrate how to load film on a developing spiral, then load the film into a developing tank in the dark, and finally develop it while the technician explained the stages involved.

Sketchbook page, October 1993
I suspect the reason I was chosen to be the demonstrator that day was three years earlier, as part of GSCE Modular science, in a module on photography we shot and developed a roll of film with the basic darkroom we had at school. For the GCSE project, we used a rangefinder camera, and I particularly remember the rangefinder spot as a diamond, and that it seemed an arcane way to focus. I haven't been able to find the original negatives from 23 years ago, but I did later make a contact sheet (below), which shows that the film was Ilford HP5- before the 'Plus' version which was launched in 1989. I don't recall the results impressing me very much at the time, but it's possible that I retained enough of what we had done then to pick me out to demonstrate to the other students three years later.

GCSE Modular Science contact sheet from 1990
I kept my first prints from the Foundation course introduction in the sketchbook. From those precious five negatives, I printed three of them during the afternoon of the introduction, and below is the first print I made. I wrote in my diary that I was 'almost impressed' by my results and that I would 'definitely do more photography'.

Sketchbook page with my first print
The first black and white film that I shot and developed with the Praktica BC1 (actually the second film through the camera, the first had been a colour film to document a college project set over the holiday) was also for a college project. We had been given an number of words to make work in response to, and two of these that I chose were 'form' and 'analysis'. For 'form' I took a number of photographs of torsos of Greek sculpture in the British Museum and contrasted these with the trunks of trees (new scans of the negatives below). 'Analysis' gave me an opportunity to take photographs of housing being demolished along the route of the M11 link road (now the A12), which I passed on the Central Line while travelling to college every day. I continued to take photographs along the route for the rest of my course, and have collected these together as the M11 Link Road Archive.

Tree study, Praktica BC1 with Ilford HP5 Plus
Torso, Praktica BC1 with Ilford HP5 Plus
The Praktica BC1 didn't last very long: the shutter got stuck after four months, and it wasn't worth repairing (the camera cost £50, and I was quoted £60 to repair it), but I was able to buy a new body, a BCA, for £26 and keep the original 50mm lens. I used the Praktica BCA all through my following degree course and afterwards, until I bought a Canon A-1 when I first began to make some money from commissions and selling work a few years after leaving college.

Monday, 9 December 2013

127 Day - Winter 2013

Canalside Properties, Baby Ikonta, Ilford FP4
For last Saturday's 127 Day, I retraced my steps from last year, walking around the perimeter of the London 2012 Olympic Park. On this year's July 127 Day, I had used the last of my 'new' 127 format films, and also shot 35mm film cut and rolled to 127 backing paper. Since then, I'd bought a couple of expired films, one roll of Macophot UP 100 with a "develop before" date of 1/2004, and a roll of Ilford FP4 from December 1976. I had previously used 127 FP4 with a similar date with good results two years ago. I also had a roll of 828 Verichrome Pan (with a develop before date of August 1977) which I had removed from its backing paper and backed with 127 paper. 828 was one of Kodak's numerous film formats from the early 20th century, and was made well into the 1980s; the format uses unperforated 35mm film. I'd used old Verichrome Pan on a few occasions before, with mixed results. All three films were shot with the Baby Ikonta. The FP4 and Verichrome Pan films were stand developed, while the Macophot UP 100 film was developed according to the Massive Dev Chart recommendations. Of the three films, the FP4 was clearly the best, despite being the oldest film. Other than some pinholing, the film probably could have been shot at box speed, rather than at 50, which was what I rated all three films at to compensate for age.

Car Park, Baby Ikonta, Macophot UP 100
Drapers Field, Baby Ikonta, Macophot UP 100
The Macophot UP 100 had noticeably more fog, and a patterning which appears to have come from the backing paper: while hanging up after developing, I could also see the numbering from the backing paper, but this cleared on drying (this has been a manufacturing problem with a number of films in recent years). Additionally, both the Macophot UP 100 and Verichrome Pan films both had a very pronounced curl, while the FP4 was no worse than 120 film would be.

Verichrome Pan
The Verichrome Pan film had a patterning from the backing paper showing rather more than on the Macophot film and also suffered a little from light leaks. As 828 film is fairly short, this provided 12 images on the film rather than the 16 or 17 frames from conventional 127 film; the image above is from the very end of the roll with holes from the film clip for hanging.

At the end of the day, to finish the Ilford FP4 film, I returned to shoot a couple of the night photographs from two years ago, although I couldn't exactly match the second image below due to continuing work around London's Olympic site.

London 2012 Olympic Park, Baby Ikonta, Ilford FP4
A106 Eastway, Baby Ikonta, Ilford FP4

Sunday, 8 December 2013

Welta Weltini II

Weltini II with f2.8 50mm Schneider Kreuznach Xenar lens in Compur shutter
When Kodak introduced the daylight-loading 35mm cartridge in 1934 it helped to popularise the use of 35mm film for still photography. Many camera manufacturers soon produced cameras inspired by Kodak's Retina, the first camera designed for the 35mm cartridge. As the Retina was designed and built in Germany by the Nagel cameraworks in Stuttgart (acquired by Kodak in 1931), it is perhaps unsurprising that many of the early 35mm cameras inspired by the Retina were produced by Nagel's German competitors such as Certo, Balda and Welta.

Welta's 35mm cameras closely follow the development of the Retina. The first Retina model was scale-focused but was soon followed in 1936 by the Retina II, a rangefinder version. A year behind Kodak AG, Welta brought out the scale-focused 35mm Welti in 1935, and a rangefinder version, called the Weltini, in 1937. My Weltini is the second version, which although not given a different name by the manufacturers, is generally referred to as the Weltini II to distinguish the camera from the original model. The Weltini cameras were closely based on the Welti, and used the some of the same components, notably the body itself, a design decision undertaken for the economics of production. As a result of fitting the rangefinder to the Welti body, the camera is in essence turned upside down, meaning the Weltini opens from the opposite side, the advance and rewind knobs are on the camera's bottom plate, the shutter release is on the left, and the film runs left to right inside the camera (which means that the negatives read right to left in sequence, in reverse to most 35mm cameras). The left-handedness of the Weltini also seems to extend to the frame counter reset and rewind release, small levers on the back of the camera most easily operated with the thumb of the left hand. The Weltini II greatly redesigned the first version's 'bolted on' look, streamlining the whole top plate (providing space for a depth of field scale), reducing the bottom plate's profile. Some minor changes to the Weltini II also occurred during production: the body release was redesigned, the stand for vertical images was changed to fold in the other direction and the shutter release was given a sharper rim. The picture below shows the Weltini next to a Weltix, a cheaper version of the Welti.

Welta Weltix (left) and Weltini
My Weltini came with a non-working shutter, a Compur-Rapid which had the cable release socket missing, so presumably had been used to donate components to repair another shutter. I subsequently bought the Weltix camera which had a working Compur shutter with a Steinheil Cassar f2.9 lens. The Weltini had a Schneider Kreuznach Xenar f2.8 lens with a rather neat serial number: 120000 (dating it to December 1937). My intention was to simply swap the shutters, but I soon discovered that although similar, the linkages to the shutter release are different, which meant that simply replacing the non-working Compur-Rapid with the Compur shutter would mean having to use the Weltini with a cable release, or just tripping the release lever where the linkage is attached to the shutter - not uncommon to cameras from the first half of the 20th century - but the bottom folding strut is positioned just in the right place to make this difficult.

As a result of having to open the shutters and forcibly remove the linkage and release mechanism from the rest of the components (best left to those with more experience), in my clumsy attempt to put the shutters back together I didn't do a very good job on the Compur - although not tested for accuracy, the only speeds that sound near to being accurate are at 1/100th and 1/300th, which, although the Weltini camera is now working, does limit its use.

Weltini II, showing advance and rewind knobs.
The advance release button is just discernible against the gunmetal where the paint is worn away.
Having shot some film in the camera, with all the constraints of the shutter speeds taken into consideration, the Weltini is undeniably awkward in use. The nearest comparison I can make is to my Kodak Retina IIa, although it's not a fair one as the Retina IIa is a later camera, evolved from the original and contemporary Retina II rangefinder. However, thanks to the Weltini's construction, operation of the camera isn't all that smooth, mainly due to the advance knob being on the underside of the camera. There is small flat button under the lens which releases the film advance for each frame (this interlock requires the sprockets inside to be turned, either with film or manually), and when in the Weltini's ever-ready case, which has parts cut out specifically to use these controls, they are quite small and not instinctively easy to access. To add to this, the advance lever feels like it should naturally turn in the other direction than it does. One advance over the Retina is that the Weltini has a lever which resets the focus of the lens to infinity automatically while closing, and closed, the elegant design of the Weltini II's rangefinder housing and low profile advance and rewind knobs do make for a fairly smooth, if heavy, pocketable camera. For its aesthetics, I wanted to like the Weltini more than I did. Perhaps a left-handed photographer would find the Weltini II a more instinctive fit.

Sample image from Weltini II on Ilford FP4
Sample image from Weltini II on Ilford Ilfodata HS23

Sample image from Weltini II on Ilford Mark V Motion Picture film
Sources/further reading:
http://camera-wiki.org/wiki/Weltini

http://galactinus.net/vilva/retro/weltini2.html 
http://rick_oleson.tripod.com/index-174.html

Wednesday, 13 November 2013

Rollei RPX 400

Rollei RPX 400 in medium format and 35mm
In my post Two Years On, I attempted to sum up the current state of black & white film production, and mentioned the wide range from Maco under the Rollei brand. I used Rollei RPX 400 for this year's 'Take Your Box Camera To Work Day' day, and as it performed well in my very basic Lumiere Scoutbox, especially in comparison with the Fomapan 400 I also used on the day, it seemed worth further investigation. I'd bought the RPX films in medium format before, in both 100 and 400 speeds, partly due to being cheap, although there are very few stockists in the UK. Discussions on internet forums around whether the RPX films are Kentmere films repackaged by Maco have elicited the information that RPX films are coated for Maco by Harman, Ilford's parent company which manufactures the Kentmere 100 and 400 budget films (see this discussion on APUG). The limited availability of the RPX films in the UK provokes the question as to whether there is some agreement over the markets for these films - notably, this page at AG Photographic redirects from RPX to Kentmere for 35mm films.

Medium format (6x9) developed in Rodinal 1:25, 9min45s at 18ºC
At the time of writing, West End Cameras is one of the few stockists of RPX films in the UK, priced at £4 a 36-exposure roll (by comparison, on the same site Kentmere 400 is £4.50; at other stockists Kentmere goes for: Silverprint £3.61; Firstcall £2.99; edit 20/2/14: Silverprint are now stocking the range of RPX films, with both RPX 400 and RPX 100 retailing at £3.60). From Macodirect, RPX 400 is €6.45 for a 35mm twin pack, which, at current exchange rates is roughly £2.75 per film. Obviously shipping from the continent is higher than UK postage; at these prices it makes sense to buy in bulk. In medium format, West End Cameras sells RPX 400 at £4.00 per roll, while from Macodirect it's €3.46, or a pack of five rolls for €16.67. (A further distinction between the two brands is that the Kentmere films are only available in 35mm, unlike the RPX films). For this post I'm only looking at RPX 400, but it would be instructive to compare the two films side by side.

Rollei RPX 400 latitude test contact sheet
Having had good results from the medium format Rollei RPX 400 I'd used previously, I decided to make some tests in 35mm. For the first roll, I tested for the film's latitude. On the contact sheet above, the first six frames are rated, left to right, 200-400-800-1600-3200-6400; the next six frames in the second row run 100-200-400-800-1600-3200; the third row was all shot at 400. The film was developed in Rodinal 1+25 for 8 minutes at 20ºC, the manufacturer's recommended time for RPX 400 at box speed. The results appear to show that the film has a good working range of latitude, although as the tests were shot in good light, a more rigorous approach would also test for latitude in poor light where I'd expect the results not to be as good.

Rollei RPX 400 at box speed, developed in Rodinal 1+25, 8 minutes at 20ºC
The next tests were to push process the film. The ability to push a film must be directly related to its latitude, as push processing is simply underexposing and then overdeveloping to compensate. I shot a second roll at 800. With Rodinal, Maco's only recommended times are for RPX 400 at box speed, while the Massive Dev Chart gives times for 400 and 800 EI in Rodinal. At 800 the Masssive Dev Chart recommends 10 minutes using a dilution of 1+50 at 22ºC; as Rodinal seems to work better at lower temperatures, I used the same time, but diluted 1+25 at 20ºC.

Rollei RPX 400, rated 800 EI, developed in Rodinal 1+25, 10 minutes at 20ºC
I also shot two rolls shot at 1600 EI. With no recommendations for developing RPX 400 in Rodinal at this rating, I extrapolated from the times given for other developers. For the first of two rolls rated 1600, I developed this in Rodinal diluted 1:25 for 14 minutes at 20ºC. As an alternative method for the second roll at 1600, I used stand development with Rodinal diluted 1+150 for three hours. This was based on the good results I'd had with HP5 Plus at 1600. The benefit of using stand development with highly dilute Rodinal is, in theory, lower contrast thanks to the compensating effect, thus countering the inevitable higher contrast inherent in push processing. The film stand developed in this way appeared to bear this out when compared with the film developed more conventionally at 1+25, although the scans below have lessened the difference, and this is more easily seen from examining the negatives.

Rollei RPX 400, rated 1600 EI, developed in Rodinal 1+25, 14m at 20ºC
Rollei RPX 400, rated 1600 EI, stand developed in Rodinal 1+150 for 3 hours
The reasons I'd originally used Rollei RPX 400 and 100 were to do with finding an alternative to the Fomapan films at a similar low price. Having taken the time to do some basic tests, the results show RPX 400 performing very well. Fomapan 400 does have a certain characteristic look that I do like, but the reason for buying Foma films has always been price. Foma also credit their 400 speed film with excellent latitude, but I have not found this to be the case when developing with Rodinal, and certainly when using a box camera with limited exposure controls -or none at all- latitude is very important (see the Massive Dev Chart's 400 ISO film test, where Fomapan appears worst in the latitude comparison). For a recent entry into the black and white film market, Rollei RPX 400 is a very welcome one, especially as it's available in both 35mm and medium format. The film has the look of a traditional cubic-type emulsion, and is quite fine-grained for its speed, in part due to the distinct softness of the grain, which also gives a smooth silvery quality to its tonality, and RPX 400 is a much better film than one might expect from its price.

Rollei RPX 400 at box speed, developed in Rodinal 1+25, 8 minutes at 20ºC
Rollei RPX 400, rated 1600 EI, stand developed in Rodinal 1+150 for 3 hours
Rollei RPX 400, medium format (6x9)
Rollei RPX 400, medium format (6x4.5) developed in Rodinal 1+50
Rollei RPX 400, medium format (6x4.5)

Saturday, 9 November 2013

Found Glass Plates

Closer inspection of the numerous boxes that I posted about as 'A box of vintage plates and paper', I found that two of the unsealed boxes had developed plates inside. One of the quarter-plate HP3 boxes contained fifteen plates, which I've scanned and posted to Flickr. The images revolve around mid-twentieth century outdoor life: mostly photographs of fish, either hanging or arranged by a gravel path, alone, or being displayed by (presumably) the proud fisherman, badly framed, and a girl in what looks like a night-dress. Then there are a couple of plates of a fallen tree, and also one apiece of a young boy, and an older man, each holding an axe over what appears to be a different fallen tree, and then two plates, one out of focus, the other with camera shake, of a man in a power boat.


See the complete set here.

Wednesday, 30 October 2013

Air Ministry Plates

Box of Panchromatic Photographic Plates produced for the Air Ministry
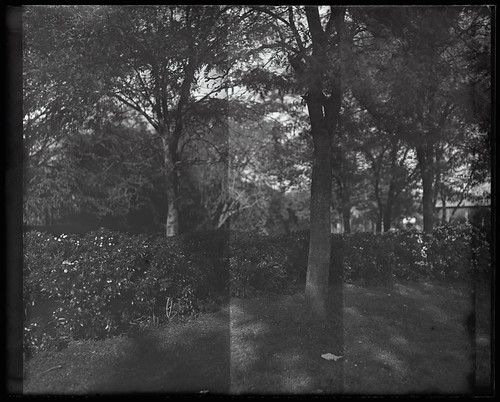
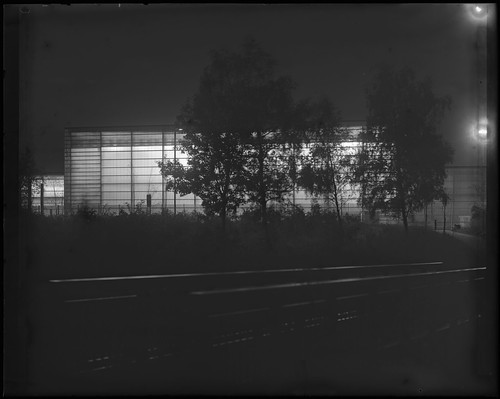
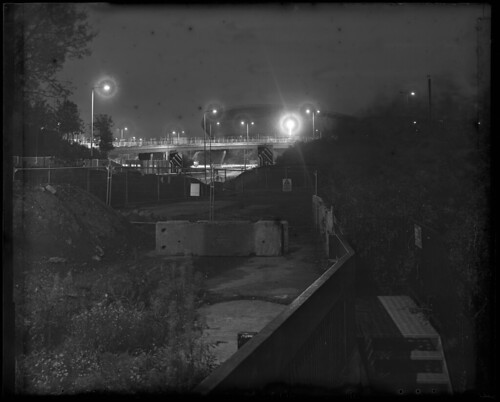
In my post Recent Glass Plate Work-part two I mentioned that 5x4 plates don't appear in auctions very often in comparison to other sizes. Since then I've only found one box of 5x4 inch glass plates, but one that's an interesting curiousity. The plates in the sealed box are described simply as 'Plates, Photographic Panchromatic'. The label is printed with the initials 'A. M.' which, with the crown symbol, stands for the Air Ministry; the Air Ministry existed from 1918-1964 before being subsumed into the UK's Ministry of Defence. The box has a maker's identification number ('TE12') which could be used to discover which company made the plates, but this isn't the sort of information that can be readily found on the internet. The date of coating appears to be '12/5/34' (it's just possible that the partially stamped digit is a '5' for '54' but comparing it to the '5' present, it does look like a '3'). These are the oldest securely dated glass plates I have used (the box of Mimosa Porträtyp-Antihalo plates might be older, but are not dated like this box).

As I wasn't expecting much from the plates at this age, I didn't do a test before shooting a couple of plates, on the same night as I shot some more Ilford G.30 Chromatic plates. I stand developed all the plates in Rodinal 1:150 for 1 hour 20 minutes (using the dilution of 1:150 rather than 1:100 in an attempt to keep the contrast of the night scenes down). Having low expectations, I was surprised by the results, which were a little thin, but printable. What was also notable was the backing: on most other plates I've used this washes off during the developing process. I also usually soak the plates in water before stand development for 2-5 minutes, but with the Air Ministry plates, the backing is thick and gelatinous, and during the final wash stage I had to take each plate out of the wash individually and use my fingers to rub away the backing.

Air Ministry plate, MPP Micro Technical Mk VI with Schneider Kreuznach Xenar 150mm f4.5 lens.
Scan from contact print.
Air Ministry plate, MPP Micro Technical Mk VI with Schneider Kreuznach Xenar 150mm f4.5 lens.
Scan from contact print.
After the initial results, I decided to use one plate to make test exposures in order to determine a working exposure index. The box gives no indication of the original speed of the plates, but comparing the exposures of the first two plates against the results of Ilford G.30 Chromatic plates previously shot, I reckoned the Air Ministry plates to be around half as sensitive.  For the test, I metered the scene at 6 EI, and made three successive exposures on the plate to give 6, 3 and 1.5 exposure indexes. It is a little hard to judge the results, partly as the background fog pulls up the shadow values, at 6 EI there is a lack of shadow detail, but the middle exposure at 3 EI looks to be printable (the image from the plate below is a scan from the negative).

Air Ministry plate test. Three successive exposures at 6 EI.
I subsequently shot another couple of the Air Ministry plates at night, choosing for the first plate a difficult subject with the brightly lit building against a foreground which is almost featureless; the second plate, a longer exposure to use a smaller aperture for greater depth of field (18 minutes at f8) shows more effects of age on the plate. Apart from a few spots, all the plates show marks from the cardboard runners holding the edges of the plates in pairs in the wrapping, but generally, for glass plates which might be 79 years old, the results are impressive.

Air Ministry plate, MPP Micro Technical Mk VI with Carl Zeiss Jena Tessar 16.5cm f5.3 lens.