Friday, 11 July 2014

Kodak High Resolution Aerial Duplicating Film

Kodak High Resolution Aerial Duplicating Film SO-192
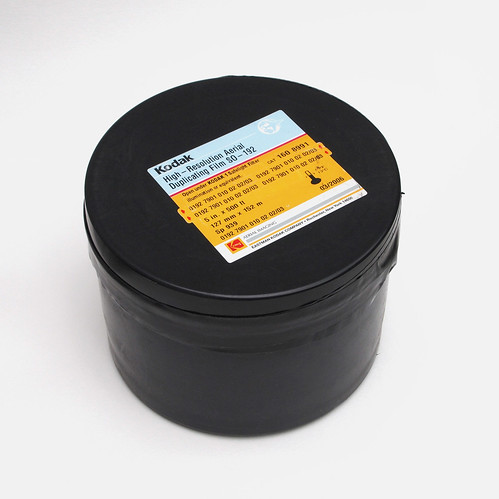
Sometimes when searching for photographic materials online, one finds quite obscure films on auction sites. This drum of Kodak High-Resolution Aerial Duplicating film was a entirely speculative bid, not really knowing exactly what it was; I calculated, that, being 5 inches wide, the 500ft of film could be cut to 1,500 sheets of 4x5. That's a lot of photographic material. It has a date of 03/2006, but given the nature of the emulsion type, unless stored in the worst conditions, this age would have little bearing on the film.

Kodak High-Resolution Duplicating Film label
Research online brought up a data sheet which provided more information about the film. The name itself is entirely descriptive, but the data sheet elaborates:
The blue-sensitive, hardened emulsions of this film is extremely fine grain and of extremely high resolving power. The film is designed for duplicating very fine grain, high-definition aerial negatives. It is intended for use as a second-generation positive and a third-generation negative.
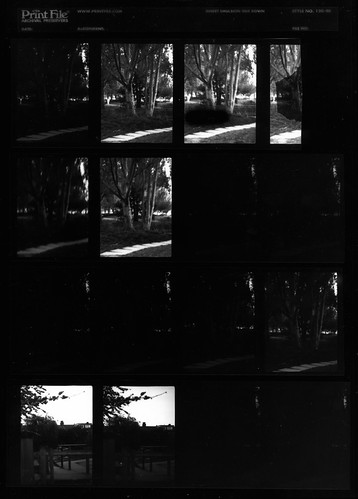
Kodak still make a number of films for aerial imaging. This film is available to buy from selective suppliers, which may mean that Kodak are still producing it, although, like other recently discontinued films, it may be that there are sufficient stocks to meet demand for some time to come. The SO-192 code stands for 'special order': a number of Kodak films have special order numbers which denotes not only the type of emulsion, but also substrate, and other aspects such as format, perforations and so on. High Resolution Aerial Duplicating film is available on two thicknesses of film base, and each has its own SO number, SO-192 on 3.9 mils (0.10 mm), and SO-187 on 7.0 mils (0.178 mm) Estar base. As the film is blue-sensitive, it can be handled under normal darkroom safelights, Kodak recommending Safelight No.1, a red safelight, although as blue-sensitive, presumably yellow or amber would also be safe. Although not intended as a camera film, I wanted to use it as such. Information about exposure and development from Kodak is purely for its use as a duplicating film, but having used similar films before, I had some idea of the parameters of both. To make some initial tests, I cut a couple of lengths of the film (inside the large tub, the film is on a metal spool) with a rotary trimmer to the width of medium format, 62mm, and rolled these with 120 backing paper. Notably, the film itself is bright yellow. I used the first test to get a usable exposure index. I had read online that the film has a sensitivity around 2 ISO, and so shot the first tests with this in mind, bracketing exposure. The film was stand developed in R09 One Shot at 1+150 for one hour. The contact sheet below shows the results. The frames run right to left, and are rated (first row) 1, 2, 3, 4, (second row) 8, 16, then 3, 6, (third row) 6, 12, 24, 24, (fourth row) 50, 50, with the last two frames at 6 and 3 EI.

Kodak High Resolution Aerial Duplicating Film contact sheet
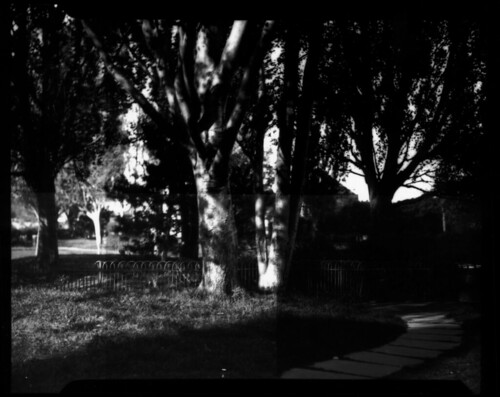
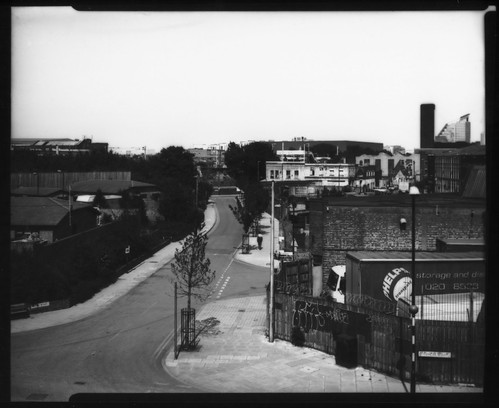
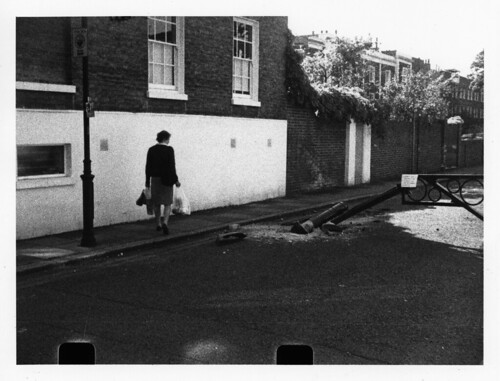
I did have problems with shooting this test roll: the shots needed long exposures, some of several seconds, and as the Baldalux camera I used does not sit very securely on a tripod, there was camera shake blurring these shots, such as the image below. When developed, the film exhibited very high contrast, grain too fine to show when scanned from the negatives, very clear film base, and, as the contact sheet above demonstrates, no real latitude to the exposure. At 2 ISO, Kodak High Resolution Aerial Duplicating Film is slower than normal paper emulsions, and slower than almost all of the old glass plates I have been using recently.

Kodak High Resolution Aerial Duplicating Film (6x4.5cm), Zodel Baldalux
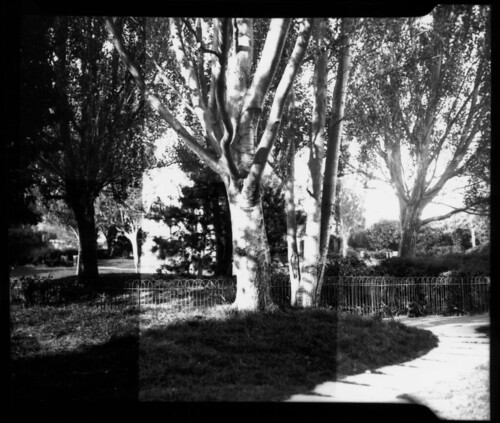
For a second test, I cut a couple of pieces to 4x5 inches, and shot them with the MPP Micro-Technical Mk VI camera. In this test I wanted to see if pre-exposure would reduce apparent contrast by raising the shadow values, and exposed a strip across both of the two sheets in the darkroom when loading the film holders. This is most evident in the upper of the two images below, although in the second shot this pre-exposed strip is across the top of the shot amongst the branches making it harder to judge. Both sheets were stand developed in R09 One Shot, diluted 1+120 for one hour. The two photographs below show how important accurate exposure is with Kodak High Resolution Duplicating film as it has very little latitude: the shutter on the Xenar lens is sluggish at the slow speeds, leading to over-exposure, whereas perhaps the Tessar's shutter speeds were running a bit fast.

Kodak High Resolution Aerial Duplicating Film 5x4 inch test shot, 16.5cm Tessar, rated 5EI,
three successive exposures by progressively withdrawing the darkslide,
giving effective exposure indexes of 5, 2.5, 1.25 (left to right)
Kodak High Resolution Aerial Duplicating Film 5x4 inch test shot, 150mm Xenar, rated 6EI,
three successive exposures by progressively withdrawing the darkslide,
giving effective exposure indexes of 6, 3, 1.5 (left to right)
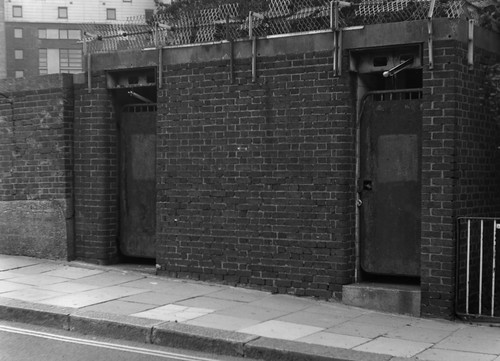
I shot some more of the film in large format, although in bright sunny conditions, which meant that the inherent contrast was a problem. There is very little detail in either highlight or shadow areas. The image below was scanned from a contact print, scanning from the negative may possibly provide a little more detail at either end of the contrast range.

Kodak High Resolution Aerial Duplicating Film 5x4 with 16.5cm Tessar
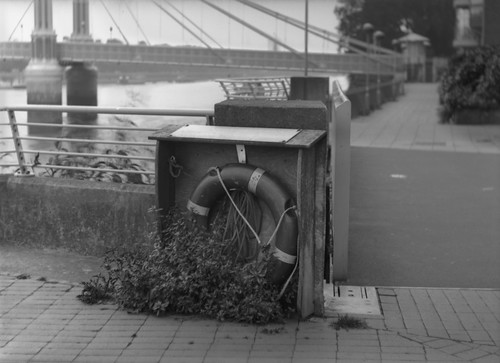
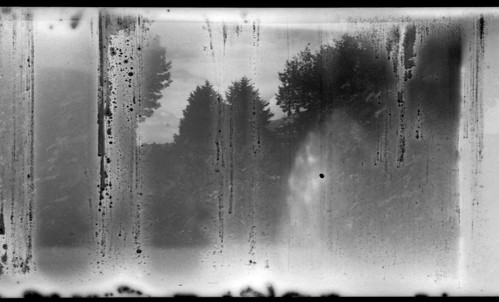
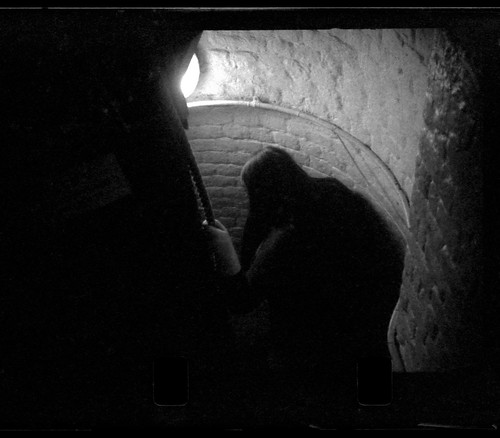
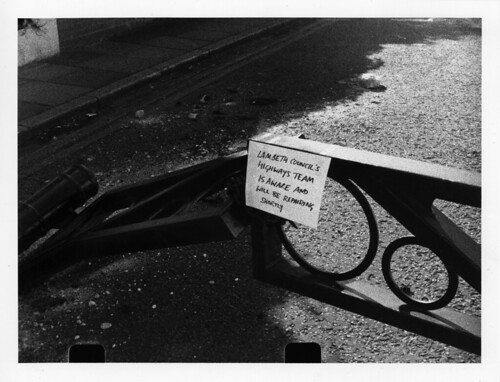
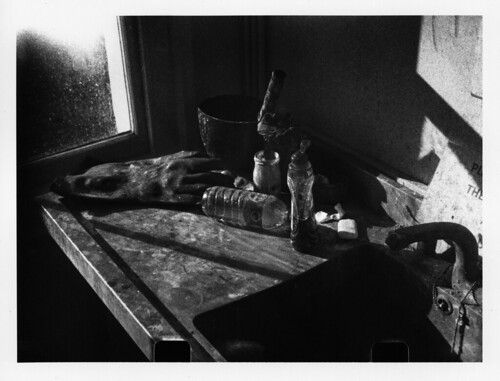
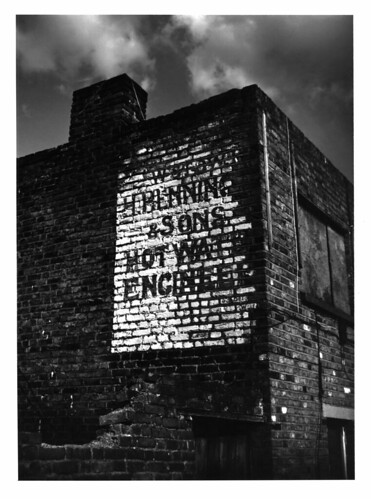
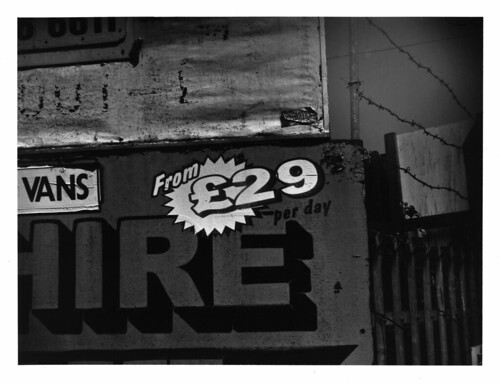
Under overcast conditions, I shot another roll cut to medium format. Here I exclusively used long exposures of several seconds, perhaps more accurate than slow shutter speeds such as 1/2 or 1/5th, although I did not adjust for reciprocity law failure (on the data sheet it suggests adjusting an exposure of 1 second to 2 seconds). For this film I increased developer dilution, using stand development with R09 One Shot at 1+200 for one hour. The combination of flat lighting, accurate (but not adjusted) long exposures, and highly dilute film developer provided the best results. Although Kodak High Resolution Aerial Duplicating film has very specific applications, and is not intended as camera negative material, with the right treatment this is possible. No doubt the film would also be useful for creating negatives and positives by enlargement for alternative and contact processes.

Kodak High Resolution Aerial Duplicating Film (6x4.5cm), Wallace Heaton Zodel

Sources/further reading:
http://www.kodak.co.uk/ek/GB/en/High_Resolution_Aerial_Duplicating_Film_SO-192.htm
Kodak Aerial Films
Tom Philo's Kodak Film Number Cross Reference Table

Saturday, 28 June 2014

Kiev-30M

Kiev-30M (open, the red dot, just visible, indicates the shutter is cocked)
The Kiev-30M is the penultimate model in a series of 16mm subminiature cameras produced by the Arsenal factory in Kiev, Ukraine. The original model of the Kiev subminiature series, the Vega, was based very closely on the Minolta-16. Like other Eastern Bloc post-war cameras copied from (mostly German) cameras, the Kiev Vega then evolved separately from the camera it was based on as the design was modified with each successive model. The second version of the Kiev Vega added the ability to focus the lens, something that the Minolta-16 cameras didn't have until much later models (though there were close-up filters available). The cassette was redesigned for the Vega 2 with a smaller spool than that of the Minolta-16, increasing the number of frames on a roll of film from 20 to 30. The Kiev Vega 2 was succeeded by the Kiev-30, which utilised a larger frame size (13x17mm) in a redesigned body. This larger frame size reduced the number of frames on a roll of film from 30 to 25 (although I wonder that the reason for the camera being called the Kiev-30 is due to this change to the preceding model). The Kiev-30M had a couple of minor changes from the Kiev-30, simplifying the camera by losing the PC flash sync socket and the manual exposure calculator on the back. The last 16mm model from Arsenal was the Kiev-303, which featured a redesigned plastic body in a variety of colours, and had four speeds rather than three, with 1/125th and 1/250th instead of the previous top speed of 1/200th.
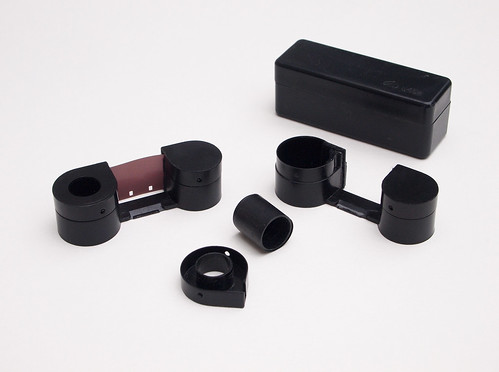
Kiev-30M box contents
My Kiev-30M came in a box set from the Lubitel shop in St Petersburg (I wrote a post about the camera shortly afterwards, but, recently, having used it more, I felt it was worth substantially rewriting this). Although the box had seals that had been broken, everything inside appeared as new. As well as the camera, the contents are: a camera strap and case; a second film cartridge, in a plastic box; a reducing frame for using the 16mm negatives in a 35mm enlarger; a reel to fit in a developing tank; the camera manual; and a piece of paper with a list, possibly of suppliers. The manual is dated with a stamp of April 1989. The three rolls of Svema Foto 65 film (which came from a different camera box) have a 'develop before' date of 'IX/1986'.

Kiev-30M (closed)
The Kiev-30M is very compact 86x47x28mm when closed, extending to 108mm wide when open. Despite the camera's small size it is relatively heavy at 190 grams as the camera is constructed almost exclusively from metal and is entirely manual and mechanical. The controls visible on the side of the camera are two wheels, one to set the limited range of shutter speeds, 1/30th, 1/60th and 1/200th; the other controls the aperture, from f3.5 to f11. On the underside of the camera is a window showing the exposure number. To take photographs, the camera's outer body shell slides to the open position (as in the image at the top of this post), which uncovers the shutter release and focus control; the two glass windows align to the viewfinder and lens. The window that covers the lens can be removed by sliding it out sideways: the Minolta-16 had filters which could be inserted here, although the Kiev-30M box didn't come with any filters. The lens is a 23mm Industar-M, which on the 13x17mm frame size provides roughly a (horizontal) 40ยบ angle of view. The lens focuses down to 0.5 metres, markings are also provided for 1 and 2 metres, in black, while picked out in red are the infinity mark and, close to this, a dot. The red dot is the focus setting for 5 metres, which serves as a hyperfocal position for all apertures. Also uncovered on the camera's top plate is a film plane indicator, while the serial number is engraved on the underneath.

Depth of focus table from the manual;
the '15' in the focus setting column must be a misprint for 0.5
Opening the camera cocks the shutter and advances the film: the shutter appears to be a guillotine-type, and when cocked, there is a red dot to indicate this visible in the lens window. The push-pull film advance does mean that opening and closing the camera without taking a shot results in a blank frame, but without opening the camera it isn't possible to look through the viewfinder.

Kiev-30M opened for loading
To load and unload the Kiev-30M, the outer shell has to be removed completely: there is a catch which can be released only when the camera is in the open position. This lays bare the exposure counter wheel: when loading a film, this needs to be manually reset by aligning a red line on the wheel with another line on the bottom plate. The film cassette is loaded by opening a cover on the top. The film cassettes have two chambers, one smaller, without a spool, for the supply side, with take-up side being slightly larger to accommodate the spool. As a legacy of the camera's origins as a copy, Minolta 16 cassettes are said to be compatible with the Kiev cameras. With a frame size of 13x17mm rather than 10x14mm, the Kiev-30M is designed for unperforated 16mm film (perforations will be visible in the image area). The cassette takes a 45cm length of film: the frame counter goes up 25, with every third number represented with two dots between (there is also a red dot between the numbers 16 and 19). When loading the cassette, a small pressure plate with a tiny tab needs to be pulled back to slide the section of film between the two chambers into position, not immediately obvious on a first attempt.

Kiev-30M cassettes
Kiev-30M with expired Svema Foto 65 film
I shot two of the Svema films while in St Petersburg, loading the cartridges inside the hotel room cupboard with all the lights in the room turned off. I finished the second roll of film once I had  returned home and stand developed it in Rodinal diluted 1:100 for one hour, using the technique I'd tried with film from the Mamiya-16 Automatic of taping the 16mm film, emulsion side out, to a length of 35mm film and loading this on a normal 35mm developing reel. The film is Foto 65, the 65 being the film's GOST value, the Russian speed scale, equivalent to 20 DIN/80 ASA. Translating the text on the box, the film was originally priced at 10 kopecks, surely very cheap even 30 years ago, and has a developing time of 5 minutes, although there's no indication of the developer required. The price of the film refills perhaps reveal why the 16mm subminiature format persisted in the Soviet bloc (the last Arsenal subminiature camera, the Kiev-303, was produced c.1990), while elsewhere Kodak's 110 format essentially used market dominance to push out all the previous competing 16mm systems twenty years earlier, where most cameras had proprietary cassette designs.

Kiev-30M with Kodak WL Surveillance 2210 film, scan from negative
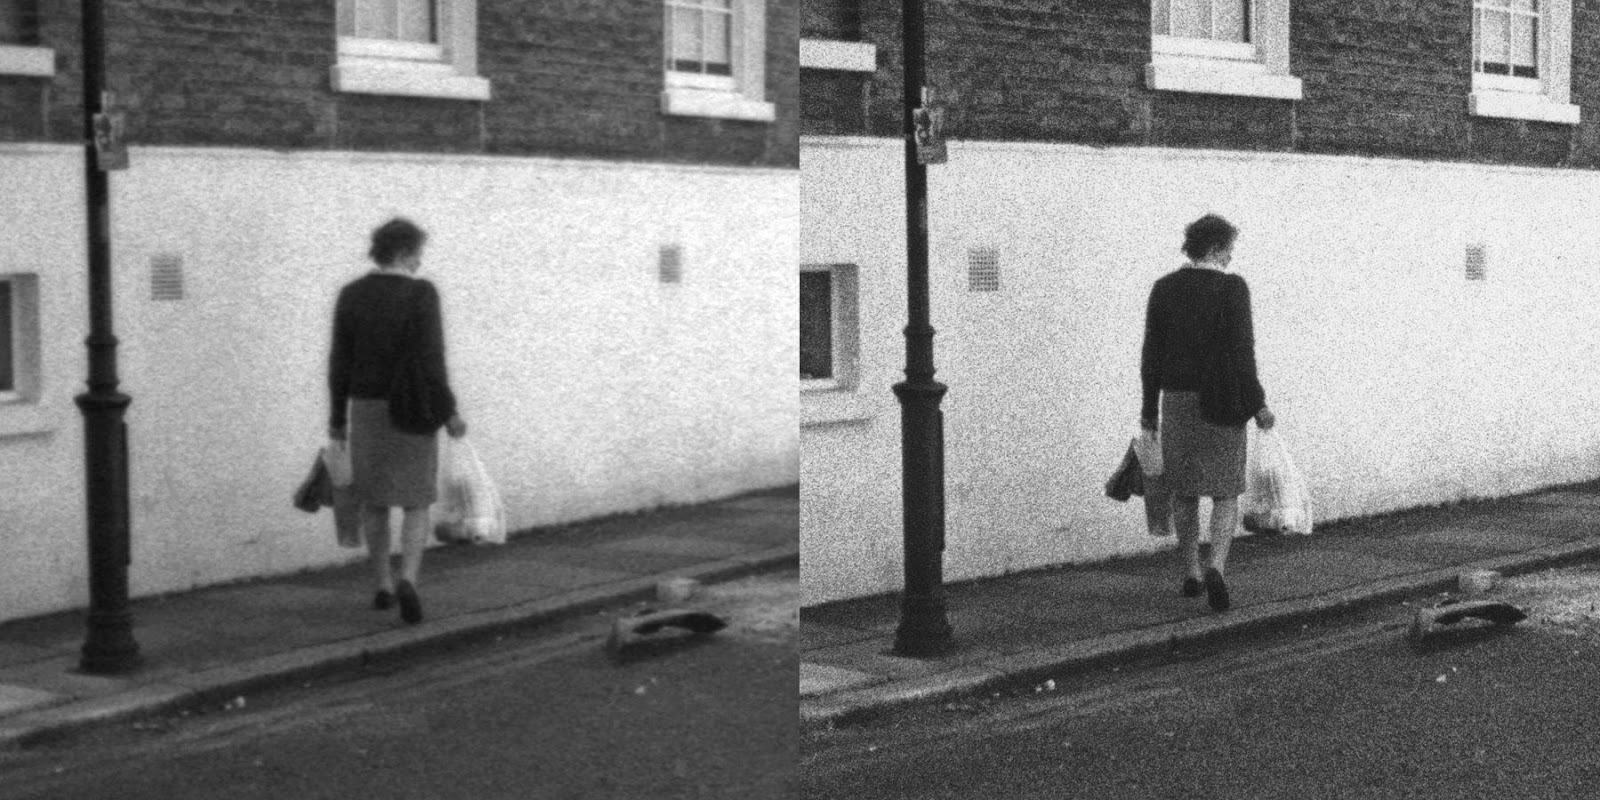
When loading the cartridges with 16mm film from 100ft rolls, it is possible to get more than 45cm of film into the supply side chamber, and it's relatively easy to get around 30 rather than 25 frames, although the frame counter doesn't turn around any further after the number 25. With single perforated film, if the film is loaded into the cassettes with the perforation side towards the plastic bridge between the chambers, the perforations appear at the bottom of the frame, to my mind less obtrusive to the resulting photographs. As I found when using the Mamiya-16 Automatic, subminiature negatives are too small when scanned with flat bed scanners to properly resolve detail. To really appreciate the results from the camera, I recently printed a number of shots from the Kiev-30M in the darkroom. The 16mm reducing frame which came in the box proved very useful when printing, and given the small size of the negatives, I had to wind the enlarger head almost to the top of its post to achieve a print size of 5x7 inches. The images below are all scanned from prints on Kentmere VC Select paper.

Kiev-30M with Kodak WL Surveillance 2210
Left: scan from negative at 3200dpi; right scan from 5x7 inch print for comparison
Kiev-30M with Kodak WL Surveillance 2210
The Kodak WL Surveillance 2210 film for the shots above is a 400 ISO film, and the grain is particularly pronounced as a result of the subminiature frame using approximately a quarter of the film area compared to a standard 35mm frame. I also shot some Agfa Copex HDP 13 microfilm with the Kiev-30M (although not stated, it's a reasonable assumption that HDP stands for High Definition Panchromatic). Typically for a microfilm, it's very slow and very high contrast, but extremely fine grained, which is a great benefit to the subminiature frame size. My first tests with stand development in R09 One Shot at 1+150 suggested an exposure index of 25, but I subsequently shot another roll rated 16 and using a developer dilution of 1+200, which provided better results. The images below were printed on Kentmere VC Select with a 00 Mulitgrade filter, the lowest contrast possible when printing (it is easier to reduce contrast further when scanning).

Kiev-30M with Agfa Copex HDP 13
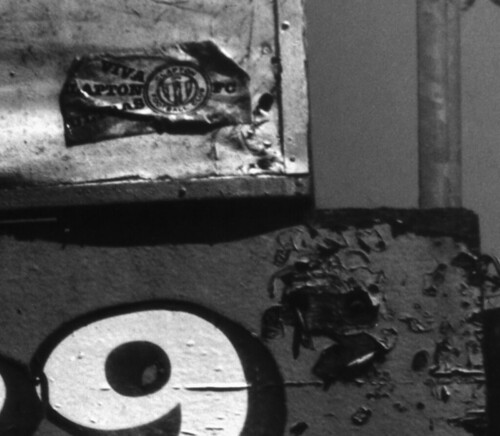
Detail from the above image showing fine grain structure and high resolution
The enlarged detail above demonstrates both the high resolution of the Agfa Copex HDP film and the resolving power of the lens in relation to the negative size. The sticker in top left is approximately 0.6mm high on the negative: the small lettering in the roundel on the sticker itself which is just legible is considerably less than a tenth of the size of the sticker. Evidently the film resolution exceeds that of the lens, but the extremely fine grain makes it ideal for the subminiature format, although the inherently high contrast means that it has very little latitude and may be more suitable for low contrast scenes and subjects, although both images above were taken on a bright sunny day, and the slow speed of the film is more appropriate for bright conditions.

As with many cameras from the former Soviet Union, the Kiev-30M is not without problems. The push-pull frame advance is not always reliable: occasionally the shutter does not cock, and so a frame is wasted in opening and closing the camera again; the catch on the underside of the body can be forced under the outer casing itself, the remedy to this is to bend this catch upwards to engage the outer casing more securely (Minolta cameras abandoned the push-pull advance as new models were introduced after the Minolta-16 II). I have also had odd vignetting on a number of frames, such as in the last shot above, which may be due to the shutter not opening fully. The cassettes are prone to light leaks, this happens more with perforated film. The limited aperture and shutter settings can fall a little short when using a fast film in bright light: 1/200th at f11 with a 400 ISO film in bright sunlight means accepting some overexposure (a yellow or neutral density filter would help in such circumstances). Conversely, a faster lens and a B setting would be useful for low-light situations. Set against these issues, the Kiev-30M is enjoyable to use for a number of reasons: its small size, when closed, easily the smallest camera I own; 16mm film is very cheap by the frame, a standard 100ft/30.5m) roll will fill many cassettes at 45cm each; and the simplicity of the camera itself.

Sources/further reading:
Kiev 16mm cameras on SovietCams.com
Kiev 16mm variations on Submin.com
Soviet-era subminiature camera list on Commie Cameras
Kiev-30M variations on Fotoua.com
Kiev-30M on USSRPhoto.com

Saturday, 14 June 2014

Ilford ULF Film Order 2014

Every year Ilford invites orders to manufacture film in a number of non-standard or obsolete sheet and roll film sizes. It's known as the ULF film order, but it isn't restricted to ultra-large format film. Among the various sheet film sizes, one of the notable items last year was the provision of HP5 Plus in 50ft lengths of 46mm, the size of 127 format; evidently last year's run had sufficient demand for Ilford to offer this size again.

The deadline for orders this year is Friday 27th June. For more information see Ilford's website: http://www.ilfordphoto.com/products/page.asp?n=137

Friday, 13 June 2014

Agfa Record I

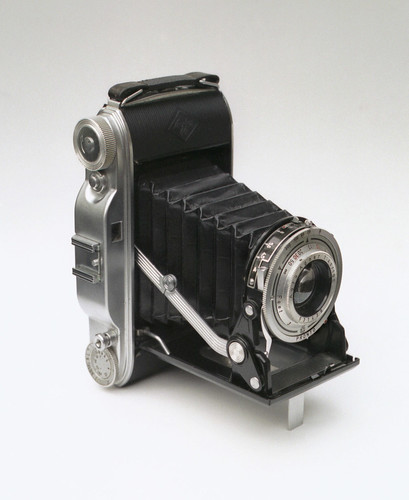
Agfa Record I
The Agfa Record I was the camera that got me into the 6x9cm format. I had previously used a Zeiss Ikon Nettar camera, which was my first folding camera, picked up form a charity shop, but found the 75mm focal length on the 6x6cm negative just a little wide, and I've also thought that the square format does require more consideration when composing the image. 6x9cm was the negative size that 120 medium format film was initially designed for, introduced with Kodak's No.2 Brownie camera in 1901. At the time most amateur photographs were contact printed from negatives rather than enlarged (a fact which lead to much larger roll negative sizes, such as the 122 postcard format); 6x9cm, although small by modern standards, was just acceptably large enough for snapshots. As I've previously written about in my post for the Baldalux camera, the folding 6x9 format camera is an ideal travelling companion, a good compromise between portability and negative size.

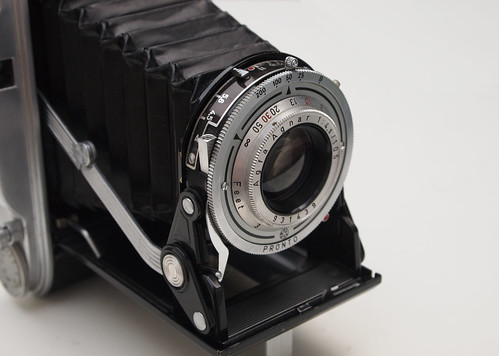
There were three models of Agfa Record cameras: the Record I was the least expensive model; models II and III were not successive designs of the Record, but contemporaneous, more sophisticated and expensive models with better lenses and shutters (the top-of-the-range Record III also featured an uncoupled rangefinder). The Record I was supplied with a 105mm f4.5 Agnar lens, Agfa's own triplet lens, which has front element focus down to 3 feet, and stops down to f32 (an aperture setting which I may never have used), in a four speed Pronto shutter (25, 50, 100, 200 plus B).

Agfa Record I - Lens and shutter detail
The camera is simply and robustly constructed. The metal body is covered in leatherette with a pattern of fine cording, providing a good grip. To open the camera, the front catch button is nestled beside the large winding knob, and when pressed the lens pops out into position with a snap, and the shutter release on the body also pops up. The arms lock to hold the lens and shutter quite rigid.  Unlike the Voigtlรคnder Bessa RF from my previous post, the shutter linkage is a solid bar along the bed underneath the lens. The viewfinder is relatively large compared to other folding cameras of similar date. Focus is by estimation: there are markings around the lens of distances in feet, with 30 and 10 picked out in red; there is also a red dot next to f11. These settings must be for 'view' and 'group' shots: with the focus set for 30 feet, at f11, depth of field extends from infinity to just short of 13 feet; set at 10 feet, it's a bit broader than 8 to 13 feet.

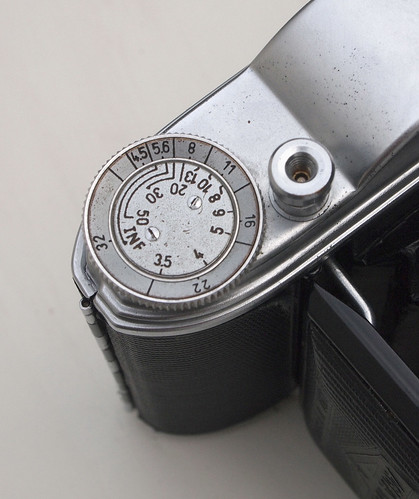
Depth of field scale
Using both the Nettar and subsequently the Record I were amongst my earliest experiences of using guess focus. I did also have a Lomo LCA at the time, but this has a wide angle lens on a small format: with the longer focal lengths of medium format folding cameras, compared to standard lenses on 35mm, for the first time calculating depth of field became very important. The Agfa Record's depth of field scale (in the image above) was extremely useful. The outer ring rotates so it is possible to align the small tick in the aperture section on the outside against the focus setting inside. With experience, guess focus for anything other than near scenes at wider apertures is relatively easy, but when I began using the camera, this small scale calculator was a welcome reassurance. I used the camera very frequently over a period of about three years, taking it abroad and on a number of protests and demonstrations. I inadvertently dropped it onto the pavement during the first of the student fees protests in 2010, which put a dent in the bottom, deforming the body just a little to make opening and closing the camera rather more tight than previously, but otherwise it still worked fine. Despite being fitted with the lowest specification lens, the negative size is very forgiving, especially when used with smaller apertures. The Pronto's four shutter speeds were restricting on occasion but I found, for its simplicity, the Agfa Record a pleasant camera to use.

Agfa Record I with Ilford Delta 100
Agfa Record I with Adox CHS 100
Agfa Record I with Ilford Delta 400
Agfa Record I with Ilford HP5 Plus
Agfa Record I with Fomapan 400
Sources/further reading:
Agfa Record cameras at Camera-Wiki
Agfa Record I at Historic Camera
Agfa Record and Billy Record Cameras at Certo 6

Wednesday, 4 June 2014

Voigtlรคnder Bessa RF

Voigtlรคnder Bessa Entfernungsmesser or Rangefinder
The Bessa Rangefinder or Bessa RF (also known as the Bessa E or Bessa E Messer, from Entfernungsmesser, the German for 'rangefinder') was introduced in 1936, one of a long-running series of Bessa folding cameras made by Voigtlรคnder (the Bessa name has also been recently revived by Cosina for their Voigtlรคnder-branded 35mm and medium format rangefinders).  It is a 6x9 folder using 120 roll film, with a mask for 6x4.5 pictures. It was available with three different lenses, the most expensive variant carrying the Heliar lens, all with a hinged filter. Production of the Bessa RF was restarted after the second world war, until the model was superceded by a 1950s Bessa Rangefinder, the Bessa II.

Having used the Bessa RF to shoot the expired Verichrome 620 film which was the subject of my last post, I thought this would be a good opportunity to write about the camera. Voigtlรคnder had previously produced the Prominent, a fully-featured 6x9 rangefinder, but the rather Baroque design must have been expensive to manufacture. The Bessa design represents a complete rethink: it was based around the body of an optical-finder Bessa that Voigtlรคnder made to replace their earlier Inos folding cameras. One aspect that remained the same is like the Prominent, the Bessa's rangefinder also has both windows offset from the eyepiece, not a common arrangement. Unlike the Prominent, the rangefinder and viewfinder are both housed under the camera's top plate, which is uncluttered except for the focus knob. On the other end of the top plate is a small button with a ridged grip. This is used to rotate a mask hidden inside the viewfinder to narrow the view from the 6x9 format down to 6x4.5 proportions when using with the internal mask. The camera's black painted trim and other components, rounded corners and curving lines lend the Bessa RF a touch of Art Deco elegance (compare, for example, the contemporaneous Super Ikonta, with similar features in a very different arrangement).

To open the camera there is a small release button on the bottom plate. The lens is self-erecting, although with my camera the front standard needed to be securely locked into place manually, it may have had more spring when new. The metal tab underneath the lens is depressed to unlock it and close the camera. When opened, the unusual shutter release is erected from the slot in the hinge-side of the door close to the body, shown in the image below. This shutter release trigger was a common feature to Voigtlรคnder's folding cameras of the 1930s and 40s, and one which the company patented.

Voigtlรคnder Bessa RF
The split image rangefinder is a separate window from the viewfinder, but it is coupled to the lens. As the rangefinder eyepiece shows a magnified and cropped image, allowing for very accurate focus, the separate viewfinder is needed for framing. Focussing is by turning the knob on the top plate which also provides a depth of field scale. This moves the whole lens and shutter unit forwards on two brass rails inside the bed. Interestingly, the camera can be focussed when closed, and as a result the focus does not have to be set to inifinity when closing the camera, unlike some rangefinders. The camera focuses down to just under 1 metre.

Detail of focus knob and depth of field scale
One of the curious effects of the Bessa's layout is that the user controls are on the left hand side of the camera, which makes for odd ergonomics for a right-handed person. However, I have read somewhere that the reason for this was that it designed to be used comfortably when held vertical, in the portrait format. I habitually use the 6x9 format for landscapes, but turning the camera through 90ยบ this makes sense: the user's right hand can support the camera with either fore- or middle finder on the shutter release, while the left hand can rotate the focus wheel. In the horizontal format, one has to use the same hand to focus, then depress the shutter. The controls around the lens are placed in such a way that these can be easy adjusted in either vertical or horizontal position when looking down at the camera. In particular, the shutter speeds are represented on two scales, visible from the front, as is standard with Compur rim-set shutters, but also just above the aperture settings on the side of the shutter.

Voigtlรคnder Bessa RF in vertical format
My camera has the Helomar f3.5 105mm lens, which was the least expensive option; the Bessa RF was also supplied with a Skopar, or, the most prized, a Heliar lens. According to this scan of the  British Journal Photographic Almanac 1939, there was a £5 difference between the bottom of the range Bessa RF with the Helomar lens, and that with the Heliar lens, which does not sound like much, but the cheapest optical-finder Bessa was just £2.17.6. The results I've had from this camera demonstrate that the Helomar lens performs as might be expected from a pre-war uncoated triplet: soft at the edges at wider apertures but still very capable of resolving fine detail in the central image area, as shown in the recent tests of Rollei RPX 25 shot with this film; stopped down beyond f8 the Helomar is acceptably sharp, especially in relation to the size of a 6x9 negative (such as the example shot on Fomapan 400 below, possibly shot at f16). Incidentally, the lens is dated to 1936, the year the Bessa RF was introduced, although the shutter's serial number is dated two years later, to 1938.

Voigtlรคnder Bessa RF sample image with Fomapan 400
When using the Bessa RF there are a few quirks to watch out for. My camera has seen a fair amount of use, judging from the paint losses and other signs of wear. As well as having to ensure that the lens is rigidly locked in place on opening, the shutter linkage sometimes needs to be reset: the pivoting arm which trips the release lever on the shutter has a pin connecting to a slot which descends when the shutter trigger is pressed. This pin sometimes comes loose and needs to be located back in the slot by hand. I don't know if this is a common problem with old Bessas, a weak point in the design: there does appear to be a fair bit of play with these components, which no doubt has increased with use. I also found when I first received the camera that the shutter release was not very 'soft', which meant that I had to use faster shutter speeds to ensure against camera shake, and as a consequence I had to use the lens at wider apertures to compensate. This was resolved by loosening the retaining ring inside the camera and turning the whole shutter and lens assembly by just a small amount, to reduce the distance the pivoting linkage arm has to travel to trip the shutter (existing scratches on the retaining ring were evidence that the lens and shutter had be removed at some point, and perhaps not positioned entirely right when replaced). One of the shots on Rollei RPX 25 was hand-held at 1/50th, taken after this adjustment, which I wouldn't have been confident about previously. My Bessa is missing the yellow filter, but still has the hinged filter ring, so it may be possible to finder a filter to fit this. It is also missing the 6x4.5 mask, and I may attempt to make one to fit the camera at some point. The main reason I haven't used the Voigtlรคnder Bessa RF more is that it is bigger and heavier than my other 6x9 folding cameras, such as the Baldalux, and when shooting the kind of landscape or cityscape photography I typically use this format for, the ability to judge focus accurately with the rangefinder is less critical. However, I did find that it was invaluable when using 620 film due to the way the spools fit in the cradle of the supply-side, something none of my other medium format cameras are capable, with the exception of the Lumiรจre Scout Box.

Voigtlander Bessa RF, close-focussed sample image with Fomapan 400
Voigtlรคnder Bessa RF sample image with HP5 Plus
Voigtlรคnder Bessa RF sample image with Rollei RPX 400
Voigtlรคnder Bessa RF sample image with expired Verichrome Pan
Voigtlรคnder Bessa RF sample image with Fomapan 400
Sources/further reading:
Bessa RF on Camera-Wiki
Early Photography's page on the Bessa RF

Sunday, 11 May 2014

Kodak Verichrome and the naming of photographic emulsions

Kodak Verichrome 620 films from the 1940s
Kodak Verichrome was introduced in 1931: the new film was named 'Verichrome', clearly derived from the Latin word veritas, truth, referring to its veracity, to emphasise this emulsion's 'true' rendering of colours. As a name, Verichrome had been used by Wratten & Wainwright in the first years of the twentieth century; Wratten & Wainwright were bought by Kodak in 1912. This 1932 advertisement states "Verichrome is particularly sensitive to greens and yellows - the colours which predominate in nature". However, Verichrome is orthochromatic and therefore not sensitive to red (and can be handled under a red safelight). The term orthochromatic has a not dissimilar derivation to Verichrome, 'ortho' meaning straight, proper or correct. In the nineteenth century, the first photographic emulsions were blue-sensitive only (in the past, this blue-sensitive emulsion was sometimes referred to as 'non-colour sensitive' or 'colour blind'), with the results that reds appeared very dark, and in landscapes, skies, being predominantly blue, tended to be featureless, over-exposured in comparison to the landscape itself. Spectral sensitivities were extended into the green and yellow wavelengths of visible light in the 1880s. Photographers welcomed a reproduction of the world which appeared more 'correct' and the use of the term orthochromatic suggests that, at the time, they did not conceive the possibility or necessity of photographic emulsions encompassing the red end of the spectrum. When red-sensitive emulsions became available, the term panchromatic became necessary, from 'pan' meaning all (I've previously shot and wrote about Verichrome's panchromatic successor, Verichrome Pan, which replaced Verichrome in 1956).

Within these three classes of black and white emulsions, there are further precise terms which are less well known, and less commonly used. I've recently been reading the Ilford Manual of Photography from 1946, and some films and plates are described as 'highly orthochromatic', to distinguish their sensitivity to yellow-orange light. Isochromatic is a term sometimes used for this type of emulsion, and Ilford did have plates named Iso-Zenith and Golden Iso-Zenith (while 'ordinary' is the term used in the Manual for blue-sensitive plates and films). The iso prefix means 'equal' and presumably relates to the emulsion's sensitivity to yellow light being equal to blue. I've used Ilford's G.30 Chromatic plates, explicitly described as being "highly yellow and orange-yellow sensitive", which may be why these fifty-year old glass plates worked very well for night photography under streetlights. Further, there are also the terms orthopanchromatic (reduced red sensitivity compared to yellow and green), isopanchromatic (increased green sensitivity), and superpanchromatic (increased red sensitivity for use with artificial light, such as tungsten bulbs). In The Negative, Ansel Adams describes panchromatic emulsions as being Type A, B and C: panchromatic Type B has "generally uniform sensitivity over the entire spectrum under daylight conditions"; Type A is most sensitve to blue light (perhaps orthopanchromatic?); Type C, "most sensitive to red", appears to equate to superpanchromatic. Adams states that Types A and C (at the start of the 1980s) are "relatively obsolete". These nuances of spectral sensitivity I hadn't appreciated when first shooting, developing and printing black and white photographs, merely understanding that there was film, as far as I knew sensitive to all light, and paper, that could be handled under a safelight. The college darkroom I first used had a relatively bright orange-brown safelight, and would have been only 'safe' for blue-sensitive emulsions. Ansel Adams writes "although panchromatic films are used for nearly all general photography today, we should avoid prejudice against other emulsions since they may have practical and aesthetic application" and continues to describe their use in landscape and portrait work. As well as the Ilford plates already mentioned, I have enjoyed using ortho film for landscape work, such as Adox Ortho 25 and Kodagraph Ortho Negative ON4, both for its particular look, and for the ability to handle it under a safelight.

Kodak Verichrome backing paper
I recently shot two rolls of 620 Kodak Verichrome, with develop before dates of October 1948 and May 1949. The 620 spool is smaller than 120, which will fit in standard medium format (120) cameras, but, crucially, the spools have a smaller slot for the winding on key. As the film can be wound on to a 120 spool, the only consideration is whether the camera can take a 620 spool in the supply side, which is possible with the Voigtlรคnder Bessa RF, unlike some of my other medium format cameras. However I still had difficulties when winding on the film, possibly due to tightness of curl on the film, pronounced both due to age (these films had been kept in a roll for nearly 70 years) and the narrower spindle of the 620 spool. The first film I tried to shoot, that with the date of May 1949, got stuck in the camera, chewed up and torn, as it advanced beyond the first couple of frames. The second film, October 1948, I couldn't wind past number 7, but I was able to remove the film from the camera using a black bag. This was stand developed in RO9 One Shot 1:100 for an hour.

The 1932 advertisement lists six qualities that Verichrome uniquely combines:
1. DOUBLE COATED. It has two layers of sensitive silver emulsion - a Fast one over a Slow.
2. HIGH SPEED. Good pictures can be made earlier in the day - and the year.
3. ENORMOUS LATITUDE. Because of this Double Coating, "Verichrome" allows remarkable latitude. A spool of "Verichrome" has been has been given relative exposures ranging from 1 to 2,400 and all have yielded printable negatives.
4. COLOUR SENSITIVITY. "Verichrome" is particularly sensitive to greens and yellows - the colours which predominate in nature.
5. NON-HALATION. A special red backing on the non-sensitive side, prevents halation and ensures clear-cut detail in brightest highlights. (This red backing disappears on development).
6. TRANSLUCENCE. This makes "Verichrome" negatives particularly suitable for enlarging.
Quality 1, the double coating, seems to relate entirely to its latitude, but is a quality not often referred to (however, there are some films such as Adox CHS, which specifically list being single-coated as an advantage to sharpness of image). The Verichrome boxes do not rate the film for exposure, but I've read elsewhere on the net that the speed of Verichrome was 50 ASA, which may equate to 100 ISO in post-1960 rating (Verichrome Pan was originally rated 80, but became 125 ISO rather than 160 after 1960). The speeds of films and plates advanced rapidly through the 1930s and 40s, so even before it was discontinued, Verichrome could no longer be considered 'high speed'. Quality 3, the claim to enormous latitude must be taken with a pinch of salt. Perhaps, being orthochromatic, development by inspection would help an extremely gifted darkroom technician achieve printable negatives at either end of this range. Quality 6 is worth noting simply becuase amateur photographs still tended to be contact printed at this date.

There is a lot of fog, some pinholing, and general degradation of age, all to be expected, but sixty-six years after the 'develop before' date, the Verichrome negatives would still be printable, although the images below are scanned. I did not rate the film when exposing, instead I gave each frame as much exposure as was practical: the first image below was shot, hand-held at 1/25th with the lens wide open at f3.5; the second image was shot at 1/10th, resting on the railing of a bridge. The final shot is largely out of focus, I think due to the curl of the film being so pronounced that it was forcing the pressure plate back enough to push the film beyond the plane of focus.

Kodak Verichrome, develop before date October 1948

Sources:
The Ilford Manual of Photography, edited by James Mitchell, 3rd edition, reprinted October 1946
The Negative, Ansel Adams, 1981
Orthochromatic, Isochromatic and Panchromatic entries on Camera-Wiki
Kodak Films on Early Photography

Tuesday, 29 April 2014

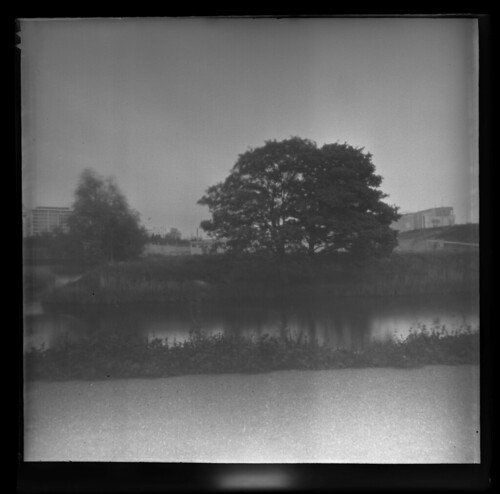
Talking about pinhole photography with security guards in the park

Ilford 8.2cm Special Lantern Plate, 10 minute exposure
Two days ago, 27th April, was 'Worldwide Pinhole Photography Day'. In the past this particular day in the photographer's calendar has been one that I haven't observed, and it's been an odd lacuna that, in all the formats and techniques I've used, I've not made a pinhole camera before. This seemed a good occasion to fill that gap. After my recent work with vintage glass plates, I naturally wanted to use them for the pinhole day. In considering what form the cameras would take, I decided to make them square, and to use some lantern plates I had which I hadn't previously shot. Prior to, and then concurrent with transparency film, lantern plates were used to make glass slides for projection and typically would be made by contact or with an enlarger. Before the pinhole day, I tested two types of 8.2cm square lantern plates for exposure, Ilford Special Lantern plates and Kodak L5 Warm Tone Lantern plates. I shot these with the MPP Micro-Technical camera in adaptors made as detailed in a previous post, using a starting exposure index of 5, thinking that the lantern plates might have an emulsion sensitivity similar to photographic paper, and took three successive exposures by progressively withdrawing the darkslide, effectively giving exposures (from right to left) at 5, 2.5, 1.2 to seen how much sensitivity the plates may have lost with age. The Ilford plate box had a leaflet inside dated to November 1965.
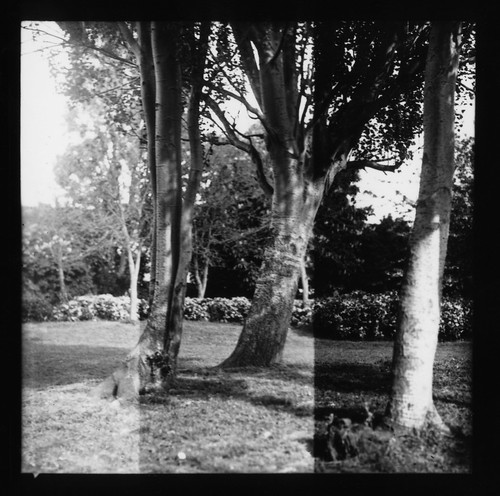
Ilford Special Lantern plate test, scan from contact print on Kentmere VC Select paper
The Ilford plates provided better results, with less fog and less silvering than the Kodak L5 plates.  Ilford's were the fastest lantern plates they manufactured ('Gaslight' and 'Contact' plates were also available), an important factor for the choice of these plates with pinhole cameras, and the Special Lantern plates were also made in three different grades of contrast: 'Soft' 'Normal' and 'Contrasty'; when shooting these as negatives, the 'Soft' contrast grade is still high, which reinforces the suggestion that the lantern plate emulsions were similar to that of photographic paper, which is usually high in contrast when used as a paper negative. The plates for the test were stand developed in R09 One Shot at a dilution of 1:100 for one hour.

I made pinhole cameras in two different sizes, to fit the 8.2cm plates tested, and 2-inch square plates, of the same type. I made the cameras from stiff card and constructed two cameras of each size; when working with glass plates it makes sense to work in pairs, as this is how the plates are packed. The pinholes were made from small squares of metal from aluminium cans, with a pin, not pushed all the way down the shaft, but merely rotating the tip to create as smooth and round a hole as possible. I measured the pinholes by scanning these at high resolution, which came out at either 0.3 or 0.2mm diameter. This measurement could then be used to calculate the f-stop of the pinholes (the f-stop number being focal length divided by aperture diameter). For both large and small cameras I made them with a focal length similar to the width of the plates, which is effectively wide angle, the focal length being less than the diagonal measurement of the image format. On the small cameras, a pinhole diameter of 0.2mm equated to f255; 0.3mm was f170. On the larger cameras these diameters gave f-stops of f400 and f274 respectively. As I wasn't able to measure the pinholes more accurately (to 1/100th of a millimetre for example), these figures were approximations, but having tested the sensitivity of the plates, I had enough information to roughly calculate the exposure times needed. Ideally I would have tested the cameras themselves before the day to see any potential shortcomings, of which there were a few, but I was still making them on the morning of the 27th.

Pinhole Camera for 2-inch plates
To shoot the cameras, I decided not to take a tripod, which meant having to find spots where the cameras could be placed for the long exposures needed, and, intending to shoot more than just four plates, I also took a dark bag, boxes of unexposed plates, and empty boxes to place the plates once shot. I started at Marsh Lane Fields in Leyton, where there was a convenient picnic table, on which I could set up a couple of the cameras for exposures of 15 and 6 minutes (and sit and read the paper while the shutters were open).
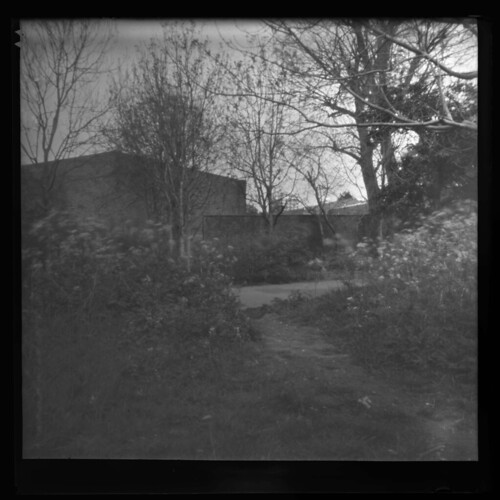
Ilford 8.2cm Special Lantern Plate, 15 minute exposure
I then walked on towards the Queen Elizabeth Olympic Park where I shot a couple more large plates on a verge sandwiched between Ruckholt Road, a slip road for the A12, the A12 flyover itself and the River Lea. This used to be one of those undesignated left-over spaces (which I have photographed before), but has recently been landscaped to provide a path along the bank into the Olympic Park. There was a sluice gate there which provided a platform to place the pinhole cameras for some more exposures. I also changed plates with the dark bag while there.
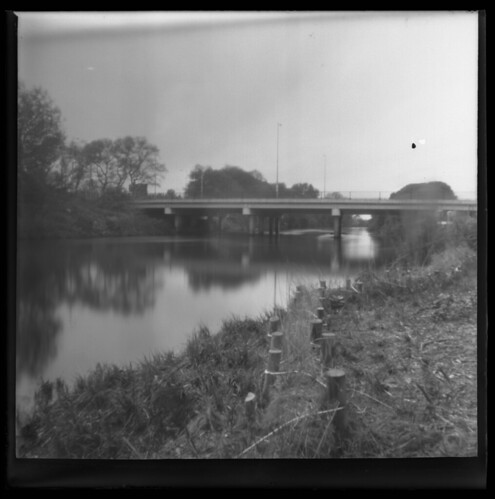
Ilford 8.2cm Special Lantern Plate, 10 minute exposure
Entering the Olympic Park, and following the Lea, I found a bench on the other side to sit and position one of the cameras to take the photograph which appears at the top of this post. While I was sitting there reading the paper, a golf buggy drew up with two security guards. I'd have liked to have recorded the encounter which followed, but I shall just describe it as well as I can recall. They said that I had been picked up on the security cameras; I can't remember exactly whether they said I'd been seen taking pictures near the children's playground, or if they just asked had I been taking pictures there. I don't know whether they were simply mistaken, or if this was an invention used to justify questioning me, but the insinuation was made. I hadn't been near the playground, and didn't know where it was at the time (I looked this up when I returned home); I may have been relatively near to it when crossing from one side of the Lea, by the Velopark, to the other, but I certainly wasn't taking any photographs at the time. It didn't seem worth explaining that the pinhole exposures of ten minutes or more would be of no use to what they seemed to be implying. They appeared to accept my denial of taking photos at the playground, but had more questions. I had been seen writing things down, which I had, so I showed them my notebook on which I'd written entries such as "3.54 No. 1 Large - River Lea/10 minutes". They then wanted to see the cameras. I only had the one out that I was taking the picture with, so I curtailed the exposure, which was going to be longer, and they also asked if I was leaving these around the park. I explained I only had four cameras and was keeping them with me. The security guards then asked what I was taking the pictures for, at which point I couldn't help entering a philosohical frame of mind (for some reason I declined to inform them that it was 'Worldwide Pinhole Photography Day'). I resisted the temptation to say "to see what things look like when they're photographed," circular but honest reasoning. I was asked if the photographs were going to be shared anywhere, and I said 'probably' on Flickr. Then they said I'd also been seen taking photographs on a phone or digital camera. It was only later that I realised what had been seen on the security cameras and not understood was my use of a handheld lightmeter; however I did have my Kiev 30-M in my pocket, and although I hadn't used it inside the park, I did tell them I had a film camera with me. They asked if they could see the photographs. I had to disappoint them by explaining they couldn't see the photographs as these would need to be developed. At this point I could sense that conversation wasn't providing any more avenues for the security guards to go down, and after some small talk about the transformation of the area, during which I kept my views of the Olympics to myself, one of the guards said "I don't have any problems with you taking photographs in the park". They had been polite throughout, and, to be generous, I can see the need for suspicious behaviour or behaviour that is not understood to be investigated. However, the statement or question about the children's playground was insidious and unnecessary. Having satisfied the security guards' questioning, I left the Olympic Park by the nearest exit.
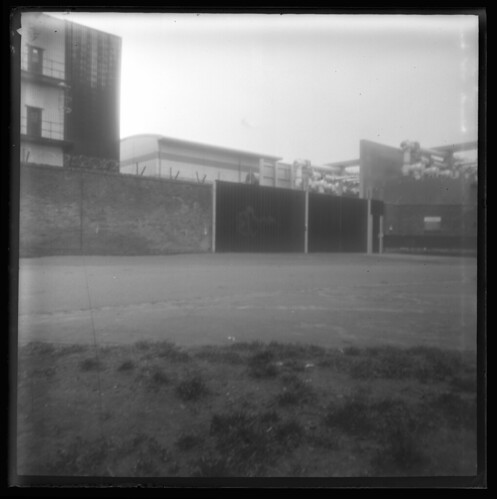
Ilford 8.2cm Special Lantern Plate, 20 minute exposure
I took a few more shots returning along the canal, such as the image above, then finally some shots at home as the light was failing, with exposures well over an hour to compensate.
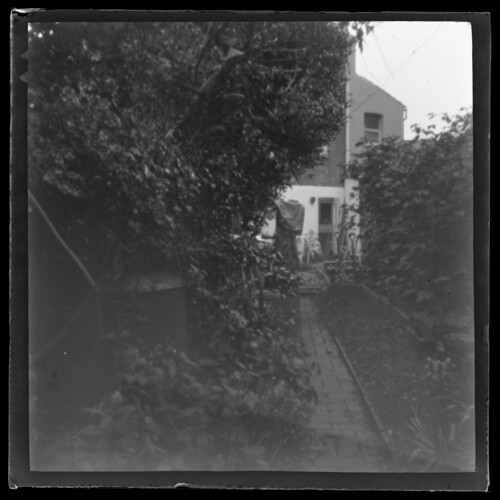
Ilford 2-inch Special Lantern Plate, 1 hour 20 minute exposure
I stand developed the 8.2cm plates for an hour, using a higher dilution of R09 One Shot, 1:150, to reduce contrast a little more than the earlier tests. Meanwhile, the smaller plates were tray developed by inspection in R09 One Shot 1:120: one of the benefits of using the lantern plates is that they are orthochromatic so can be handled under a red safelight. All but one of the plates used were Special Lantern plates, but I did also shoot a 2-inch Contact Lantern plate, which proved both slower and higher in contrast than the Special Lantern plates: this was tray developed for a considerably longer time than the other plates, but there wasn't sufficient exposure to provide any shadow detail. All the negatives had come out, but there had been some problems, particularly with the small cameras, some of the plates not sitting properly in the slots I'd made to hold them inside the cameras, and some slight light leaks, problems which I might have been able to elimate had I tested the cameras beforehand, but I wasn't disappointed with my first pinhole photographs.

See the whole set of pinhole photographs here.
Worldwide Pinhole Photography Day website.