Sunday, 11 October 2015

The Canon A-1

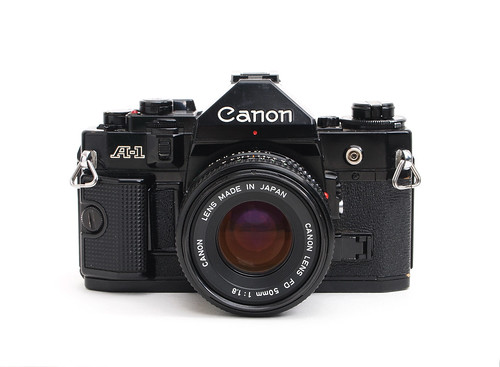
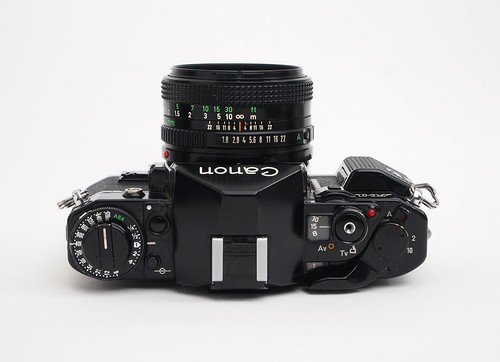
Canon A-1 with f1.8 50mm FD lens
One of my reasons for starting this blog four years ago was that I was becoming interested in cameras other than SLRs, and describing the experiences of using these cameras; in comparison, what I think of as classic film SLR cameras tend to be well-known and well-represented in blogs, articles and discussions on the internet, and that to add my own views might seem superfluous. However, for a couple of admittedly personal reasons, it seemed like perhaps time to add a post of my own on the Canon A-1.

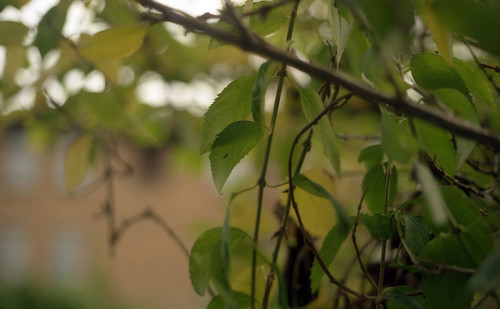
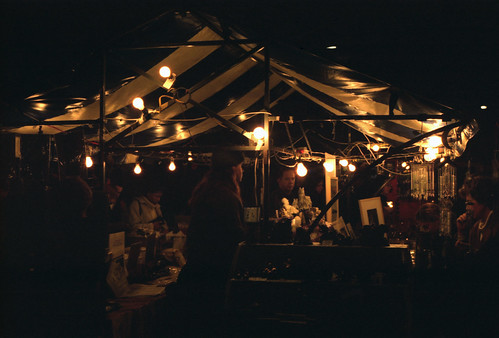
My first 35mm SLR camera was a Praktica BC1, shortly to be replaced with a BCA body, which I used all through my student years and for some time afterwards; in 2001, with a small amount of money from a commission, I wanted to buy a more advanced 35mm SLR, but not the contemporary type of film cameras that were soon to give way to digital (in the 1990s, my Praktica was around a quarter of the price of a Canon SLR). Part of the reason for choosing the Canon A-1 was simply that I had been able to compare my Praktica against the A-1 of a fellow student at college, so a few years later it seemed an inevitable choice. My original Canon A-1 was stolen after a couple of years of use, but I replaced it with another some months later when I could afford to, and used it almost exclusively for about four or five years - mostly during the period when I didn't have access to a darkroom and shot colour or chromogenic black and white film. Part of the reason for writing a post about the camera now was a brief misconception that I had bought the camera a full fifteen years ago, before realising that it was fourteen years ago this month (the two shots below come from my first test roll); and it has been one of the cameras that I have been lending to students to use in an introduction to black and white film-based photography that I have been teaching - and being reminded of the quality of the results.

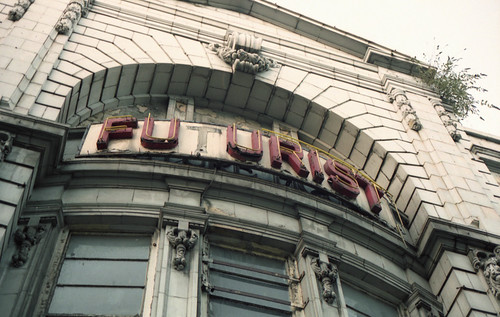
Canon A-1 with Kodak Portra 160NC - first test roll
The A-1 was already several years old when I first encountered it, older than my Prakticas. Canon introduced the camera in 1978, two years after the innovative Canon AE-1, and it was produced until c.1985. In the original manual, the A-1 is described as:
...the most exciting and advanced camera on the market. Canon has good reason to have unbounded confidence and pride in the A-1. Embodied in this camera are the qualities of the finest SLR cameras and into it went the most sophisticated electronics technology available in the world today.
This quote from the introduction to the 100-page manual may well have been more than just marketing hyperbole: Camera-wiki's page on the A-1 states that "Canon's competitors were considerably slower in introducing programmed SLRs: Minolta in 1982 with the X-700, Nikon with the FA and Pentax with the Super A in 1983 and Olympus with the OM-2S Program in 1984."

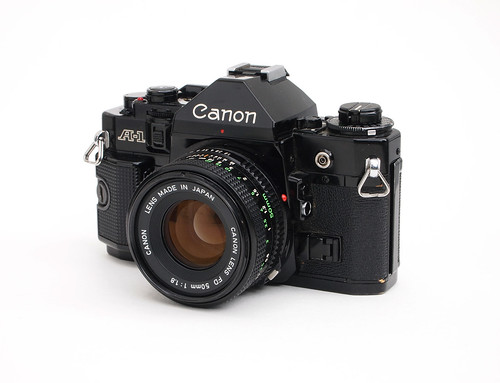
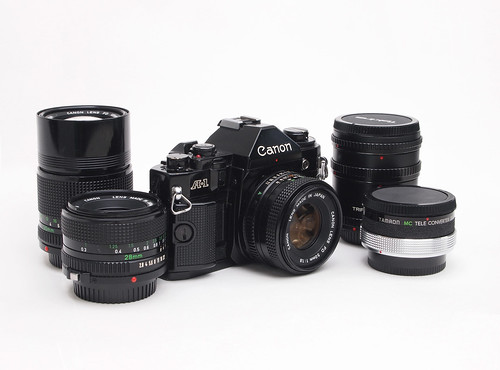
Canon A-1 with f1.8 50mm FD lens
The A-1's specifications were impressive for 1978: it has five automatic exposure modes plus full manual override: shutter speed priority AE; aperture priority AE; programmed AE (i.e. automatic selection of both shutter speed and aperture); AE flash photography with dedicated Canon flashes; and stopped-down aperture AE. The ASA dial has a very wide range from 6 ASA to 12800 ASA in third-stop increments, and provided with +/- two-stops exposure compensation, also with third-stop increments. The centre-emphasis TTL meter has an EV range from -2 to 18 at 100ASA. The viewfinder has an LED read-out for aperture and shutter speeds which automatically compensates for subject/viewfinder brightness. It also displays M for manual, buLb for 'B', and F or bu F for AE flash, with EEEE EE as an error message. In manual mode, the meter display shows the shutter speed selected on the Tv dial and shows the aperture (including intermediate half-stops) that will give correct exposure: the user then has to ensure that the aperture ring is set to this value - which does require taking the eye from the viewfinder. The LED read-out can be turned off using the collar switch around the battery check button on the left of the camera's top plate.

Canon A-1 with f1.8 50mm FD lens
Additional features include: a stopping-down lever with a lock position (this lock position activates the stopped-down AE mode, which meters from the currently selected aperture, rather than at full aperture as in other AE modes); exposure preview (in addition to lightly depressing the shutter release) and exposure lock buttons on the left of the lens mount; a hot shoe with contacts for dedicated Speedlite flashes, and PC socket; and a built-in eyepiece shutter to prevent light entering via the viewfinder in long exposures. It also has a film reminder slot on the rear of the camera and a film plane indicator on the left hand side of the top plate.

Canon A-1 main user controls
The main user controls are all located on the right-hand side top plate. The main switch around the film advance is used to turn the camera on - at A - off - at L (for Lock) - and two self-timer positions for 2 and 10 seconds. There is also a multiple exposure switch next to the 10 second self timer position. Around the shutter release (with cable release socket) is the AE mode selector, the AT dial: Av selects aperture priority (when FD lenses are set to A on the aperture ring) with aperture values appearing in the window; Tv for shutter speed priority, with the window showing shutter speeds. These dial settings are colour coded: black numbers on yellow for apertures, with a range from f1.4 to f22; white numbers on black for fractions of a second, orange for whole seconds, from 1/1000 to 30 seconds, plus 'B' and P for programmed automatic exposure. These values are changed using the dial on the front of the camera, which also has a guard which can be raised to prevent accidental movement of the dial. All these functions can be operated by finger and thumb, which, together with the 'action grip' makes for an intelligent, functional ergonomic design: the lens mount is slightly offset to the left of the camera's axis, which balances it rather nicely in the hand. Aesthetically, the camera was only available in black, unlike a number of Canon's other SLRs around the same period, with numerals and lettering picked out mostly in white, with a few limited uses of colour. These choices appear to have made the design date less obviously than later Canon SLRs through the 1980s, notably the T series.


The Canon A-1 was designed to fit with all Canon's many FD, FL and R series lenses (with a few minor exceptions), and I acquired the common FD lenses, the f2.8 28mm and the f3.5 135mm; I did have a zoom for a time, but never took to using it. The f1.4 50mm lens and the faster f1.2 50mm lens are amongst the most sought after Canon FD fit prime lenses, and command high prices as a result; the standard f1.8 50mm lens that usually comes with the A-1 performs perfectly well. I also bought a (rarely used) extension tube set, and a 2x teleconverter. I was given a photocopy of the original comprehensive manual shortly after I bought the first A-1, useful to work out all the additional functions never or almost never used (I've never shot a double exposure with the camera, for example, and don't think I've ever really used the aperture priority mode). The manual provides illustrations of the many accessories provided for the A-1 and other Canon SLRs at the time, notably a data back, motor wind, magnifying eyepieces and so on. The only drawback to the Canon A-1 is that the electronic shutter is entirely dependent on battery power, a PX28 (although for others its fastest shutter speed of 'only' 1/1000th is also a cause for complaint). The electronic shutter can be a problem when a battery fails: many other SLR cameras of similar dates have at least one default mechanical shutter speed. On my current body, the battery door is cracked in two places - a common problem, looking at other descriptions online - but this is kept secure behind the action grip.

The Canon A-1 did (and continues to) live up to my expectations when I finally bought one, making the Praktica BCA look and feel very basic and primitive in comparison, although, for a first 35mm SLR camera, it had been both adequate and cheap (the secondhand price difference being much greater twenty years ago). In the course of writing this post, I've put a few more rolls of film through my A-1, and it's helped to remind me just how good the Canon A-1 is as a classic, manual-focus 35mm SLR camera.

Canon A-1 (50mm f1.8 lens) with Fuji Superia 200
Canon A-1 (50mm f1.8 lens) with Ilford XP2
Canon A-1 (50mm f1.8 lens) with Ilford HP5 Plus
Canon A-1 (50mm f1.8 lens with 20mm extension tube) with Fomapan 400
Canon A-1 (50mm f1.8 lens) with Ilford HP5 Plus, pushed processed to 800
Canon A-1 (50mm f1.8 lens) with Ilford HP5 Plus, push processed to 1600
Canon A-1 (50mm f1.8 lens) with Ilford Delta 3200
Canon A-1 (28mm f2.8 lens) with Ilford HP5 Plus
Canon A-1 (135mm f3.5 lens) with Ilford HP5 Plus
Sources/further reading:
Canon A-1 on Camera Wiki
Canon's Camera Museum
The Canon A-1 manual
The Casual Photophile review of the Canon A-1
Photography in Malaysia's excellent Canon A-1 pages
Canon A-1 on Photoethnography

Monday, 28 September 2015

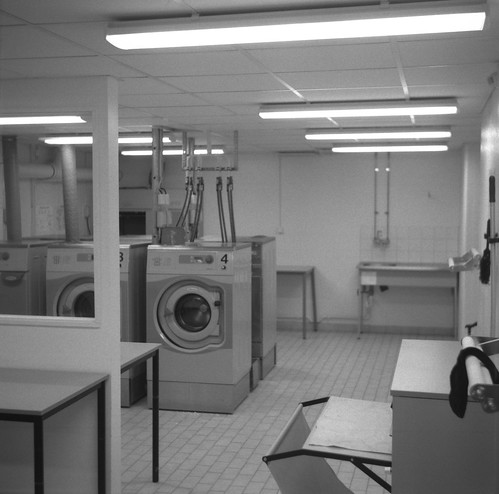
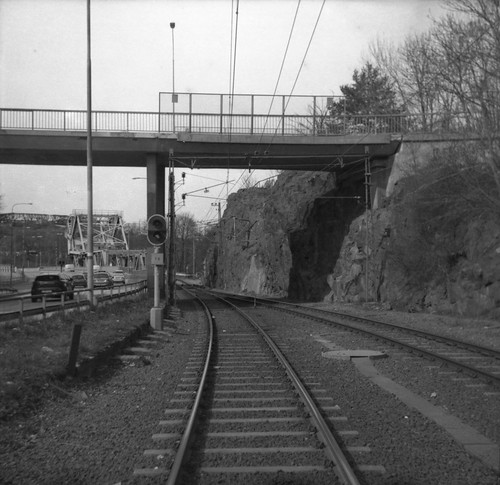
Some Thoughts On Railway Stations


In the spring I travelled to Stockholm by rail. The reason for choosing this method of travel was that I could plot a route with stops at both Wuppertal and Hamburg, researching locations from two films by Wim Wenders: Alice In The Cities, and The American Friend. This parallel journey through the Germany of the 1970s was documented on a separate, dedicated blog. I have just recently updated the blog with the photographs taken on the journey - which took some time to develop and scan (I shot about fifty rolls of film - 35mm, 120 and 110). I took three cameras with me: the medium format Zodel Baldalux, 35mm Kodak Retina IIa and my Pentax Auto 110, with cartridges reloaded with Kodak WL Surveillance film - as well as taking the rest of the roll of 16mm film and a dark bag to reload the 110 cartridges each day of my journey - although none of the images on the blog are actually from the Pentax.

I have now recently updated the blog with two pages directly relating to locations used for scenes in both films, the pages marked Alice in the Cities and The American Friend, as well as interspersing relevant images through a number of the posts written on the journey itself, about the films, the research and the locations, and more generally about travelling from London to Stockholm by train. I haven't added images from the two films for comparison, but some of the locations in Hamburg are shown in the images from the film on the Cranes Are Flying blog about The American Friend. Due to the nature of formatting with Blogger, the blog entries are listed as most recent first, essentially presenting the journey in reverse order.


Monday, 31 August 2015

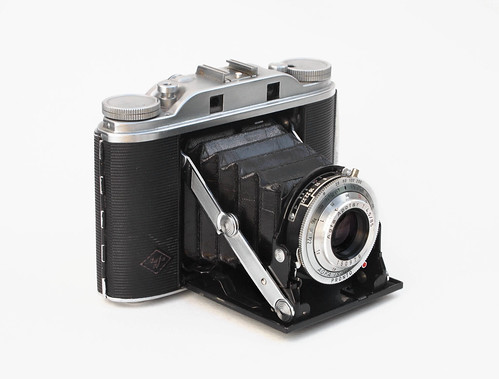
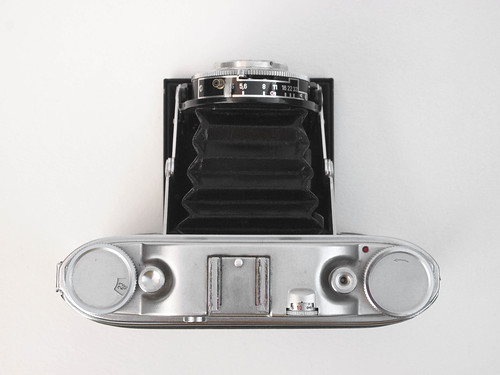
Agfa Isolette III

Agfa Isolette III
Agfa's Isolette range of 6x6 medium format folding cameras are still very much well-used and well-liked, judging by the numerous references and results among film photographers online, a good sixty years since the models were produced. My own experiences with the Isolette are limited and recent, having bought an Isolette III earlier this year at a Stockholm flea market for 200SEK, but I had used an Agfa Record I for a number of years, and the Isolette's construction, styling, design and user experience are all very similar to the Record 6x9 cameras. The Agfa Isolette cameras take 6x6 images, although a couple of the Isolette models had masks for smaller formats. The Isolette III was introduced in 1954, snd is essentially the same camera as the Isolette II with the addition of an uncoupled rangefinder.

The Isolette cameras were provided with lenses of both 75mm and 85mm focal lengths, which are dependent on the lens' widest aperture: f4.5 lenses on the Isolette are 85mm, while f3.5 lenses are 75mm. I've preciously had a couple of medium format cameras in the 6x6 image size with 75mm lenses, a common focal length, but I've sometimes felt it a little too wide on the format. However, it may be worth bearing in mind that the 6x6 format came about with the twin-lens reflex camera, the typical construction of which would not have been conducive to changing the camera's orientation had it shot a rectangular image, and so the square format allowed cropping in either orientation as much as being used full-frame. Using the full, square frame, I find achieving satisfactory compositions require more thought than a common rectangular photographic frame; conversely, it seems a shame to crop the image to do so and not make use of the whole negative's area.

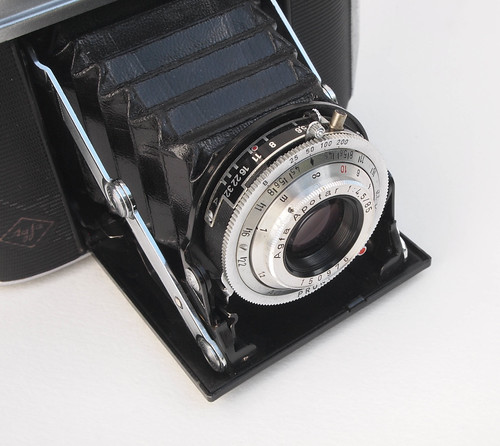
Agfa Isolette III lens and shutter detail
My model has Agfa's Apotar lens in a Pronto four-speed shutter, both being among the cheaper variants available. The Apotar is a triplet lens, but, being post-war, it is coated. The Apotar was the middle of the range of lenses: the lowest priced lens was the Agnar, the lens that my Record I came with, even so it did provide very good results on modern medium format films. The Isolette has focus below 1 metre, although the 1 metre is the last mark on the focus ring (possibly the lens focusses down to 3ft which would be marked on US - under the Ansco name - or UK export models). The marks at 3m and 10m are picked out in red. The Pronto shutter has four speeds 25th, 50th, 100th, 200th, plus B. The addition of the camera's rangefinder meant that unlike other Isolette models, the III no longer sports a T setting (I personally find shutters with a 'T' setting more useful then a 'B'). Other features mark my Isolette as a later version, from 1956 onwards: there is a film reminder dial on the top left of the camera instead of a depth-of-field calculator, the DOF indications are around the lens instead (the film reminder has old DIN speeds of 23/10 - 21/10 - 17/10 and COL T - COL K - COL NT). Film advance is manual, using a red window on the camera back but it does have a double exposure lock on the shutter release: after exposure a small round window shows red until the film is advanced and the lock disengages. The shutter can still be tripped by the lever around the lens when locked.

Agfa Isolette III top plate
The camera had two problems when I bought it: the camera back did not close tight at one side; and the rangefinder wheel was immovable. The first of these problems was solved by using pliers to bend inwards one of two prongs to provide a tighter fit with the camera back's latch (when in Stockholm itself I realised this might be a problem and simply held the back tight when shooting - although on some exposures I wasn't careful enough with this and some show the top right corner of the pressure plate not keeping the film in alignment, falling behind the plane of focus).

Detail of loose catch
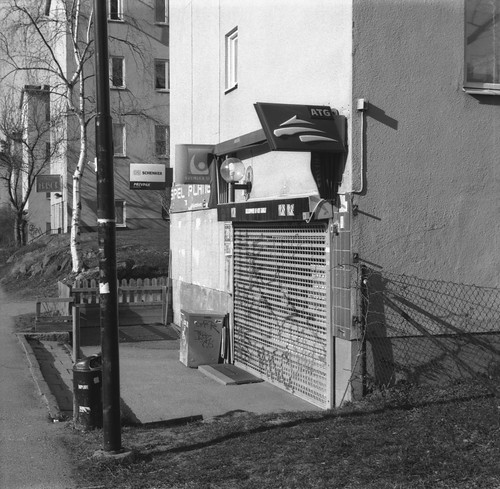
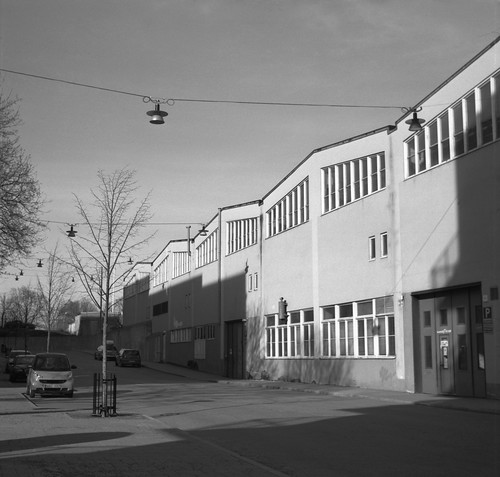
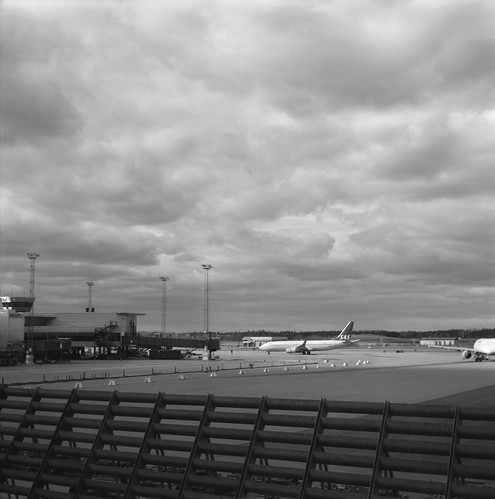
I didn't have the tools to attempt to fix this or the rangefinder while in Stockholm. However, as the rangefinder is uncoupled, the fact that it was stuck did not interfere with using the camera, it merely meant estimating distances, and paying more attention to the DOF scale around the lens. Despite these issues, I liked using the Isolette III enough to use it while in Stockholm rather than the Baldalux 6x9 camera I'd brought with me, and shot a number of different films with it, Rollei RPX 25 and 400, Fomapan 400, Superpan 200 and some Kodak Verichrome Pan with a "develop before" date of October 1969.

Sample image with Fomapan 400
Sample image with Superpan 200
Sample image with Rollei RPX 25
Sample image with Rollei RPX 400 at 1600
Sample image with Kodak Verichrome Pan, develop before date of 1969

Sources/further reading:
Isolette range on Camera-Wiki
Agfa/Ansco Isolettes by Andrew Yue
Isolette cameras on J. Noir's Camera Pages
Isolette III manual (first version)

Monday, 10 August 2015

Foma Retropan 320 Soft

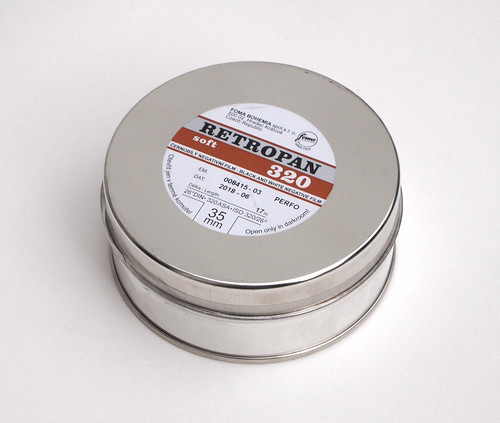
Foma Retropan 320 Soft 35mm bulk film
In May this year, Foma announced a new film, Retropan 320 Soft. As the past few years have seen the market for film contract, and products discontinued, any news of new films provokes interest - and sometimes a little scepticism - from film photographers online. Foma has both the well-established Fomapan 400 and 100, and recently re-introduced their 200 speed film to their product lines, a new film at a speed fractions of a stop between the two needs to have distinctly different characteristics to be a worthwhile addition. Foma states that Retropan 320 soft is:
is a panchromatically sensitized special negative black and white film with fine grain, good resolution and contour sharpness. The film is characterized by a wide range of half tones and soft light which makes it suitable for photography and subsequent contact printing or “retro” style enlarging of negatives (photographs of still lives, architecture, experiments, landscapes, portraits, etc.)
The choice of name for this new film provides an indication of these qualities, and it could be said that the speed itself, 320 ISO, has something 'retro' about it, there being only one other black and white film rated 320, Tri-X sheet film. Retropan 320 Soft is currently only available in bulk rolls of 35mm and large format sheet films. For this post about the film, I have only tested the emulsion in 35mm, but results for sheet film can no doubt be extrapolated from these. I bought a bulk roll from Process Supplies, the only distributor in the UK so far.

As an entirely new film, there is as yet little data for developers and times. At the time of writing, Retropan 320 is not listed on the Massive Dev Chart; the data sheet from Foma gives times and dilutions for just four developers and their dedicated one (these are: Foma's new Retro Special Developer; Ilford Microphen; Kodak HC 110; Spur NHC; and Rollei Supergrain). I don't use any of the listed developers, and although best results may be achieved in the manufacturer's dedicated developer, it may not be practical to buy specialist developers tailored to every film. Instead, I chose both of the two developers that I've used over a number of years: Rodinal (in this case, R09 One Shot) and Ilfotec LC29.

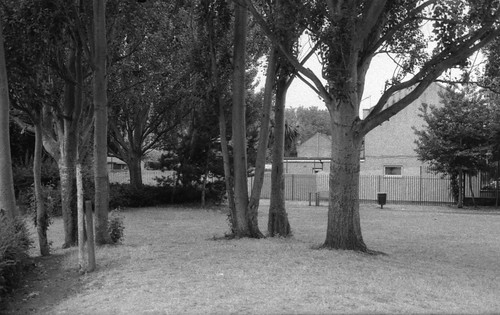
For my first test roll I had intended to process the film by using one hour stand development in Ilfotec LC29 at 1+100; instead due to a mix up of tanks (the other tank had Kodak Plus-X), I developed this in Ilfotec LC29 diluted 1+29 for 9 minutes at 20ºC. It was immediately evident when pulling the film out of the wash that the negatives were of low contrast and good latitude; there is a grey base to the film, and it does not have any edge markings in 35mm, which can be useful for gauging development. However, the time and dilution used appeared relatively successful despite being entirely serendipitous. The first test roll was shot on an overcast morning, and the six-stop difference in exposures made for the latitude test appeared as a fairly gentle gradation across the frames. When scanning the negatives of this first test, these appeared to show a slightly usual tonal response: however, the grass under the trees was very yellow and reflective of the diffuse lighting conditions. I shot (in sunny conditions) and developed a second latitude test as I had initially intended, using stand development with Ilfotec LC29 diluted 1+100 (this went over the hour mark by a quarter, but with stand development and a film with good latitude, there would be naturally a wide margin in timings).

For a third test roll, I used stand development with R09 One Shot at 1+100. Although direct comparisons suffer the vagaries of each stage between subject and resulting image - metering, camera equipment, development and scanning - this roll appears to show fuller negatives. The first two rolls developed in Ilfotec LC29 looked as though rating the film at box speed risked a lack of shadow detail, especially in high contrast subjects. This is in part an issue of metering, but the negatives in R09 appeared to better achieve the stated box speed.

Retropan 320 at box speed, developed in Ilfotec LC29 1+29, 9m at 20ºC
Retropan 320 at box speed, stand developed in Ilfotec LC29 1+100 for 1 hour 15 minutes
Retropan 320 at box speed, stand developed in R09 One Shot 1+100 for one hour
Foma's data sheet lists Retropan 320 Soft as having qualities of "fine grain, good resolution and contour sharpness". The first quality, fine grain, may be achievable with the dedicated developer. In the tests that I made, the grain appeared not untypical of a 400 ISO film, not what I would describe as 'fine grain'; there does appear a slight difference between the results developed in Ilfotec LC29 with normal agitation and stand development: the appearance of the grain is just perceptibly tighter when stand developed in the two images compared below.

Retropan 320 at box speed, stand developed in Ilfotec LC29 for one hour
Retropan 320 at box speed, developed in Ilfotec LC29, 1+29, 9m at 20ºC
Retropan's "good resolution and contour sharpness" are more evident. There must be a relationship between fineness of grain, sharpness and resolution, although this is not necessarily a straightforwardly linear one: a film can be 'grainy' and still possess good resolution, and the converse may be true. The image below of the chain link and wooden fences does show these qualities, as does this photograph with a spider's web showing up in this shot, and the lettering in this photograph.

Retropan 320 at box speed, stand developed in R09 One Shot, 1+100 for one hour
The "soft light" described in the data sheet appears to be related to halation, and possibly irradiation. This may be due to the film having little or no anti-halation layer. In the tests I made, halation was more prominent when over-exposed, as one would expect, but as the film's good latitude means that it copes well with over exposure, so this effect could be deliberate by design (this can, incidentally, produce a look reminiscent of infrared film when these highlights are located on foliage). With regards to this effect, the data sheet states:
Base 
The following bases are used for manufacturing the particular sorts of the film:
- 35 mm film - a gray or gray-blue cellulose triacetate base 0.125 mm thick,
- sheet film - a clear polyester base 0.175 mm thick furnished with an antihalo colour backing which will decolourize during processing.
This suggests that in 35mm the film does not have a specific anti-halation backing, but the "gray or gray-blue" base may be tinted so as to reduce halation, although the effect of halation can clearly be seen in some of my results; this may also be light scatter due to irradiation, a separate but related effect.

Retropan 320, two stops overexposed, stand developed in R09 One Shot 1+100 for one hour
Retropan 320 at box speed, stand developed in Ilfotec LC29 1+100 for one hour
Additionally to overexposure as a general approach, specifically, subjects with bright local luminance - light areas against a larger dark background - emphasise these effects. This is in part due to metering: all the above tests were shot with an Olympus OM10, relying on its centre-weighted metering. The relationship of subject metering and exposure to development could be better correlated when shooting sheet film of course. These effects would also be less obvious with large format.

Foma's data sheet states that Retropan 320 Soft's "wide exposure latitude provides very good results also when overexposed by min. 1 EV (ISO 160/23°) and underexposed by 2 EV (1250/32°)." It provides times for rating the film at 640, but not 1250 (interestingly, all developing times on the data sheet are given as a range and not absolutes: these are all either one or two minutes). Given the results from the latitude tests that I shot, there seemed little point in specifically finding and adjusted developing time for rating the film at 160, but I did want to try push processing. I shot a roll of Retropan 320 rated at 640 with the Voigtländer Vito IIa,  developed in Ilfotec LC29 1+19 for 16 minutes at 18ºC. This guess at a developing time was based on the results from my first film, with less dilution, and what felt like a much increased time.

Retropan 320 at 640, developed in Ilfotec LC29, 1+19, 16m at 18ºC
For a two stops push, rating the film at 1250 ISO, I developed it in Ilfotec LC29 1+19 for 20 minutes at 19.5ºC. As is generally the case with push processing, the results in good, even lighting were better than the few that I shot at night (as underexposure and overdevelopment increases contrast, and night shots tend to be high contrast, with localised point sources of illumination and deep shadow areas). For a further test of push processing, I might chose less dilution, 1+9, with similar times. Despite local halation, the highlight areas appear resistant to blocking. The characteristic curves on the data sheet are cropped to the very start of the shoulder area: from the latitude tests, I have a suspicion that the film demonstrates a gentle rollover at the shoulder. The curves also show an unusual 'bent leg' to the straight line section, at least with the dedicated developer.

Retropan 320 at 1250, developed in Ilfotec LC29, 1+19. 20m at 19.5ºC
Retropan 320 at 1250, developed in Ilfotec LC29, 1+19, 20m at 19.5ºC
All the tests I've made so far do show Retropan 320 to have quite distinct qualities, and so providing perhaps some kind of niche for it as a product, although these are an unusual combination; I've found it to be a bit of a curate's egg. With limited availability and limited information from the manufacturers, this does provoke some speculation about the intentions for the new film. Presumably what is currently available represents a limited batch of emulsion made to test market viability, but Foma's production of a dedicated developer for it demonstrates a willingness to support Retropan 320 at least for the immediate future; with sufficient demand, availability in 35mm cassettes and medium format rollfilm would confirm this.

Retropan 320 at box speed, stand developed in Ilfotec LC29 1+100 for 75 minutes
Retropan 320 at box speed, stand developed in R09 One Shot, 1+100 for one hour
Retropan 320 at box speed, developed in Ilfotec LC29, 1+29, 9m at 20ºC
Retropan 320 at 640, developed in Ilfotec LC29, 1+19, 16m at 18ºC
Retropan 320 at 1250, developed in Ilfotec LC29, 1+19, 20m at 19.5ºC

Tuesday, 28 July 2015

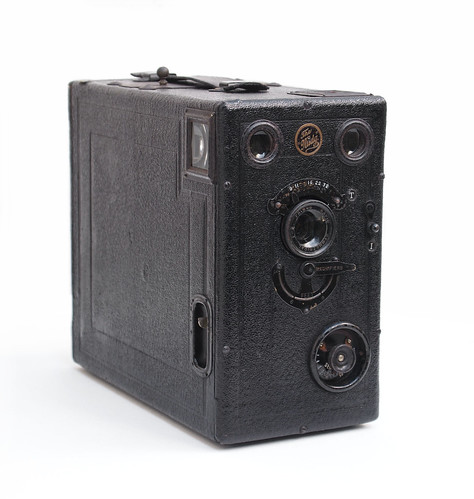
The "Midg" Falling Plate Camera

The "Midg." Falling Plate Camera
"It may be worth recalling that in those days hand cameras were called detective cameras, due to a popular belief that they were used by the police in the detection of crime. They used 1/4-plates (then thought small) held in sheathes and changed by a bag, or by a mechanism that could be relied on to jamb [sic] at critical moments. Serious workers and really nice people would have scorned to be seen with a hand camera."
Letter to Miniature Camera Magazine, September 1937
The introduction of the dry gelatin photographic plate was one of the most important factors in the mass popularisation of photography, soon to be followed by the innovation of film itself. The technology immediately preceding, the wet plate, had the distinct disadvantage of sheets of glass needing to be coated, shot and developed all within a very short time. The new dry plate could be coated with photographic emulsion and then stored until use - and stored again until development. Additionally, with time no longer a critical factor, both coating and development of the glass plates became two operations that a photographer could delegate to specialists. The convenience of the dry plate resulted in new forms of cameras being introduced to take advantage of this technology. In the quote above from Miniature Camera Magazine, the writer is recalling his experiences of photography in the 1890s, in contrast to the cameras of the 1930s: the magazine was dedicated the 'miniature' formats of 127 and 120 rollfilm, and 35mm. The 'detective cameras' referred to are a form of box camera: the nomenclature appears to have been used to contrast these against the typical whole- or half-plate 'stand' cameras of the time, wood and brass bellows cameras normally used on a tripod. Although by no means small, the detective camera, usually a leather covered box camera, would have appeared a relatively unobtrusive piece of equipment. As the letter describes, these were cameras which carried a magazine of plates, sometimes changed by a bag attached to the camera, or by a mechanism allowing a series of plates to be exposed and then stored inside the camera. A common version of this was the falling plate type: glass plates (or, in a few cameras, sheet film) either fell into place to be exposed, or, as was more common, fell out of place once exposed. Unlike stand cameras with separate single or double plate holders, the magazine camera had the convenience of holding (usually) a dozen plates at a time and could be used hand-held.

The Midg (sic) was one such camera, popular in Britain at the start of the 20th century. The small round badge between the viewfinder lenses has its name written as The "Midg." - complete with double inverted commas and full stop. It was sold by Butcher and Sons, which would later join with Hougtons and eventually become Ensign. The name suggests a small camera; its dimensions are 18.5 x 21 x 10.5cm, making it very large when compared to rollfilm box cameras of the same period or slightly later. There were a number of models of the Midg, some with focussing lenses, some with front movements. My camera has neither, so would appear to be a No. 0, likely a back-formed model number after new, more advanced, Midg cameras appeared; the f8 lens would place its date from 1905 onwards; earlier cameras had slower lenses.

Although badged by Butcher and Sons, the camera itself would have been made by another company, not an uncommon practice. The Living Camera Museum entry for the Midg states that it was "probably made in Germany"; Grace's Guide gives the following useful entry:
1915. Houghtons Ltd and W. Butcher and Sons Ltd formed a joint venture Houghton-Butcher Manufacturing Co Ltd to share manufacturing facilities. This agreement was essential for Butcher, which had no manufacturing plant and was mainly trading imported German cameras before the outbreak of World War 1. The two companies continued to trade separately, and the camera designs remained distinct. [my emphasis]
As many of these falling plate cameras were designed along very similar lines, it is by no means easy to discover the original manufacturer of the Midg purely by comparing images of cameras online (it is possible that the Midg was made exclusively for Butcher, but far more likely it would also have been sold under another name in Germany). However, according to Camera-Wiki, Butcher did sell cameras by Huttig, notably the Gnom and the Aviso as the Little Nipper, so it may just be possible that the Midg was another Huttig camera (it also mentions Ica, but not any specific models). The Midg first appeared in 1904 (Early Photography gives c.1903 as the date), and was still being advertised in the early 1920s. Generally, the magazine camera as a type was popular from the 1890s to around the time of the first world war; the Midg itself has a small role in popular culture thanks to the Cottingley Fairies hoax. For the first photographs in 1917, Elsie Wright and Frances Griffiths used Elsie's father's Midg; once these images had become famous, the girls were given Cameo cameras in 1920 to take more photographs, moving from falling plate to folding cameras, and in doing so perhaps demonstrating the decline in use of the falling plate camera.

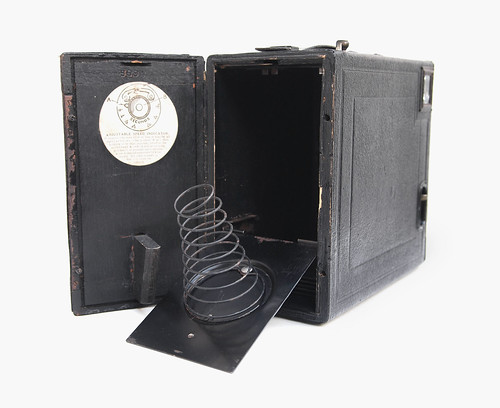
The Midg is a quarterplate magazine camera and takes twelve glass plates in metal holders. As photographic plates were usually sold in one-dozen packs, it would be possible to load a whole pack of plates at a time. The image below shows the back of the camera opened: the bolt mechanism on top of the camera releases each exposed plate to fall into the bottom of the camera. This also has a small round window which shows numbers 1 to 12 as the plates are advanced; this has to be manually set. Plates from the bottom of the camera can be removed (in the darkroom) while unexposed plates are still in position. Some falling plate cameras had split backs for this purpose, but as the Midg has a separate pressure plate this is not necessary (in some cameras, the spring was fixed directly to the inside of the camera back).
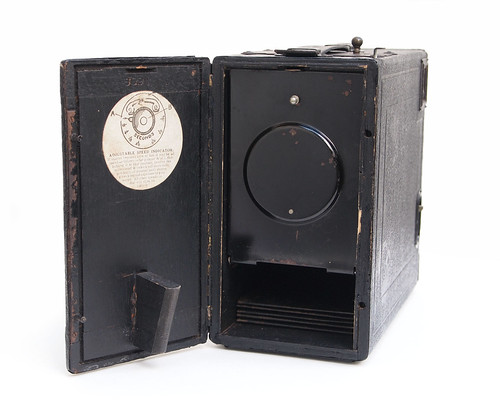
Back opening showing pressure plate and plateholders
Back opened to show spring mechanism
The metal holders are removed from the camera for loading and unloading. To load the camera, these are placed on two rails, just visible in the image above. The holders, below, have two pins at the bottom, which are positioned under the rails when loading, before the pressure plate and spring are then closed, along with the camera back. Along one side of the holders are holes, in groups of three, a marking which numbers the plates on exposure from one to twelve. My camera was missing two holders (numbers 3 and 11).
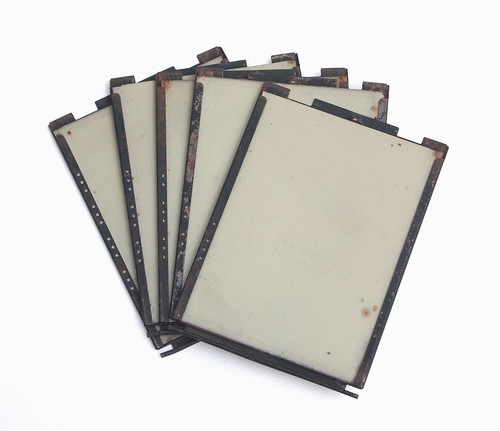
Midg plateholders showing edge markings
Inside the camera when I received it, the plateholders were loaded with glass plates: six of these were blank, unexposed, but four of these had negatives inside. Leaving aside the question as to why the negatives had been reloaded into the camera, it was clear - due to the markings on their edges - that these pictures had been shot with this same camera. The negatives all looked overexposed with uneven patches of fogging, probably from light leaks. I made contact prints from the negatives, three of which showed the same woman, one joined by a man, below, and the fourth with the some flowers - perhaps the same flowers seen in the photograph below.
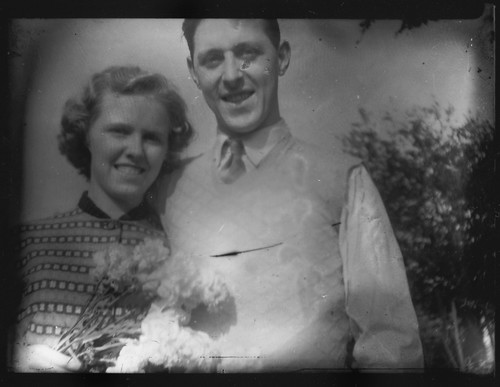
Negative found inside the camera
The lens is an f8 Primus Rapid Symmetrical lens, essentially a Rapid Rectilinear design, stopping down to f32 (when cleaning the camera, I removed the plate around the lens and found the back of it with aperture markings engraved down to f44). The lens is fixed, but is provided with three supplementary close-up lenses. The pointer underneath the lens rotates these into place behind the front lens element for pictures at distances of 9, 6, and 3 feet (the position without these supplementary lenses is marked 'open' rather than infinity). This does mean that there is no intermediate focussing, and in use, I found these distances were not very accurate; other versions of the Midg have distances of 4, 8, 12, feet, which from my results when using the 6 and 3 feet settings, felt as though these distances might be more realistic.
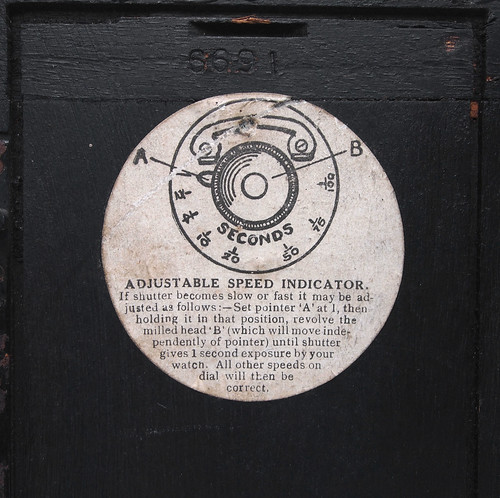
Shutter adjustment instructions
The shutter appears to be an everset self-capping, sector type. An arrow beside the lens is switched to either T for 'Time' or I for 'Instant' settings. On I, shutter speeds are set on a dial, from 1 second, through 1/2, 1/4 1/10, 1/20, 1/50, 1/75, to 1/100. Inside the camera back is a pasted notice about adjusting the shutter tension, from which I inferred that possibly the shutter works with intermediate timings when set between speeds. The shutter release is a lever on the side of the body which has a simple lock position.
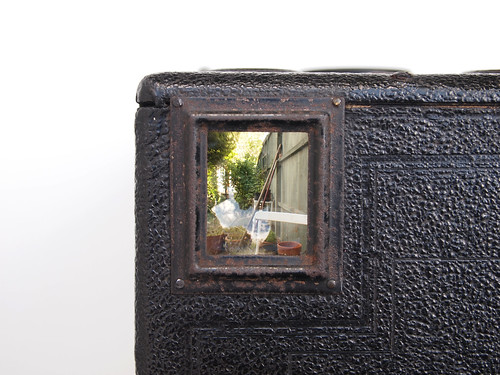
Midg finder showing laterally reversed image
Framing is achieved by two large (and surprisingly clear) viewfinders with laterally reversed images. Before using the camera, it needed a good deal of cleaning, having a smell about it of many decades in an attic. In cleaning, I removed most of the metalwork from the body, including the plate changing mechanism itself. This fits into a rather roughly cut section of the wooden top to the camera. The metal frames of the viewfinders were simply fixed by panel pins into the wood. Although there was a small amount of corrosion on the mirrors, once cleaned these provide the best images I've seen on viewfinders of this type. The hand strap had been replaced by a home made version at some point - the underside has an embossed line bearing no relation to its shape, obviously cut from a larger piece of leather. In renovating the camera, I didn't attempt to take apart the shutter. This fired, but stuck at slower speeds. I attempted to adjust it as described by the notice inside, but this made no difference; possibly at 1/100th it is accurate. I did shoot a couple of images at 1/100th 'wide' open at f8, but these were quite underexposed.

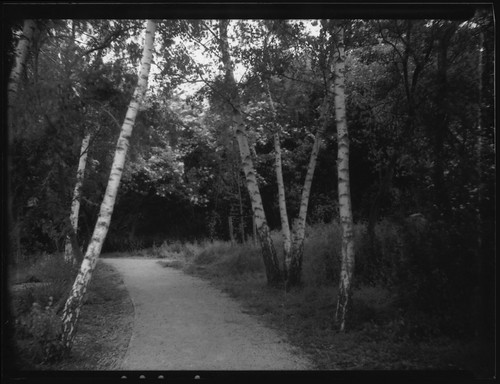
Having used old, previously unexposed photographic plates successfully in the past, obviously I wanted to use the Midg to shoot glass plates; I had seen a few examples online of these cameras being used contemporaneously with film or paper, but none shot with actual glass plates. For the first photographs with the Midg, I chose a box of Ilford Soft Gradation Panchromatic plates. I've shot a number of these plates in different sizes from the 1940s through to the 1960s with almost universally good results. This particular box had a 1930s-1940s style label but unlike many other boxes of Ilford glass plates, although it was sealed, there was neither a label under the wrapping with developer formula and a date code, nor a separate leaflet inside to date it more securely. I rated the plates at 25, and, except for one underexposed image, I used a tripod and the T setting for all the shots. As a result, I mostly used apertures of f16-f32 to provide exposures of 2-10 seconds, easier to achieve manually, than trying to get a 1/2 or 1/4 second. I also used a yellow filter for many of the shots: as well as providing definition to the skies, this also functioned as a neutral density filter, giving longer exposures, again, making it easier use the shutter on its T setting.
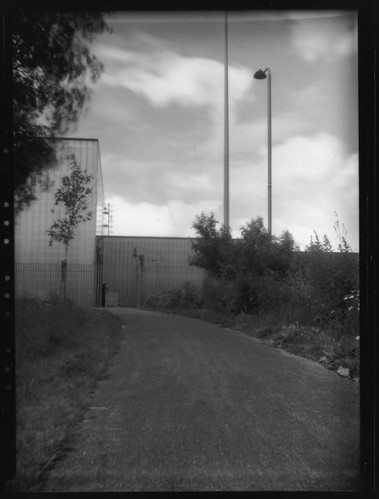
Ilford Soft Gradation Panchromatic plate
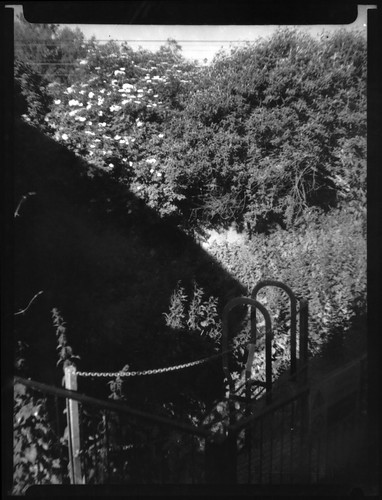
I shot some plates with the camera in a vertical position; using the camera horizontally, after exposing the plate above, I tried the plate advance mechanism, only to find that, although the spring pushed the plate forward and released it, while horizontal, the plate didn't drop in to base of the camera cleanly, and, even with some shaking about, it got stuck at an angle. This showed up in as a shadow across the corner of the next plate exposed (below), and I was not able to advance this plate to take any more photographs. This was very much what I expected might happen - and I could have confirmed this without potentially wasting a glass plate - however, given the dark area at the top of the affected plate below, the top left corner being occluded in this way is not especially distracting. After this, when shooting horizontal images, I turned the camera back to its vertical orientation before advancing to the next plate.
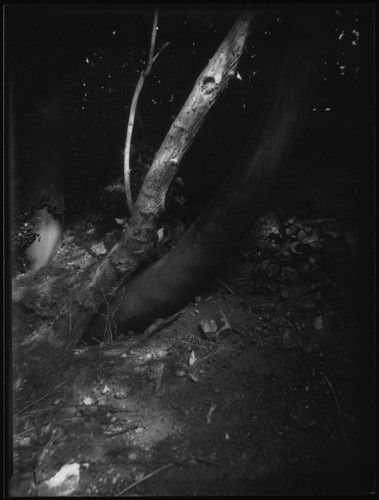
Ilford Soft Gradation Panchromatic plate
The camera is designed to hold the plates in place once these have dropped into its base by two sprung metal runners in the front, which have six pairs of protruding notches, made to secure two exposed plates at a time, as in the image below; the door of the camera has an angled profile that fits underneath the pressure plate, as can be seen in the photographs further up in this post, to ensure, once exposed, the plates are do not move around inside the body of the camera, even if the camera is turned upside down.
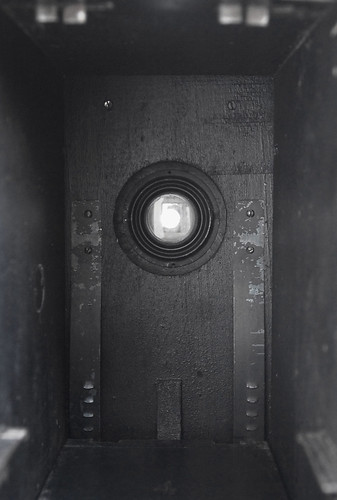
Camera interior showing notched metal springs
Having shot a whole box's worth of Ilford Soft Gradation Panchromatic plates, I wanted to try some different glass plates. Having three as-yet unopened boxes of Kodak P1200 Super Panchro-Press plates from the 1950s, I loaded a few holders with these, and shot them at the same time as some Ilford F.P.3 sheet film. However, when it came to developing the Kodak plates, opening the tank once these were in the fixer I could see the emulsion lifting off the glass. None of the plates had the emulsion detach completely, so this was an extreme example of what is known as 'frilling'; the plates also had patches which look like mould obscuring the images on the negatives, which are just discernible, but the difference from the Ilford plates is very marked.
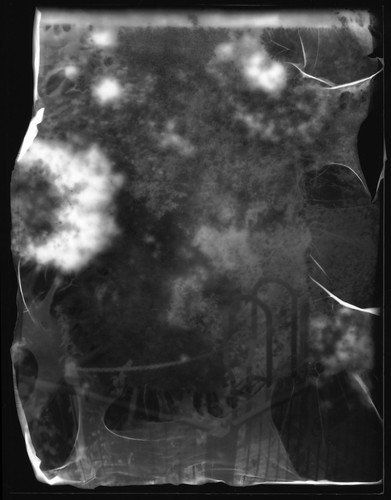
Kodak P1200 Super Pancro-Press
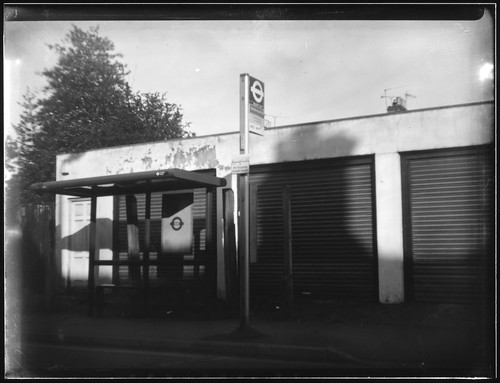
As well as glass plates, I also wanted to shoot some film with the Midg. I already possessed a number of film sheaths in the quarterplate size, and some, but no means all, of these fitted into the Midg's plateholders. I have read about falling plate cameras needing the weight of glass to provide the impetus for the plate to fall once released, but in the Midg, the plateholders happily fall into the bottom of the camera while empty, so using film instead of glass plates did not cause any difficulties. I first shot some Ilford F.P.3 film from late 1940s. Ilford introduced F.P.3 in 1946; my box had a leaflet inside the box dated to May 1949. I had previously tested this box of film by shooting a sheet with my Ensign Klito camera; the FP3 film has some degradation due to its age, but by increasing the exposure and achieving a denser negative means this became less obvious - it shows more clearly in areas of flat tone. Despite being nearly 70 years old, the film was still quite responsive: I shot a first few exposures rated at 25; however, with some uneven marks that I suspected might be due to the interleaving black paper (possibly not acid free), I subsequently rated the films at 12 to reduce the appearance of these marks.
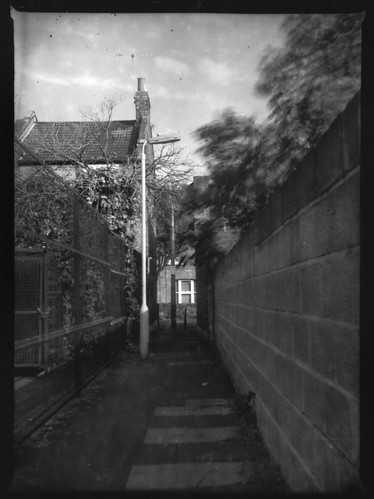
Ilford F.P.3 film, rated 25
Ilford F.P.3 film, rated 12
Finally, I also shot some process-type emulsions in both film and plates. I used some Kodak Ortho Type 3 film with a 'develop before' date of April 1970 and Ilford N.50 Thin Film Half Tone plates, dating to April 1957. As expected, both these emulsions were high in contrast, which was a little problematic with subjects containing bright sun and deep shadows, shot on sunny evenings. The Kodak film was stand developed in Ilfotec LC29 with a high dilution of 1+150, while the N.50 plates were tray developed in R09 One Shot, also at 1+150, by inspection under a red safelight.
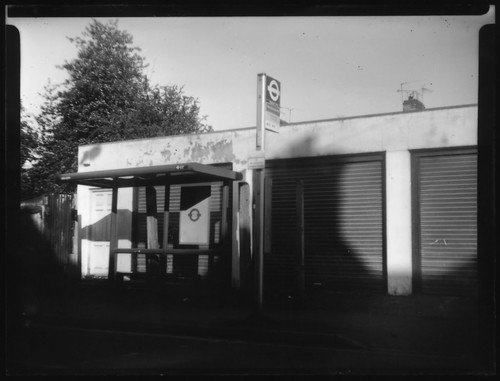
Kodak Kodalith Ortho Type 3 film
Ilford N.50 Thin Film Half Tone plate

Sources/further reading:
The Midg on Camera Wiki
The Midg on Living Image
The Cottingley Fairies photographs
Detective Cameras on Early Photography, including the Midg