Showing posts with label Superpan 200. Show all posts

Monday, 12 December 2022

127 Day December 2022

Baby Ikonta with cut-down Rollei Superpan

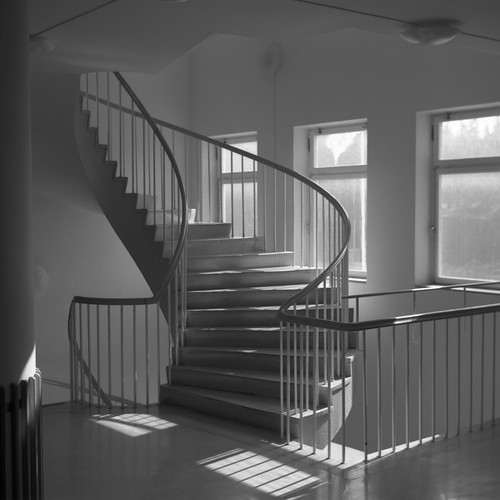
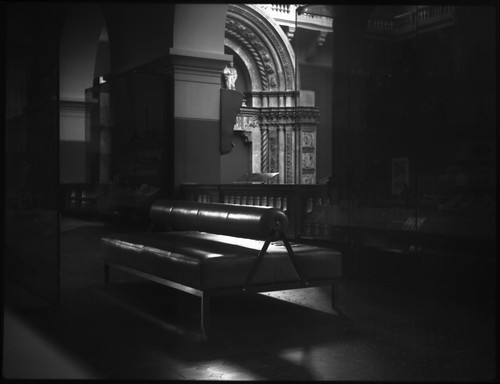
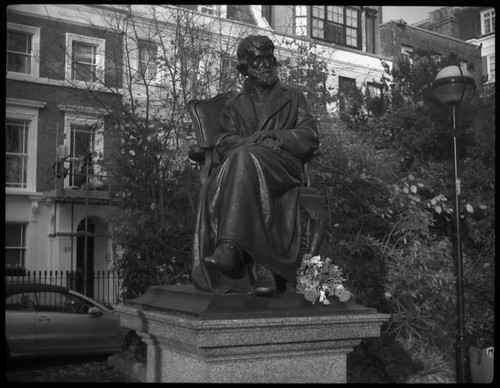
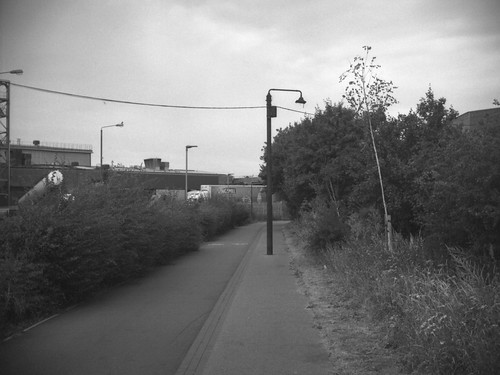
Despite neglecting this blog for a few months now, I couldn't not observe last week's 127 Day. I used the Baby Ikonta again, but had just a couple of rolls of Kodak High Resolution Aerial Duplicating film cut to 127 size, and a short off-cut from a previously-cut-down roll of Rollei Superpan 200 (when cutting down 120 film to 127, the length of the 120 roll is longer than that needed for 127, meaning that with every cut down roll of 120, there's a remainder of film long enough for 5-6 'half'-frames on the '16-on' format); the image above is from the beginning of the short roll which shows that I hadn't accurately lined up the cut end of the film with the start of the numbers on the backing paper. The frames on the Superpan film were hand-held; the Kodak High Resolution Aerial Duplicating film when used as a negative film has a workable ISO of 2. I took most of these photographs in the Victoria & Albert Museum, without a tripod, placing the camera on any level and stable surface I could find that might provide an interesting viewpoint, mostly parapets and benches. I did take one frame, handheld outside, at (I think) 1/10th at f3.5 (the image of Second World War bomb damage to the museum's exterior; another photograph taken outside with this film was made placing the camera on a brick wall).

Baby Ikonta with Kodak High Resolution Aerial Duplicating film

On a winter's day, the light levels in the museum are often quite low: exposure times were between 8 seconds and approximately 1 minute. When I developed the film using PQ Universal, it was clear that I could have bracketed more, and, possibly at longer times, the film does exhibit some reciprocity law failure. Scanning the negatives, there was a lot of digital 'spotting' to do: the extremely clear shadow areas show up any specks of dust or dirt incredibly well. The blue-sensitive high-contrast nature of the film also shows how the daylight entering the galleries from skylights caused the floor appearing in some of the frames to appear very bright in comparison to almost everything else in the image, with the exception of some of the plaster casts (such as Michelangelo's David). 

Baby Ikonta with Kodak High Resolution Aerial Duplicating film

There was also a denser band along one side of one roll of this film, which I haven't found the cause of, but this may be fogging due to cutting the film down by hand under safelights in an insufficiently-dark darkroom, with something partially shading the film. I did think that this could be due to not using enough chemistry when developing, but usually this would show up as a pattern with the image of bubbles from the surface of the developer. This line can be seen to the left of the cast of the architectural façade in the image below.

Baby Ikonta with Kodak High Resolution Aerial Duplicating film

The Kodak High Resolution Aerial Duplicating film may also have benefitted from flashing before exposure to raise the shadow values, perhaps something to remember for January's 127 Day. The Rollei Superpan film was less problematic (despite not being taped at quite the right place to the backing paper), but I did use Kodak HC-110 to develop the film, having previously tested this with Rodinal, and worked out a time/temperature/dilution regime to get the best results for my own approach, which I haven't done with HC-110, merely taking the Massive Dev Chart's single recommendation: 6 minutes at dilution B, 1+31 from concentrate.

Baby Ikonta with Kodak High Resolution Aerial Duplicating film

Baby Ikonta with Kodak High Resolution Aerial Duplicating film

Baby Ikonta with Kodak High Resolution Aerial Duplicating film

Baby Ikonta with Kodak High Resolution Aerial Duplicating film

Baby Ikonta with Rollei Superpan 200

Baby Ikonta with Rollei Superpan 200

Baby Ikonta with Kodak High Resolution Aerial Duplicating film

Friday, 15 July 2022

127 Day July 2022

Zeiss Ikon Ikonta 520/18 with Rollei Superpan

Although I've not devoted much time to this blog of late, I didn't want to miss 127 Day earlier this week. This occurred towards the end of a spell of hot humid weather, with a dip to slightly more comfortable temperatures and humidity, a lull before the forecasted extreme heat in a few days' time. Taking some photographs on a walk in the early evening, it was still very warm, and the lighting had a peculiar heavy overcast quality (I was also recovering from a second Covid-19 infection, which, with the weather, gave a slightly soporific feel to the evening, and possibly as a result I wasn't really giving that much sufficient attention to subject matter and composition). I used the reliable Baby Ikonta, and a roll of cut-down Rollei Superpan 200, a film I've used a few times before, and had tested a fair bit in Rodinal to get a workable time/dilution; however, the roll of film I shot on 127 Day I developed with Kodak HC-110, a new developer for me, and so I went with the Massive Dev Chart's recommended time/dilution. Somehow, to me at least (and it may just be my own associated memory), the resulting negatives convey the airless quality of the day, with glimpses of the grass looking bleached by the sun, the foliage of the trees beginning to get the dusty dark tonality of high summer, possibly in part thanks to the extended red sensitivity of Rollei Superpan. Possibly most of the images might also have benefited from a yellow filter too, although I don't have any filters which fit the Baby Ikonta's lens: the constraints and conditions of exposing just a single roll on the day didn't really allow for any of these considerations.


Friday, 2 April 2021

Thornton-Pickard Stereo Puck

Thornton-Pickard Stereo Puck
"It is often said in praise of a particularly good print that it is “almost stereoscopic.’’ With the Stereo Puck every good exposure is given full stereoscopic effect by dual lenses—and the cost of the outfit is now within everyone's reach." 
Thornton-Pickard advertisment
"...the New Wonder Camera The STEREO PUCK MAKES YOUR PICTURES LIVE"
Thornton-Pickard advertisment, BJP Almanac 1932
The prominent legend announcing the fact of the Thornton-Pickard Stereo Puck being "British Made" on the front plate above its lenses, much clearer than the faintly embossed name itself beneath them, brings to mind a scene from the sitcom The I.T. Crowd: in attempting to fight a fire, the character Moss points an extinguisher towards the fire, which promptly bursts into flame itself. Asking "Why's it done that?", Moss looks intently at the extinguisher, and there's a cut to a close up of a label: "Made in Britain", which provokes a knowing sigh from Moss. Intended, on the Stereo Puck, one imagines, to imply a mark of quality, this "British Made" assertion (as indeed for many a product) is at the very least an injunction for the consumer to patriotically 'buy British'. Something about this–the injunction and its instinctive reaction, as exemplified by Moss's sigh–as a general attitude, has an undercurrent of anxiety, of Britain's contemporary place in the world in relation to its long history, a history here of manufacture, but, by broader implication, its imperial history, a notion of a once-held 'greatness' (such a notion untroubled by any deeper examination), although Britain never seriously challenged the German, and then later, Japanese camera industries, and the Stereo Puck, "British made", was of course produced many decades ago. The association I've drawn with the example of the scene from The IT Crowd may be, perhaps, an unfair reaction, a knee-jerk attitude that itself needs examining, but in the case of the Stereo Puck, it's not entirely unwarranted.

I've long had an (occasional) interest in stereo photography, and when I saw the Stereo Puck come up in an online auction for not very much, I bought it on a whim; I used the camera for the first time two years ago for 'Take Your Box Camera To Play Day'; the film I shot then came out with scratches running through all the negatives, which was a little disheartening, and it had sat on a shelf since then, awaiting some remedial action. I was prompted to pick it up again by the #filmweekender box camera challenge from Twitter user Jason Avery: with a number of box cameras to choose from, I thought that the Thornton-Pickard Stereo Puck was sufficiently niche to warrant using it for this challenge.

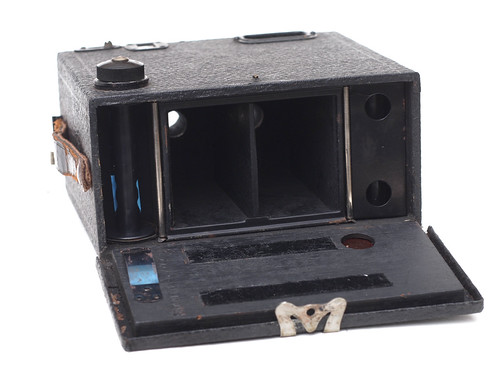
Apart from its ability to take stereo pairs, the Stereo Puck is quite typical of the box camera form: it uses 120 medium-format rollfilm (itself introduced for the Kodak No.2 Brownie, the archetypal box camera); it has a fixed-focus simple lens; a single shutter speed; and a small reflecting finder for framing. It's wooden bodied, at a time when many box cameras were being made from metal (and early plastics like Bakelite were beginning to be used; the Stereo Puck's advance knob seems to be made from Bakelite) and the build quality suggests a certain cheapness: as an example, in the image below, the shutter lever on my camera can be seen to be not fixed entirely square-on to the camera body.
Thornton-Pickard Stereo Puck - top view

Thornton-Pickard did produce some fairly high quality cameras from the last decades of the nineteenth century, field and studio cameras, and, in particular, their reflex cameras and roller blind shutters. The Stereo Puck dates from the 1930s, by which time the company was in decline: it ceased manufacture in 1939 (it was preceded by the Puck, a more conventional box camera). In one of the advertisements quoted at the top of this post, three models are described, enumerated as the No.1, No.2, and No.3, all of which appear to have been available concurrently (at the time of the advert; when researching the Stereo Puck online, these numbers aren't usually used to differentiate its different variants). Sources online date the first version to around 1930, although the given dates vary. I've also observed that there were two versions of the model described as 'No.1': some show the metal tab in front of the handle which provides three different aperture settings, while some do not and presumably have just the one aperture setting. My version of the Stereo Puck is the No.2 and has the most commonly noted difference: this has the 'portrait' supplementary lenses, filters which swing in front of the lenses, easy to identify from the small lever next to the viewfinder, absent from the No.1. Finally, the advertisement describes the No.3 Stereo Puck, which has the ability to photograph either stereo pairs or single images (it's not clear how this works, and, from images of the camera online, I can't tell what might differentiate the No.3 in external appearance; it would be possible to shoot single images with the other models of the Stereo Puck by using a lens cap on one lens at a time–not easy to do due to the recessed lens fittings, with the 'cap' needing to be more like a plug–and not advancing the film until each side of the pair has been exposed).

The Stereo Puck takes (nominally) 6x4.5cm stereo pairs on medium format film, giving eight pairs on a roll of film; by necessity this image format creates a compromise in that the lens separation is noticeably narrower than that of human binocular vision. This is, apparently, a remarkably consistent physiological trait, with a distance of 6.5cm. Ideally, each lens then would be separated by this same distance to simulate stereo vision, but with the Stereo Puck, the lenses are separated by 4.2cm (I've read other distances online, but measuring my camera gives 4.2cm). There are circumstances in which lenses for stereoscopy would need to differ from that of the human eye, but these would be for extreme distances, both near and far, for microscopy or for imaging at distant ranges (to achieve a stereo image of a distant landscape, for example, it helps to have a much greater lens separation, otherwise both images appear too similar to create the illusion of depth). In the 35mm format, in order to construct a camera with a sufficient lens separation, the images have to be recorded on the film in a discontinuous series (i.e., the stereo pairs are not adjacent on the film), the most common method is to have the frame advance periodically 'jump' already exposed frames on the film, such as with the Stereocrafters Videon, where each pair is separated by two images of subsequent pairs on the film, which means that, as a sequence, after a first exposure, the film advances one frame twice in a row, then has to advance three whole frames to avoid double exposing one half of each stereo pair; other methods include exposing the film diagonally to avoid double exposure, as with the Meopta Stereo 35 and the Sawyers View Master. In medium format, the 6x6 image size is more typically used for stereo cameras as the wider image format means that the lens separation is greater; however, at the time that the Stereo Puck was produced, 120 medium format film only had numbers on the backing paper for the 6x9 frame size, which no doubt accounts for the Stereo Puck's design and use of the 6x4.5 stereo pairs, with the understandable compromise on lens separation (roughly concurrent with the Stereo Puck, the Rolleiflex popularised the 6x6 frame size on 120 film; while the Rolleiflex did not depend on frame numbers printed on the film's backing paper, evidently the format was attractive to manufacturers of cameras and film, and 6x6 frame numbers were introduced for less high-end 6x6 format cameras).

The user controls on the Stereo Puck are simple and limited. The shutter, tripped by a lever on the top right of the body from the user's position, has a single speed, reported between 1/20th-1/50th online, and a 'time' mode, with a small metal tab that pulls out to keep the shutter open until either pushed in or the shutter lever is flipped back to its original position: the shutter lever does not spring back to its original position, and so, like many older box cameras, this lever trips the shutter in either direction (on most single-lens box cameras of course, this lever runs up and down, rather than side-to-side), left-to-right or vice-versa. The lenses are fixed-focus four-inch f12.5 achromats; absent on some 'No.1' Stereo Pucks, there are three aperture settings with a metal tab in front of the handle that pulls out a strip of metal with holes punched behind the lens with click stops to provide smaller apertures. The aperture settings aren't marked, but logically these two smaller apertures are one stop successively smaller than the maximum aperture, giving approximately f18 and f25. The 'portrait' auxiliary close-up filters are hidden behind the front panel and pivot between the lenses. These can be swung in to position using the smaller lever next to the viewfinder. This lever is sprung, so the close-up filters return out of the way behind the front panel as soon as the lever is let go.

Thornton-Pickard Stereo Puck opened for loading

Loading the camera, the back is hinged on its leatherette covering; the back is made from wood, like the rest of the camera body, but has a metal outer rim that acts as a light trap with a clasp to secure it to the body. On one side, a curved spring attached to the back acts to provide pressure on the take-up spool. The two strips of felt inside the camera back appear to function as a pressure plate on the film behind the lenses; film advance it by red window using the 6x9 numbers. The supply side spool has a removable metal holder rather than the spring attached to the back; it's hard to see exactly what the design of this achieves, other than perhaps avoiding adding a knob on the supply side to secure the toll of fresh film. There is also a standard trip fitting in the base of the camera, but, for some reason, not centred either side-to-side or front to back.

Thornton-Pickard Stereo Puck with supply-side spool holder removed
When I first used the Stereo Puck a couple of years ago, its limitations were apparent. Some of these are an unavoidable part of the design, such as the narrow lens separation, but other issues are a result of the camera's construction, largely due to a lack of care in the manufacturing tolerances of the Stereo Puck. One of the first things I noticed is the disparity between the two sides of the stereo pair: the images are not well aligned in their vertical dimension, and, in addition, the focus on each side is different. These two aspects together might matter less in an inexpensive box camera with a single lens, but with two lenses, especially with a narrow stereo base, a good stereo image would be approved by the focus and alignment being better.

Thornton-Pickard Stereo Puck with Ilford HP5 Plus
In the image above, the left hand image is lower than the right; the left hand image also has better focus at the bottom of the frame, with the right hand image better at the top. The disparity in focus can be mitigated a little with using the smaller aperture settings, if lighting conditions allow when using the shutter on 'instant'. When creating stereo anaglyphs, the vertical alignment can easily be overcome simply by lining up the two images better, with a small amount of cropping. The ergonomics of the Stereo Puck take a little getting used to, especially if one is familiar with the more typical box camera form, as the shutter release and close-up filter lever are on top of the camera rather than at the sides; as with many a box camera, the viewfinder is merely an adequate indication of what direction the camera is facing and what might be generally in the centre of the frame.

Thornton-Pickard Stereo Puck (close-up filter) with Ilford HP5 Plus at 800
Picking up the Stereo Puck again to use it for the #filmweekender challenge, I carefully rubbed down the rollers at either side of the inside of the camera, which had some spots of corrosion, then polished these in an attempt to prevent the scratches that I had with my first roll of film and which can be clearly seen in the image above. I wasn't entirely successful, but the rather obvious gouges have become thin hairlines, much less obtrusive–in the image above, one has to enlarge it a fair bit to discern these lines. Possibly more polishing might remove these completely. I had a roll of Ilford HP5 Plus, and some Rollei Superpan 200; shooting on the afternoon of the 21st March, the weather was heavily overcast, with the result that I chose to push the HP5 Plus one stop in development, giving an effective exposure index of 800 (as I have remarked before, the idea that one should use a low ISO film in box cameras as these were the films available at the time such cameras were designed only holds true if one uses box cameras in the same way as they would have been used at the time: only taking photographs hand-held outside in bright weather conditions; in addition, possibly tray developing the film by inspection to make up for shortcomings in exposure, and possibly using intensification on the negatives as well). Most of the shots with HP5 Plus were hand-held although I did brace the camera against railings in at least one shot, and some used the close-up filter, supposedly for subjects of 1-3 metres, such as the image above. For comparison, I also took a couple of stereo pairs with and without the close-up filters, as below. Comparing the two pairs, the discrepancy in focus without the close up filter is as described above, with the focus better on the lower part of the left hand frame (although this is also closer to the lens), while focus it better towards the top of the right hand frame. Oddly, the close-up filter appears to reverse this trend, or at least, focus is better closer to the camera on the right, while on the left, the middle distance appears better.

Thornton-Pickard Stereo Puck with HP5 Plus at 800 (without close-up filter)
Thornton-Pickard Stereo Puck with HP5 Plus at 800 (with close-up filter)
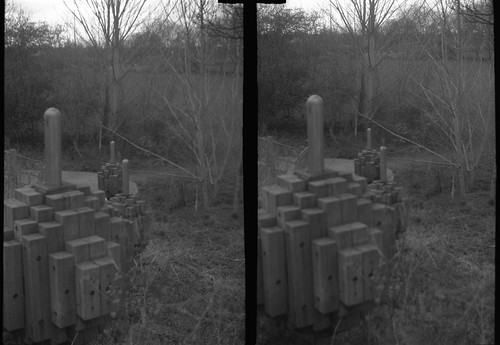
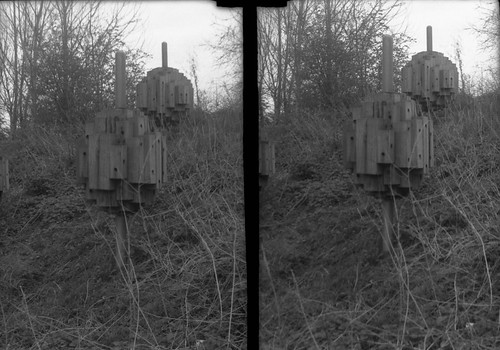
Opening the camera to remove the HP5 Plus, I was faced with something of a 'fat roll', and before loading the camera again, I bent all the springs forward in order to apply more pressure to the film; the HP5 had some light leaks at the edges of the last couple of stereo pairs, but not as bad as I had feared. When using Rollei Superpan, with an ISO of 200, this was too slow to use the camera hand-held; I could have attempted to push the film a couple of stops, but I've found Superpan to have relatively low latitude and pushing the film would be far from ideal. Instead, I used the odd wooden sculptures I had been photographing to place the camera on in lieu of a tripod and use the time setting on the shutter, generally stopping the lens down and exposing for around a second.

Thornton-Pickard Stereo Puck with Rollei Superpan (without close-up filter)
Thornton-Pickard Stereo Puck with Rollei Superpan (with close-up filter)
For the last couple of stereo pairs, I had inadvertently pushed in the tab for the shutter, so, without realising it, these were shot on the 'instant' setting, and, as a result, almost nothing registered on the negative. I developed both rolls of film in Rodinal, diluted 1+50 for 19 minutes at 19ºC, the time, temperature, and dilution that I'd settled on in my previous testing of Superpan, and close enough to the published times for HP5 Plus at 800 (16 minutes at 20ºC).

The Stereo Puck was sold with a stereo viewer, which my camera came without, but for which the negatives from the camera would be contacted for a print to fit the viewer. This should perhaps be also taken into consideration with the camera: at the scale of a contact print, the discrepancy in focus and alignment would be less obtrusive than in a larger print, or indeed a high resolution scan viewed on a screen. Instead of contact prints for physical viewing, I have been making red-cyan anaglyphs from the stereo pairs as the easiest iteration of the images, particularly online, correcting the alignment images while doing so.


One doesn't use a box camera for accuracy and precision, so perhaps the limitations and compromises of the Stereo Puck that I've outlined should be expected and accepted, particularly within its historical context. One imagines that, before the boom in 35mm stereo cameras during the 1950s, it made the taking of stereo photographs an affordable novelty at the time it was produced. For contemporary use, all these factors are hardly likely to make it a stereo camera of choice but, using it again for the #filmweekender challenge, after cleaning it up to prevent it scratching the film, perhaps it shouldn't have sat on a shelf for a couple of years.

Sources/further reading:
Stereo Puck on Camera-Wiki
Stereo Puck on Early Photography
Stereo Puck variants on Red Belllows
Model 1 without close-up filters or aperture stops on Welt Der Stereoskopie
Model 1 on Wood and Brass


Monday, 31 August 2015

Agfa Isolette III

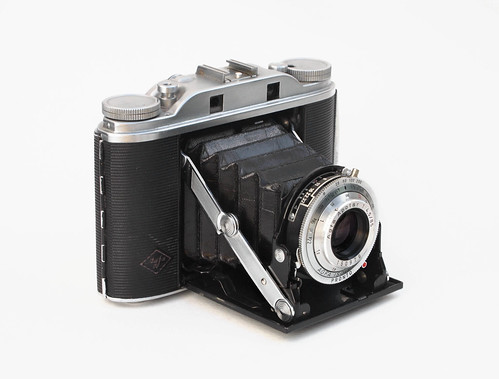
Agfa Isolette III
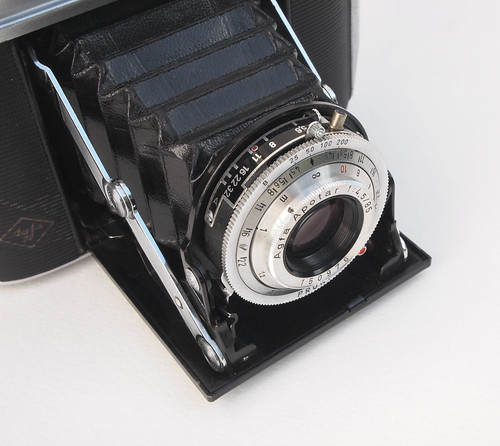
Agfa's Isolette range of 6x6 medium format folding cameras are still very much well-used and well-liked, judging by the numerous references and results among film photographers online, a good sixty years since the models were produced. My own experiences with the Isolette are limited and recent, having bought an Isolette III earlier this year at a Stockholm flea market for 200SEK, but I had used an Agfa Record I for a number of years, and the Isolette's construction, styling, design and user experience are all very similar to the Record 6x9 cameras. The Agfa Isolette cameras take 6x6 images, although a couple of the Isolette models had masks for smaller formats. The Isolette III was introduced in 1954, snd is essentially the same camera as the Isolette II with the addition of an uncoupled rangefinder.

The Isolette cameras were provided with lenses of both 75mm and 85mm focal lengths, which are dependent on the lens' widest aperture: f4.5 lenses on the Isolette are 85mm, while f3.5 lenses are 75mm. I've preciously had a couple of medium format cameras in the 6x6 image size with 75mm lenses, a common focal length, but I've sometimes felt it a little too wide on the format. However, it may be worth bearing in mind that the 6x6 format came about with the twin-lens reflex camera, the typical construction of which would not have been conducive to changing the camera's orientation had it shot a rectangular image, and so the square format allowed cropping in either orientation as much as being used full-frame. Using the full, square frame, I find achieving satisfactory compositions require more thought than a common rectangular photographic frame; conversely, it seems a shame to crop the image to do so and not make use of the whole negative's area.

Agfa Isolette III lens and shutter detail
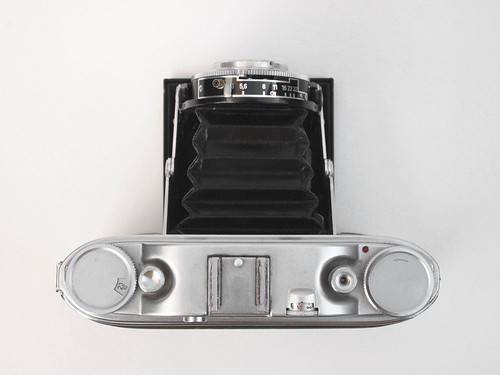
My model has Agfa's Apotar lens in a Pronto four-speed shutter, both being among the cheaper variants available. The Apotar is a triplet lens, but, being post-war, it is coated. The Apotar was the middle of the range of lenses: the lowest priced lens was the Agnar, the lens that my Record I came with, even so it did provide very good results on modern medium format films. The Isolette has focus below 1 metre, although the 1 metre is the last mark on the focus ring (possibly the lens focusses down to 3ft which would be marked on US - under the Ansco name - or UK export models). The marks at 3m and 10m are picked out in red. The Pronto shutter has four speeds 25th, 50th, 100th, 200th, plus B. The addition of the camera's rangefinder meant that unlike other Isolette models, the III no longer sports a T setting (I personally find shutters with a 'T' setting more useful then a 'B'). Other features mark my Isolette as a later version, from 1956 onwards: there is a film reminder dial on the top left of the camera instead of a depth-of-field calculator, the DOF indications are around the lens instead (the film reminder has old DIN speeds of 23/10 - 21/10 - 17/10 and COL T - COL K - COL NT). Film advance is manual, using a red window on the camera back but it does have a double exposure lock on the shutter release: after exposure a small round window shows red until the film is advanced and the lock disengages. The shutter can still be tripped by the lever around the lens when locked.

Agfa Isolette III top plate
The camera had two problems when I bought it: the camera back did not close tight at one side; and the rangefinder wheel was immovable. The first of these problems was solved by using pliers to bend inwards one of two prongs to provide a tighter fit with the camera back's latch (when in Stockholm itself I realised this might be a problem and simply held the back tight when shooting - although on some exposures I wasn't careful enough with this and some show the top right corner of the pressure plate not keeping the film in alignment, falling behind the plane of focus).

Detail of loose catch
I didn't have the tools to attempt to fix this or the rangefinder while in Stockholm. However, as the rangefinder is uncoupled, the fact that it was stuck did not interfere with using the camera, it merely meant estimating distances, and paying more attention to the DOF scale around the lens. Despite these issues, I liked using the Isolette III enough to use it while in Stockholm rather than the Baldalux 6x9 camera I'd brought with me, and shot a number of different films with it, Rollei RPX 25 and 400, Fomapan 400, Superpan 200 and some Kodak Verichrome Pan with a "develop before" date of October 1969.

Sample image with Fomapan 400
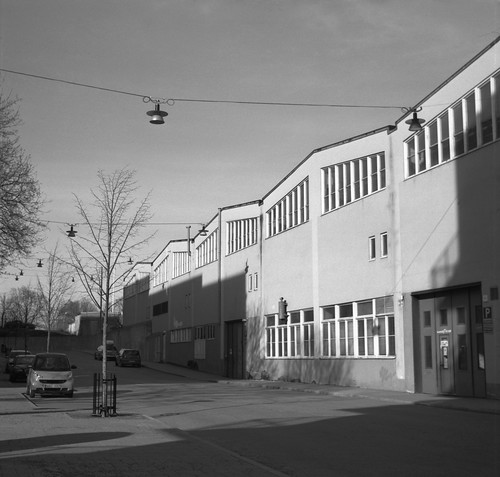
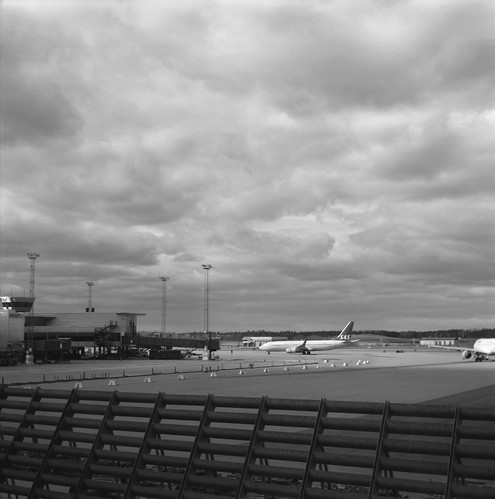
Sample image with Superpan 200
Sample image with Rollei RPX 25
Sample image with Rollei RPX 400 at 1600
Sample image with Kodak Verichrome Pan, develop before date of 1969

Sources/further reading:
Isolette range on Camera-Wiki
Agfa/Ansco Isolettes by Andrew Yue
Isolette cameras on J. Noir's Camera Pages
Isolette III manual (first version)

Wednesday, 10 June 2015

Agfa/Rollei Superpan 200

Superpan 200 in 35mm and medium format
There are very few black and white films manufactured with a nominal speed of 200; currently, just three: Fomapan 200, Ilford SFX 200 Creative, and Agfa Superpan 200.  Fomapan 200 was discontinued for a few years, but was recently reintroduced in a new formulation; Ilford's SFX 200 shares some characteristics with Agfa Superpan 200: the name denotes that the Agfa film is superpanchromatic, with extended red sensitivity beyond normal panchromatic films, to near infra-red, and with the right filters (like SFX 200) it can produce similar effects to true infra-red film. Of the three films, all are available in 35mm and medium format rollfilm, additionally, Fomapan 200 is also available in large format sheet film. There are few stockists in the UK for Superpan 200, West End Cameras currently has the film in stock; when asked about in Silverprint, they hadn't heard of the film. Superpan 200 is sold by Maco but is produced (as Aviphot Pan 200) by Agfa-Gevaert in Belgium, and Maco's website uses Agfa-Gevaert's Aviphot Pan 200 technical information sheet. As can be seen in the photograph above, the film packaging uses both Agfa and Rollei brand names for the medium format film, while the 35mm labels do not use the Rollei name (the 35mm film is also not DX-coded). In the film rebates, on the medium format version, Rollei is used, while 35mm has just the name Superpan 200.

Agfa-Gevaert's data sheet describes Aviphot Pan 200's applications as:
Aerial photography assignments from low to medium altitudes, for gathering, interpreting and processing information intended for cartography, inventory purposes and exploration studies. This film can be used in industrial recording systems, such as equipment for plotting graphs in control and monitoring devices. It can also be used in stereo image recording devices, either airborne or in ground-based facilities for subsequent production of three-dimensional plans, maps, etc.
Characteristics
With its expanded colour sensitivity into the near infra-red range of the colour spectrum, Aviphot Pan 200 offers excellent penetration through haze, fog and other atmospheric conditions liable to affect the image quality. Obviously, this yields an improved image contrast and therefore more information. With the uniform distribution of the panchromatic sensitivity within the range of visible light, the terrain can be imaged very faithfully without having to revert to the use of special spectral recording filters. Yellow filters can be used to get a higher image contrast. They also decrease the overall film sensitivity.
As with previous film tests I shot a roll of 35mm Superpan using an Olympus OM10 SLR, with a range of meter settings of 25, 50, 100, 200, 400, 800 for film latitude. With no published development times for Ilfotec LC29, the developer I used, on neither the data sheet from Maco, nor the Massive Dev Chart, I used stand development, with a dilution of 1+100 for one hour.

First latitude test contact sheet, stand developed in Ilfotec LC29
The first test showed the film to have narrow latitude, with the best exposure indexes of between 50-200, but developed in Ilfotec LC29, rating the film at 100 (or a little under) seemed to give the best results (the original data sheet states that "Aviphot Pan 200 can be exposed as a 125 to 250 ASA film," although this is with Agfa's G74c developer). Stand development is usually a good technique to get straight negatives from a properly exposed film, but the first results were a little disappointing.

I used the same camera and exposure settings for a second roll, repeating the latitude test of metering for 25, 50, 100, 200, 400, 800, but this time developed the film with R09 One Shot, diluted 1+:25 for Maco's published time of 8 minutes at 20ºC. The results with R09 One Shot were better than the first test, but using normal agitation does appear to have increased the contrast of the film, although lighting conditions were different, with some winter sunlight providing bright highlights.

Second latitude test, developed in R09 One Shot
The two tests show that the latitude range of Superpan 200 is relatively narrow (compare for example, Adox Silvermax's wide latitude range): exposed at 25 and 50, the highlights and midtones begin to lose separation, while with underexposure, the shadows quickly lose detail. The scans below have been adjusted to pull the maximum amount of detail from highlights and shadows: as is typical with black and white negative film, overexposure does give better results than underexposure, but Superpan 200 is less flexible in this regard than some other films.

Agfa Superpan 200, rated 25, developed in R09 One Shot 1+25
Agfa Superpan 200, rated 800, developed in R09 One Shot 1+25
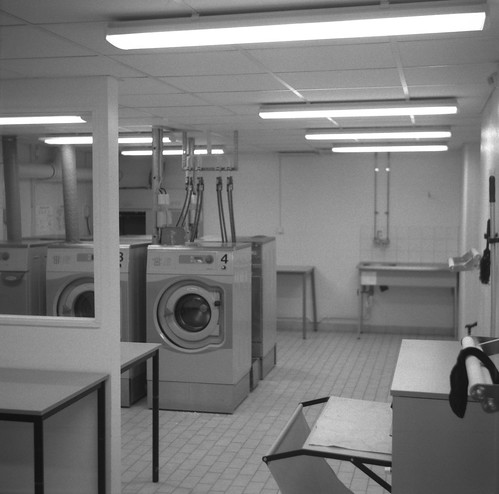
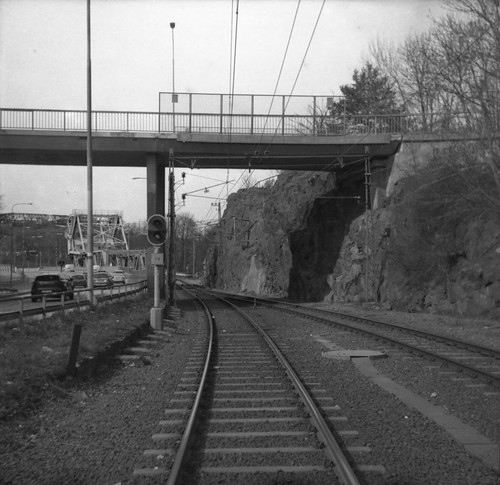
I also shot a first roll in medium format in my Voigtländer Bessa RF, developing this in R09 One Shot at 1+25 for 8 minutes at 20ºC. For this, I relied on the 'Sunny 16' rule for exposure, which I often use for cameras without built-in lightmeters, but as a result, a number of the negatives were rather thin, partly a result of trying to calculate exposure settings for winter sunlight. Despite this, at medium format, Superpan 200's qualities are immediately apparent - its sharpness, relatively tight grain structure, its clear base with very little curl once processed and the contrast; the results were reminiscent of Rollei RPX 25 - despite the difference in speed, both films have a very similar look.
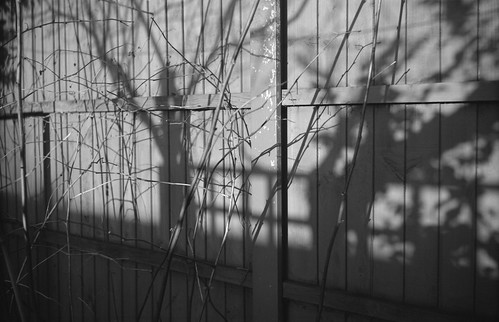
Voigtländer Bessa RF, R09 One Shot 1+25, 8m at 20ºC
Having developed Superpan 200 in both Ilfotec LC29 and R09 One Shot, I suspected that R09 One Shot at higher dilutions would provide better results, notably with higher-contrast scenes; I shot some more 35mm Superpan 200 with both the Kodak Retina IIa, and my Agfa Optima Sensor, and developed at a dilution of 1+50, for 17 minutes at 20ºC. As it's easier to increase contrast in printing or scanning, with a film like Superpan 200, it is important to expose and develop to keep both shadow and highlight detail - as with all films, but some emulsions have greater latitude and lower contrast, making it easier to achieve good negatives while being less exact in approach.
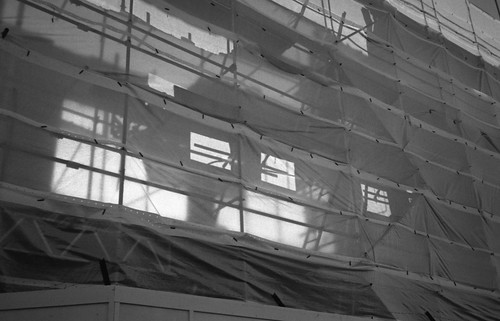
Agfa Optima Sensor with Superpan 200, R09 One Shot 1+50, 17m at 20ºC
The first tests that I made with Superpan 200 reflected the fact that these were not shot in the best lighting conditions, in the middle of winter; with more available light and higher dilutions of developer, the subsequent results in 35mm were better. I also shot medium format film in both the No.2 Brownie and the Ica Trona: even with simple Brownie meniscus lens and the uncoated Tessar on the Ica Trona, the results were good, possibly the inherent contrast of Superpan 200 complements the softness of these old lenses. On a precautionary note, the rolls of film that I shot in medium format showed that the emulsion is easily scratched if not carefully handled and the synthetic base is susceptible to 'light piping' - Maco's website does include a warning about this, and it's important to make sure the medium format films are tightly wound on their spools when removing after exposure in the camera.

Kodak No.2 Brownie with Superpan 200, R09 One Shot, 1+50, 17m at 20ºC
Ica Trona 210 with Superpan 200, R09 One Shot, 1+50, 17m at 20ºC
As well as higher dilutions, I also wanted to try developing the film at lower temperatures in Rodinal. Having used Rodinal, or R09 One Shot, for a number of years, it does seem that some of its best qualities are facilitated by using higher dilutions and lower temperatures: one or two degrees below 20ºC does seem to negate some of the 'roughness' associated with the appearance of grain when developing faster films in Rodinal. This does start to extend development times; for the shot below I used 20 minutes diluted 1+50 at 18ºC. Not having an infra-red filter, one aspect of Superpan 200 that I did not test was the ability to achieve an 'infra-red look', but even without such filtering it's a very apt film for landscape photography. The extended red sensitivity, its "excellent penetration through haze, fog and other atmospheric conditions" provide a good rendition of both skies and distances, even unfiltered; for some of the later medium format shots I used a yellow filter.

Ica Trona 210 with Superpan 200, R09 One Shot, 1+50, 20m at 18ºC
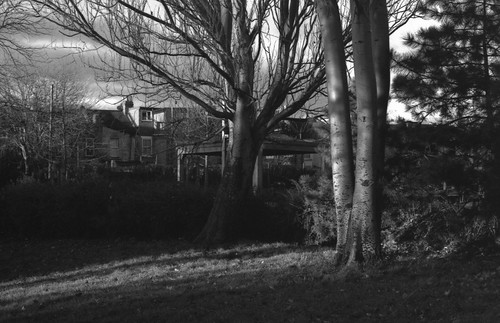
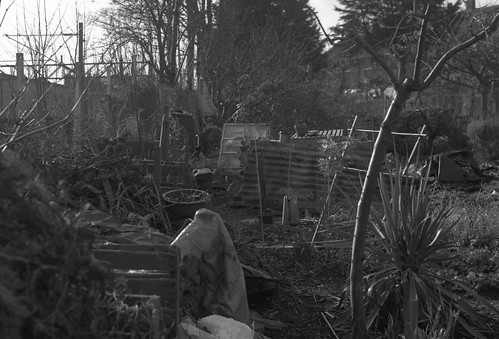
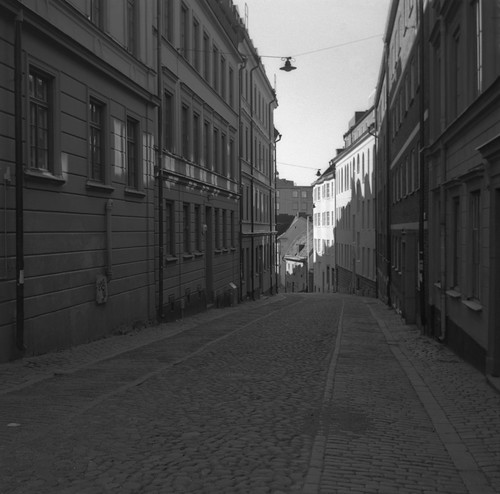
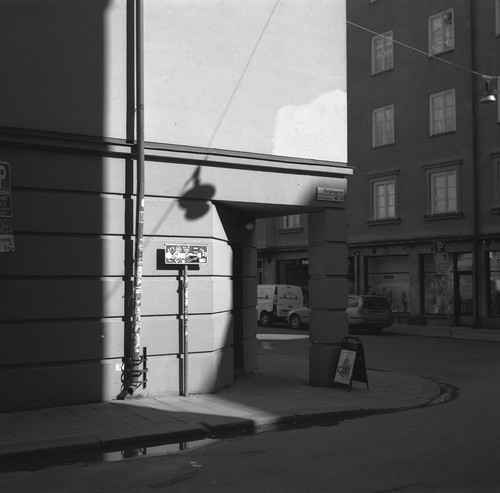
Having made enough tests, Superpan 200 was one of the films that I took with me - in medium format only - on a recent trip through Europe to Stockholm. The medium format camera that I took was the folding Zodel Baldalux, which I've frequently used for travelling. At the Loppmarknaden flea market in Stockholm, I bought an Agfa Isolette III, so shot a few rolls of Superpan 200 with this camera. As with the tests that I had made a couple of months earlier, I found myself taking lots of photographs in low slanting sun, and some of the contrasts between bright sunlight and deep shadows, such as in the third image below, needed careful metering (I used my hand-held Weston meter rather more than usual when shooting Superpan 200). These last few rolls of Superpan 200 I developed in R09 One Shot at 1+50, and used a time of 19 minutes at 19ºC - an easy relationship of time to temperature to remember.
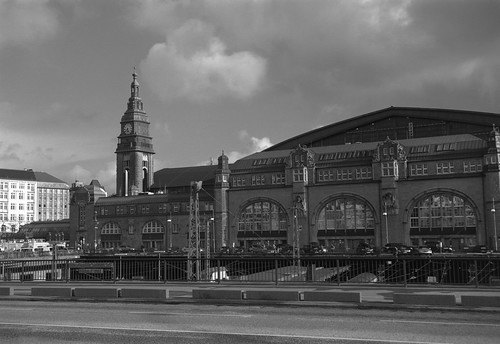
Zodel Baldalux with Rollei Superpan 200 with yellow filter, R09 One Shot 1+50, 19m at 19ºC
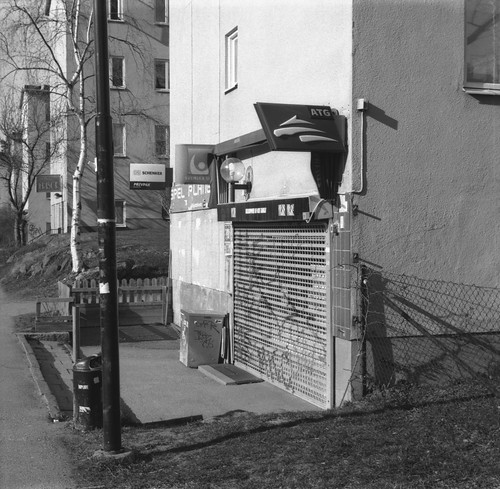
Agfa Isolette III with Rollei Superpan 200, R09 One Shot 1+50, 19m at 19ºC
Sources/further reading:  
Agfa's Aviphot product pages
Aviphot Pan 200 data sheet (PDF)
Maco developing times for Superpan 200 (PDF)
Extensive review on 125px