Wednesday, 1 March 2017

Take Your Box Camera To Work Day 2017

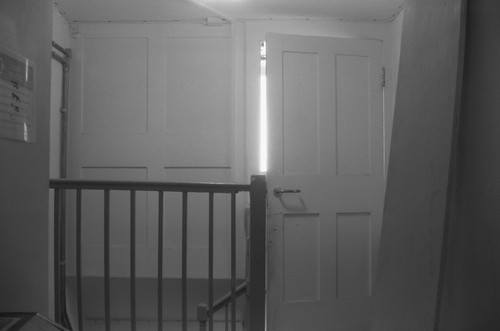
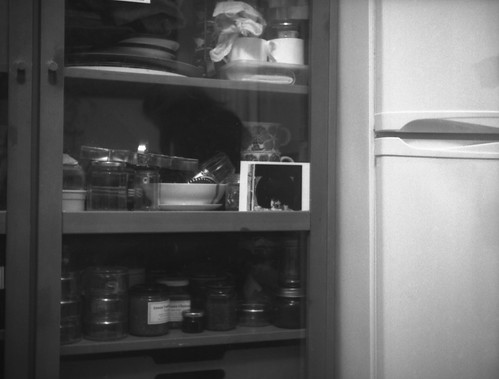
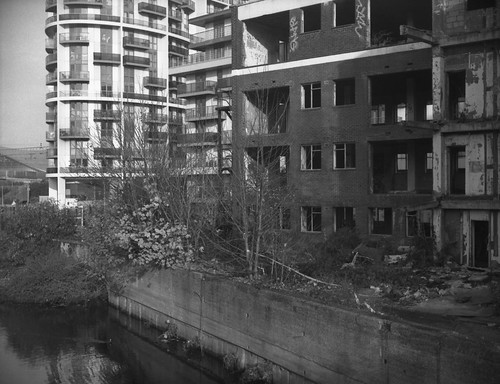
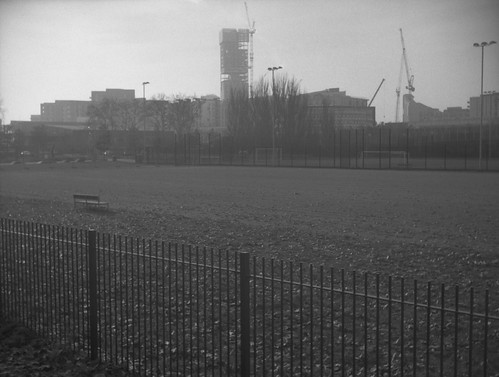
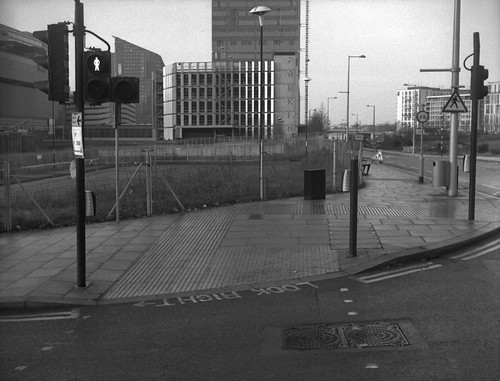
Kodak No.2A Brownie with Ilford HP5 Plus
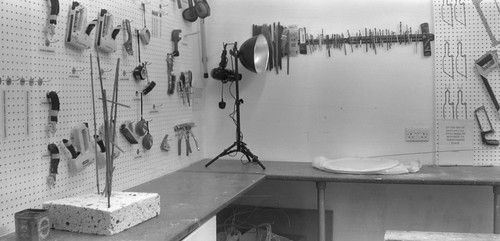
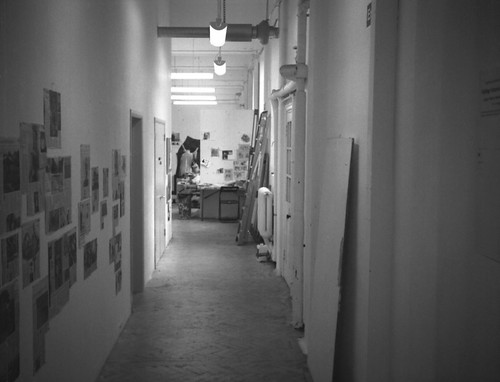
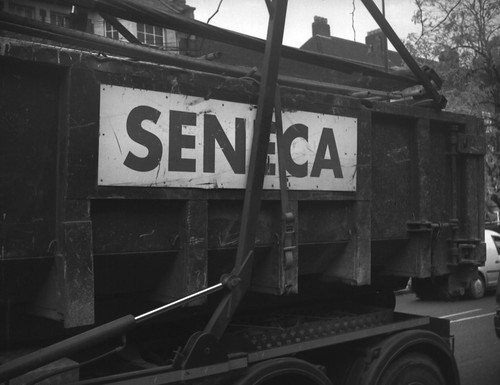
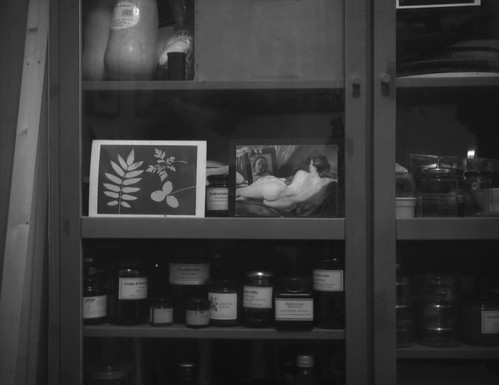
For yesterday's 'Take Your Box Camera To Work Day', I used my Kodak No.2 Brownie; having shot with it for last June's 116 Day, I was keen to use it again, but hadn't had the excuse. Keeping the 116 backing paper from the two Kodacolor 116 films that I had used last year, it was a simple matter to transfer 120 film to the slightly larger paper. The original 116 film is longer than 120, with the result of getting just six whole images from a roll, but I had no problems with frame spacing, as I did have when using 120 film with adaptors, as the numbers and markings do not quite evenly match up; although I did get six whole images, most of a seventh image was possible, but with the odd effect of the very end of the film curling up inside the camera and creating an odd oblique shadow on itself with distortion in one corner, as the narrow width of 120 film meant that it wasn't securely held each side of the frame (this did also show up as a slight curl at the top or bottom - or both - of most images).

Kodak No.2A Brownie with HP5 Plus - seventh frame
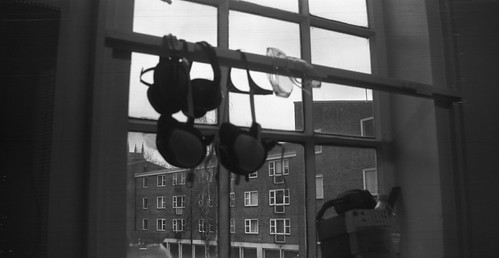
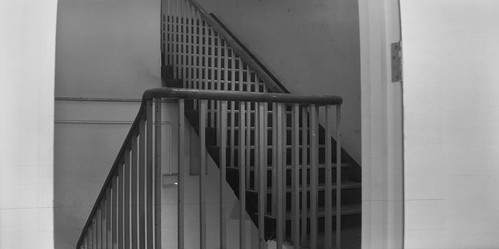
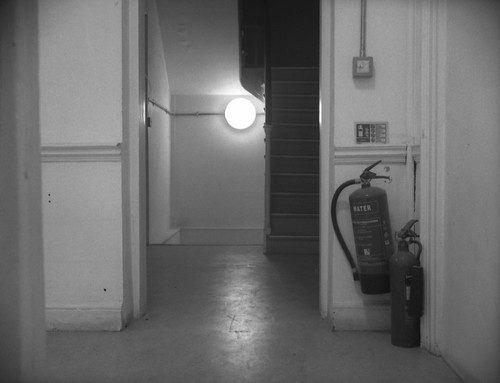
I shot two rolls of Ilford HP5 Plus with the 116 backing paper; most were long exposures with the 'time' setting, and at the camera's smallest aperture, finding level surfaces to place the camera for a few seconds, although I did attempt a few shots on the 'instant' setting, such as the one below, but with the Brownie's widest aperture being around f11, interior shots with a fixed shutter speed of around 1/40th would generally be underexposed; in addition, the weather for most of the day was overcast, providing less daylight to help illuminate rooms with windows.

Kodak No.2 A Brownie with Ilford HP5 Plus
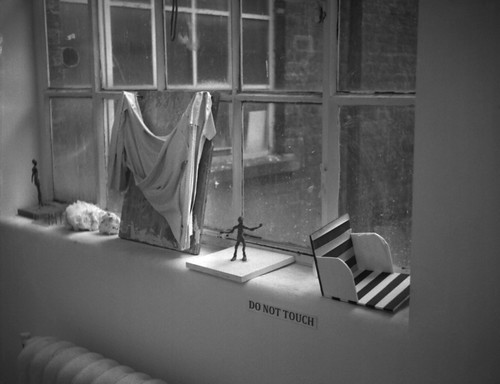
Despite having attempted to clean the rollers on the camera, the photographs shot with the Brownie did have scratches through the emulsion, although not generally as bad as the film I'd used last year. These scratches tended to show more on the instantaneous shots, as the negatives were thinner; the patterns of the scratches also suggested that, by virtue of how the Brownie's film advance works, each turn of the wind on key has points where the tension is greatest, and the scratches were more prominent, as seen in the image below.

Kodak No.2A Brownie with Ilford FP4 Plus
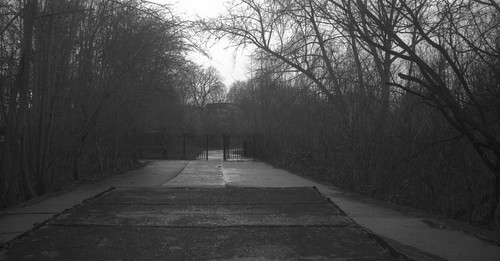
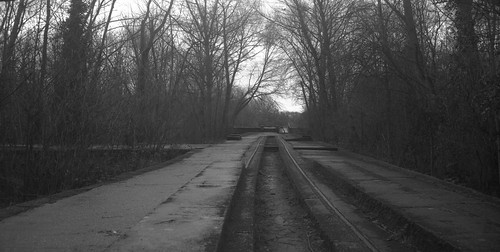
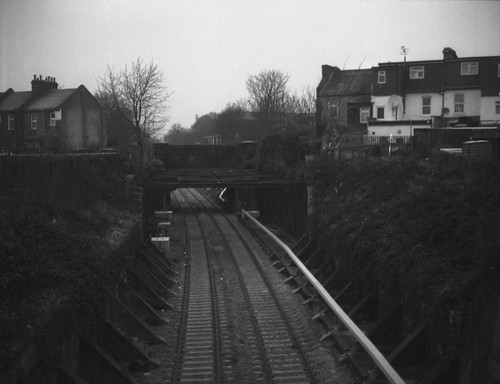
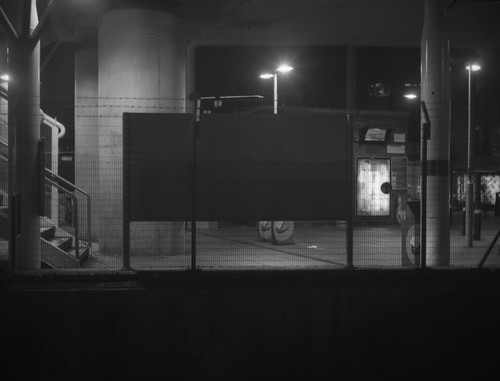
As well as HP5 Plus, I also shot a roll of Ilford FP4, using the spool adaptors I'd previously made, which worked well enough, as did the spacing generally, using the 6x4.5 frame markings on the back of 120 paper (which I have written about more fully in my post about the Zeiss Ikon Cocarette). Probably the best shots from the day were two on FP4 Plus from my journey home, with the light failing, using relatively long exposures at f22, at the bottom of this post, which demonstrate how good the Brownie's lens can perform stopped down (the subjects of most of the other photographs are a little close for the fixed-focus lens). An additional synchronicity for using the No.2A Brownie on this year's 'Take Your Box Camera To Work Day' is that my particular model B version is one hundred years old this year: a couple of small details (specifically, the spool-end tension springs and the unmilled latches) are evidence that the camera was produced at some point between June and October 1917.

Kodak No.2A Brownie with Ilford HP5 Plus
Kodak No.2A Brownie with Ilford FP4 Plus

Saturday, 25 February 2017

Canon FTb-N

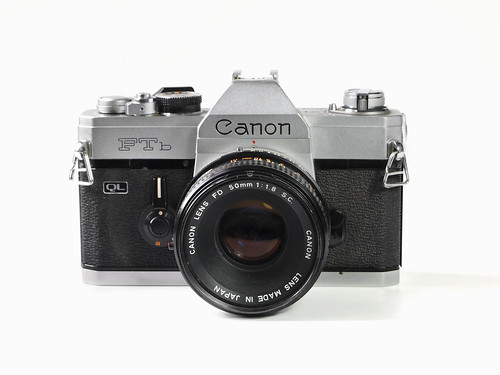
Canon FTb-N 35mm SLR camera
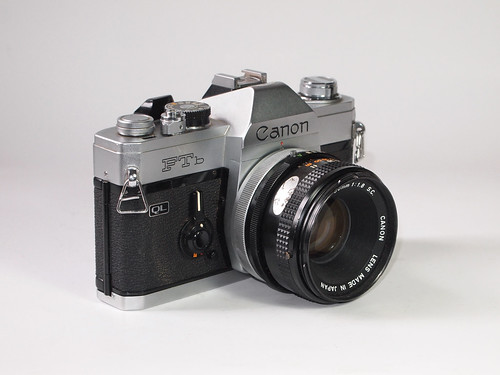
When one gets a reputation for an interest in 'old cameras' (old as being short hand for film), not entirely unfrequently, I find myself being given cameras. One recent gift was a well-used but well-cared for Canon FTb-N. On the camera itself, the model name FTb is engraved on the body, without the N-suffix, but the FTb-N is easy to distinguish from the earlier FTb by the redesigned stop-down lever: on the previous model this is larger and unpainted with a leatherette inset patch - and in addition the PC flash socket (on the other side of the lens) lacks a cover. The advance lever gained a plastic tip and, one further change, not visible externally, is that the shutter speed is now visible in the bottom left hand corner of the viewfinder. Although sometimes written FTbn or FTbN, the Canon Camera Museum uses the name Canon FTb-N, which should be the authoritative version.

The evolution of Canon's F-series SLR cameras began with the FX and FP models from 1964; the lens mount was redesigned with the Canon F-1 in 1970. The FTb of 1971 has this newer FD mount, but the name derives from the earlier Canon FT QL of 1966: the FTb (and FTb-N) was an upgrade of the FT QL with the new FD lens mount. The "improved" FTb-N model has sufficiently small revisions that would appear not to be distinct enough to have the N engraved on the camera body. Canon also produced a simplified version of the camera for overseas markets, released as the TX in 1975.

Canon FTb-N with 50mm f1.8 lens

The code printed inside this example confirms it was made in December 1974 in Canon's Fukushima plant. Having previously used Canon's A series SLR cameras, mostly the A-1, there are some similarities in design and feel to the FTb-N. It is bigger and boxier than the A series, and notably taller in the body, which hints at its design being older, bridging the gap between the first generation of Japanese SLR cameras, and the later 1970s iterations with more compact, refined designs. The FTb-N does share the same lens mount with the later A series, providing compatibility with all of Canon's FD lenses; in addition, the FTb-N can also use FL and R series lenses but without full aperture metering.

The FTb-N I was given came with the standard, older breech-lock f1.8 50mm FD lens; it also had a Vivitar 70-200mm zoom and a Canon 135mm lens which, unfortunately, was cloudy with fungus. Most of the functions on the FTb-N are very much familiar classic SLR territory: manual focus, single stroke film advance, cloth focal plane shutter with speeds of 1 second to 1/100th and 'B', threaded shutter release with a lock position (that can be used as a 'T' setting), manual rewind, hot shoe and PC flash connectors.

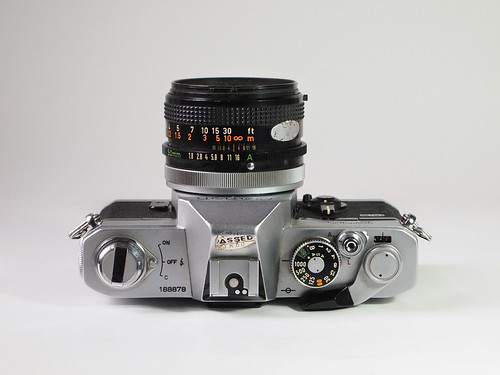
Canon FTb-N top plate
Other than the TTL meter, the FTb-N is entirely mechanical. The lever located around the rewind crank turns the light meter on and off as well as featuring a battery check function at 'C' (the meter is also set to 'off' for using flash as indicated). The battery was originally a mercury PX625, for which modern replacements are available; the battery compartment is on the side of the camera, below the rewind crank, rather than in the bottom plate. Metering itself is a fairly common match-needle arrangement inside the viewfinder: the shutter speed/film speed selection is reflected in the sensitivity of the needle's response; turning the aperture selection ring moves a second needle with an eye to match the first. Film speeds, in ASA, run from 25 to 2000 in a window within the shutter speed dial. There was also a low-light meter-booster accessory available, which fitted to the hot shoe.

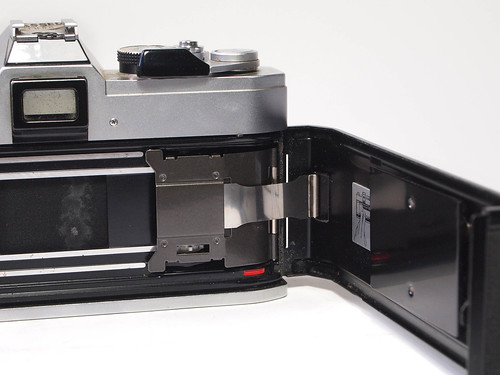
Although the 'new' model status of the FTb-N isn't marked on the camera body, the QL badge stands for Canon's Quick Load system: a hinged plate inside the camera assists accurate loading. The film leader has to be placed up to a red mark inside the camera, and then the plate folds flat on the the film, designed to make loading fool-proof. When advanced, a series of rotating sprung rubber feet use friction against this internal plate to pull the film into the take-up chamber. In practice, I always check 35mm film is correctly loaded by watching for the rewind crank turning when film is advanced; the QL system removes the necessity for slipping the end of the film into a slot as with most 35mm cameras, which can sometimes be fiddly. Canon used the QL system on a number of cameras, both SLRs and rangefinders, for a number of years, but I imagine the extra complexity in production balanced against the perceived ease of loading proved of insufficient benefit, and the feature wasn't used on the A-series SLRs.

Canon Quick-Load system

As well as the QL system, another interesting design feature of the FTb-N is its multi-function stop-down/self-timer lever: pushing the lever towards the lens stops down the selected aperture; rotating this 180ยบ away from the lens sets the self-timer; under the lever is a second, smaller lever, which selects 'L' to lock the stop-down lever, 'M' to lock up the instant return mirror, or a white dot for 'unlocked' functions.

Using the FTb-N was very much like experiencing a simpler antecedent to the far more sophisticated Canon A-1 which I used for most of my 35mm photography for many years: most of the user controls, although less advanced, are in much the same places. The largely metal, mechanical camera feels quite solidly made in use, and its relative simplicity ensures that there are few distractions when shooting with the FTb-N; one of the few aspects of the camera that wasn't entirely to my liking was its focus screen - having been used to shooting SLR cameras with split central image circles for focussing, the FTb-N just has a microprism patch in the centre with a slightly darker rectangle around it to indicate the meter area, this I found makes fine focussing take just a little more time and attention than the clarity of a split image.

Canon FTb-N (50mm f1.8 lens) with Eastman Double-X film
Canon FTb-N (50mm f1.8 lens) with Ilford HP5 Plus at 1600
Canon FTb-N (50mm f1.8 lens) with Ilford Mark V Motion Picture film
Canon FTb-N with Ilford Mark V Motion Picture film and Vivitar 70-200mm zoom lens
Sources/further reading:
Canon FTb-N page on the Canon Camera Museum
Classic Cameras - FTb-N
Photoethnography's Canon FTb page
Canon FTb page on Camera-Wiki

Wednesday, 15 February 2017

Tuesday 28th February is 'Take Your Box Camera To Work Day'

Keen to keep this camera-themed day going, and with just under two weeks to go, this year, Tuesday 28th February is 'Take Your Box Camera To Work Day'. Looking back at previous years, it's frequently been on the 28th (or 29th February), so it may be good to define it simply as the last week day in February each year. The concept wasn't mine, but I have intermittently attempted to promote it in recent years, as camera- or film-themed days have become popular; it's just another excuse to shoot film. Of course, there are a number of considerations around shooting a box camera in a work environment: not all work situations are amenable to such behaviour; and, with most work generally being inside, the fact that box cameras are designed for exterior daylight shots, one needs to adopt strategies for achieving a decent exposure, often involving either using fast film (or push processing), or 'B' settings for long exposures, or both.

For those posting on Flickr, in the Box Camera Revolution Group or elsewhere, including Twitter, the tags 'TYBCTWD' and 'TYBCTWD17' will help identify shots from the day. Although I've taken it upon myself to promote the concept, I don't intend to adjudicate if photographs were shot at work, or on the day itself, still less to define what precisely constitutes a box camera: the spirit of the day is what counts for anyone willing to participate.

Kodak No.2 Brownie with Rollei RPX 400

Tuesday, 31 January 2017

The Image Circle

Jupiter-8 50mm lens with Ilford FP4
“All lenses, regardless of format, project a circular image, and the rectangular film format must fit within this image-circle. With a small camera, a high-quality image is required within the film area, and the remainder of the image circle is disregarded. A view camera, on the other hand, requires an image-circle considerably larger than the film area, to allow freedom to use the camera adjustments. A lens’s covering power or coverage refers to the total image-circle; it is a fixed quantity, regardless of the film format, and is not a function of focal length.”
Ansel Adams, The Camera
The rectangular photographic image is a convention derived by the historically existing relationship to painting and other graphic arts (note, for example, the use of the term ‘print’ for the photographic image on paper), and this frame is built in to the technology itself. The rectangle has much to recommend it, but it is not inherent to the photographic image. The image that a lens forms is circular; the rectangular frame is ultimately a legacy of architecture via the portable easel painting (tracing this legacy further back, cave paintings and rock art do not have definable edges: organic surfaces and surface decoration are essentially integrated). Of course, many photographs have been framed in a circular fashion - the first Kodak camera used a circular mask to make round images, and for Polaroid cameras, the Impossible Project make an instant film with a round frame - but these are a vestigial reminder of the fact that an image produced by a lens is circular - again, it is as likely that this alternative convention of the round frame is derived from painting (the portrait miniature, as many daguerreotypes were originally presented) and architecture, and perhaps also the experience of viewing images produced by other lens-based technologies such as telescopes and microscopes, around long before photography. Given the construction of the eye, specifically that the eye has a lens analogous to the photographic lens, there is a direct relationship to human vision, in which one can never really perceive its edges; with binocular vision this becomes an awareness of a squashed oval visual field, where beyond the edge is simply an infinitude of nothing.

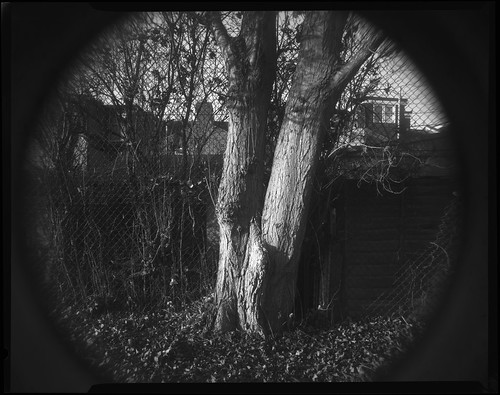
In Ansel Adams' quote above, the must in "the rectangular film format must fit within this image-circle" was something I wanted to challenge. In photography, the circular image is only generally seen in extreme wide angles, such as the fish eye lens, and begins to announce its presence in the vignetting that accompanies simple lenses on cheap cameras (as with the Diana and the V. P. Twin). I wanted to achieve something other than a distorted image, which would obscure the object of this exercise: the distorted image would be remarkable for those qualities, not merely for being circular.
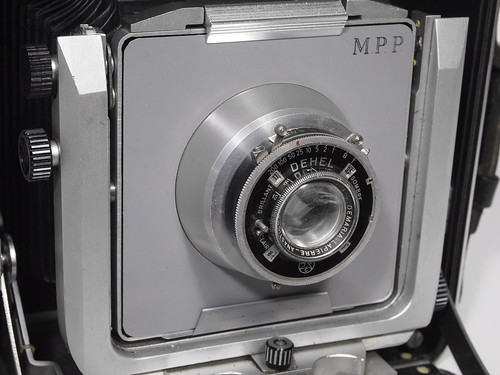
Demaria-Lapierre 75mm Manar Anastigmat lens
The first photographs used a 75mm f3.5 Manar Anastigmat lens, which originally came from a Dehel medium format folding camera, of which I converted the body to make my 127 format film cutter. Although the Dehel camera was 6x4.5, a 75mm focal length lens would equally be used for a square 6x6 format; the lens itself just happened to be the right size to fit on a conical lens board for the Micro-Technical Mk VIII. I used the Mk VIII as the folding bed can be dropped to two different positions, an important factor if this is not to intrude into the picture itself with such a wide angle lens (the angle of view itself being a relationship of focal length to image size - on the 6x4.5 negative format, 75mm represents a 'normal' angle of view). Although the edges of the image circle can be seen with the 75mm lens, the whole circle is too large to fit on the 4x5 negative. I had assumed that, as a fairly cheap triplet lens, the Manar's coverage would not be very good, but this was better than expected.
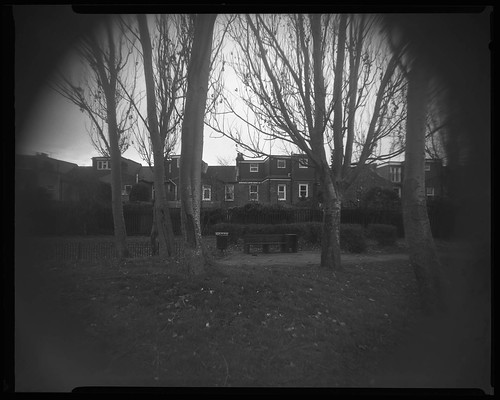
75mm Manar Anastigmat on Kodak Plus-X
75mm Manar Anastigmat with Ilford FP4
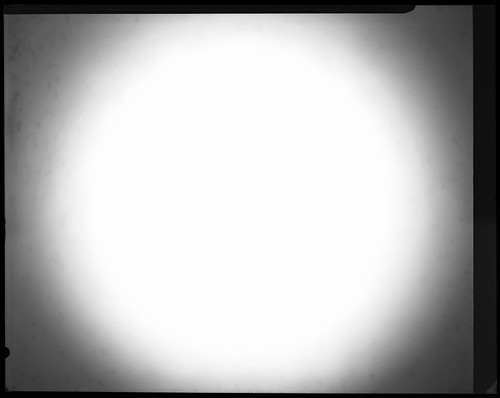
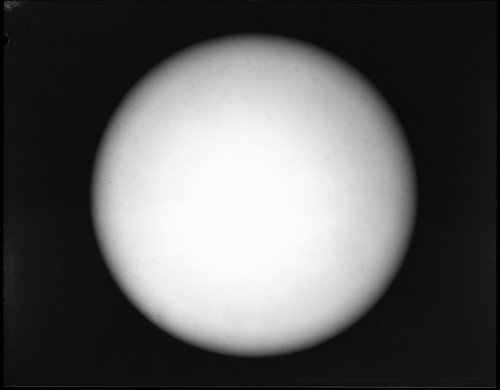
As part of this exercise, I did also photograph a white wall, unfocussed, in order to see the effect more clearly. I began with the assumption that a small aperture would provide better coverage but found that this was not the case (this was something I'd read about coverage in relation to using camera movements in large format; I wanted as small an image circle as was possible, hence using wide apertures); in the shots taken with the Manar lens, the clearest circle is that taken at f32, fairly obvious in the two comparisons below - although it is true to say that the definition at the edges is better and therefore a smaller aperture may describe a larger usable image circle, without the circle itself being any larger - indeed, the circle appears slightly smaller.
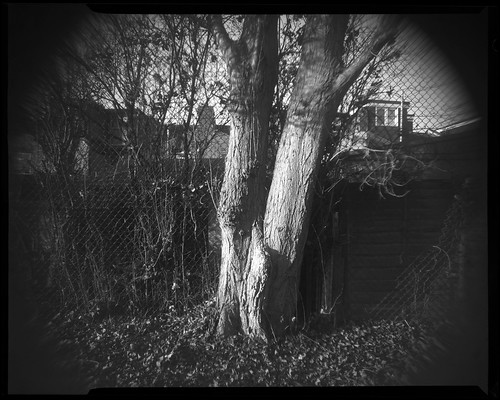
75mm Manar Anastigmat at f5.6 on Ilford FP4 film
75mm Manar Anastigmat st f32 on Ilford FP4 film
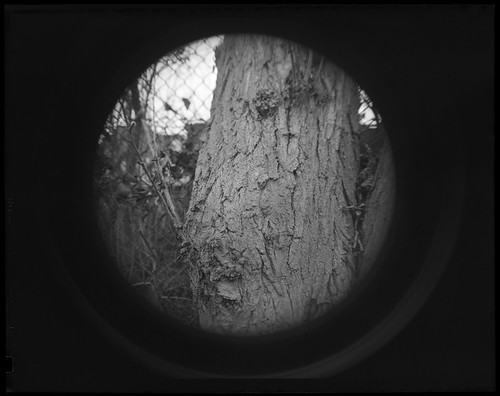
When extending the lens to close focus, the image circle expands to fill whole film area, as below, with only very little distortion visible in the corners; focussing even closer could have made this distortion fall outside the area of the film completely.
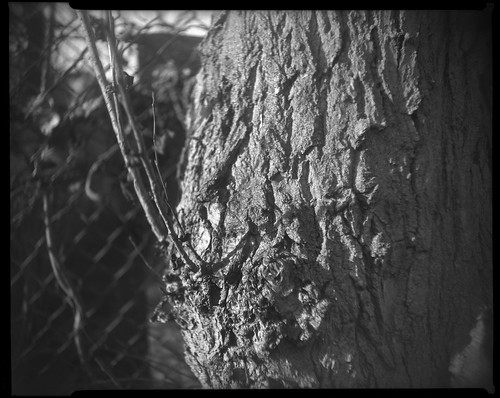
74mm Manar Anastigmat with Ilford FP4
Although the photographs shot at small apertures produced a fairly clear circle, it was larger than the 4x5-inch film format; to produce a complete circle, with a sharp image and clean edge, I used the Jupiter-8 f2 50mm lens from my Kiev-4, as this has a protruding, narrow rear element - a function of it not having a focussing helical built into the lens. This meant that it was relatively easy to fix it into a lensboard, improvised with card retaining rings (holding the red infinity tab) and rubber bands. Unlike the Manar lens, the Jupiter-8 does not have a shutter, which meant that exposures had to be made by the simple expedient of removing then replacing the lens cap. This created some problems in terms of exposure: I was still working on the assumption that smaller apertures would give better coverage.
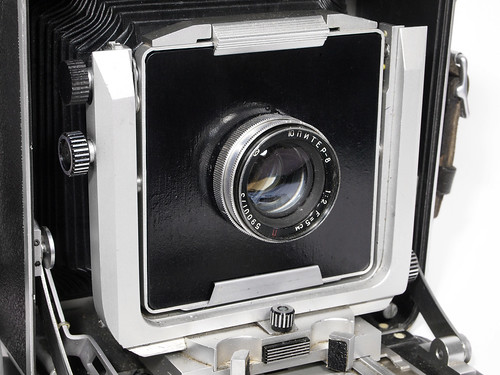
Jupiter-8 50mm lens
The first photographs with both lenses I shot on Ilford FP4, which, even rating at 64 to compensate for age (the film has a date hand written on the box 11/4/78, with the label printing dating to June 1976), made it difficult to attempt exposures of less than 1/2 a second by hand, and, in addition, the weather was sunny and bright. I did also take some photographs on Rollei ATO 2.1, rated at 6, which did provide long enough exposure times, but the high contrast images did not really convey the effect I wanted to achieve clearly: again, I wanted the circular image to be the distinct feature of the photographs. I shot a second set of images on Kodak Plus-X rated 25, on an overcast day, which made it easier to shoot with the Jupiter-8 lens relatively wide open. As well as not having a shutter, the 50mm lens also had a problem in that it could not be placed far back enough into the camera to achieve infinity focus, which is the reason for the images below being close focused: with the front standard racked back into the camera body as far as possible, I moved the camera and tripod forward until the image came into focus. In order to place the lens further back, a recessed lens board would be required (this should also, in theory, make the image circle smaller).
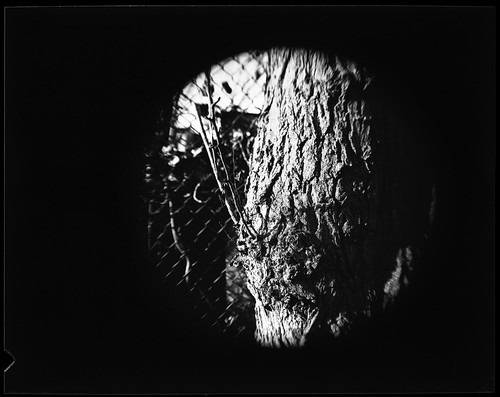

50mm Jupiter-8 lens with Rollei ATO 2.1
Jupiter-8 50mm lens with Kodak Plus-X
The Jupiter-8 lens made a circular image onto the film with surprisingly little distortion, except at the very edges (a side effect of using smaller apertures is that both lenses appear to show some form of internal reflections in the camera, visible as rings around the image circle itself). With edge distortion being affected by aperture, further tests at smaller apertures with a recessed lensboard might provide even crisper, clearer circular images. Although this was simply an exercise to work through - in practical terms - some ideas about the intrinsic edge of the photographic image, I do think that there is something remarkable about the idea that, in almost every photograph you have ever seen, the image formed by the lens has been cropped by the camera.

References
Ansel Adams, The Camera, Little, Brown and Company, New York 1980, twelfth paperback printing, 2005.
Alan Horder (editor), The Manual of Photography, sixth edition, Focal Press Limited 1971
Sunday, 29 January 2017

127 Day January 2017

Zeiss Ikon Ikonta 520/18 with Agfapan Agfa APX 100
For last Friday's 127 Day, I shot just the one roll of film, cut down medium format Agfapan APX 100 with a 'develop before' date of January 2009. I used the Baby Ikonta again; given the weather conditions and short daylight hours, a number of the shots were long exposures on the 'T' setting. With smaller apertures, generally around f16, the Novar lens performs well, against the hand held shots three or four stops wider; I rated the APX 100 at box speed, being less than ten years past its 'develop before' date, although ideally a faster film would have been more appropriate for the day.


Saturday, 31 December 2016
Photographic Objects

"A forward-thinking young man"
For my last post of the year, I wanted to reflect on some work that I exhibited during 2016; I have only very rarely exhibited photography (other than online) but this year I made a number of 'photographic objects' for exhibitions to which I was invited to contribute. As these were all created with chemical photography, the work falls under the remit of this blog.

Invited to contribute to the exhibition Art:Science:Life by Dr Lucy Lyons at the Ipswich Art School Gallery, the brief was to respond to an object in the adjacent Ipswich Museum's collection, and make a piece of work which could take the original object's place in the museum, while the object itself would be displayed in the art gallery next door, along with the information about the artwork, under the banner of 'Curated Responses', alongside a number of other invited artists.

Curated Responses
I chose the two aircraft recognition sheets from the Ipswich at War gallery in the museum. These were printed on some form of translucent material, which provided the initial inspiration to form my response. A number of years ago, I had read H.G. Wells' novel The War In The Air and was struck by its prescient qualities. My first thoughts were to use this, the book itself, as an object to make a painting, but on reflection, a much more apposite approach was to echo the material qualities of the objects I had chosen. To this end, I used Kodak High-Resolution Aerial Duplicating film to make contact prints of the cover and colophon of my paperback of the novel: not only did the film have a similar look to the aircraft recognition sheets, it was also manufactured to duplicate aerial reconnaissance photographs. Asked to write a statement for the 'Curated Responses' room, I provided the following:
H.G. Wells' novel The War In The Air was first serialised in 1908. Written before Louis Bleriot's successful cross-channel flight, it imagines a war in the near future in which flying machines are decisive; the use of aircraft in the two World Wars, renders aspects of Wells' speculative future prophetic. Taking the cover and the title page (with the reverse showing the original publication date) from a paperback edition of Wells’ book, I made contact prints on Kodak High Resolution Aerial Duplicating film. This high contrast film is designed to make positive and negative duplicates from high resolution aerial photographic negatives; its transparent qualities mimic the aircraft recognition sheets from the Second World War that Wells would live to see.

"A forward-thinking young man"
I called the piece "A forward-thinking young man" from a quote in the book about the protagonist that could equally be applied to Wells himself.

At the Doomed Gallery in Dalston, for the London Pinhole Festival in April to coincide with Worldwide Pinhole Photography Day 2016, I showed a small set of pinhole images, shot two years earlier, presented as positives on glass, appropriate as the original negatives were made with glass plates.

“Talking about pinhole photography with security guards in the park”

I titled the piece, “Talking about pinhole photography with security guards in the park” to relate it directly to my experiences of taking the photographs, rather than what they might show. The work was accompanied by a statement which read:

Related to an ongoing series of photographs using previously unexposed vintage photographic glass plates, for 'Worldwide Pinhole Photography Day' in 2014, I shot a number of photographs using homemade pinhole cameras around the London 2012 Olympic Park. The photographic plates used in the pinhole cameras were Ilford Special Lantern plates, designed to make glass slides for projection, coated in 1965. These were developed as negatives and then contact printed on Ilford N.50 Thin Film Half Tone plates (from 1957) to create positive transparencies on glass for display. The title is a reference to the photographer’s aberrant behaviour and its being outside the sphere of reference of those in authority.

For the positives, created simply by contact printing the original pinhole glass negatives, I used orthochromatic plates so I could work under red lights and develop by inspection. As the physical qualities of the plates themselves seemed important, especially their fragility, I wanted to display these in such a way as to allow the viewer to inspect the plates closely. I could have shown the positives on a light box, but I felt like this would have diminished some of those qualities that I wished to emphasise, so I constructed a shelf which would hold the glass plates upright, projected a short distance from the gallery wall. The lighting was not entirely sympathetic, but this did have the effect of making the viewer look at the plates all the more attentively in order to comprehend the images.
Prototype for a Photographic Object
I returned to using the Kodak High Resolution Aerial Duplicating film for an exhibition called Machine Flight at the Pictorem Gallery in November. Close to the gallery in Walthamstow, there was the ideal source material in locations on Walthamstow Marshes. I took an initial set of photographs on 'Expired Film Day' of the railway arches where A. V. Roe built and then flew the first British aeroplane on the marshes in 1909; I shot the photographs on 4x5 film with a lens that could have been used at the time, a Rapid Rectilinear. I returned to take a second set of photographs of an adjacent feature on the marshes, known as 'bomb crater pond', less than a couple of hundred metres from the railway arches. This pond was created by the impact of a V2 towards the end of the Second World War. It seemed too appropriate a coincidence that within a generation from the first heavier-than-air powered flight, the space age was born, and that this would come together on an otherwise unremarkable patch of north London.

I shot the photographs on FP4 and Plus-X from the 1970s, and contact printed these negatives on a continuous strip of the High Resolution Aerial film, eighteen images, the whole length of positive film being around 2.5 metres long in total. Given how this aerial film would have been originally used, I made a device a little reminiscent of a microfilm reader, allowing the viewer to scroll through the images sequentially, forwards and backwards; I titled this a prototype, as its Heath Robinson construction would ideally have been improved.

Thursday, 22 December 2016

127 Day December 2016


Two weeks ago, for December's 127 Day, I shot three rolls of Ilford FP4 Plus cut down to the 127 format, using my Baby Ikonta. I chose FP4 Plus to coincide with the 'shoot week' of December's #FP4 Party. Taking the same route as three (and four) years ago, I cycled around the boundaries of the London 2012 Olympic Park, shooting some of the same views. I developed all three films with RO9 One Shot at 1+50; the results, although generally good, demonstrate some of the limitations of the camera's Novar lens, notably in the vignetting seen across all the photographs.