Thursday, 17 April 2014

Recent three colour process images

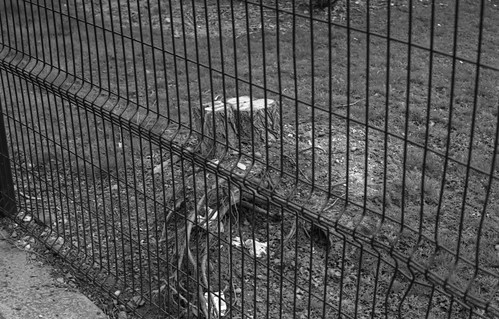
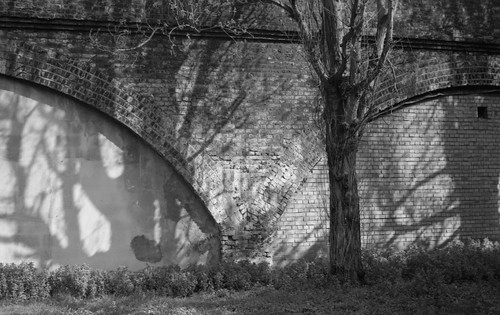
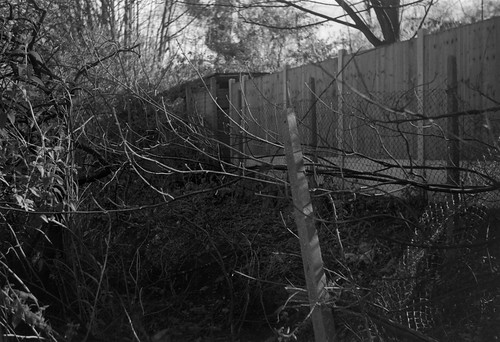
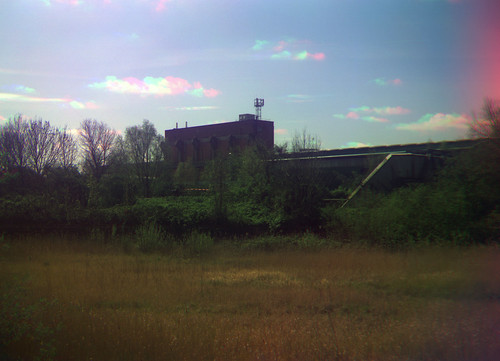
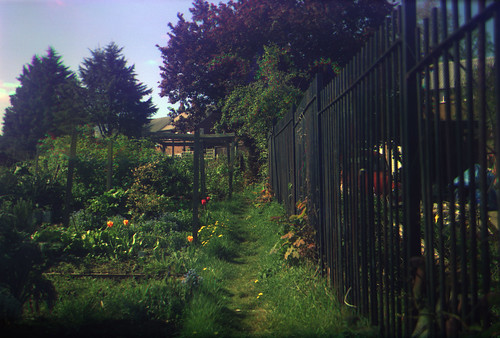
Three colour process, separation negatives shot on Ilford Delta 100 with Zodel Baldalux,
colour RGB image composited in Photoshop CS2
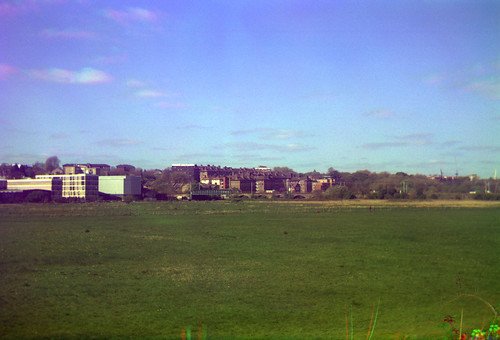
In my post last year, 'An Experiment with Three Colour Photography', I described the technique of using three black and white photographs to produce a colour image. For that experiment I used large format film, which meant the taking of each separate shot was inherently slowed down by the process of shooting sheet film. I also had problems when scanning the negatives to create the colour image, as I had to scan each in two halves, leaving problems with both alignment and balancing the colours in the three RGB channels. I subsequently took the tri-colour filter set with me to St Petersburg last September, but only used them for one medium format shot. By necessity this was hand held, and not much quicker than shooting large format, with the problem of holding the camera and the gelatin filters in front of the lens and then pressing the shutter button with two hands (while a stiff breeze threatened to blow the filters into the Neva river). Despite the results needing a good deal of cropping as each shot was not very well aligned through being hand-held, the very distinctive qualities of the three colour technique made me wish I had used it for a few more shots on this journey.

Hand held three colour process, separation negatives shot on HP5 Plus
with Zodel Baldalux, colour RGB image composited in Photoshop CS2
For the above image, a tripod would have ensured a better alignment of each colour. Using roll film rather than large format means that each shot can be taken with quicker succession, although I was still using a manual camera which required cocking the shutter and advancing the film using the red window between each shot. Anything moving in front of the camera shows the time taken between each frame, such as the figures and waves in the shot above, and the clouds. Recent good weather has provided the opportunity to take some more three-colour images. I had hoped for some cloud-free days, as these are the one aspect of the landscape shots which highlight the brief time discrepancy between each shot, but entirely cloudless days are rare. The image at the top of this post was the best of the recent shots; the photograph immediately below shows some problems with shooting into the sun with the filters held in front of the lens causing reflections. The tri-colour filters I have been using are unmounted squares of gelatin, which have the tendancy to pick up fingerprints very easily, and are difficult to clean and this particularly shows up when the sun hits the filter surfaces, and a slight soft-focus effect results.

Three colour process, separation negatives shot on Ilford Delta 100
with Zodel Baldalux, colour RGB image composited in Photoshop CS2
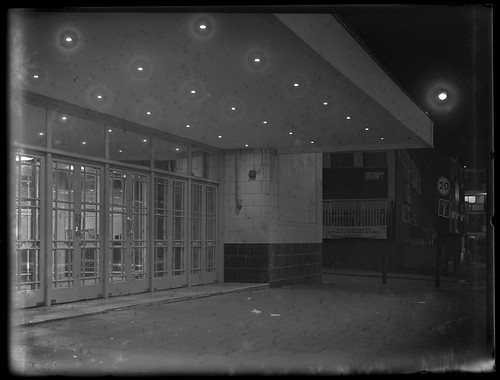
Three colour process, separation negatives shot on Ilford Delta 100
with Agfa Record I, colour RGB image composited in Photoshop CS2
Three colour process, separation negatives shot on Ilford Delta 100
with Agfa Record I, colour RGB image composited in Photoshop CS2
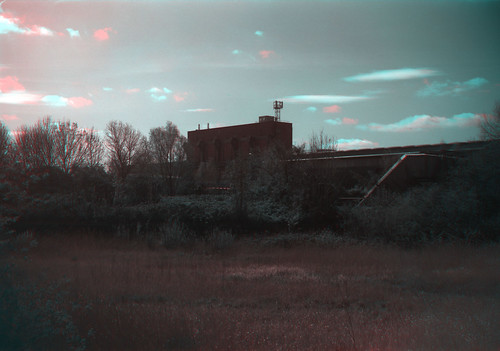
As the 6x9 format gives eight images on a roll of 120 film, this meant that I could shoot two sets of three colour separations, with two frames left on the film. On some of the films I used these frames to shoot second versions of some colours, but I also tried a two colour separation, shooting just through the red and green filters. When making the RGB composite I used the green filtered negative in both Green and Blue channels, essentially giving a red/cyan colour image. This effect was intended to mimic the two colour bipack systems used in the early part of the twentieth century for colour motion pictures (see the Wikipedia article on Bipack Colour).

Two colour process, separation negatives shot on Ilford Delta 100
with Zodel Baldalux, colour RGB image composited in Photoshop CS2

Wednesday, 9 April 2014

Glass plate adaptors

Adaptors to use 10.8x6cm glass plates in 4x5 inch plateholders
In my last post, 'Some odd-sized glass plates', I wrote about making adaptors to shoot the 10.8x6cm HP3 glass plates in 4x5 inch plateholders; a comment on the post about the passing reference to making the adaptors has provoked me to illustrate them.

Adaptor diagram (to scale at 96 dpi)
I used mountcard of the sort that should be found in any good arts and crafts suppliers. The mountcard itself is roughly 1.5mm thick. The adaptors are made from two pieces of card glued together with PVA glue. The lower piece of card, shown in green outlines above, is the dimensions of a 4x5 glass plate, with an aperture cut in the centre to fit the plates in. The upper piece of card, in red, has a smaller aperture, 2mm narrower on each side, which provides a lip to hold the plate in place. In terms of the thickness of the adaptor as a whole, there's enough clearance with the plateholder's darkslide that the additional height does not interfere with sliding the darkslide in and out. The emulsion surface of the glass plate should be level to the plane of focus, being held in place by the curved spring from behind and flush with the surface of the lower piece of card, which itself should be held exactly as a 4x5 plate would be. Importantly, the upper piece is reduced in length so that either end of the adaptor fits under each end of the plateholder. I've found that plateholders do vary a small amount in their tolerances: the above diagram fits Type II plate holders by Folmer Graflex Corp. The 5mm difference between the upper and lower pieces at the right end of the diagram above fits under the top end of the plateholder, the 3mm end fits under the lower (folding) end of the plateholder, as shown in the image below (rotated 180º, so the folding end of the holder is on the right in the picture).

Adaptor in 4x5 Folmer Graflex Plateholder
The mountcard was painted with black acrylic paint to give a matte finish, and I also numbered the adaptors with small notches in one corner, to identify which plates were shot in which holders, not entirely necessary, but potentially useful.

Detail with numbering notches (underside)
I also made some adaptors to use quarterplate-sized plates in 4x5 holders, with the same method of contstruction, which, although I could shoot in my Ensign Folding Klito, meant I could use the lenses and movements of the MPP Micro-Technical Mk VI with the effect of a small amount of cropping. As well as these technical considerations, the fact that glass plates in the quarterplate size (4 1/4 x 3 1/4, or 10.8x8.2cm) appear to be most abundant, it seemed wise to able to shoot this size in more than just one camera (the first couple of results with 1940s Ilford HP3 plates are below).

Ilford HP3 4 1/4 x 3 1/4 inch glass plate.
Shot with MPP Micro-Technical Mk VI using adaptor.
Ilford HP3 4 1/4 x 3 1/4 inch glass plate.
Shot with MPP Micro-Technical Mk VI using adaptor.

Saturday, 5 April 2014

Some odd-sized glass plates

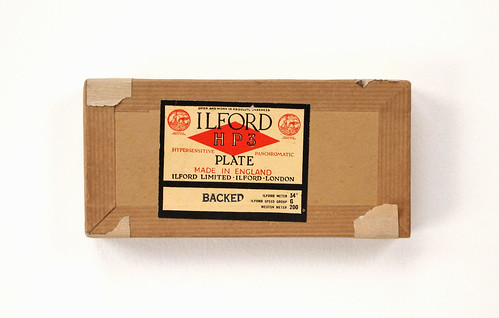
Ilford HP3 6x13 plate box
In my blog post 'A box of vintage plates and paper' I listed amongst the contents one of the HP3 boxes as "One box with 'paddle steamer' trademark, stereo plates 6x13cm (?) size." I have a box of identical dimensions of unopened Ilford Selochrome plates, which are labelled on the outer wrapping 6x13cm, a stereo plate format. However, opening the box in a dark bag to investigate, I found that the plates inside were rather shorter than the box suggested. I sacrificed one plate to the light to be able to measure it accurately. The plate was 6cm by 10.8cm, but had evidence of having been cut down or clipped by hand - one of the short sides had a rather rough edge (I'm actually surprised by how rough and haphazard the edges of some of the glass plates I've used has been). I imagine that the plates had been cut down in such a way that they could be fitted or used inside quarter-plate holders. I could have done this with my Ensign Klito, but instead chose to make adaptors to use the HP3 plates in 5x4 inch plateholders, and shoot them with my MPP Micro-Technical camera. I shot a first plate from this box without having made any tests, but having used HP3 plates of a similar age before, I thought that given a long enough exposure, I would get a result.

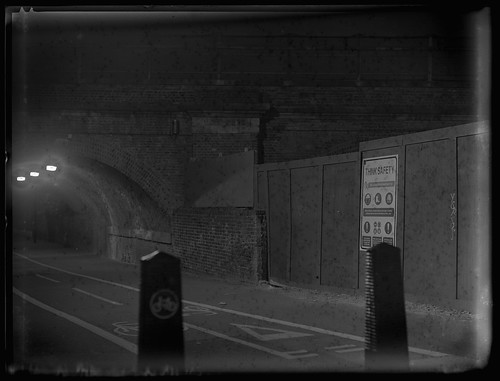
10.8x6cm HP3 plate, first exposure, MPP Micro-Technical Mk VI with 150mm Xenar
I gave the plate a generous twelve-minute exposure with the lens wide open at f4.5. The resulting negative was perhaps over-exposed, but there was plenty of detail and, without any sources of light inside the frame, there were no blown highlights. Although shot using a tripod, there is a bit of camera shake: during the exposure, a car stopped directly in front of the camera and the driver leaned out to ask me directions to a well-known nearby shopping centre. During this exchange I had to keep the darkslide in front of the open lens to preserve the scene. As the plate didn't fit in my Combi-Plan tank, I simply dropped it into a Patterson 3-reel tank for stand development, with the emulsion side facing the tank's outside edge.  I subsequently made a test but this wasn't entirely necessary: as I have found with some of the glass plates I've used, a combination of long exposures, inherent latitude, reciprocity law failure, and the compensating effect of stand development (plus some fog from age), all help to make for a large margin of error.

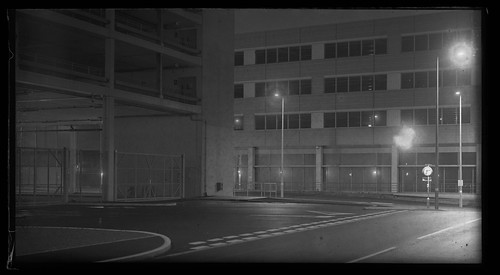
10.8x6cm HP3 test plate, MPP Micro-Technical Mk VI with 16.5cm Tessar
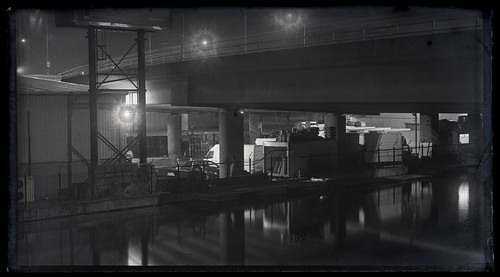
I metered the plate for the test at 25, and made three exposures by progressively withdrawing the darkslide. On development, I found I'd loaded this plate back to front, with the anti-halation backing facing the lens and imparting a texture to the image. However, it was clear that the plates were still very usable, and I shot the rest of the plates over the next few weeks.

HP3 plate, MPP Micro-Technical Mk VI with 16.5cm Tessar
HP3 plate, MPP Micro-Technical Mk VI with 150mm Xenar
HP3 plate, MPP Micro-Technical Mk VI with 16.5cm Tessar
HP3 plate, MPP Micro-Technical Mk VI with 150mm Xenar


Monday, 31 March 2014

Rollei RPX 25

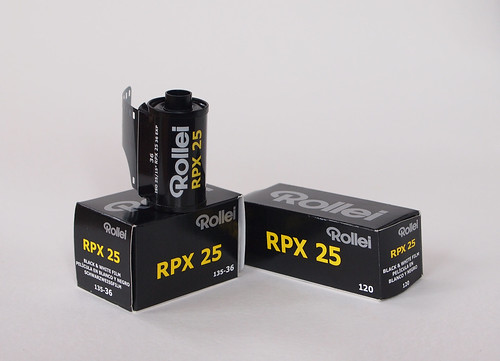
Rollei RPX 25 in 35mm and medium format
Having reviewed both Rollei RPX 100 and 400 in recent months, as Maco also introduced a new low-speed fine grain Rollei RPX 25 at the end of last year, I wanted to test this film too. Like the 100 and 400 ISO versions, it's available in 35mm and medium format, and all films have now been repackaged, in cartons instead of the plastic containers prevously used, and the 35mm cartridges now have DX coding. Previously the 100 and 400 speed films, like other 'Rollei' branded films from Maco, had printed adhesive labels affixed to uncoded generic cartridges. The new packaging suggests that Maco are investing resources in their RPX range for the foreseeable future. Maco have been known for buying stock from other manufacturers, rebranding and repackaging film, and when RPX 100 and 400 appeared, there was much speculation online about its similarities to Harman's Kentmere 100 and 400 films. While there is currently no data sheet available from Maco for Rollei RPX 25, on Macodirect the new film is described as:
...a low-speed panchromatic black and white film with a nominal sensitivity of ISO 25/15° [...] Rollei RPX 25 is characterised by a high sensitivity reserve of one f-stop, depending upon development. The thin-section document-emulsion is poured onto a highly transparent base and offers an extraordinary sharpness, with finest grain.
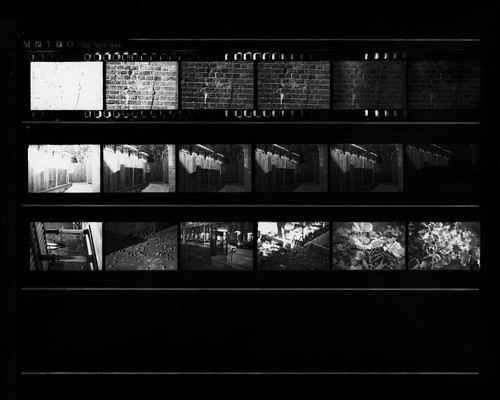
As I have done for the other two RPX films, for a first roll in 35mm, I wanted to test the film for latitude. Shooting the film with a Praktica MTL3 camera, I shot the frames on the first and second rows with exposure indexes of 6-12-25-50-100-200; the frames on the third row were all shot at a rating of 25. I developed the film using the manufacturer's recommendation of 6 minutes in R09 One Shot (Rodinal) diluted 1+25 at 20ºC.
Rollei RPX 25 latitude test contact sheet
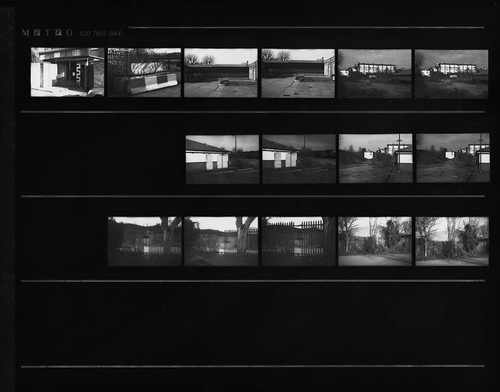
I also shot a second roll at 25 ISO. I used a yellow filter on some of the shots which included the sky. The second roll was also developed in Rodinal, but this time diluted 1+50 for 11 minutes at 20ºC, an alternative recommendation for the film.
Rollei RPX 25 film test contact sheet
My first impressions from developing these two rolls were that Rollei RPX 25 has very different qualities from RPX 100 & 400: it was immediately clear that the negatives were of high contrast; the film base was very clear and tough (I was unable to tear the film). The film also dried very flat, there being almost no curl to the negatives once cut. When printing the contact sheets on Kentmere VC Select paper, I tried making the contact prints without using a multigrade filter, meaning that the contrast should be in the middle of the paper's range, but the contrast was too high with almost no detail showing at either extremes of the latitude tests. I reprinted the contact sheets with a 00 multigrade filter for the minimum of contrast, as with the sheet shown above. As Rollei RPX 25 does not demonstrate the wide latitude of the other RPX films, exposure needs to be more exact, and, I suspect, it also requires more careful development.
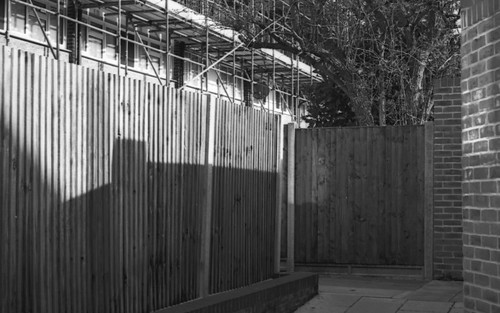
Rollei RPX 25 at box speed, developed in Rodinal 1+25, 6m at 20ºC
In scanning the negatives, I was able to supress the extremes of the film's inherent contrast and pull detail out of both shadows and highlights, which may not be as easy to do when printing in the darkroom. The above image I shot for the latitude test specifically because the scene showed a very wide contrast range, and would be ideal for testing this (however, the brick wall, also shot for the latitude test, was not as good a subject, tending with underexposure to look more graphic and linear). In terms of grain, the flatbed scanner I used wasn't capable of resolving its fine detail. The latitude test appears to show that highlight detail is quickly lost with overexposure; in the shot of the daffodils, not a great photograph by any means, the highlights are almost entirely featureless, but with less exposure the shadows would have suffered. The film developed with a dilution of 1+50 may have had slightly less contrast, but this was hard to judge as the lighting conditions were different: although many of the scenes are lit by the sun, it was later in the afternoon.
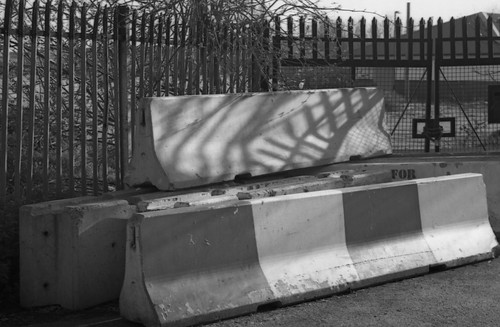
Rollei RPX 25 at box speed, developed in Rodinal 1+50, 11m at 20ºC
I wasn't entirely happy with the results of the first two films in general, although some individual shots were better than others. Due in part to shooting the film on a bright sunny day, the inherent contrast of the film was problematic regardless, and I felt the manufacturer's recommendations for exposure and development were some way off giving satisfactory results. I wanted to try reducing the contrast by developing with a higher dilution of Rodinal. Although the general strategy when attempting to achieve pictorial contrast with document-type emulsions (such as the Ilfodata HS23 film, and Rollei ATO 2.1 - and Maco's own publicity describe RPX 25 as having a "document-emulsion") is to expose more and develop less, with the highlights in danger of blocking out at box speed, such as in the frames rated 12 and 6 in the latitude test, I wanted to try rating the film at 50 to avoid this. Maco's own quote is that RPX 25 has a "nominal sensitivity of ISO 25" with a "high sensitivity reserve of one f-stop" could be read that the film's true ISO is more like 50, but with exposure recommended for 25.
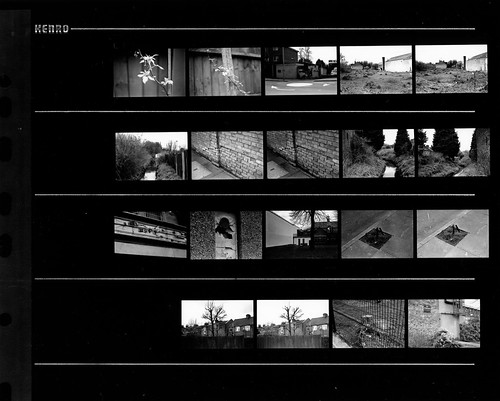
Rollei RPX 25 stand development film test contact sheet
I shot another two rolls of 35mm, one with my Olympus OM10, rating the shots at 25 and 50, and some at an intermediate exposure index of 32, and another film in the Kodak Retina IIa. For the film from the OM10, I used stand development in Rodinal diluted 1+100; the film from the Retina was developed with Rodinal diluted 1+150, but for 12 minutes at 20ºC with normal agitation, a much higher dilution than the 1+50 recommended. At the point of hanging up the negatives to dry I could see that the results were better, with the film developed at 1+150 looking a bit thin; subsequently scanning these negatives was much less trouble than the first two rolls, where I found it difficult to keep highlight detail without making the lower range of midtones lose separation, leading these to become muddy. With a higher dilution of film developer, the highlights were easier to control, although with the stand developed negatives, the shots that had areas of sky within the frame showed these as virtually featureless, and attempting to recover or preserve detail in the scanning caused problems with halos around the branches seen against the sky. The negatives developed at the dilution of 1+150 were better in this regard. Nevertheless, with these dilutions I printed the contact sheets striaght without reducing the paper's contrast.
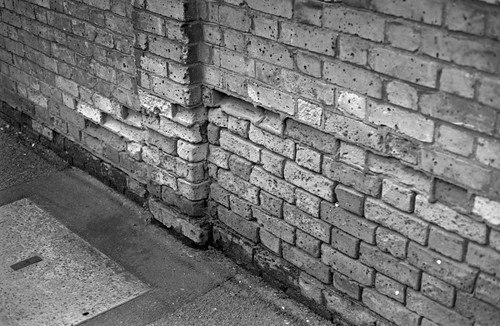
Rollei RPX 25 at box speed with stand development in Rodinal 1+100
Rollei RPX 25 at EI 32 with stand development in Rodinal 1+100
Rollei RPX 25 at box speed, developed in Rodinal 1+150, 12mins at 20ºC
Feeling that the developer dilution of 1+150 was close to the result I wanted, I shot a roll of RPX 25 in medium format with a Voigtländer Bessa RF, rating it at around 25 using the 'sunny 16' rule for exposure (I noticed that medium format RPX 25 has identical backing paper to Ilford's 120 films, unsurprising perhaps, being made in conjunction with Harman, but the older packaged versions of RPX 100 and 400 had different backing paper, with instructions in both English and German: at the end of the roll there is the injunction 'Hier Falten/Fold Here'). I modified my times and dilutions from the previous 35mm roll, and developed the medium format film in Rodinal at 1+120, for 14 minutes at a lower temperature of 18ºC.
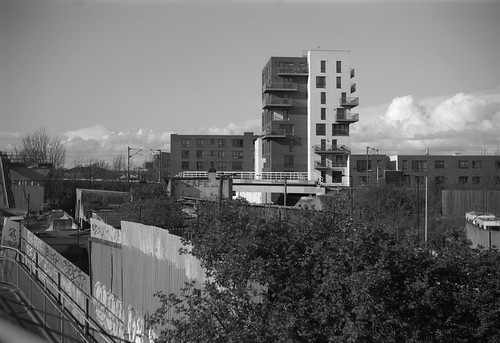
Rollei RPX 25 (medium format) at box speed, developed in Rodinal 1+120, 14mins at 18ºC
The results from the medium format roll appeared to show that extending development time while lowering dilution, and perhaps importantly temperature, brought less extreme contrast to the tonal range, while keeping good tonal separation. Incidentally, using a pre-war uncoated lens with these medium format shots may have also helped with the contrast a little - I had hoped for an overcast day with flat lighting to shoot the medium format film based on the previous 35mm tests, but highlight detail has held up well. Even with the bottom-of-the range Helomar lens, the negatives hold a huge amount of detail - with the shot below, it's possible in the original scan to count all the bricks in the building in the centre between the two high rise blocks, which promises well for prints made optically, as opposed to flat-bed scans.
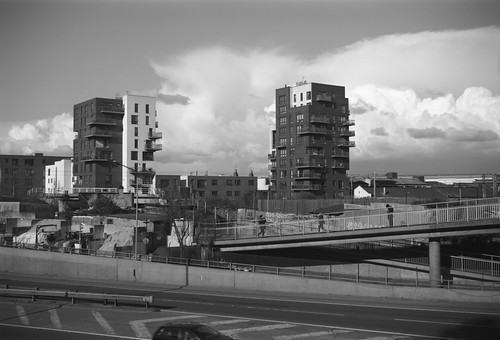
Rollei RPX 25 (medium format) at box speed, developed in Rodinal 1+120, 14mins at 18ºC
Rollei RPX 25 is very different from the two faster films that share the RPX name, different enough that for Maco to use the RPX label for this film feels misleading. Both Rollei RPX 100 and 400 are much more flexible films where the recommended exposure and development times give good results with a variety of shooting conditions; from my tests RPX 25 needs far more careful exposure and development to bring out its own distinctive qualities of sharpness and fineness of grain without losing tonality to its high contrast. As a film photographer, while other emulsions are being discontinued, it's heartening to see new products appearing; as a low-speed fine-grain film, Rollei RPX 25 may well not be a good choice for a general all-purpose black and white film, but for the right subject conditions, with attention to exposure and development, it does provide beautifully sharp and clear results.
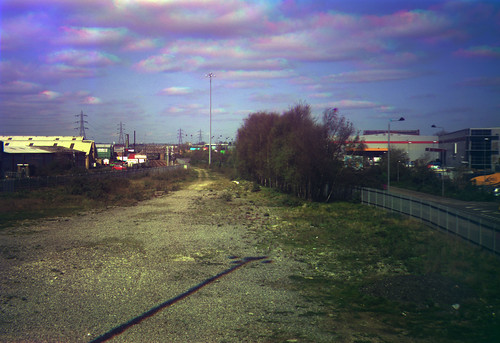
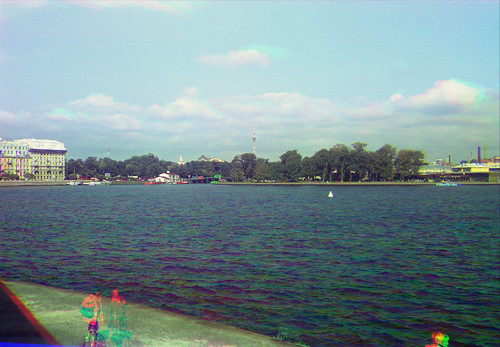
Tuesday, 25 March 2014

Take Your Box Camera To Play Day 2014

Lumière Scout Box with Ilford FP4 Plus
In a spirit of inclusiveness, Flickr member art y fotos suggested a 'Take Your Box Camera To Play Day' for those either fortunate - or unfortunate - not to have to go to work and take part in the 'Take Your Box Camera To Work Day'. It was also suggested that it should be a weekend, Saturday and Sunday 22nd and 23rd of March. Again I used my Lumière Scout Box, with two slower speed rolls as the weather was forecast to be fine and bright, Ilford FP4 Plus (with an expiry date April 2009), and a roll of Rollei RPX 100. Both rolls of film were developed in Ilfotec LC29, diluted 1:19, 10 minutes at 19ºC to provide a push of around one stop.

Lumière Scout Box with Ilford FP4 Plus
The FP4 Plus provided the best results, although as the roll progresses there is a problem with film flatness, which can be seen in the image above where the roof line lightly undulates. A yellow filter might have enhanced the tonal modelling in the skies. The roll of RPX 100 has suffered from the emulsion reacting to the printing on the film's backing paper, with the numbering just visible in the sky of the photograph below. Although I haven't experienced this with Rollei RPX films before, it is a manufacturing problem which has sometimes affected batches of medium format films, which, anecdotally, appears to be confined to the cheaper end of the market (I have never found this happen to Ilford films for example, even those decades old, like the FP4 used for some of the 127 Days).

Lumière Scout Box with Rollei RPX 100
See all the photographs in the Take Your Box Camera To Work Day group pool.

Friday, 7 March 2014

Take Your Box Camera To Work Day 2014

Lumiere Scout Box with Rollei RPX 400
Last week, Friday 28th February was 'Take Your Box Camera To Work Day'. After my recent tests of Rollei RPX 400, it was clear that the film could be a good choice to use for the day with my Lumière Scout Box. Having found RPX 400 to possess good latitude and also take pushing well, it seemed the ideal compromise for both shots with 'Instant', liable to be underexposed, and longer exposures (which most of the interiors were) on the Scout Box's 'Pneumatique' (bulb) setting. I developed the two films shot on the day in R09 One Shot (Rodinal), diluted 1:25, for 15 minutes at 18.5ºC, an effective push of around a stop and a half.

Lumiere Scout Box with Rollei RPX 400
See the whole set of photographs on Flickr.

Monday, 17 February 2014

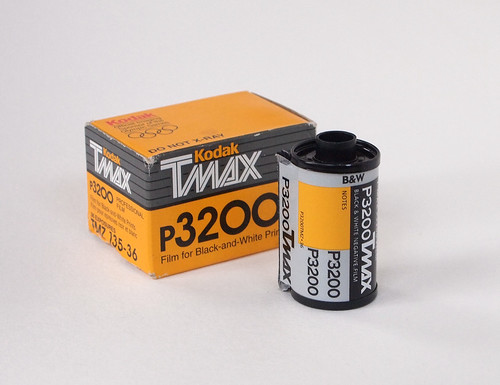
Kodak T-Max P3200

Kodak T-Max P3200
Nearly three years ago I wrote a post about Ilford Delta 3200, and at the time cited Kodak T-Max P3200 as being the other ultra-high speed film available, which was true at the time of writing. However in October 2012 Kodak announced, due to low demand, T-Max P3200 was being discontinued. [Edit 23/2/18: Kodak have announced that T-Max P3200 is being re-introduced.] It would be interesting to see the relative volume of sales for Delta 3200 against T-Max P3200, but one advantage that Ilford's film always had over T-Max P3200 was its availability in medium format as well as 35mm. The two emulsions are similar: these are both tabular grain films with a true speed around 1000 ISO. As fast films tend to have a lower contrast range, and both have the latitude to be rated 3200 and provide acceptable results with this push. Incidentally, this would appear to be the reason for the 'P' in P3200, acknowledging the 'push' when used at the box speed of 3200. The reason for writing a blog post about Kodak T-Max P3200 now, rather than when it was announced that it was to be discontinued, was that I recently decided to shoot a couple of rolls I'd been storing in my fridge for some time; one roll had a develop before date of 2011, the other 2001. In my experience faster films lose more sensitivity with age: I usually buy a Ilford Delta 3200 as and when I need the film, rather than keeping rolls in storage.

Kodak T-Max P3200 (sometimes referred to as TMZ from its emulsion code) appeared on the market in 1988, and it took Ilford another ten years to respond with Delta 3200 (Fuji similarly released a Neopan 1600, also now discontinued). For some, the benefits of such a fast film are marginal: with the right development both Kodak and Ilford 400 speed films can be pushed 3 stops to 3200, and indeed Kodak's discontinuation notice recommends using T-Max 400, pushed to 1600 as a replacement. However, for handheld night photography (for which I've often used Delta 3200), the increased contrast with push processing a slower film can be an issue as night scenes often tend to be high contrast in nature. The Kodak discontinuation notice admits this, stating that "The exception [to replacing P3200 with T-Max 400] would be extremely low light situations where P3200 might be able to pull out some shadow detail that would otherwise be lost".

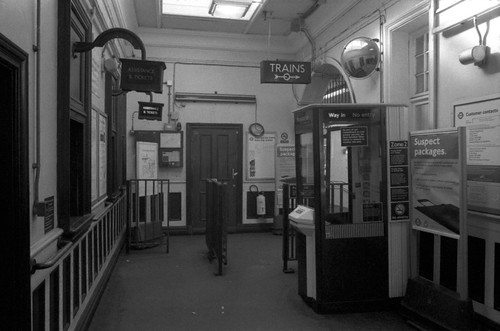
Kodak T-Max P3200, developed in ID11 stock solution, 12 minutes at 20º C.
I first used T-Max P3200 in the mid-1990s, and in my post on Delta 3200 I wrote about the kind of subject that I often desired to photograph at the time, frequently the low light situations such a fast film was produced for. As Kodak T-Max P3200 was more expensive, I tended to use HP5 Plus, push processed to 800, 1600 or 3200 in these situations instead. Developed in ID11, P3200 yielded relatively smooth grain when exposed properly. For the two rolls of P3200 shot recently, I used Ilfotec LC29 developer; Rodinal (and latterly the R09 One Shot version) has been my film developer of choice for about seven years, but, as any developer, it's not ideal for all situations, especially with the fastest and most grainy films. The grain appears more prominent in the negatives developed with Ilfotec LC29 compared to ID11.

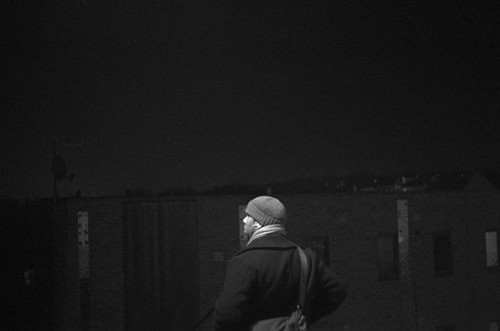
Kodak T-Max P3200 (develop before date of October 2011),
developed in Ilfotec LC29, 1:19, 11 minutes at 20ºC.
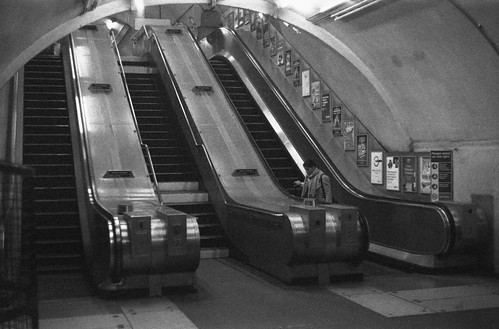
Kodak T-Max P3200 (develop before date of September 2001),
developed in Ilfotec LC29, 1:19, 12m30s at 19ºC.
Of the two rolls I've shot in the last couple of months, that with a "develop before" date of September 2001 had noticeable fogging when developed, leading to quite evident grain in the shadow areas; the film with a 2011 date provided better results, less fog, and appeared to give sharper negatives with a better tonal range. Although I hardly ever used Kodak T-Max P3200, it's always unfortunate when an emulsion disappears from the market, shrinking the range of available films, and many photographers will miss it (see the elegies below); Ilford Delta 3200 now remains as the only ultra-fast film.

Further reading: 
Goodbye T-Max P3200 on the Online Photographer
The Demise Of Kodak TMAX P3200 John Vlahakis
Kodak P3200 T-MAX R.I.P. on Wallace Koopmans Artlog
Time To Start Hoarding: Kodak discontinues T-MAX P3200 film on Imaging Resource