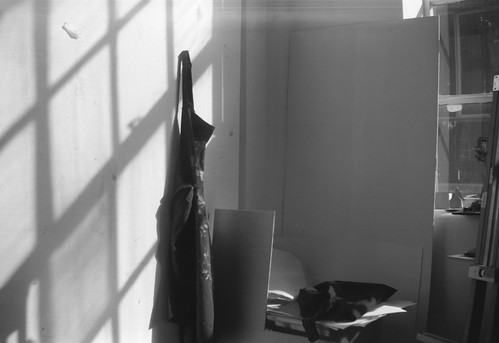
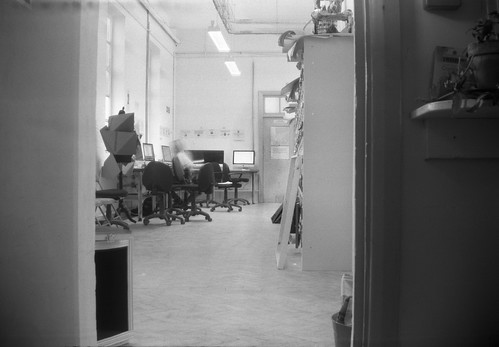
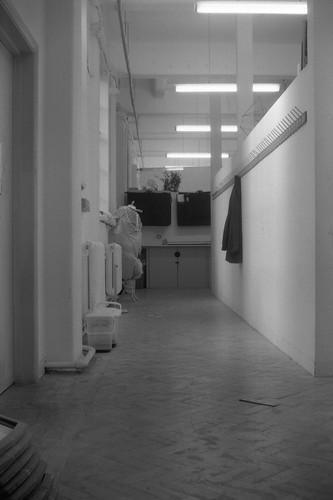
Wednesday, 10 June 2015

Agfa/Rollei Superpan 200

Superpan 200 in 35mm and medium format
There are very few black and white films manufactured with a nominal speed of 200; currently, just three: Fomapan 200, Ilford SFX 200 Creative, and Agfa Superpan 200Fomapan 200 was discontinued for a few years, but was recently reintroduced in a new formulation; Ilford's SFX 200 shares some characteristics with Agfa Superpan 200: the name denotes that the Agfa film is superpanchromatic, with extended red sensitivity beyond normal panchromatic films, to near infra-red, and with the right filters (like SFX 200) it can produce similar effects to true infra-red film. Of the three films, all are available in 35mm and medium format rollfilm, additionally, Fomapan 200 is also available in large format sheet film. There are few stockists in the UK for Superpan 200, West End Cameras currently has the film in stock; when asked about in Silverprint, they hadn't heard of the film. Superpan 200 is sold by Maco but is produced (as Aviphot Pan 200) by Agfa-Gevaert in Belgium, and Maco's website uses Agfa-Gevaert's Aviphot Pan 200 technical information sheet. As can be seen in the photograph above, the film packaging uses both Agfa and Rollei brand names for the medium format film, while the 35mm labels do not use the Rollei name (the 35mm film is also not DX-coded). In the film rebates, on the medium format version, Rollei is used, while 35mm has just the name Superpan 200.

Agfa-Gevaert's data sheet describes Aviphot Pan 200's applications as:
Aerial photography assignments from low to medium altitudes, for gathering, interpreting and processing information intended for cartography, inventory purposes and exploration studies. This film can be used in industrial recording systems, such as equipment for plotting graphs in control and monitoring devices. It can also be used in stereo image recording devices, either airborne or in ground-based facilities for subsequent production of three-dimensional plans, maps, etc.
Characteristics
With its expanded colour sensitivity into the near infra-red range of the colour spectrum, Aviphot Pan 200 offers excellent penetration through haze, fog and other atmospheric conditions liable to affect the image quality. Obviously, this yields an improved image contrast and therefore more information. With the uniform distribution of the panchromatic sensitivity within the range of visible light, the terrain can be imaged very faithfully without having to revert to the use of special spectral recording filters. Yellow filters can be used to get a higher image contrast. They also decrease the overall film sensitivity.
As with previous film tests I shot a roll of 35mm Superpan using an Olympus OM10 SLR, with a range of meter settings of 25, 50, 100, 200, 400, 800 for film latitude. With no published development times for Ilfotec LC29, the developer I used, on neither the data sheet from Maco, nor the Massive Dev Chart, I used stand development, with a dilution of 1+100 for one hour.

First latitude test contact sheet, stand developed in Ilfotec LC29
The first test showed the film to have narrow latitude, with the best exposure indexes of between 50-200, but developed in Ilfotec LC29, rating the film at 100 (or a little under) seemed to give the best results (the original data sheet states that "Aviphot Pan 200 can be exposed as a 125 to 250 ASA film," although this is with Agfa's G74c developer). Stand development is usually a good technique to get straight negatives from a properly exposed film, but the first results were a little disappointing.

I used the same camera and exposure settings for a second roll, repeating the latitude test of metering for 25, 50, 100, 200, 400, 800, but this time developed the film with R09 One Shot, diluted 1+:25 for Maco's published time of 8 minutes at 20ºC. The results with R09 One Shot were better than the first test, but using normal agitation does appear to have increased the contrast of the film, although lighting conditions were different, with some winter sunlight providing bright highlights.

Second latitude test, developed in R09 One Shot
The two tests show that the latitude range of Superpan 200 is relatively narrow (compare for example, Adox Silvermax's wide latitude range): exposed at 25 and 50, the highlights and midtones begin to lose separation, while with underexposure, the shadows quickly lose detail. The scans below have been adjusted to pull the maximum amount of detail from highlights and shadows: as is typical with black and white negative film, overexposure does give better results than underexposure, but Superpan 200 is less flexible in this regard than some other films.

Agfa Superpan 200, rated 25, developed in R09 One Shot 1+25
Agfa Superpan 200, rated 800, developed in R09 One Shot 1+25
I also shot a first roll in medium format in my Voigtländer Bessa RF, developing this in R09 One Shot at 1+25 for 8 minutes at 20ºC. For this, I relied on the 'Sunny 16' rule for exposure, which I often use for cameras without built-in lightmeters, but as a result, a number of the negatives were rather thin, partly a result of trying to calculate exposure settings for winter sunlight. Despite this, at medium format, Superpan 200's qualities are immediately apparent - its sharpness, relatively tight grain structure, its clear base with very little curl once processed and the contrast; the results were reminiscent of Rollei RPX 25 - despite the difference in speed, both films have a very similar look.
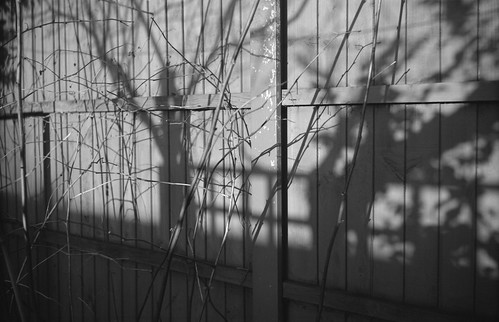
Voigtländer Bessa RF, R09 One Shot 1+25, 8m at 20ºC
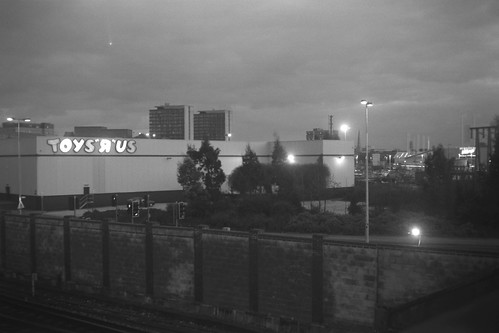
Having developed Superpan 200 in both Ilfotec LC29 and R09 One Shot, I suspected that R09 One Shot at higher dilutions would provide better results, notably with higher-contrast scenes; I shot some more 35mm Superpan 200 with both the Kodak Retina IIa, and my Agfa Optima Sensor, and developed at a dilution of 1+50, for 17 minutes at 20ºC. As it's easier to increase contrast in printing or scanning, with a film like Superpan 200, it is important to expose and develop to keep both shadow and highlight detail - as with all films, but some emulsions have greater latitude and lower contrast, making it easier to achieve good negatives while being less exact in approach.
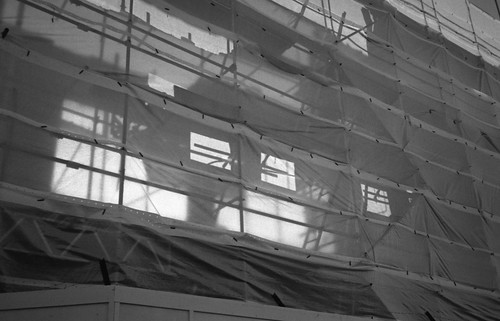
Agfa Optima Sensor with Superpan 200, R09 One Shot 1+50, 17m at 20ºC
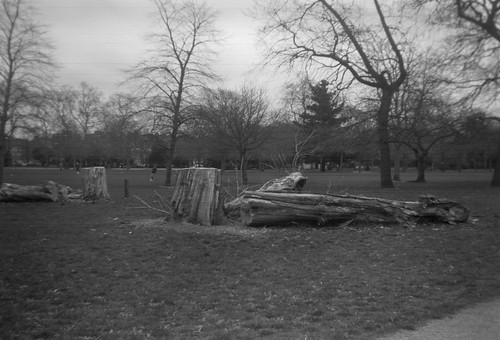
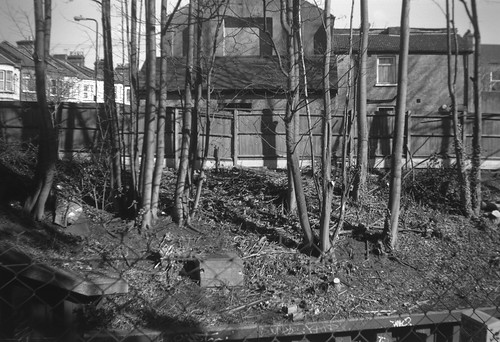
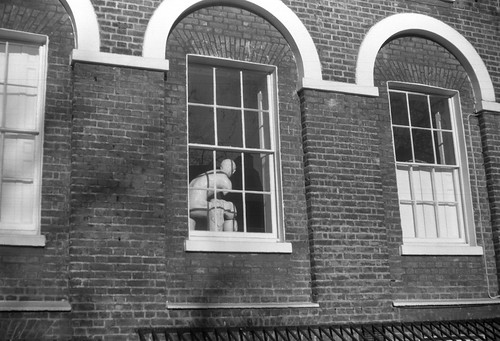
The first tests that I made with Superpan 200 reflected the fact that these were not shot in the best lighting conditions, in the middle of winter; with more available light and higher dilutions of developer, the subsequent results in 35mm were better. I also shot medium format film in both the No.2 Brownie and the Ica Trona: even with simple Brownie meniscus lens and the uncoated Tessar on the Ica Trona, the results were good, possibly the inherent contrast of Superpan 200 complements the softness of these old lenses. On a precautionary note, the rolls of film that I shot in medium format showed that the emulsion is easily scratched if not carefully handled and the synthetic base is susceptible to 'light piping' - Maco's website does include a warning about this, and it's important to make sure the medium format films are tightly wound on their spools when removing after exposure in the camera.

Kodak No.2 Brownie with Superpan 200, R09 One Shot, 1+50, 17m at 20ºC
Ica Trona 210 with Superpan 200, R09 One Shot, 1+50, 17m at 20ºC
As well as higher dilutions, I also wanted to try developing the film at lower temperatures in Rodinal. Having used Rodinal, or R09 One Shot, for a number of years, it does seem that some of its best qualities are facilitated by using higher dilutions and lower temperatures: one or two degrees below 20ºC does seem to negate some of the 'roughness' associated with the appearance of grain when developing faster films in Rodinal. This does start to extend development times; for the shot below I used 20 minutes diluted 1+50 at 18ºC. Not having an infra-red filter, one aspect of Superpan 200 that I did not test was the ability to achieve an 'infra-red look', but even without such filtering it's a very apt film for landscape photography. The extended red sensitivity, its "excellent penetration through haze, fog and other atmospheric conditions" provide a good rendition of both skies and distances, even unfiltered; for some of the later medium format shots I used a yellow filter.

Ica Trona 210 with Superpan 200, R09 One Shot, 1+50, 20m at 18ºC
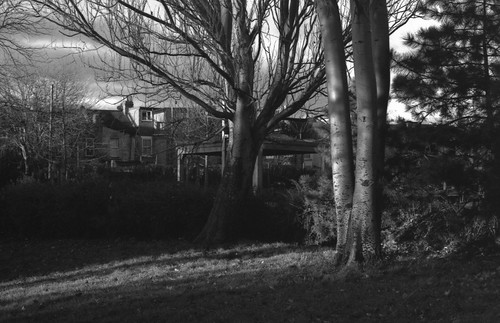
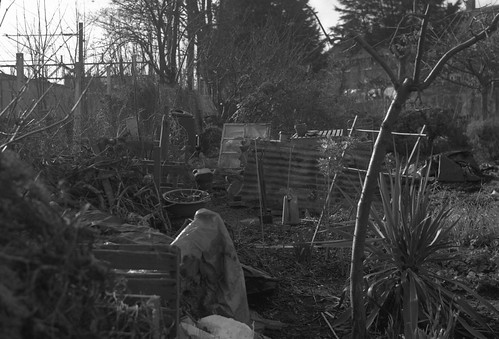
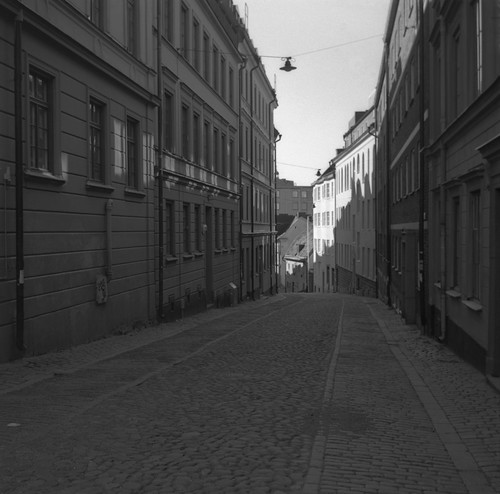
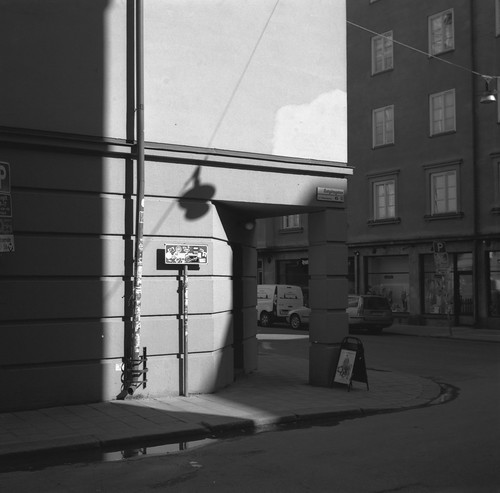
Having made enough tests, Superpan 200 was one of the films that I took with me - in medium format only - on a recent trip through Europe to Stockholm. The medium format camera that I took was the folding Zodel Baldalux, which I've frequently used for travelling. At the Loppmarknaden flea market in Stockholm, I bought an Agfa Isolette III, so shot a few rolls of Superpan 200 with this camera. As with the tests that I had made a couple of months earlier, I found myself taking lots of photographs in low slanting sun, and some of the contrasts between bright sunlight and deep shadows, such as in the third image below, needed careful metering (I used my hand-held Weston meter rather more than usual when shooting Superpan 200). These last few rolls of Superpan 200 I developed in R09 One Shot at 1+50, and used a time of 19 minutes at 19ºC - an easy relationship of time to temperature to remember.
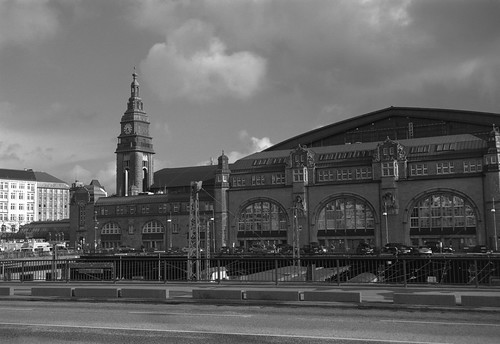
Zodel Baldalux with Rollei Superpan 200 with yellow filter, R09 One Shot 1+50, 19m at 19ºC

Agfa Isolette III with Rollei Superpan 200, R09 One Shot 1+50, 19m at 19ºC
Sources/further reading:  
Agfa's Aviphot product pages
Aviphot Pan 200 data sheet (PDF)
Maco developing times for Superpan 200 (PDF)
Extensive review on 125px

Thursday, 28 May 2015

Worldwide Pinhole Photography Day 2015

Ilford Special Lantern Plate
Having made four pinhole cameras for last year's Worldwide Pinhole Photography Day, it was simple enough to use these again for this year's event on 26th April. I had made the cameras to use glass lantern plates in two different sizes, 8.2x8.2cm and two-inch square plates. Unlike last year, where I had an encounter with security staff in the Queen Elizabeth Olympic Park, this year I just shot the plates at home and while working on my allotment.

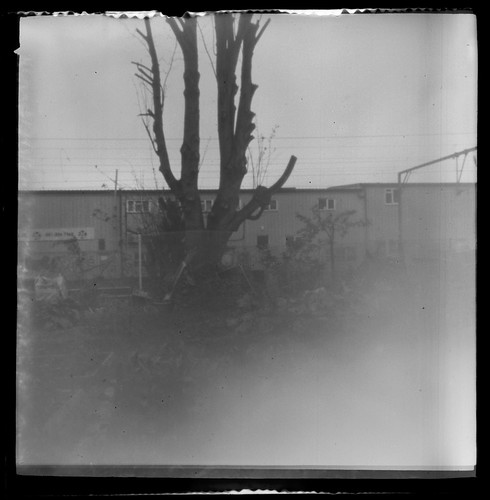
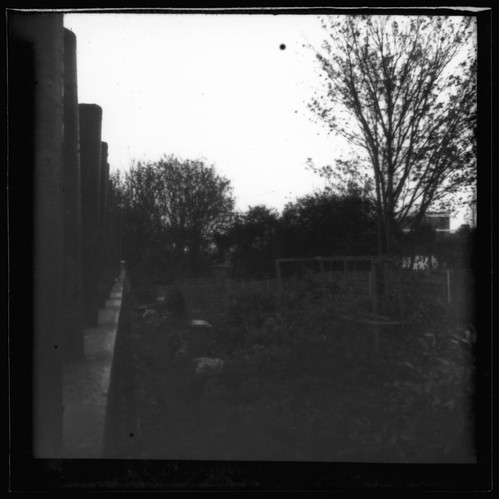
For the small cameras, I used Ilford Special Lantern plates, the fastest lantern plates that Ilford manufactured, and the plates that I used were of 'soft' contrast grade; I've used these plates fairly often before, and not just with pinhole photography. The box that the plates I used for this year's Worldwide Pinhole Photography Day had a leaflet inside the box dated to 1966, and in common with other boxes of Special Lantern plates, the emulsion has lasted well. However, I did have problems  with fogging, possibly a light leak as this shows up in the bottom right corner in most of these plates.

Ilford Special Lantern Plate
One feature of the emulsion used for lantern plates is that it is 'ordinary' or blue sensitive. In the still life photograph above, the yellow of the lemons is rendered as dark, if not darker, to their green leaves (this plate was also underexposed). For most of the pinhole photographs taken with the lantern plates, this has little directly observable difference from panchromatic emulsions, but with a high-key local colour, such as with the lemons, it is striking in comparison.

Ilford Special Lantern Plate
For the larger cameras, I used Kodak L5 Warm Tone plates, having used all my Ilford plates in the 8.2cm size. I'd shot a test plate from the box last year, so I anticipated the results. The Kodak emulsion has suffered more from age in comparison to the Ilford plates, and appears higher in contrast. The plates were all tray developed by inspection under a red safelight in RO9 One Shot, diluted 1:120.

Kodak L5 Warm Tone Lantern Plate
See the whole set of photographs here.
Worldwide Pinhole Photography Day website.

Saturday, 16 May 2015

Flickr's 'new' auto tags

I haven't been very active on Flickr recently for a number of reasons, but a couple of days ago while looking at my photostream, I noticed some tags to the images that I hadn't added. These tags are in white boxes, different from the grey boxes that the tags I had added to my photographs. At the top of the tags section, 'Beta' has been added, and a query box shows up the following message:
Tags are keywords that make photos easier to find in Flickr search. The ones you add will show up in dark gray. Flickr’s friendly robots will try to help out by adding some for you; these will appear with just a gray outline.
Looking through my photostream, many of the robot-generated tags appeared to be very generic: 'indoor' and 'outdoor' being among the most common, generic enough to be of little use when searching for something I would suspect. Some tags, however, were simply wrong. I have many photographs of old cameras, most of which have been tagged 'electronics'. This may be an understandable mis-indentification of any camera as being or using electronics. Some are more baffling: a photograph of retouching inks labelled as 'food', 'beverage' and 'people'; riot police labelled as 'flower' and 'plant'; a derelict garage as 'vehicle' and 'train'; a building as 'vehicle' and 'bike'; there are many, many other examples of this misidentification.

On Flickr's help forum, an official thread begun on 7th May announces the changes:
Starting this morning, in addition to any tags that you add to your photos, you’ll notice that Flickr may also add tags to help make them more discoverable in search. This is thanks to Flickr’s image recognition technology, which recognizes patterns in photos. For instance, when our technology recognizes patterns commonly found in car photos, it will label the image “car” and when it finds patterns commonly found in cat photos, it will label the image “cat.”

You’ll notice that tags added by Flickr will appear in an outlined box to make them visually distinct from the ones you add (which appear in a gray box). As the photo’s owner, you can delete any tags you don’t want or tags that are inaccurate.

Inaccurate tags
While we are very proud of this advanced image recognition technology, we’re the first to admit there will be mistakes and we will constantly be working to improve the experience. Usually, you can tell why a mistake was made (sometimes a bike looks like a motorcycle), but occasionally, it may be baffling (no, your grandma doesn’t look like a cat!). But the good news is that if you delete an incorrect tag, our algorithm learns from that mistake and will perform better in the future.
As a Flickr user with over 2,600 photographs, this process is going to involve a good deal of my time to improve their automated processes; there are some accounts with tens of thousands of images. It is also hard to understand how the algorithm will improve if I delete technically accurate tags, like 'outdoor' that I do not want on my photographs. Over the past eight years as a member, I have considered the tags I've added to my photographs to be as much a part of the photographs' presentation as the titles and descriptions that I also add. The automated tags are an essential part of the new feature 'camera roll' in 'magic view' mode, where it is easy for the user to see wrongly tagged images. Flickr's auto-tagging had been an invisible component of its search function for some time, but now these tags are public; however, it may not be clear to the casual browser that the tags with the grey outline are not added by the photographer. One glaring problem with the automated process is that it does not cross reference with users' tags: the photograph of riot police is tagged, by me, 'Metropolitan Police', 'demo' and 'protest', so it would be unlikely to also be 'flower' and 'plant'.

The announcement of the official help forum post ends:
Here’s your chance to tell us about your experience: Please feel free to share your most impressive (yay!), most unexpected (boo!), or most hilarious (ha!) results in this thread. We look forward to hearing from you.
As a Flickr user who has stayed with the site through a number of changes that I've not appreciated, I am used to the infantile language; users have told Flickr about their experiences. At the time of writing there are over 2,000 responses on the thread, the vast overwhelming majority being negative, and the main complaint being that the automated tagging was not offered as an opt-in, nor is there any way to remove all automated tags as a batch. I can understand that for some users, automated tagging may be a useful function, especially as Flickr wants "to make it the one place where you upload every photo and video you take, and then easily find, organize, edit, and share them". I am not one of these users - I probably post less than one in ten photographs I take, and as explained, I carefully tag my photographs to describe the attributes I want to draw attention to. One of the most "most unexpected (boo!), or most hilarious (ha!) results" of the automated tagging has been photographs of Auschwitz labelled as 'sport'.

Thursday, 30 April 2015

Flea Markets in Stockholm

Front left:Agfa Isolette III; right: Vito CL; behind: Instamatic 300
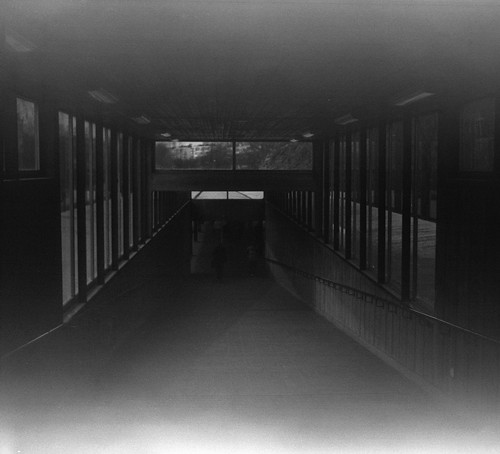
In Stockholm recently, I visited two of the local flea markets there during my stay: the Sunday market at Hötorget, and the all-week around covered market, Loppmarknaden at Vårberg. The overall quality of the stalls at Hötorget was better, while Loppmarknaden, which is an underground hall in the shopping complex attached to Vårberg Tunnelbana station, some of the stalls appeared to be little more than just piles of household rubbish. This market charges an entry fee at weekends, but I went on a weekday. There were many digital cameras from about a decade ago, a number of older SLRs, but the only camera that caught my eye was an Agfa Isolette III. This looked in good condition, although a bit dusty, and everything worked except for the uncoupled rangefinder, which was stuck on the 10m mark. This may be easy to repair, but as it is uncoupled, this does not affect the camera's operation, simply meaning that guess-focussing has to be used. What piqued my interest sufficiently to buy the Isolette was the half-used roll of film inside. The seller wanted (and got) 200 SEK, just over £15. I finished the roll of film in the Isolette at Vårberg, in the market and at the station adjoining it. Stand developing the film, Kodacolor II, in RO9 One Shot for an hour at 1:100 resulted in a few faint images, no negatives came out from before the few that I shot with it, and the best, if rather fogged, image was of the ramp to the platforms of the station.

Agfa Isolette III with Kodacolor II film
I returned to the Hötorget market a week on from my first visit, which had been on Easter Sunday. It was busier, with more stalls, some of which were the same as the previous week, I found a Voigtländer Vito CL, which, although dirty, looked in relatively good condition, and its shutter fired and the lightmeter was responding. I asked how much and was told 100 SEK; the same stall had a Kodak Instamatic 300 which had a part-used film cartridge inside. As with the Isolette, the part-used film was intriguing, and the seller gave me both cameras for 100 SEK and put them into a hessian bag. I shot the rest of the film at the flea market while there, then later I cut open the 126 cartridge, removed the 126 film for safekeeping until development, and loaded the cartridge with a length of Agfaphoto APX 400 taped to the backing paper. I shot this film a couple of days later. Using 35mm film in the camera provided problems that I have experienced before with the film's perforations not always coinciding with the holes in the backing paper, leading to gaps and overlaps in the exposures, and tears in the film where the advance had to be forced. The original colour film from the cartridge was stand developed in RO9 One Shot 1:100 for one hour, and the APX 400 developed as normal. The Kodak Instamatic 300 does have a selenium meter to control exposure, and, although the shutter fired, it was hard to tell whether this or the aperture changed with the light conditions. The 400 ISO film was mostly shot with a deep yellow filter taped over the lens and the negatives do not appear overexposed; the Kodacolor VR film from the cartridge (dating from 1982-86) was too dense to scan once developed, although images are visible.

Kodak Instamatic 300 with Agfaphoto APX 400

Monday, 23 March 2015

Take Your Box Camera To Play Day 2015

Kodak No.2 Brownie Model F with Fomapan 400
Last year's 'Take Your Box Camera To Play Day' was repeated this weekend. Having used the Kodak No.2 Brownie recently, I shot just one roll of Fomapan 400 on Saturday. The weather was cloudy with very occasional and brief spells of hazy sunshine, such as in the shot above. The rest of the photographs were shot on the widest aperture. The negatives suffered more from the scratches that had been visible in the photographs from 'Take Your Box Camera To Work Day', which may be partly that these are more visible on thinner negatives (and it maybe that some films are more susceptible to scratching).

Kodak No.2 Brownie Model F with Fomapan 400


Monday, 9 March 2015

The Kodak No.2 Brownie

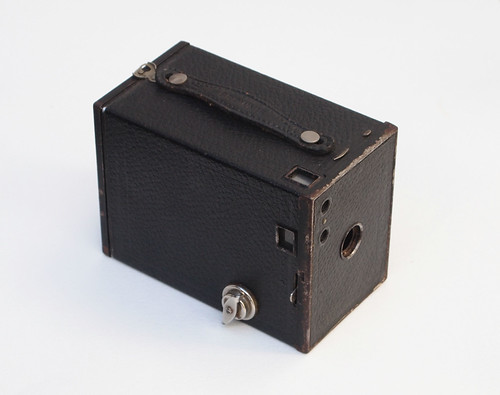
Kodak No.2 Brownie
"Simple, sturdy, reliable, these inexpensive little cameras have stood the test of years, and will be found in the hands of many thousands of people all over the world, who are making perfectly satisfactory pictures with them. They are especial favorites with the children on account of their great simplicity, but they are withal so practical that they have been readily taken up by grown-up people who wish to make pictures in the easiest possible manner and at the minimum of expense. Each has two finders, automatic shutter, carefully tested lens, and imitation leather covering. They [the Brownie No.2 and No.2A] differ from each other only in the size of the pictures they make and in their lenses."
Kodaks and Kodak Supplies / 1914 (Canadian Kodak Company)
Building on the premise of the first Kodak camera of 1888, the original Brownie was designed by Frank Brownell for Eastman Kodak to sell for just one dollar (the original Kodak was first priced at $25; at the time the Brownie appeared, a pocket Kodak was $5). This price reduction was achieved by a number of design and manufacturing processes, but chiefly by substituting the well constructed wooden body of the first Kodaks with leather covered cardboard for the Brownie. The original Brownie of 1900 was designated the No.1 once the No.2 was produced a year later. Like the original Kodak, it had no viewfinder, but V-shaped sightlines incised on the body to aid framing. A few months later an accessory finder was provided which the user could attach to the camera body; the No.2 Brownie had two integral finders for portrait and landscape orientation. The No.2 was originally priced at $2, quite possibly due to the inclusion of those two viewfinders. The significance of the No.2 Brownie of 1901 is due to Eastman Kodak introducing a paper-backed rollfilm format still widely used today: 120. The 120 format provides negatives of approximately 6x9cm; as prints were commonly made by contact at the time, a large negative was an advantage. During their first half century of camera manufacture, Kodak produced numerous film formats. Retrospectively assigned number codes in 1912, beginning sequentially from 100, there were 20 different formats by the time the Brownie No.2 appeared 1901. Although a number of the competing formats were continued for many years, for some reason, the c.62mm-wide paper-backed rollfilm of the No.2 Brownie emerged as the standard.

I've had two No.2 Brownie cameras, the first came from a car boot sale nearly twenty years ago priced £1, the second bought recently was £3 (unless in exceptional condition or a rare variant, Brownie cameras should not be expensive today, as some models had production runs in the millions). Illustrated here, I bought this second camera to create a film splitter, but after cleaning it and gluing down some of the leatherette, the camera seemed too good not to use . Both my No.2 Brownie cameras were the Model F, made from 1924 onwards. The significant change introduced with the Model F was that the card body was now made in metal. Additionally, two tripod sockets were added. According to the Brownie Camera site, my current Brownie camera can be identified by its fully detachable rear door as an early version from 1924-25.

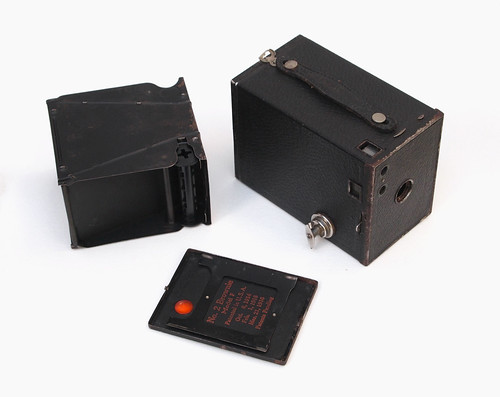
Kodak No.2 Brownie, with film carrier removed
Operation of the camera is simplicity itself. Film is loaded by opening the back and removing the film carrier, threading the film onto the the take up spool and replacing this into the camera. The 10cm meniscus lens is focus-free, set, possibly at a hyperfocal distance, rather than at infinity, judging from some of my recent photographs with the camera. The rotary shutter fires at a single instantaneous speed on both the lever's upstroke and downstroke, while the time setting works on both by pulling up the small tab on the top of the camera on the opposite side from the viewfinder. The middle tab above the lens provides the three aperture stops, holes punched in a thin sheet of metal in front of the lens; the apertures are progressively smaller as this is pulled out. By simply measuring these three holes, these apertures are approximately f14, f18 and f32 (I've read online that these are either f11, f16, f22 or f16, f22, f32). The shutter speed is somewhere between 1/30th - 1/60th: on my particular Brownie, the shutter appears to move just perceptibly faster in one direction than the other. The animation below, with the front camera cover removed, shows how this simple shutter works. As the shutter lever is pressed down, the spring on the other side of the pivot pulls the shutter around until this circular motion is briefly interrupted by the T-shaped bar. This provides a small amount of tension, released once the tab on the shutter has passed the end of the 'T' and the open sector on the shutter rapidly rotates over the lens, exposing the film. The animation below is slowed to one-third of actual speed.

Kodak No.2 Brownie sector shutter
Given the sensitivity of film a century ago, the apertures do seem small: fast or sometimes named 'rapid' films of the time were in the range of 20-30 ISO. Picture Taking with the Brownie Camera No. 2 (1918) is instructive of how the camera would have been used at the time. This stresses several times that the smallest aperture stop is not to be used for instantaneous exposures, or 'snapshots':
"To take instantaneous pictures the object should be in the broad open sunlight, but the camera should not. The sun should be behind the back or over the shoulder of the operator. Snap shots should only be made when the largest stop is before the lens. If a smaller stop be used, the light will be so much reduced that it will not sufficiently impress the image on the film and failure will result. [...]
STOPS. The stops should be used as follows:
1. THE LARGEST For all ordinary instantaneous exposures.
2. THE MIDDLE For instantaneous exposures when the sunlight is unusually strong and there are no heavy shadows; such as in views on the sea shore, or on the water; also for interior time exposures, the time for which is given in the table on pages 16 and 17.
3. THE SMALLEST For time exposures out doors in cloudy weather. Not for instantaneous exposures. The time required for time exposures on cloudy days with smallest stop will range from one-half second to five seconds, according to the light. The smaller the stop the sharper the picture. When setting the stops always see that the one to be used is brought to the center of the lens, where it catches. If you use the smallest stop for instantaneous exposures absolute failure will result."
When introduced most films were either 'ordinary', that is, blue sensitive, or orthochromatic, and developed by inspection, and although Picture Taking with the Brownie Camera No. 2 describes using a 'Brownie Developing Box' or a film tank, it does also have a section on tray developing film. Developing by inspection would allow for compensation in under- (or over-) exposure with extending or contracting development time. Additionally, from reading photography books such as the Ilford Manual of Photography, I have the impression that the intensification and reduction of negatives was common, something I've never done, but Picture Taking with the Brownie Camera No. 2 does mention these techniques. Occasionally I have read opinions online that modern fast films are too fast for box cameras, designed as they were for the use of slow films, with slow shutter speeds to match. I have never found this to be the case. Most modern films have enough latitude to provide good results in a variety of lighting conditions with a box camera that has very limited exposure controls. With a fast film in the No.2 Brownie, the smallest stop can be used for instantaneous exposures in bright light, but, unless taking photographs in bright sunlight, the middle stop usually gives the best results (it is also possible that using the smallest stop may actually reduce image quality due to diffraction). Incidentally, I have been recently testing Agfa Superpan 200, and shot one roll in the No.2 Brownie; at 200 ISO, the speed of the film is a good match for instantaneous exposures and the film's sharpness and relatively high contrast appear to be excellent qualities to offset the softness of the Brownie's lens.

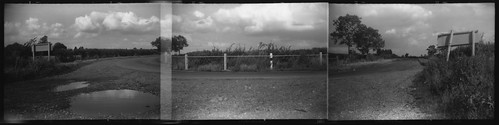
My first No.2 Brownie was my second medium format camera, my first being a Zeiss Ikon Ikoflex. Unlike the Ikoflex which had double-exposure prevention and an automatic film counter, I realised that advancing the film by using the red window in the Brownie, I could create overlapping exposures. I subsequently made a series of in-camera panoramic triptychs by rotating the camera on a tripod and advancing the film between each shot so that the exposures would just overlap and join together, creating an image spanning roughly 135 degrees. It would be possible to make a longer image with more exposures, but three overlapping shots are nearly ten inches wide, and as such fitted onto a sheet of 10x8-inch paper for contact prints, and this could also be enlarged using the large format 10x8 Durst enlarger that I had access to at college.

In-camera panoramic shot on Ilford HP5 Plus
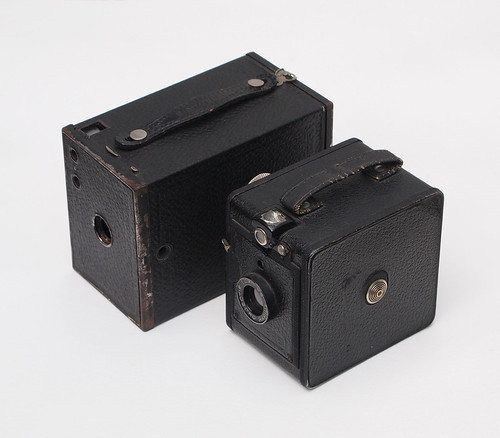
Having used the No.2 Brownie for the most recent 'Take Your Box Camera to Work Day', I could draw some comparisons to the Lumière Scout Box that I've used previously: it is bigger than the Scout Box, partly due to having a slightly longer focal length, but also the shutter and aperture stops are in front of, rather than behind the lens; the No.2 Brownie's meniscus lens is fairly unremarkable and does display a small amount of barrel distortion and vignetting, but the 6x9cm size negative is quite forgiving for small enlargements (although I have not shot direct like-for-like comparisons, the Scout Box lens does appear to give better results).

The Kodak No.2 Brownie with (front) the Lumière Scout Box
The limitations of the No.2 Brownie are also what make it a pleasure to shoot with. Like all but the most sophisticated box cameras, a lack of user controls can be liberating, freeing the user to concentrate on the subject, and the small, basic finder also means a fair amount of uncertainty as to composition, which provides an element of surprise on development. With modern films, these point and shoot cameras from a hundred years ago can still be a joy to use.

Kodak No.2 Brownie with Rollei RPX400
Kodak No.2 Brownie with Agfa Superpan 200
Kodak No.2 Brownie with Ilford HP5 Plus
Sources/further reading:
Kodaks and Kodak Supplies 1914
, Canadian Kodak Co. Ltd

Picture Taking with the Brownie Camera No. 2, Canadian Kodak Co. Ltd, 1918
The early years of Eastman Kodak on Kodak.com
The No.2 Brownie on the Brownie Camera Page
No.2 Brownie on Early Photography
History of Kodak Cameras with film sizes, original prices and production dates
B is for Brownie at the National Media Museum
George Eastman House collection of Brownies

Monday, 2 March 2015

Take Your Box Camera To Work Day 2015

Kodak No.2 Brownie with Rollei RPX 400
For this year's Take Your Box Camera To Work Day last Friday, I used a different camera to previous years. I had recently bought a cheap Kodak No.2 Brownie, with the intention of making this into a film slitter. I did temporarily use this as a means to cut down film, for this January's 127 Day, but after cleaning the Brownie, and finding it to be in good working condition, I decided to use it for shooting. Composing the shots was rather down to guesswork, as between the two brilliant finders, there was one loose mirror which had lost most of its silvering, with the result that very little showed on the small ground glass finder. I shot three rolls of Rollei RPX400, two of which were developed in Ilfotec LC29, and one in R09 One Shot. As it was a sunny day, the interior photographs with sunlight in were shot on the instant setting, while others were shot for a number of seconds on 'time', and the latitude of RPX400 made up for the wide variations in exposure. When scanning I realised that the negatives had been scratched, which I thought may have been while advancing the film in the camera, or possibly in handling them after washing, and some of the worst scratches have been mitigated digitally.

Kodak No.2 Brownie with Rollei RPX 400
See the whole set of photographs on Flickr.